
:max_bytes(150000):strip_icc()/LG-ESPN-Plus2-5a613f28564249e38ef803888f21e257.jpg)
"2024 Approved Game On The Leading 12 YouTube Videographers for Opening Tutorials (Free/Paid)"
Game On: The Leading 12 YouTube Videographers for Opening Tutorials (Free/Paid)
Best 12 YouTube Gaming Intro Makers - Free and Paid

Richard Bennett
Mar 27, 2024• Proven solutions
When searching the words “intro maker”, thousands of results jump into your eyes, but only a few of them are suitable for YouTube gamers . Luckily, we did it for you. After 34 hours’ research and comparison, we finally rounded up the 12 best gaming intro makers, sorted by online and desktop solutions. Hopefully, these intro makers will help you convert more viewers to your subscribers like those noted YouTubers did.
Read on to know how to take your video to the next level with these gaming intro makers and templates.
You may also like: Top 10 Best Free Music and Sound Effect Resources for Games >>
- Part 1: 4 Best Desktop YouTube Gaming Intro Makers
- Part 2: 8 Best Online Intro Makers for YouTube Gaming
- Part 3: 3 Easiest Ways to Make a Gaming Intro
- Bonus: Best Intro Templates for YouTube Gamer
Wondershare Filmstock Gaming Video Editing Skils ](https://filmstock.wondershare.com/creative-theme-game?source%5Fchannel=seo%5Farticle&spm=rs.filmora%5Fweb )
Part 1: Best YouTube Intro Makers for Gaming [Desktop Software Solutions for Windows/Mac/Linux]
Before I recommend the YouTube Gaming Intro Makers, I want to share how we make a stunning YouTube intro, so that you can see in creating a video intro, which elements should be included. Check the video tutorial below to get some tips and tricks for making YouTube Intro.


Those who wish to have more control over their video editing needs are advised to pick desktop software solutions like Filmora and After Effects, and Blender, etc. They can serve the editing needs of beginners as well as professionals. So, in the first part, I’ll show you some of the best gaming intro makers for YouTube video, some of them are free to use, others may need to subscribe.
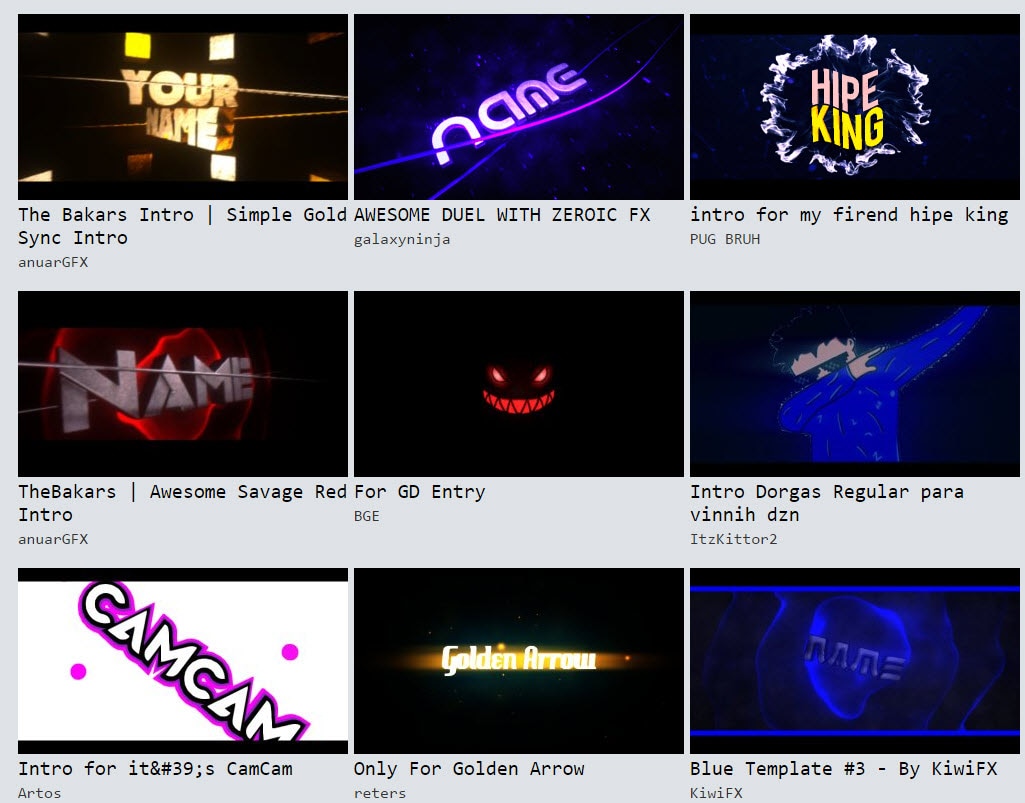
1. Wondershare Filmora: Freemium
Wondershare Filmora is a great tool that you can use to create a film-look YouTube video, including gaming video intros. What’s more, it offers you lots of pre-made intros with text and title animation, elements, overlays, effects, and transitions. Besides the inbuilt presets and templates for making gaming intro makers, you can find more video effects for gaming intro making in the Filmstock effects store . The 8 Bit Gamer and blockbuster effects are also perfect choices for making gaming intros. After finishing the editing, you can directly upload the video to YouTube from the program.
Download Mac Version ](https://tools.techidaily.com/wondershare/filmora/download/ )
You may also like: Best 3D Intro Makers for YouTube Videos
2. After Effects: ($19.99/month)
Editing YouTube gaming intro task becomes easier when you have Adobe Effects on your desktop computer. Most of the professionals love to access this platform due to its wide range of effects and presentation templates.
Now, if you are a member of Filmstock, you can download some Free After Effects Templates and use it in After Effects to make a stunning gaming intro without paying extra money.
3. Blender: (Free)
It is a well known open source and free of cost gaming intro maker that can process 3D pipelines with ease. It can easily handle processes like motion tracking, composition, rendering, simulation, animation, rigging and modeling etc. It may appear difficult for beginners to make a gaming intro with this free intro maker but professionals can definitely create wonders with this software tool.
4. Cinema 4D: $3510.5
This is a complete and complex software for 3D video animation, it’s developed by MAXON Computer GmbH in Germany, and it gives you almost all the power and control over 3D design and creation. It is very expensive ($3510.5) and complex, so if you just want a simple and quick intro, we don’t recommend this to you to make a simple gaming intro.
Part 2: Best YouTube Intro Makers for Gaming - Online solution
If you are a beginner, then you should go ahead with the online free gaming intro maker tools below. They have a wide range of pre-made templates and you can operate them with ease even without messing up with deep any technical details.
1. Panzoid(Free):
It is a well known online video editing software tool that also possesses abilities of background editor and can also generate quick clips to fulfill instant needs. As it is available for free and works online so beginners can easily switch to this editor anytime from anywhere using their handheld devices. This free to use software tool allows users to complete editing tasks with advanced 3D animations , but the only downside of this tool is its too many annoying ads.
You can find many tutorials about how to use Panzoid on YouTube if you have any questions.
2. Renderfx ($24.99 only):
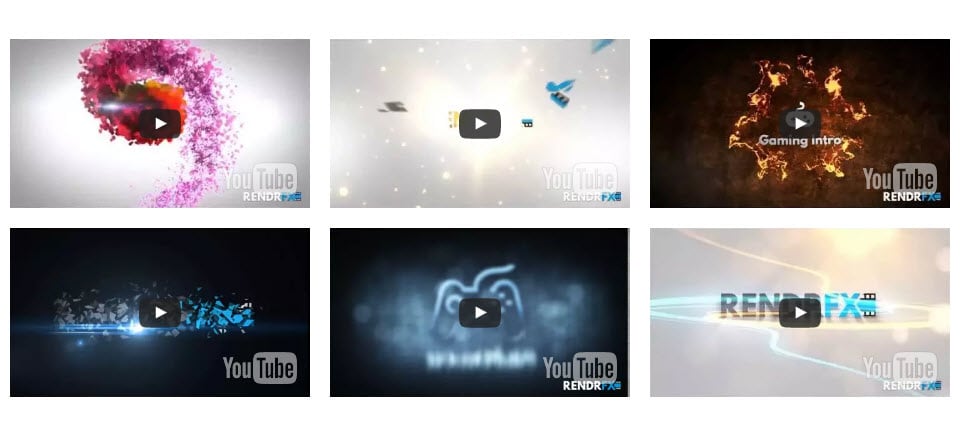
The high definition effect is the most beautiful part in my opinion. You would definitely love to have a professional class video editing solution for your YouTube gaming needs. Renderfx allows gamers to generate eye-catching videos for YouTube channel uploads; they can prepare presentations, outros, and intros over here.
3. Renderforest ($29.99/Export):
There are lots of interesting things to talk about Renderforest. It contains a wide range of video templates such as neon power logo, electromagnetic logo, neon lightroom, fly-in-fire logo, and many more. You can create various videos for free by utilizing all its advanced features, but in case if you want to expert your created video out without the watermark, then you have to pay $29.99 per export.
4. ivipid($1.99 to $34.99)
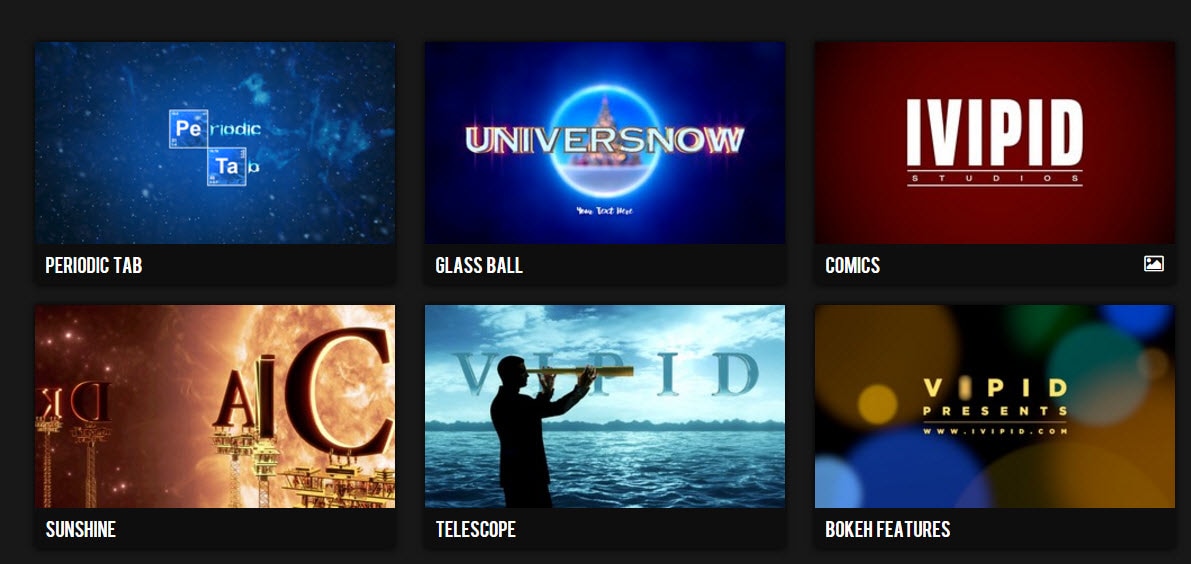
If you are more focused on customization needs and want to create something unique for your next YouTube gaming video, then Lvipid.com is here to serve all your needs. There are unlimited stunning themes, including awesome animation cards and video intro personalization options. Note that you have to use credits to start producing a new video on this platform.
5. Moovly Studio: ($5 per Month)

Here is an advanced multimedia solution that is hosted over the cloud platform and assists users in developing promotional videos and animations with a few simple to follow steps. You can enjoy these services with payment of $5/month only.
6. Introchamp: ($5 per template)
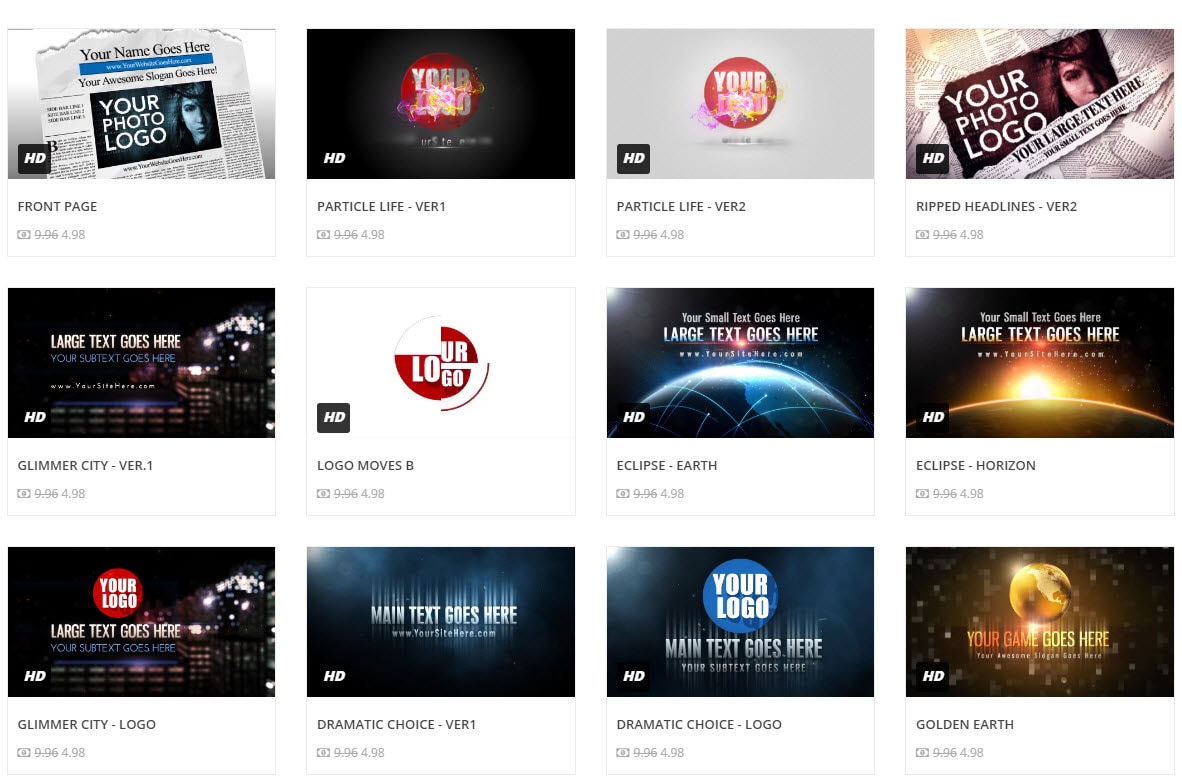
As the name indicates, this online tool is master in the creation of video intros, so you need not apply additional efforts to get desired results. Simply pay amount $4.98 to $11.95 and collect all fantastic graphics, text options, and music to complete your task.
7. Intromaker: ($5 to $20 only)
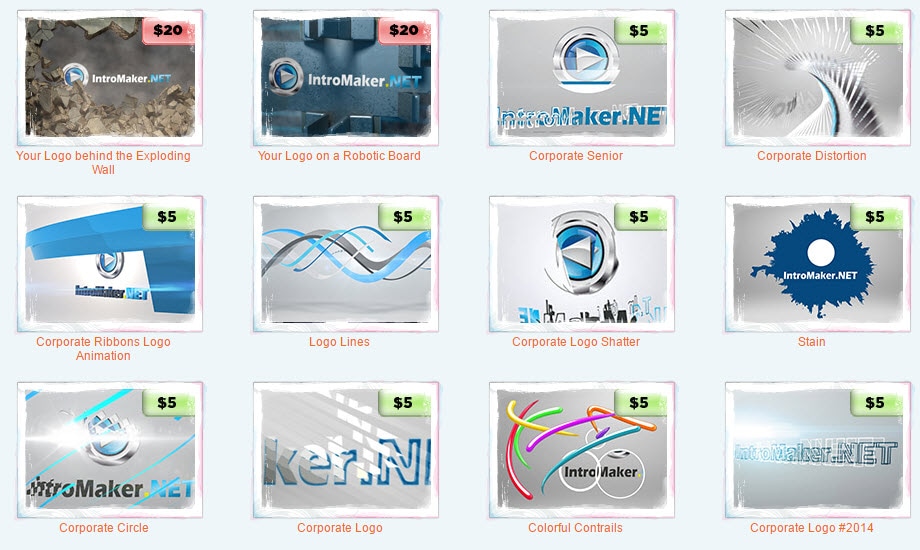
Its stunning designer wizard can assist you in logo designing; just upload your desired image with .jpg or .png extension and merge it into your video background to have impressive results. Its simple editing interface makes editing tasks much easier for beginners. One of the disadvantages is that you can’t preview the result before you finish the order.
8. Flixpress: ($49.44/month)
It provides a wide range of services like handling business promos, slideshows, ads, and YouTube Intros. It offers variable pricing plans so that beginners can start with free ones, and professionals can choose low-cost plans with ease. One can avail access to a full library with a payment of $49.44/month.
Part 3: 3 Easiest Ways to Make a Gaming Intro
If you’re new to YouTube video creation, here we introduce 3 easiest ways that can help you make fascinating gaming intros.
1. Using video intro makers
No matter you are a beginner or a professional, these intro makers offer you multiples options to make wonderful gaming intros from pre-made templates or from nothing.
2. Hiring freelancers
It is also possible to get professional assistance online from top platforms like Peopleperhour , Upwork , Fiverr and, Valoso etc. Those who are not able to find enough time to edit their game videos can hire a well experienced professional online. They charge an hourly basis or as per the work offered by you. They can complete the customization task on your behalf.
3. Taking use of pre-made intro templates
Some websites/YouTube channels over the Internet also offer attractive pre-made templates that are time-saving solutions and can definitely fulfill the purpose of excellent video intro. You can collect fantastic templates from sites like Editorsdepot, VideoBlocks, and Pushedtionsanity, etc.
Note: The intro part is needed to be very short; probably, a maximum of 5 seconds is sufficient to create the impact; otherwise, your audience will become impatient, and they will run away.
Part 4: Best Intro Templates for YouTube gamer [Free Intro Templates Download Sites]
If you’re using Blender, After Effects, Sony Vegas, Cinema 4D, etc, you’ll be happy to find that there are a lot of free intro templates on the Internet. Just download them, and replace the text by your channel name, no further editing skills asked. You can pick some of the best collections from here.
The newly released stock media library Filmstock effects store is a good website to download free intros and customize it based on your personalized needs.
Download Mac Version ](https://tools.techidaily.com/wondershare/filmora/download/ )
Click the image below to visit this effects store directly. If you are looking for some free items which are totally free to download and use, you can check the Free video effects, footage, music and photos .
Filmstock Stock Media Library ](https://tools.techidaily.com/wondershare/filmora/download/ )
1. Editors Depot
Editors depot has thousands of stock videos and templates with free intros available. You can download them then edit in Blender, Cinema 4D, After Effects, or Sony Vegas.
2. VideoBlocks
Videoblocks has after effect templates you can simply download and bring into Photoshop. All you need to do with these templates is insert your name and import the music, the background images and graphics are all generated.
3. Pushedtionsanity
PushedToInsanity is a site designed to provide the users with the latest and best FREE templates for Cinema 4D, After Effects, and Sony Vegas. You will find lots of Intro Templates, Outro Templates, Banner Templates, and almost everything you need for your YouTube videos. You can check their YouTube Channel to watch all the intro templates
After reading so many YouTube gaming intro makers, you may have exhausted. So we have made a simple comparison table about each intro maker, and below is the list of best online and desktop gaming intro makers that can complete the intro making the task as per your choice, pick any of these as per your needs.
You can click the platform name in the form to check the detailed intro about it directly.
| Type | Platform | Price |
|---|---|---|
| Online | Panzoid.com | Free |
| Renderfx | $24.99 to remove the watermark | |
| Renderforest | $29.99/export | |
| Ivipid.com | 1.99$ to $34.99 | |
| Moovly Studio | $5/month | |
| Introchamp | $5 per templates | |
| Intromaker | $5 to $20 | |
| Flixpress | $129.99 monthly for full libray and liftime storage | |
| Desktop | Wondershare Filmora | $59.99 lifetime |
| After Effects | $19.99/monthly | |
| Blender | Free | |
| Cinema 4D | $3510.5 |
Wondershare Filmora is an amazing intro maker for YouTube gamers, besides the various inbuilt titles, animations, filters, transitions and music library, Filmora also has some stunning editing tools to empower your creativity.
Richard Bennett
Richard Bennett is a writer and a lover of all things video.
Follow @Richard Bennett
Richard Bennett
Mar 27, 2024• Proven solutions
When searching the words “intro maker”, thousands of results jump into your eyes, but only a few of them are suitable for YouTube gamers . Luckily, we did it for you. After 34 hours’ research and comparison, we finally rounded up the 12 best gaming intro makers, sorted by online and desktop solutions. Hopefully, these intro makers will help you convert more viewers to your subscribers like those noted YouTubers did.
Read on to know how to take your video to the next level with these gaming intro makers and templates.
You may also like: Top 10 Best Free Music and Sound Effect Resources for Games >>
- Part 1: 4 Best Desktop YouTube Gaming Intro Makers
- Part 2: 8 Best Online Intro Makers for YouTube Gaming
- Part 3: 3 Easiest Ways to Make a Gaming Intro
- Bonus: Best Intro Templates for YouTube Gamer
Wondershare Filmstock Gaming Video Editing Skils ](https://filmstock.wondershare.com/creative-theme-game?source%5Fchannel=seo%5Farticle&spm=rs.filmora%5Fweb )
Part 1: Best YouTube Intro Makers for Gaming [Desktop Software Solutions for Windows/Mac/Linux]
Before I recommend the YouTube Gaming Intro Makers, I want to share how we make a stunning YouTube intro, so that you can see in creating a video intro, which elements should be included. Check the video tutorial below to get some tips and tricks for making YouTube Intro.
Those who wish to have more control over their video editing needs are advised to pick desktop software solutions like Filmora and After Effects, and Blender, etc. They can serve the editing needs of beginners as well as professionals. So, in the first part, I’ll show you some of the best gaming intro makers for YouTube video, some of them are free to use, others may need to subscribe.
1. Wondershare Filmora: Freemium
Wondershare Filmora is a great tool that you can use to create a film-look YouTube video, including gaming video intros. What’s more, it offers you lots of pre-made intros with text and title animation, elements, overlays, effects, and transitions. Besides the inbuilt presets and templates for making gaming intro makers, you can find more video effects for gaming intro making in the Filmstock effects store . The 8 Bit Gamer and blockbuster effects are also perfect choices for making gaming intros. After finishing the editing, you can directly upload the video to YouTube from the program.
Download Mac Version ](https://tools.techidaily.com/wondershare/filmora/download/ )
You may also like: Best 3D Intro Makers for YouTube Videos
2. After Effects: ($19.99/month)
Editing YouTube gaming intro task becomes easier when you have Adobe Effects on your desktop computer. Most of the professionals love to access this platform due to its wide range of effects and presentation templates.
Now, if you are a member of Filmstock, you can download some Free After Effects Templates and use it in After Effects to make a stunning gaming intro without paying extra money.
3. Blender: (Free)
It is a well known open source and free of cost gaming intro maker that can process 3D pipelines with ease. It can easily handle processes like motion tracking, composition, rendering, simulation, animation, rigging and modeling etc. It may appear difficult for beginners to make a gaming intro with this free intro maker but professionals can definitely create wonders with this software tool.
4. Cinema 4D: $3510.5
This is a complete and complex software for 3D video animation, it’s developed by MAXON Computer GmbH in Germany, and it gives you almost all the power and control over 3D design and creation. It is very expensive ($3510.5) and complex, so if you just want a simple and quick intro, we don’t recommend this to you to make a simple gaming intro.
Part 2: Best YouTube Intro Makers for Gaming - Online solution
If you are a beginner, then you should go ahead with the online free gaming intro maker tools below. They have a wide range of pre-made templates and you can operate them with ease even without messing up with deep any technical details.
1. Panzoid(Free):
It is a well known online video editing software tool that also possesses abilities of background editor and can also generate quick clips to fulfill instant needs. As it is available for free and works online so beginners can easily switch to this editor anytime from anywhere using their handheld devices. This free to use software tool allows users to complete editing tasks with advanced 3D animations , but the only downside of this tool is its too many annoying ads.
You can find many tutorials about how to use Panzoid on YouTube if you have any questions.
2. Renderfx ($24.99 only):
The high definition effect is the most beautiful part in my opinion. You would definitely love to have a professional class video editing solution for your YouTube gaming needs. Renderfx allows gamers to generate eye-catching videos for YouTube channel uploads; they can prepare presentations, outros, and intros over here.
3. Renderforest ($29.99/Export):
There are lots of interesting things to talk about Renderforest. It contains a wide range of video templates such as neon power logo, electromagnetic logo, neon lightroom, fly-in-fire logo, and many more. You can create various videos for free by utilizing all its advanced features, but in case if you want to expert your created video out without the watermark, then you have to pay $29.99 per export.
4. ivipid($1.99 to $34.99)
If you are more focused on customization needs and want to create something unique for your next YouTube gaming video, then Lvipid.com is here to serve all your needs. There are unlimited stunning themes, including awesome animation cards and video intro personalization options. Note that you have to use credits to start producing a new video on this platform.
5. Moovly Studio: ($5 per Month)
Here is an advanced multimedia solution that is hosted over the cloud platform and assists users in developing promotional videos and animations with a few simple to follow steps. You can enjoy these services with payment of $5/month only.
6. Introchamp: ($5 per template)
As the name indicates, this online tool is master in the creation of video intros, so you need not apply additional efforts to get desired results. Simply pay amount $4.98 to $11.95 and collect all fantastic graphics, text options, and music to complete your task.
7. Intromaker: ($5 to $20 only)
Its stunning designer wizard can assist you in logo designing; just upload your desired image with .jpg or .png extension and merge it into your video background to have impressive results. Its simple editing interface makes editing tasks much easier for beginners. One of the disadvantages is that you can’t preview the result before you finish the order.
8. Flixpress: ($49.44/month)
It provides a wide range of services like handling business promos, slideshows, ads, and YouTube Intros. It offers variable pricing plans so that beginners can start with free ones, and professionals can choose low-cost plans with ease. One can avail access to a full library with a payment of $49.44/month.
Part 3: 3 Easiest Ways to Make a Gaming Intro
If you’re new to YouTube video creation, here we introduce 3 easiest ways that can help you make fascinating gaming intros.
1. Using video intro makers
No matter you are a beginner or a professional, these intro makers offer you multiples options to make wonderful gaming intros from pre-made templates or from nothing.
2. Hiring freelancers
It is also possible to get professional assistance online from top platforms like Peopleperhour , Upwork , Fiverr and, Valoso etc. Those who are not able to find enough time to edit their game videos can hire a well experienced professional online. They charge an hourly basis or as per the work offered by you. They can complete the customization task on your behalf.
3. Taking use of pre-made intro templates
Some websites/YouTube channels over the Internet also offer attractive pre-made templates that are time-saving solutions and can definitely fulfill the purpose of excellent video intro. You can collect fantastic templates from sites like Editorsdepot, VideoBlocks, and Pushedtionsanity, etc.
Note: The intro part is needed to be very short; probably, a maximum of 5 seconds is sufficient to create the impact; otherwise, your audience will become impatient, and they will run away.
Part 4: Best Intro Templates for YouTube gamer [Free Intro Templates Download Sites]
If you’re using Blender, After Effects, Sony Vegas, Cinema 4D, etc, you’ll be happy to find that there are a lot of free intro templates on the Internet. Just download them, and replace the text by your channel name, no further editing skills asked. You can pick some of the best collections from here.
The newly released stock media library Filmstock effects store is a good website to download free intros and customize it based on your personalized needs.
Download Mac Version ](https://tools.techidaily.com/wondershare/filmora/download/ )
Click the image below to visit this effects store directly. If you are looking for some free items which are totally free to download and use, you can check the Free video effects, footage, music and photos .
Filmstock Stock Media Library ](https://tools.techidaily.com/wondershare/filmora/download/ )
1. Editors Depot
Editors depot has thousands of stock videos and templates with free intros available. You can download them then edit in Blender, Cinema 4D, After Effects, or Sony Vegas.
2. VideoBlocks
Videoblocks has after effect templates you can simply download and bring into Photoshop. All you need to do with these templates is insert your name and import the music, the background images and graphics are all generated.
3. Pushedtionsanity
PushedToInsanity is a site designed to provide the users with the latest and best FREE templates for Cinema 4D, After Effects, and Sony Vegas. You will find lots of Intro Templates, Outro Templates, Banner Templates, and almost everything you need for your YouTube videos. You can check their YouTube Channel to watch all the intro templates
After reading so many YouTube gaming intro makers, you may have exhausted. So we have made a simple comparison table about each intro maker, and below is the list of best online and desktop gaming intro makers that can complete the intro making the task as per your choice, pick any of these as per your needs.
You can click the platform name in the form to check the detailed intro about it directly.
| Type | Platform | Price |
|---|---|---|
| Online | Panzoid.com | Free |
| Renderfx | $24.99 to remove the watermark | |
| Renderforest | $29.99/export | |
| Ivipid.com | 1.99$ to $34.99 | |
| Moovly Studio | $5/month | |
| Introchamp | $5 per templates | |
| Intromaker | $5 to $20 | |
| Flixpress | $129.99 monthly for full libray and liftime storage | |
| Desktop | Wondershare Filmora | $59.99 lifetime |
| After Effects | $19.99/monthly | |
| Blender | Free | |
| Cinema 4D | $3510.5 |
Wondershare Filmora is an amazing intro maker for YouTube gamers, besides the various inbuilt titles, animations, filters, transitions and music library, Filmora also has some stunning editing tools to empower your creativity.
Richard Bennett
Richard Bennett is a writer and a lover of all things video.
Follow @Richard Bennett
Boost Your YouTube Presence with Personalized Annotations and Card Integration
How to Add YouTube Annotations and Cards?
Richard Bennett
Mar 27, 2024• Proven solutions
Update: YouTube has replaced annotation with end screen. You can find the latest informaiton about YouTube screen and YouTube cards here.
YouTube Cards and Annotations are very useful if you want to encourage your viewrs to take an action, like Subscribe, go to another video or associated website, etc. Today, we’re going to show you the differences between cards and annotations, and how to add them in YouTube videos.
Do you want to make your YouTube video more attractive? Wondershare Filmora is a such video editing software designed for YouTube creator. It not only allows you cut, trim, crop, zoom, reverse, rotate the video clips, but also makes the advanced features like green screen, PIP, tilt-shift and mosaic easy like a piece of cake. With Wondershare Filmora, you can ignite your YouTube videos with over 300 effects like Fashion, Beauty, Block Buster, Travel, etc.
Download Mac Version ](https://tools.techidaily.com/wondershare/filmora/download/ )
The main difference between annotation and cards is their outlook. Cards are more graphical whereas annotations are text based. The cards slide in once you click the small “i” button on the video where as the annotation is there based on the timings set by the user. Moreover the main differences between the two are:
1. YouTube Cards are small and unobtrusive, unless a viewer chooses to click on them, which is why they are the better option when you are trying to get views on other videos. Irritating a few people with a big annotation might be worth it if you also draw other people’s attention to your cause or website, but it is not a good way to endear yourself to people you are trying to get views and subscriptions from. When a card is clicked a thumbnail will appear with a link to your additional content. YouTube Cards are often better than annotations for adding links to your videos because they look much tidier. Also, unlike annotations, cards will be visible to people watching your videos on their mobile devices.
2. You cannot use Cards just to insert notes into your videos, though, and you cannot adjust their size like you can with annotations. So, if you do need a link to be large and extremely noticeable, annotations might still be your best option. Cards and annotations can even be used in combination sometimes.
How to add YouTube Cards
YouTube Cards are similar to annotations but more interactive. They allow the owner of the video to add images and other links. A small box appears, clicking on which will activate the cards.
- Click on the “Video Manager” tab

- Click “Edit” tab under the video screen shot you want to add the card on
- Click on the “Cards” tab

- On the right panel click on “Add Card” drop down menu and select the type of card you want to add
- Click on the create button which will open the corresponding video
- Once you finish the subsequent information required click create card
- Select the timeline for the playhead to appear which leads to the card slide

- Apply changes and exit
How to add YouTube annotations
YouTube Annotation is addition of a text layer, link or hotspots over your video. They add interactive boxes which link to other websites or videos (any link you want).
- Click on the video manager tab
- Click edit tab under the video screen shot you want to add the annotation on
- Click on the “End screen & Annotation” tab

- On the right panel click on “+ Add Element” and select the kind of annotation you want to add
- Adjust the position of Annotation, you can drag the rectangle to locate it at any position of the video, move the slide to set the start and end time of the annotation

- Apply changes
The types of YouTube annotations:
1. Speech Bubbles
Speech Bubbles: look like the dialogue box in a comic strip. There is a tail which you can adjust so it looks like one of the people in your video is saying what is written in the annotation. Speech bubbles are great for adding in funny comments.
2. Notes
Notes: come in a limited selection of colors and can be adjusted to take up a maximum of 30% of your player screen. Sometimes you need a huge annotation to get an important point across, but using huge note annotations too often – especially near the beginnings of your videos – will annoy viewers. If you need a large note annotation make sure to place it later in your video, when a viewer will already be invested in what they are watching and less likely to click away.
3. Titles
Titles: are large pieces of text that go either at the beginning of your video or in-between different topics within your video. YouTube’s titles are not very nice to look at, but they are a decent option if you do not have access to video editing software.
4. Spotlights
Spotlights: have a subtle border and are completely clear inside. Your text only appears when a user hovers over the spotlight. Spotlights are great for turning elements within your video into links.
5. Labels
Labels: are completely transparent, like spotlights, but the user does not have to hover over them for your text to be visible.
6. Pauses
Pauses: are no longer available to add to your videos, although Pause Annotations added before they were removed still work. Pause Annotations used to stop your video for a set period of time when your annotation appeared.
If somebody watches your video and gets to the end then that means they enjoyed it and will probably be open to checking out more of your content. Rather than hoping that your other videos show up in the ‘Suggested Videos’ YouTube will show after yours has finished playing you should always include an outro, or ending card, after your video to recommend your own work. Annotations are used in a lot of successful YouTuber’s ending cards.
One form this takes is small Note annotations in the bottom corners of the screen, one linking to your previous video and one to the next. Sometimes your viewers might not necessarily get the most enjoyment out of your videos by watching them in order, though. Sometimes you want to link viewers to the videos that are most related to the one they just watched.
The best outros also include a subscribe button, which can be created using annotations. These annotations work best when combined with a verbal call to action. Make sure your outro lasts long enough for people to make the decision to subscribe or click another video.
No matter what kind of annotations you are using, you should never use more than two of them at a time anywhere except for your outro. You should also never place annotations at the very top of your screen, or in the middle at the bottom. If your video is embedding on a separate website then the player will cover annotations at the top of the screen, and ads might cover annotations placed in the bottom-middle of the screen. Keep in mind when using annotations that they will not be visible to users watching your videos on mobile devices. If mobile traffic is very important to you then consider using YouTube Cards.
Richard Bennett
Richard Bennett is a writer and a lover of all things video.
Follow @Richard Bennett
Richard Bennett
Mar 27, 2024• Proven solutions
Update: YouTube has replaced annotation with end screen. You can find the latest informaiton about YouTube screen and YouTube cards here.
YouTube Cards and Annotations are very useful if you want to encourage your viewrs to take an action, like Subscribe, go to another video or associated website, etc. Today, we’re going to show you the differences between cards and annotations, and how to add them in YouTube videos.
Do you want to make your YouTube video more attractive? Wondershare Filmora is a such video editing software designed for YouTube creator. It not only allows you cut, trim, crop, zoom, reverse, rotate the video clips, but also makes the advanced features like green screen, PIP, tilt-shift and mosaic easy like a piece of cake. With Wondershare Filmora, you can ignite your YouTube videos with over 300 effects like Fashion, Beauty, Block Buster, Travel, etc.
Download Mac Version ](https://tools.techidaily.com/wondershare/filmora/download/ )
The main difference between annotation and cards is their outlook. Cards are more graphical whereas annotations are text based. The cards slide in once you click the small “i” button on the video where as the annotation is there based on the timings set by the user. Moreover the main differences between the two are:
1. YouTube Cards are small and unobtrusive, unless a viewer chooses to click on them, which is why they are the better option when you are trying to get views on other videos. Irritating a few people with a big annotation might be worth it if you also draw other people’s attention to your cause or website, but it is not a good way to endear yourself to people you are trying to get views and subscriptions from. When a card is clicked a thumbnail will appear with a link to your additional content. YouTube Cards are often better than annotations for adding links to your videos because they look much tidier. Also, unlike annotations, cards will be visible to people watching your videos on their mobile devices.
2. You cannot use Cards just to insert notes into your videos, though, and you cannot adjust their size like you can with annotations. So, if you do need a link to be large and extremely noticeable, annotations might still be your best option. Cards and annotations can even be used in combination sometimes.
How to add YouTube Cards
YouTube Cards are similar to annotations but more interactive. They allow the owner of the video to add images and other links. A small box appears, clicking on which will activate the cards.
- Click on the “Video Manager” tab
- Click “Edit” tab under the video screen shot you want to add the card on
- Click on the “Cards” tab
- On the right panel click on “Add Card” drop down menu and select the type of card you want to add
- Click on the create button which will open the corresponding video
- Once you finish the subsequent information required click create card
- Select the timeline for the playhead to appear which leads to the card slide
- Apply changes and exit
How to add YouTube annotations
YouTube Annotation is addition of a text layer, link or hotspots over your video. They add interactive boxes which link to other websites or videos (any link you want).
- Click on the video manager tab
- Click edit tab under the video screen shot you want to add the annotation on
- Click on the “End screen & Annotation” tab
- On the right panel click on “+ Add Element” and select the kind of annotation you want to add
- Adjust the position of Annotation, you can drag the rectangle to locate it at any position of the video, move the slide to set the start and end time of the annotation
- Apply changes
The types of YouTube annotations:
1. Speech Bubbles
Speech Bubbles: look like the dialogue box in a comic strip. There is a tail which you can adjust so it looks like one of the people in your video is saying what is written in the annotation. Speech bubbles are great for adding in funny comments.
2. Notes
Notes: come in a limited selection of colors and can be adjusted to take up a maximum of 30% of your player screen. Sometimes you need a huge annotation to get an important point across, but using huge note annotations too often – especially near the beginnings of your videos – will annoy viewers. If you need a large note annotation make sure to place it later in your video, when a viewer will already be invested in what they are watching and less likely to click away.
3. Titles
Titles: are large pieces of text that go either at the beginning of your video or in-between different topics within your video. YouTube’s titles are not very nice to look at, but they are a decent option if you do not have access to video editing software.
4. Spotlights
Spotlights: have a subtle border and are completely clear inside. Your text only appears when a user hovers over the spotlight. Spotlights are great for turning elements within your video into links.
5. Labels
Labels: are completely transparent, like spotlights, but the user does not have to hover over them for your text to be visible.
6. Pauses
Pauses: are no longer available to add to your videos, although Pause Annotations added before they were removed still work. Pause Annotations used to stop your video for a set period of time when your annotation appeared.
If somebody watches your video and gets to the end then that means they enjoyed it and will probably be open to checking out more of your content. Rather than hoping that your other videos show up in the ‘Suggested Videos’ YouTube will show after yours has finished playing you should always include an outro, or ending card, after your video to recommend your own work. Annotations are used in a lot of successful YouTuber’s ending cards.
One form this takes is small Note annotations in the bottom corners of the screen, one linking to your previous video and one to the next. Sometimes your viewers might not necessarily get the most enjoyment out of your videos by watching them in order, though. Sometimes you want to link viewers to the videos that are most related to the one they just watched.
The best outros also include a subscribe button, which can be created using annotations. These annotations work best when combined with a verbal call to action. Make sure your outro lasts long enough for people to make the decision to subscribe or click another video.
No matter what kind of annotations you are using, you should never use more than two of them at a time anywhere except for your outro. You should also never place annotations at the very top of your screen, or in the middle at the bottom. If your video is embedding on a separate website then the player will cover annotations at the top of the screen, and ads might cover annotations placed in the bottom-middle of the screen. Keep in mind when using annotations that they will not be visible to users watching your videos on mobile devices. If mobile traffic is very important to you then consider using YouTube Cards.
Richard Bennett
Richard Bennett is a writer and a lover of all things video.
Follow @Richard Bennett
- Title: "2024 Approved Game On The Leading 12 YouTube Videographers for Opening Tutorials (Free/Paid)"
- Author: Thomas
- Created at : 2024-05-31 12:39:16
- Updated at : 2024-06-01 12:39:16
- Link: https://youtube-help.techidaily.com/2024-approved-game-on-the-leading-12-youtube-videographers-for-opening-tutorials-freepaid/
- License: This work is licensed under CC BY-NC-SA 4.0.
