
:max_bytes(150000):strip_icc():format(webp)/GettyImages-77744394-e5f79596e54a4ba6a914eed31be7efc4.jpg)
"2024 Approved Insights Into the Algorithm Choosing Noteworthy Video Comments"
Insights Into the Algorithm Choosing Noteworthy Video Comments
What Is the YouTube Highlighted Comment?

Liza Brown
Mar 27, 2024• Proven solutions
Did you just come across a comment tagged with Highlight on YouTube and wondering what it means? In our guide, you will find an answer to this, along with related queries like how YouTube highlighted comment works, the removal process, its benefits, and more.
If you own a YouTube channel or are starting one, even you can do this. Without further ado, let’s jump straight into the core of YouTube’s highlighted comments. We’ve categorized this article into a total of 8 parts for simple and better understanding.
- Part 1: What Does Highlighted Comment Mean On YouTube?
- Part 2: What Does Highlighted Comments Look Like on YouTube?
- Part 3: How to Make Comment Highlighted?
- Part 4: How to Highlighted Comments URL?
- Part 5: How to Reply to Highlighted Comments?
- Part 6: How to Remove Highlighted Comments?
- Part 7: Tips for Writing a Comment
- Part 8: Benefits of Highlighted Comments
Part 1: What Does The Highlighted Comment Mean On YouTube?
Before you get on with highlighting your comments, you must understand what it means exactly. You may follow comments on the videos posted by several YouTubers, but the highlighted ones are always making it to the top of the list.
Having said that, neither the content creator nor users or moderators choose to highlight YouTube comments to begin with. They are no rocket science, but only a tad bit more than what you know as a bookmarking feature.
Think of highlighted comments as a “tag”. You might notice this in the form of a ‘new activity YouTube notification’ link you receive on your registered email. Only you can see this tag when you click the notification and arrive at Youtube.com to either view or reply to a comment.
Highlighting comments (HC’s) are an automatic feature generated by YouTube. It draws the YouTuber’s & viewer’s attention to relevant activities. Don’t fail to notice that the highlight disappears once you are done interacting in the tagged comment thread. However, they are reloadable by tapping the comment timestamp.
For instance, you may want to check the following links. The 2 URLs lead you to the same video, but only one of them shows a highlighted comment.
- https://www.youtube.com/watch?v=XWhjJjhpmQA&lc=Ugya-89WYAlutJurKGh4AaABAg
- https://www.youtube.com/watch?v=XWhjJjhpmQA
Notice the name “lc” in the first URL- that stands for linked comment. YouTube might include this additional parameter. If a reply comment (HR) gets highlighted, the parent comment gets raised to the top.
Part 2: What Does The Highlighted Comment Look Like?
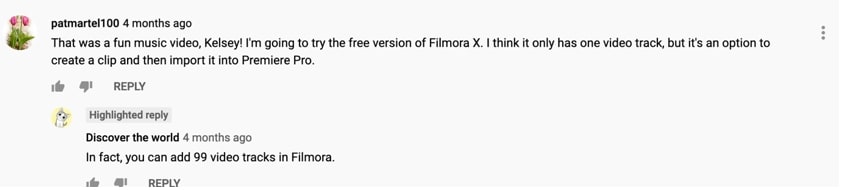
YouTube has been working on improving the navigation of the comment section for videos, and highlighted comments are one of them. These comments appear even above the pinned comments on a video. The label of a highlighted comment is displayed above the commentator’s name in a light grey shade.

YouTube labels comment replies as well and call it “Highlighted Reply.” You can see this tag above the replier’s name in the same color tone.
Part 3: How to Make My Comment Highlighted?
Now, making YouTube highlight your comment on a popular video is nothing less than an art. YouTube doesn’t make it easy for you. The advantage of getting your comment highlighted on YouTube is limitless.
Thus, anybody who wants to get their YouTube comment an HC tag has to follow a few simple steps, which we will discuss below in another section. Finding the correct or relevant video content that can benefit your channel from such a comment is an excellent place to start.
For example, if you are a YouTuber who deals in tech information, you need to look for a popular video or channel with a similar genre, in this case, technical knowledge. The more popular the channel is, the more is the chance of a viewer checking the comments on its videos. You will only benefit if you’re comment is highlighted on pages of Youtuber’s who are huge.
Part 4: How to Get the URL of Highlighted Comments?
The ways to acquire the URL or link for a highlighted comment are different for both parties- viewer and host.
Suppose you are a viewer who is going through the comments section of a video. If you want to get the highlighted URL for the comment, simply click on the timestamp (e.g., 2 weeks ago) beside the commentator’s username.
On the other hand, for a YouTuber, getting access to the comment URL is relatively straightforward. The host will get a notification on his or her registered email-id when a viewer publishes a comment on their posted video. You will find the link to the highlighted comment in the notification
Part 5: How to Reply to Highlighted Comments?
Replying to “highlighted comments” on your YouTube channel is pretty easy since this feature was developed, keeping the user’s convenience in mind. If you want to follow up or reply to such comments, you can do so from your email or YouTube Dashboard.
If you click the notification bell icon, whenever a viewer drops a new comment on one of your videos, YouTube will send you a notification via email. On opening the email, you will find a clickable “Reply” option. Or else, if you follow the comment section in the YouTube Dashboard, you can directly view or reply to highlighted comments from here as well.
Have you ever wondered why a highlighted comment always shows at the top of the comment list? Both the above options will lead you to the comment thread on YouTube. To help you find the new activity easily, it appears with the highlight tag on it. The purpose is to remind you that you are here for that specific comment.
Part 6: How to Remove Highlighted Comments?
Can you, as a video maker, remove highlighted comments on YouTube? The direct answer to this would be a ‘No.’ It is because based on how you have opened the specific video, YouTube does it automatically.
Alternatively, you can try out a few temporary solutions.
- You can edit the particular URL of the video where the highlighted tag is showing. Remove the red part of the URL (example given below) starting with “&”:
https://www.youtube.com/watch?v=XWhjJjhpmQA&lc=Ugya-89WYAlutJurKGh4AaABAg After removing the above parameter, reload the original video link (below):
https://www.youtube.com/watch?v=XWhjJjhpmQA
- Try logging out from your Google Account and browse YouTube (anonymously). Doing this will ensure that you no longer see any highlighted comments. However, at the same time, this will restrict you from interacting in any way with that video, let alone leaving a comment.
Part 7: Tips for Writing a Comment that will be Pinned as a Highlighted Comment?
Many frequently inquire on the internet about how they can improve the chances of getting their comment pinned, as highlighted on YouTube. The secret lies in how you write the statement. We’ve listed a few pro tips below that can help:
- First, go through all the posted comments under the video. It will help you identify what is missing. You can comment or write the missing point in comprehendible and straightforward words. Also, never forget to acknowledge the YouTuber’s talent.
- Remember, no one has the time to read long comments. So, when you know what you want to write, try to shorten your sentences. A short and crisp comment draws more attention.
- After you have framed your comment, make sure that it is grammatically correct. YouTube and Google hate grammatical errors.
- Do not hit the post option already. Before publishing it, you must cross-check that your comment has all the above points in place.
- Lastly, you have to wait after publishing on the video’s comment section. YouTube will highlight your comment if it passes according to the YouTube policy and if the search engine finds it unique.
Part 8: Are Highlighted Comments Beneficial?
Being a convenience feature, a highlighted comment on YouTube is 100% beneficial. That is especially true if you are looking for ways to optimize your channel.
YouTube is undeniably the second largest search engine on the web. Highlight comments can potentially increase the outreach of your content and, consequently, your brand presence.
As said earlier, these comments always show first on the comment section. Needless to say, many people who watch the videos also scroll down to the comments section to start a conversation or see what other viewers are saying about this video.
In the process, alongside the interaction, they also check out the channels or profiles of the commentators. Viewers often visit the pages of these channels, and if they happen to enjoy the video content, they will subscribe to the YouTuber’s channel. If your comment gets highlighted, your YouTube channel can be one of them.
Conclusion
YouTube can be an intimidating tool for marketing and more so for newcomers. Every YouTuber wishes that their channel performs better than the previous day. Even though the highlighted comment or highlighted reply feature doesn’t have any direct benefits, it can indeed help in optimizing your YouTube channel.
It can connect you with potential viewers and increase the number of people that visit your channel regularly. However, how many of them stay and hit the “Subscribe” button is a different story altogether and is wholly based on whether they like what you share through your videos.
In this article, we have shared facts on YouTube’s commonly seen highlighted comment feature. Yet, the term is a heavily misleading one, as far as viewers and Youtuber’s are concerned. We have also covered all other aspects and queries related to this term. Here’s hoping they clarify all your doubts.
Liza Brown
Liza Brown is a writer and a lover of all things video.
Follow @Liza Brown
Liza Brown
Mar 27, 2024• Proven solutions
Did you just come across a comment tagged with Highlight on YouTube and wondering what it means? In our guide, you will find an answer to this, along with related queries like how YouTube highlighted comment works, the removal process, its benefits, and more.
If you own a YouTube channel or are starting one, even you can do this. Without further ado, let’s jump straight into the core of YouTube’s highlighted comments. We’ve categorized this article into a total of 8 parts for simple and better understanding.
- Part 1: What Does Highlighted Comment Mean On YouTube?
- Part 2: What Does Highlighted Comments Look Like on YouTube?
- Part 3: How to Make Comment Highlighted?
- Part 4: How to Highlighted Comments URL?
- Part 5: How to Reply to Highlighted Comments?
- Part 6: How to Remove Highlighted Comments?
- Part 7: Tips for Writing a Comment
- Part 8: Benefits of Highlighted Comments
Part 1: What Does The Highlighted Comment Mean On YouTube?
Before you get on with highlighting your comments, you must understand what it means exactly. You may follow comments on the videos posted by several YouTubers, but the highlighted ones are always making it to the top of the list.
Having said that, neither the content creator nor users or moderators choose to highlight YouTube comments to begin with. They are no rocket science, but only a tad bit more than what you know as a bookmarking feature.
Think of highlighted comments as a “tag”. You might notice this in the form of a ‘new activity YouTube notification’ link you receive on your registered email. Only you can see this tag when you click the notification and arrive at Youtube.com to either view or reply to a comment.
Highlighting comments (HC’s) are an automatic feature generated by YouTube. It draws the YouTuber’s & viewer’s attention to relevant activities. Don’t fail to notice that the highlight disappears once you are done interacting in the tagged comment thread. However, they are reloadable by tapping the comment timestamp.
For instance, you may want to check the following links. The 2 URLs lead you to the same video, but only one of them shows a highlighted comment.
- https://www.youtube.com/watch?v=XWhjJjhpmQA&lc=Ugya-89WYAlutJurKGh4AaABAg
- https://www.youtube.com/watch?v=XWhjJjhpmQA
Notice the name “lc” in the first URL- that stands for linked comment. YouTube might include this additional parameter. If a reply comment (HR) gets highlighted, the parent comment gets raised to the top.
Part 2: What Does The Highlighted Comment Look Like?
YouTube has been working on improving the navigation of the comment section for videos, and highlighted comments are one of them. These comments appear even above the pinned comments on a video. The label of a highlighted comment is displayed above the commentator’s name in a light grey shade.
YouTube labels comment replies as well and call it “Highlighted Reply.” You can see this tag above the replier’s name in the same color tone.
Part 3: How to Make My Comment Highlighted?
Now, making YouTube highlight your comment on a popular video is nothing less than an art. YouTube doesn’t make it easy for you. The advantage of getting your comment highlighted on YouTube is limitless.
Thus, anybody who wants to get their YouTube comment an HC tag has to follow a few simple steps, which we will discuss below in another section. Finding the correct or relevant video content that can benefit your channel from such a comment is an excellent place to start.
For example, if you are a YouTuber who deals in tech information, you need to look for a popular video or channel with a similar genre, in this case, technical knowledge. The more popular the channel is, the more is the chance of a viewer checking the comments on its videos. You will only benefit if you’re comment is highlighted on pages of Youtuber’s who are huge.
Part 4: How to Get the URL of Highlighted Comments?
The ways to acquire the URL or link for a highlighted comment are different for both parties- viewer and host.
Suppose you are a viewer who is going through the comments section of a video. If you want to get the highlighted URL for the comment, simply click on the timestamp (e.g., 2 weeks ago) beside the commentator’s username.
On the other hand, for a YouTuber, getting access to the comment URL is relatively straightforward. The host will get a notification on his or her registered email-id when a viewer publishes a comment on their posted video. You will find the link to the highlighted comment in the notification
Part 5: How to Reply to Highlighted Comments?
Replying to “highlighted comments” on your YouTube channel is pretty easy since this feature was developed, keeping the user’s convenience in mind. If you want to follow up or reply to such comments, you can do so from your email or YouTube Dashboard.
If you click the notification bell icon, whenever a viewer drops a new comment on one of your videos, YouTube will send you a notification via email. On opening the email, you will find a clickable “Reply” option. Or else, if you follow the comment section in the YouTube Dashboard, you can directly view or reply to highlighted comments from here as well.
Have you ever wondered why a highlighted comment always shows at the top of the comment list? Both the above options will lead you to the comment thread on YouTube. To help you find the new activity easily, it appears with the highlight tag on it. The purpose is to remind you that you are here for that specific comment.
Part 6: How to Remove Highlighted Comments?
Can you, as a video maker, remove highlighted comments on YouTube? The direct answer to this would be a ‘No.’ It is because based on how you have opened the specific video, YouTube does it automatically.
Alternatively, you can try out a few temporary solutions.
- You can edit the particular URL of the video where the highlighted tag is showing. Remove the red part of the URL (example given below) starting with “&”:
https://www.youtube.com/watch?v=XWhjJjhpmQA&lc=Ugya-89WYAlutJurKGh4AaABAg After removing the above parameter, reload the original video link (below):
https://www.youtube.com/watch?v=XWhjJjhpmQA
- Try logging out from your Google Account and browse YouTube (anonymously). Doing this will ensure that you no longer see any highlighted comments. However, at the same time, this will restrict you from interacting in any way with that video, let alone leaving a comment.
Part 7: Tips for Writing a Comment that will be Pinned as a Highlighted Comment?
Many frequently inquire on the internet about how they can improve the chances of getting their comment pinned, as highlighted on YouTube. The secret lies in how you write the statement. We’ve listed a few pro tips below that can help:
- First, go through all the posted comments under the video. It will help you identify what is missing. You can comment or write the missing point in comprehendible and straightforward words. Also, never forget to acknowledge the YouTuber’s talent.
- Remember, no one has the time to read long comments. So, when you know what you want to write, try to shorten your sentences. A short and crisp comment draws more attention.
- After you have framed your comment, make sure that it is grammatically correct. YouTube and Google hate grammatical errors.
- Do not hit the post option already. Before publishing it, you must cross-check that your comment has all the above points in place.
- Lastly, you have to wait after publishing on the video’s comment section. YouTube will highlight your comment if it passes according to the YouTube policy and if the search engine finds it unique.
Part 8: Are Highlighted Comments Beneficial?
Being a convenience feature, a highlighted comment on YouTube is 100% beneficial. That is especially true if you are looking for ways to optimize your channel.
YouTube is undeniably the second largest search engine on the web. Highlight comments can potentially increase the outreach of your content and, consequently, your brand presence.
As said earlier, these comments always show first on the comment section. Needless to say, many people who watch the videos also scroll down to the comments section to start a conversation or see what other viewers are saying about this video.
In the process, alongside the interaction, they also check out the channels or profiles of the commentators. Viewers often visit the pages of these channels, and if they happen to enjoy the video content, they will subscribe to the YouTuber’s channel. If your comment gets highlighted, your YouTube channel can be one of them.
Conclusion
YouTube can be an intimidating tool for marketing and more so for newcomers. Every YouTuber wishes that their channel performs better than the previous day. Even though the highlighted comment or highlighted reply feature doesn’t have any direct benefits, it can indeed help in optimizing your YouTube channel.
It can connect you with potential viewers and increase the number of people that visit your channel regularly. However, how many of them stay and hit the “Subscribe” button is a different story altogether and is wholly based on whether they like what you share through your videos.
In this article, we have shared facts on YouTube’s commonly seen highlighted comment feature. Yet, the term is a heavily misleading one, as far as viewers and Youtuber’s are concerned. We have also covered all other aspects and queries related to this term. Here’s hoping they clarify all your doubts.
Liza Brown
Liza Brown is a writer and a lover of all things video.
Follow @Liza Brown
Mastering the Art of Converting YouTube to Interactive Animated GIFs
How to Convert YouTube Videos to GIFs

Shanoon Cox
Mar 27, 2024• Proven solutions
A GIF adds an extra element to any conversation and makes the reader feel connected to the post. Using GIF can turn useful if done rightly. It narrates a story in a single animated image for social media conversation. In this article, we will brief you about how to convert YouTube to gif, various GIF converters, their uses, and the pros and cons of each converter.
Let’s get started!
How to Convert a YouTube Video into GIFs?
1. YouTube to GIF Directly
Here is a quick way to convert the YouTube video to GIFs without typing a YouTube to GIF website.
Gif.com is a free and easy-to-use video editor available with multiple effects. This converter was created keeping in mind how people spend hours and money on paid platforms.
Follow the below steps to convert a YouTube video into gifs.
- In the YouTube video page, add gif before youtube.com. For example, I want to convert the YouTube video https://www.youtube.com/watch?v=40fuGLmwHwk to GIFs, here is how it looks like after adding gif at the beginning: https://www.gifyoutube.com/watch?v=40fuGLmwHwk . Press the enter button on your keyboard and you will enter the gifs.com directly.

- In gifs.com, you can play and pause the YouTube video and drag the bar to select a desired moment for gif. Press the “Create Gif” button on the top right side to convert the specific part of the YouTube video to gif.
- You will then be directed to the result page to see your GIF created using the YouTube video, and you can change the GIF title and the tag.
- Lastly, you need to copy the link and share it!
Pros of converting YouTube to GIFs with Gifs.com:
- The interface is easy to use and it provides lots of tools to adjust.
- Simple functionality.
Cons:
- The watermark on your created GIF can be removed only after purchasing the premium version.
- GIFs can be downloaded only by registered users.
2. FreeGifMaker.me
FreeGifMaker is one simple online tool that allows the creation of animated Gifs for free. A minimum of two pictures has to be uploaded out of ten. It takes few seconds and is super easy to make a GIF from a YouTube video. You can use FreeGifMaker.me in some easy steps.
- Open the website http://freegifmaker.me/youtube-to-gif/ on your desktop.
- Go to YouTube and copy the video URL you want to create a GIF of and paste it on the website mentioned above.
- Then click “Load YouTube Video” below the URL and wait for a few seconds while the tool checks the video source.
- Once the YouTube video is loaded, enter the gif duration, start time, and click on the “Make a GIF button.” It will redirect you to the result page.
- Pros:
- Conversion size is unlimited**.**
- There is no usage of ads.
- Easy to make Gifs.
- Cons:
- The upload speed is slow.
- The converter gives limited options for editing.
3. Wondershare Online UniConverter
Online UniConverter converts video into a high-quality animated GIF and allows editing. It is a simple converter with unique features.
If you want to convert your YouTube video into a GIF, follow the steps.
- You need to upload your video through the “Choose Files” option. You can also copy the link from YouTube.
- Wait for some time once you upload the file; you can then set your start time, end time, frame rate according to your needs.
- Lastly, click on “Create GIF” and download your GIF. You can also save it through the dropdown option available besides “Download.”
- Pros:
- Easy to handle.
- A wide range of customization tools is available.
- Zero ads.
- Cons:
- Upload speed is slow.
- Conversion size is limited.
4. GifRun
It is a video maker that started in 2013, and GifRun converts videos from YouTube, Facebook, and other sources to high-quality GIFs. You can create Gifs free of cost from GifRun.
Here is how you can use Gifrun.
- Open the website and paste the URL you want to convert into Gif. Later, press “Get Video” option below the URL box.
- In this step, you can adjust the duration, start time, add text, and also pause and preview the video. Once you’re done altering the video, click “Create GIF.”
- Lastly, click on the “Download” button beside the add text button, or share the link directly.
- Pros:
- Fast conversion and download.
- There is no upload limit.
- The video preview feature is available.
- Cons:
- UI is ad-infested.
- Supports YouTube videos only.
5. Makeagif
This GIF converter creates high-quality GIFs in no time. You need to paste the URL in Makeagif and nothing much. It can make GIFs from Instagram, Facebook, Twitter, and other platforms easily.
The only issue is that it supports one type of conversion with a maximum limit of 25MB.
Here is how you can make your favorite GIF in few steps.
- Open makeagif.com and paste the YouTube URL in the box available.
- Once you paste the URL, the website will automatically take you to the edit page to edit GIF length, start time, speed, and add caption and stickers. The next step is to select the category to which the video belongs available on the left side of the screen.
- After editing, click on “Continue to publishing” then “Create GIF” at the lower right corner of the screen. Voila! Your GIF is ready to use.
- Pros:
- The UI is user-friendly.
- Ads are minimal
- Various GIF conversions are supported.
- Cons:
- The conversion size is small.
- Batch conversions are not available.
6. ImgFlip
It is a creative GIF website supporting various videos from other websites such as Vimeo and YouTube. ImgFlip has innovative customization tools for cropping, reshaping, adding text and, a lot more, but you just need to be aware of the ads.
Want to know how to create GIF? Go through these simple steps.
- You can make GIFs both from Video and Images. To make GIF from a video, paste the YouTube URL in the box at the top, upload the tape from your device’s file.
- After pasting the URL, you will be given lots of customization options. Choose the effect of your choice for your GIF.
- Lastly, click on “Generate GIF” available on the right side of the screen. You can now share the GIF via your device or download it.
- Pros:
- Plenty of customization options.
- Fast conversion.
- Easy to upload and use.
- Cons:
- Ads pop up frequently.
- Offline conversion is unavailable.
7. GIPHY
It is a free GIF converter that helps you download free YouTube GIFs. You can also make GIFs from your photos, videos available on your device along with video URLs and images. The only problem is, to use Giphy you first have to log in to the app.
Follow the below steps to create a GIF from YouTube videos with Giphy:
- Open Giphy on your device and click on “Create” on the top right-side of your screen.
- Paste the URL in the space given below. A pop-up will tell you to log in. Log in to the website to continue.
- The video you choose should be less than 15 seconds and under 100MB. You will be given editing options from which you can select the start time and duration of your GIF along with Captions and Tags.
- In the end, press the “Create GIF” button to make the GIF. When it’s done, you will be redirected to the GIF page. You can then share your GIF on any social media site.
- Pros:
- Ads are absent
- Uploading is fast
- Wide range of free GIFs available
- Cons:
- Not perfect for green hands
8. Imgur
It is one of the best apps that offers tons of images, memes, and GIFs. You can make GIFs of less than 60 seconds with high quality, which you can share anywhere.
Here are three easy steps to make GIFs
- Visit the page “imgur.com/vidgif” and paste your YouTube URL there.
- Set a start time by clicking or dragging on the timeline. The total runtime is also adjustable, with 60 seconds as the maximum time for GIFs.
- Lastly, press on “Create GIF” to see the magic. The GIF is converted from the YouTube video.
- Pros:
- The users can share the post of their choice
- Users can save posts.
- Great collection of short GIFs and videos.
- Cons:
- During loading, the screen flashes.
9 VEED.IO
Veed is a simple YouTube video converter that makes your work super easy. It converts YouTube videos into GIFs with various editing options like crop, trim, text ads, and many more.
Check out how to use VEED in 3 steps.
- Start by pasting the URL of your YouTube video into VEED, Your video will be ready to convert into GIF.
- Now you are all set to edit your video. You have the option to crop and trim the video. You can also include different font styles, colors, and sizes of your choice.
- Lastly, download the GIF you made in VEED.
- Pros:
- Downloading the software is not mandatory.
- UI is simple and easy to navigate.
- The subtitle option is present.
- Cons:
- It takes a lot of time to upload video.
- Many basic tools.
10. Kapwing
Kapwing is a helpful video converter that can easily turn any video into GIFs with a click. It can also convert different files such as 3GP, GIF, WEBM.
To create beautiful GIFs with this video editor, follow these easy steps.
- Open Kapwing video editor and upload your video from YouTube.
- Choose the “Export dropdown” option and choose the format you wish to convert.
You can also preview the GIF and customize it as per your choice.
- In the final step, export the video by clicking the “Export Video” button. Save and download the newly created GIF and share it anywhere with your friends.
- Pros:
- Great editing tools.
- Easy to use.
- Cons:
- Available only on the website.
- Too many tools for the same purpose.
Final Thoughts
With the increased use of GIFs on social media, you can now easily convert your favorite YouTube videos into GIFs on your own. All you have to do is simply choose the tools mentioned above and share it with your friends.
Shanoon Cox
Shanoon Cox is a writer and a lover of all things video.
Follow @Shanoon Cox
Shanoon Cox
Mar 27, 2024• Proven solutions
A GIF adds an extra element to any conversation and makes the reader feel connected to the post. Using GIF can turn useful if done rightly. It narrates a story in a single animated image for social media conversation. In this article, we will brief you about how to convert YouTube to gif, various GIF converters, their uses, and the pros and cons of each converter.
Let’s get started!
How to Convert a YouTube Video into GIFs?
1. YouTube to GIF Directly
Here is a quick way to convert the YouTube video to GIFs without typing a YouTube to GIF website.
Gif.com is a free and easy-to-use video editor available with multiple effects. This converter was created keeping in mind how people spend hours and money on paid platforms.
Follow the below steps to convert a YouTube video into gifs.
- In the YouTube video page, add gif before youtube.com. For example, I want to convert the YouTube video https://www.youtube.com/watch?v=40fuGLmwHwk to GIFs, here is how it looks like after adding gif at the beginning: https://www.gifyoutube.com/watch?v=40fuGLmwHwk . Press the enter button on your keyboard and you will enter the gifs.com directly.
- In gifs.com, you can play and pause the YouTube video and drag the bar to select a desired moment for gif. Press the “Create Gif” button on the top right side to convert the specific part of the YouTube video to gif.
- You will then be directed to the result page to see your GIF created using the YouTube video, and you can change the GIF title and the tag.
- Lastly, you need to copy the link and share it!
Pros of converting YouTube to GIFs with Gifs.com:
- The interface is easy to use and it provides lots of tools to adjust.
- Simple functionality.
Cons:
- The watermark on your created GIF can be removed only after purchasing the premium version.
- GIFs can be downloaded only by registered users.
2. FreeGifMaker.me
FreeGifMaker is one simple online tool that allows the creation of animated Gifs for free. A minimum of two pictures has to be uploaded out of ten. It takes few seconds and is super easy to make a GIF from a YouTube video. You can use FreeGifMaker.me in some easy steps.
- Open the website http://freegifmaker.me/youtube-to-gif/ on your desktop.
- Go to YouTube and copy the video URL you want to create a GIF of and paste it on the website mentioned above.
- Then click “Load YouTube Video” below the URL and wait for a few seconds while the tool checks the video source.
- Once the YouTube video is loaded, enter the gif duration, start time, and click on the “Make a GIF button.” It will redirect you to the result page.
- Pros:
- Conversion size is unlimited**.**
- There is no usage of ads.
- Easy to make Gifs.
- Cons:
- The upload speed is slow.
- The converter gives limited options for editing.
3. Wondershare Online UniConverter
Online UniConverter converts video into a high-quality animated GIF and allows editing. It is a simple converter with unique features.
If you want to convert your YouTube video into a GIF, follow the steps.
- You need to upload your video through the “Choose Files” option. You can also copy the link from YouTube.
- Wait for some time once you upload the file; you can then set your start time, end time, frame rate according to your needs.
- Lastly, click on “Create GIF” and download your GIF. You can also save it through the dropdown option available besides “Download.”
- Pros:
- Easy to handle.
- A wide range of customization tools is available.
- Zero ads.
- Cons:
- Upload speed is slow.
- Conversion size is limited.
4. GifRun
It is a video maker that started in 2013, and GifRun converts videos from YouTube, Facebook, and other sources to high-quality GIFs. You can create Gifs free of cost from GifRun.
Here is how you can use Gifrun.
- Open the website and paste the URL you want to convert into Gif. Later, press “Get Video” option below the URL box.
- In this step, you can adjust the duration, start time, add text, and also pause and preview the video. Once you’re done altering the video, click “Create GIF.”
- Lastly, click on the “Download” button beside the add text button, or share the link directly.
- Pros:
- Fast conversion and download.
- There is no upload limit.
- The video preview feature is available.
- Cons:
- UI is ad-infested.
- Supports YouTube videos only.
5. Makeagif
This GIF converter creates high-quality GIFs in no time. You need to paste the URL in Makeagif and nothing much. It can make GIFs from Instagram, Facebook, Twitter, and other platforms easily.
The only issue is that it supports one type of conversion with a maximum limit of 25MB.
Here is how you can make your favorite GIF in few steps.
- Open makeagif.com and paste the YouTube URL in the box available.
- Once you paste the URL, the website will automatically take you to the edit page to edit GIF length, start time, speed, and add caption and stickers. The next step is to select the category to which the video belongs available on the left side of the screen.
- After editing, click on “Continue to publishing” then “Create GIF” at the lower right corner of the screen. Voila! Your GIF is ready to use.
- Pros:
- The UI is user-friendly.
- Ads are minimal
- Various GIF conversions are supported.
- Cons:
- The conversion size is small.
- Batch conversions are not available.
6. ImgFlip
It is a creative GIF website supporting various videos from other websites such as Vimeo and YouTube. ImgFlip has innovative customization tools for cropping, reshaping, adding text and, a lot more, but you just need to be aware of the ads.
Want to know how to create GIF? Go through these simple steps.
- You can make GIFs both from Video and Images. To make GIF from a video, paste the YouTube URL in the box at the top, upload the tape from your device’s file.
- After pasting the URL, you will be given lots of customization options. Choose the effect of your choice for your GIF.
- Lastly, click on “Generate GIF” available on the right side of the screen. You can now share the GIF via your device or download it.
- Pros:
- Plenty of customization options.
- Fast conversion.
- Easy to upload and use.
- Cons:
- Ads pop up frequently.
- Offline conversion is unavailable.
7. GIPHY
It is a free GIF converter that helps you download free YouTube GIFs. You can also make GIFs from your photos, videos available on your device along with video URLs and images. The only problem is, to use Giphy you first have to log in to the app.
Follow the below steps to create a GIF from YouTube videos with Giphy:
- Open Giphy on your device and click on “Create” on the top right-side of your screen.
- Paste the URL in the space given below. A pop-up will tell you to log in. Log in to the website to continue.
- The video you choose should be less than 15 seconds and under 100MB. You will be given editing options from which you can select the start time and duration of your GIF along with Captions and Tags.
- In the end, press the “Create GIF” button to make the GIF. When it’s done, you will be redirected to the GIF page. You can then share your GIF on any social media site.
- Pros:
- Ads are absent
- Uploading is fast
- Wide range of free GIFs available
- Cons:
- Not perfect for green hands
8. Imgur
It is one of the best apps that offers tons of images, memes, and GIFs. You can make GIFs of less than 60 seconds with high quality, which you can share anywhere.
Here are three easy steps to make GIFs
- Visit the page “imgur.com/vidgif” and paste your YouTube URL there.
- Set a start time by clicking or dragging on the timeline. The total runtime is also adjustable, with 60 seconds as the maximum time for GIFs.
- Lastly, press on “Create GIF” to see the magic. The GIF is converted from the YouTube video.
- Pros:
- The users can share the post of their choice
- Users can save posts.
- Great collection of short GIFs and videos.
- Cons:
- During loading, the screen flashes.
9 VEED.IO
Veed is a simple YouTube video converter that makes your work super easy. It converts YouTube videos into GIFs with various editing options like crop, trim, text ads, and many more.
Check out how to use VEED in 3 steps.
- Start by pasting the URL of your YouTube video into VEED, Your video will be ready to convert into GIF.
- Now you are all set to edit your video. You have the option to crop and trim the video. You can also include different font styles, colors, and sizes of your choice.
- Lastly, download the GIF you made in VEED.
- Pros:
- Downloading the software is not mandatory.
- UI is simple and easy to navigate.
- The subtitle option is present.
- Cons:
- It takes a lot of time to upload video.
- Many basic tools.
10. Kapwing
Kapwing is a helpful video converter that can easily turn any video into GIFs with a click. It can also convert different files such as 3GP, GIF, WEBM.
To create beautiful GIFs with this video editor, follow these easy steps.
- Open Kapwing video editor and upload your video from YouTube.
- Choose the “Export dropdown” option and choose the format you wish to convert.
You can also preview the GIF and customize it as per your choice.
- In the final step, export the video by clicking the “Export Video” button. Save and download the newly created GIF and share it anywhere with your friends.
- Pros:
- Great editing tools.
- Easy to use.
- Cons:
- Available only on the website.
- Too many tools for the same purpose.
Final Thoughts
With the increased use of GIFs on social media, you can now easily convert your favorite YouTube videos into GIFs on your own. All you have to do is simply choose the tools mentioned above and share it with your friends.
Shanoon Cox
Shanoon Cox is a writer and a lover of all things video.
Follow @Shanoon Cox
- Title: "2024 Approved Insights Into the Algorithm Choosing Noteworthy Video Comments"
- Author: Thomas
- Created at : 2024-05-31 12:45:06
- Updated at : 2024-06-01 12:45:06
- Link: https://youtube-help.techidaily.com/2024-approved-insights-into-the-algorithm-choosing-noteworthy-video-comments/
- License: This work is licensed under CC BY-NC-SA 4.0.
