
"2024 Approved Integrating Chroma Keying Into Your Edit Suite"
Integrating Chroma Keying Into Your Edit Suite
The world of video-making owes much of its magic to small leaps of innovation. One of these leaps is the use of the chroma key background, which most people know by the more colloquial term—green screen.

Chroma key, also known as green screen or blue screen, is a cool hack for seamless visual storytelling, allowing content creators to replace backgrounds with any image or video they want. This technique is widely embraced in film, television, and online content, and has opened the door to limitless creative possibilities. Aside from its ability to maximize creativity, it is also cheap to employ and convenient to set up, which has made it a staple for everyone who works with visuals.
In this simple guide, we’ll delve into the fundamentals of the chroma key effect, how it is used for video making, and how to leverage that as you perfect your visual content.
YouTube Video Background Creating realistic video scenes at your will is easy to complete with Filmora green screen removal.
Create Video Backgrounds Create Video Backgrounds Learn Green Screen

How Does Chroma Key Work?

Chroma Keying is done by singling out a specific color (usually green or blue) from the foreground, removing it, and replacing it with a different background (for example, a sunset). This process typically follows a series of steps:
- Background Selection:
A solid, single-color background, often green or blue, that contrasts well with the subject must be used. The color chosen should not be present in the subject or any props in the camera field to avoid unintentional transparency.
- Color Keying:
This requires the use of specialized visual effects software to key out the chosen color. The green or blue background is designated as transparent, making everything of that color see-through. The software distinguishes between the keyed color and the subject, creating a mask for the transparent areas.
- Foreground Filming:
This involves filming the subject against the live chroma key background. During filming, the chosen background color (green or blue) won’t appear in the final result due to its transparency. The subject is captured as if separately from the isolated background.
- Post-Processing:
In post-production processing, the editor takes the keyed-out color and replaces it with the new background of their choice. This step creates the illusion that the subject is in a different setting or environment. The transparent areas become filled with the chosen background which, if done right, results in a cohesive and visually appealing composition.
Why Green?
Theoretically, the chroma key background can be any solid color. However, the most commonly used colors are studio blue and bright green, with the latter far more common.
The choice of background color depends on the specific requirements of the production and the colors present in the scenes being filmed.
Free Download For Win 7 or later(64-bit)
Free Download For macOS 10.14 or later
Contrast
The less similar your chosen background color is to natural skin tones, the easier to isolate and replace in your footage. Bright green provides a strong contrast to most human skin tones and is less likely to be present in costumes or natural surroundings, making it easier to isolate subjects during the color separation.
Luminance
The color green emits light with greater intensity than blue, allowing for far more effective isolation by cameras during filming. This also means that blue screens demand increased lighting for proper exposure compared to green. This situation may be less than ideal if you lack powerful lighting or you don’t have the big bucks for them.
Digital Sensors
Many digital cameras and sensors are more sensitive to green wavelengths, resulting in cleaner and more accurate color keying during post-processing. Modern technology has also evolved to optimize for a green background, making it a more practical choice for the chroma key effect.
Wardrobe and Set Design
Bright green occurs less naturally in costumes and set designs than other colors, making green the optimal choice for reducing the likelihood of color spill and keying issues. However, if you know your scene will have lots of green, it is probably best to film with a blue screen, so there’s less risk of color spill and less post-production work.
Setting up Your Own Chroma Key Studio
Setting up your chroma key is convenient and straightforward, but there are some key factors to consider while setting up to ensure maximal performance.
Choosing the Right Background Color
The first step in the chroma key setup is selecting the right background color to be keyed out. This choice determines your effective color separation and ensures a smooth keying process during editing. Choosing a chroma-key background color that contrasts distinctly with the subject’s colors is essential for effective color separation. This prevents unintentional transparency, color spill, and ensures a polished final result.
Lighting Considerations
Lighting is an important part of the chroma-keying process. Bold, uniform, and consistent lighting on both the subject and the background makes it easy to delineate one from the other fully. This minimizes shadows and variations in color, creating a smooth and seamless keying process. Multiple diffuse lights from different angles are often used to illuminate the green screen evenly.
Positioning/Camera
Proper subject and camera placement are necessary to ensure an even color-keying process during post-production. To prevent shadow interference, the green screen should be smooth, tense, and without wrinkles or shadows.
High-quality cameras are essential every time, especially for chroma keying. Images with better definition are easier to key, so camera quality significantly affects the outcome. Even if your camera isn’t the best, merely shooting well can ensure a clean color-keying process during editing, resulting in professional-looking visuals.
Recording Tips for Chroma Key
- Proper Lighting
Maintaining uniform and well-defined lighting during recording is essential for a successful chroma-keying process. This consistency ensures a seamless keying process during post-production.
- Keep Distance from the Green Screen
The optimal distance between the subject and the green screen minimizes color spill and allows for natural movements. Proper distance between subject and background allows for easier isolation of the background and much smoother post-editing. A recommended starting point for the issue is around 6 to 10 feet from the background.
- Subjects and Clothing
As mentioned before, the choice of costume for Selecting appropriate clothing that doesn’t match the chroma key color prevents transparency issues. Subjects also have to be positioned in such a way that there is minimal light interference and reflection. These contribute to a flawless chroma key outcome.
3 Basic Troubleshooting Strategies
- Color Spill
Sometimes, reflected light from your green background can be cast on your subject and may remain so when the background light is keyed out. This phenomenon is known as a color spill. It is usually because of uneven lighting or shooting around reflecting surfaces. Avoiding spill can differentiate between good and lousy chroma key aftereffects.
Human hair is one area where color spill can show up unsuspectingly. Due to the translucency of hair, it is common for some unintended light to seep through. This allows some background visibility, which you do not want with a chroma key. This is especially notable with lighter hair colors like blond hair.
There are ways to account for this. Many video-editing software have features such as spill suppression and screen matte adjustments that can enhance the final footage. Specialized plugins also go a long way in ensuring minimizing spill. Addressing spill correction tackles unwanted green artifacts and ensures a clean keying process.
- Poor Lighting
Suboptimal green screen lighting can lead to inconsistencies in keying and editing, undermining your product. One way to avoid this is to light the screen and subject separately. Another tip, although expensive, is using multiple diffuse light sources and trying to maintain even lighting across every square foot of your scene. Super bright or dark spots can ruin your output, so it’s worth the extra effort if you don’t want to deal with problematic post-production.
- Poorly Refined Edges
Chroma keying should leave your videos with crisp, defined, natural-looking edges. But post-production editing can make all the difference if it doesn’t come out to your taste. Softening and refining edges make a smoother transition between the foreground object and the new background. Light adjustments to edge thickness and screen matte settings can also help enhance overall visual quality and add finesse to your work.
Conclusion
Green screen photography produces excellent results, and its ease of use makes it indispensable for videographers of all levels. In this guide, we’ve discussed chroma key technology, its role in the industry, and how to apply it to your craft to elevate visual content.
Chroma key, also known as green screen or blue screen, is a cool hack for seamless visual storytelling, allowing content creators to replace backgrounds with any image or video they want. This technique is widely embraced in film, television, and online content, and has opened the door to limitless creative possibilities. Aside from its ability to maximize creativity, it is also cheap to employ and convenient to set up, which has made it a staple for everyone who works with visuals.
In this simple guide, we’ll delve into the fundamentals of the chroma key effect, how it is used for video making, and how to leverage that as you perfect your visual content.
YouTube Video Background Creating realistic video scenes at your will is easy to complete with Filmora green screen removal.
Create Video Backgrounds Create Video Backgrounds Learn Green Screen
How Does Chroma Key Work?
Chroma Keying is done by singling out a specific color (usually green or blue) from the foreground, removing it, and replacing it with a different background (for example, a sunset). This process typically follows a series of steps:
- Background Selection:
A solid, single-color background, often green or blue, that contrasts well with the subject must be used. The color chosen should not be present in the subject or any props in the camera field to avoid unintentional transparency.
- Color Keying:
This requires the use of specialized visual effects software to key out the chosen color. The green or blue background is designated as transparent, making everything of that color see-through. The software distinguishes between the keyed color and the subject, creating a mask for the transparent areas.
- Foreground Filming:
This involves filming the subject against the live chroma key background. During filming, the chosen background color (green or blue) won’t appear in the final result due to its transparency. The subject is captured as if separately from the isolated background.
- Post-Processing:
In post-production processing, the editor takes the keyed-out color and replaces it with the new background of their choice. This step creates the illusion that the subject is in a different setting or environment. The transparent areas become filled with the chosen background which, if done right, results in a cohesive and visually appealing composition.
Why Green?
Theoretically, the chroma key background can be any solid color. However, the most commonly used colors are studio blue and bright green, with the latter far more common.
The choice of background color depends on the specific requirements of the production and the colors present in the scenes being filmed.
Free Download For Win 7 or later(64-bit)
Free Download For macOS 10.14 or later
Contrast
The less similar your chosen background color is to natural skin tones, the easier to isolate and replace in your footage. Bright green provides a strong contrast to most human skin tones and is less likely to be present in costumes or natural surroundings, making it easier to isolate subjects during the color separation.
Luminance
The color green emits light with greater intensity than blue, allowing for far more effective isolation by cameras during filming. This also means that blue screens demand increased lighting for proper exposure compared to green. This situation may be less than ideal if you lack powerful lighting or you don’t have the big bucks for them.
Digital Sensors
Many digital cameras and sensors are more sensitive to green wavelengths, resulting in cleaner and more accurate color keying during post-processing. Modern technology has also evolved to optimize for a green background, making it a more practical choice for the chroma key effect.
Wardrobe and Set Design
Bright green occurs less naturally in costumes and set designs than other colors, making green the optimal choice for reducing the likelihood of color spill and keying issues. However, if you know your scene will have lots of green, it is probably best to film with a blue screen, so there’s less risk of color spill and less post-production work.
Setting up Your Own Chroma Key Studio
Setting up your chroma key is convenient and straightforward, but there are some key factors to consider while setting up to ensure maximal performance.
Choosing the Right Background Color
The first step in the chroma key setup is selecting the right background color to be keyed out. This choice determines your effective color separation and ensures a smooth keying process during editing. Choosing a chroma-key background color that contrasts distinctly with the subject’s colors is essential for effective color separation. This prevents unintentional transparency, color spill, and ensures a polished final result.
Lighting Considerations
Lighting is an important part of the chroma-keying process. Bold, uniform, and consistent lighting on both the subject and the background makes it easy to delineate one from the other fully. This minimizes shadows and variations in color, creating a smooth and seamless keying process. Multiple diffuse lights from different angles are often used to illuminate the green screen evenly.
Positioning/Camera
Proper subject and camera placement are necessary to ensure an even color-keying process during post-production. To prevent shadow interference, the green screen should be smooth, tense, and without wrinkles or shadows.
High-quality cameras are essential every time, especially for chroma keying. Images with better definition are easier to key, so camera quality significantly affects the outcome. Even if your camera isn’t the best, merely shooting well can ensure a clean color-keying process during editing, resulting in professional-looking visuals.
Recording Tips for Chroma Key
- Proper Lighting
Maintaining uniform and well-defined lighting during recording is essential for a successful chroma-keying process. This consistency ensures a seamless keying process during post-production.
- Keep Distance from the Green Screen
The optimal distance between the subject and the green screen minimizes color spill and allows for natural movements. Proper distance between subject and background allows for easier isolation of the background and much smoother post-editing. A recommended starting point for the issue is around 6 to 10 feet from the background.
- Subjects and Clothing
As mentioned before, the choice of costume for Selecting appropriate clothing that doesn’t match the chroma key color prevents transparency issues. Subjects also have to be positioned in such a way that there is minimal light interference and reflection. These contribute to a flawless chroma key outcome.
3 Basic Troubleshooting Strategies
- Color Spill
Sometimes, reflected light from your green background can be cast on your subject and may remain so when the background light is keyed out. This phenomenon is known as a color spill. It is usually because of uneven lighting or shooting around reflecting surfaces. Avoiding spill can differentiate between good and lousy chroma key aftereffects.
Human hair is one area where color spill can show up unsuspectingly. Due to the translucency of hair, it is common for some unintended light to seep through. This allows some background visibility, which you do not want with a chroma key. This is especially notable with lighter hair colors like blond hair.
There are ways to account for this. Many video-editing software have features such as spill suppression and screen matte adjustments that can enhance the final footage. Specialized plugins also go a long way in ensuring minimizing spill. Addressing spill correction tackles unwanted green artifacts and ensures a clean keying process.
- Poor Lighting
Suboptimal green screen lighting can lead to inconsistencies in keying and editing, undermining your product. One way to avoid this is to light the screen and subject separately. Another tip, although expensive, is using multiple diffuse light sources and trying to maintain even lighting across every square foot of your scene. Super bright or dark spots can ruin your output, so it’s worth the extra effort if you don’t want to deal with problematic post-production.
- Poorly Refined Edges
Chroma keying should leave your videos with crisp, defined, natural-looking edges. But post-production editing can make all the difference if it doesn’t come out to your taste. Softening and refining edges make a smoother transition between the foreground object and the new background. Light adjustments to edge thickness and screen matte settings can also help enhance overall visual quality and add finesse to your work.
Conclusion
Green screen photography produces excellent results, and its ease of use makes it indispensable for videographers of all levels. In this guide, we’ve discussed chroma key technology, its role in the industry, and how to apply it to your craft to elevate visual content.
Charting a Path to YouTube Wealth: CPM Analysis
YouTube is a great way to make money online through sponsorship and selling merchandise and sponsorships. However, a big chunk of the creator generates their revenue from Google ads. The YouTube monetization rates defines how much you can make from the ads. In this article, we talk about YouTube monetization rates and what you need to start making money.
YouTububer Monetization Helper A cross-platform for creating visually appealing and engaging videos that will increase the chances of monetization on YouTube!
Free Download Free Download Learn More
Part 1. How Much Do YouTubers Make Per View?
Are you curious about how much YouTubers make per view? Most people are. The Influencer Marketing Hub estimates that the average YouTuber makes $0.018 per view. These rates vary from $0.10 to $0.30 per ad view depending on the type of video and location.

The YouTube monetization rates vary significantly because of various factors:
- The number of views a video receives
- The number of clicks an ad receives
- Ad blockers
- Ad Quality
- Video length
Part 2. How Much Do YouTubers Make Per 1,000 Views
A YouTube channel is a great way to generate revenye. Quality content attracts a large audience, enabling a way to generate ad revenue. Although it may be difficult to grow a YouTube channel, the revenue generated is worth. The youtube monetization rates determine the amount you can earn for every 1,000 views on your videos.
Allowing advertiser to run their ads on your channel through Google AdSense is an effective way of monetizing YouTube Content. The advertisers pay YouTube to display their products on the platform. YouTube then pays YouTubers for displaying the ads on their videos. Although the YouTube monetization rates may vary, overall revenue generated is usually substantial.
Each view will generate $0.10 to $0.30 or an average of $0.018. The YouTuber will be paid $18 on average for a video with 1,000 ad views. The amount paid depends on the CPM (Cost per Mille), which is the cost of advertising to 1,000 people. Brands will incur between $4 and $24 on YouTube to advertise on YouTube. However, the revenue generated by the Youtuber will be lower because not all the 1,000 views will be ad views.
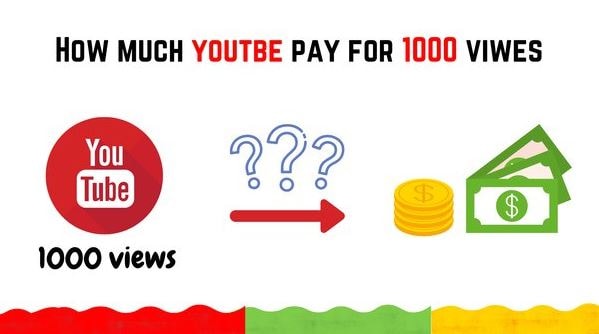
Most YouTubers report to earn around $5 to $7 from 1,000 views of their videos. Here is a breakdown of the earnings from this:
- Top talent on YouTube will likely earn $5 per 1,000
- Garnering 1 million views will earn the YouTuber $5,000
- Garnering 1 million views with 5 videos will earn the YouTuber $25,000
The figures above are just estimates. YouTubers often make more or less this amount.
Part 3. How Many Views Do YouTubers Need to Get Paid?
To get paid from revenues, you need to be eligible for the YouTube Partner Program (YPP). The following is the eligibility criteria.

The specific eligibility criteria include the following:
- Subscribers - At least 1,000
- YouTube Reach – At least 4,000 valid public watch hours in the past 12 months or at least 10M public Shorts views in the last 90 days
- YouTube Shorts Reach -
- Sign and agree to the terms and conditions
- Have an AdSense account
- Get reviewed and approved
Once approved for the YPP, you have the potential to start earning through ads. The revenue-sharing program allows you to earn income for the ads that show on your channel. Specifically, Google will pay you 68% of the revenue from the ads displayed with AdSense. For instance, a video that generates $1,000 from AdSense revenue will pay the YouTuber $680.
Part 4. The Top 6 Highest Paid YouTubers
YouTube creates a clear path for the birth of a new breed of celebrities. They have a huge following, and grow their wealth by sharing content with them. Let’s have a look at the top 6 paid YouTubers right now:
- Beast (Jimmy Donaldson) - $54 Million
- Jake Paul - $45 million
- Markiplier - $38 Million
- Rhett and Link - $30 million
- Unspeakable - $28.5 million
- Nastya - $28 million
1. Mr. Beast (Jimmy Donaldson) - $54 Million

Ranked first among the highest-paid YouTubers, Jimmy has the most popular channel. With more than 150 million subscribers, he creates videos about challenges, pranks, and giveaways. The videos have accumulated billions of views, contributing to his estimated net worth of over $100 million. Another important source of income is the Mr. Beast Burger app and menu that lets fans order MrBeast-banded meals from over 1,600 restaurants across the country.
2. Jake Paul - $45 million

Jake Paul is a renowned American professional boxer. Widely famous on social media, his YouTube is also one of the most highly ranked. He shares different kinds of videos from his boxing games. He also does pranks and reviews about different products.
3. Markiplier - $38 Million

Markiplier makes videos about playing games. The YouTube channel, which started in 2021 is renowned for moving merch. In addition to ad revenue, Markiplier records high sales of T-shirts, hoodies, and other items tied to the Unus Annus series.
4. Rhett and Link - $30 million

This YouTube channel started as the duo hosting a nerdy daily talk show called Good Mythical Morning. It quickly grew into an empire with brand extensions and spinoffs that boosted its views and earnings on YouTube.
5. Unspeakable - $28.5 million
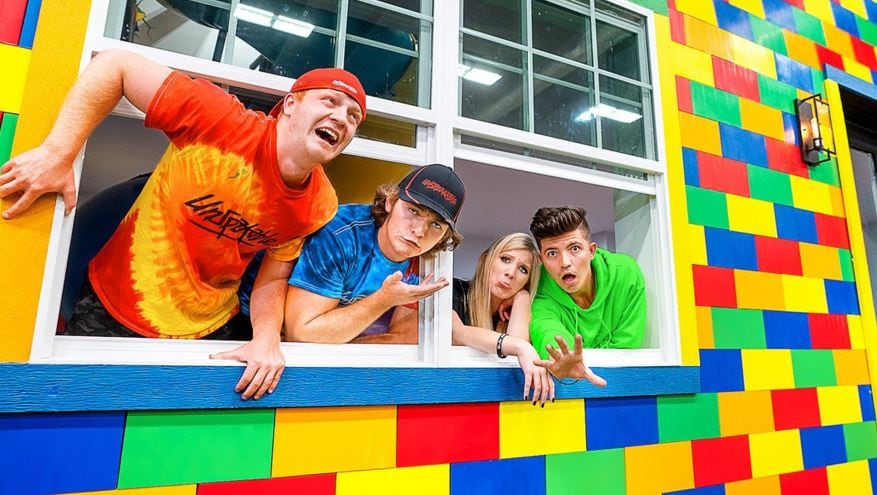
Unspeakable talks about Minecraft in the channel. Nathan Graham posts videos of himself playing this and other games. He also posts other kinds of entertaining content such as filling a room with live alligators. His creativity has allowed him to collaborate with brands in making different ads and promotions.
6. Nastya - $28 million

Nastya immigrated from Russia with her parents. With over 88 million subscribers on her channel, she chronicles her life in prosaic installments. In 2021, she did a Spotter deal and added other brand extensions like merchandise and NFT collection that contributed added income.
Part 5. Edit Your Videos for Monetization with Wondershare Filmora
The amount of money a YouTuber earns depends on several factors. However, the amount can be increased by uploading quality videos. YouTube will quality and engaging content attract more audience, increasing the opportunities for revenue generation. Wondershare Filmora is one such software, that allows you to tell your story in a better way.
Free Download For Win 7 or later(64-bit)
Free Download For macOS 10.14 or later
With the integration of AI, Filmora now offers a wide range of editing features that you can use to automate editing. Instantly generate images, remove image background, and now. These features help create visually appealing and engaging videos that will increase the chances of monetization on YouTube. One of the AI features that stands out is Instant Mode.
Filmora Instant Mode
The Instant Mode helps beginners design slideshow videos with minimal effort. You probably have no video editing experience or a professional content creator with no time to make more videos. With Instant Mode, you can create a video within minutes. Let’s have a look at the steps involved:
Step 1 – Start Instant Mode on Filmora
After opening Filmora on your device, click on Instant Mode. This feature is on the left side of the screen.

Step 2 – Choose a Template
From the Instant Mode window, choose the video template you want to use. Click on it and play to preview the Video. Once satisfied, click om the Download Slideshow button to start editing your video.

Step 3 – Import Media Items
Click on the Import Your Media icon, and add all the media files you want to use for the video. Make sure to import more media files for better use, and press the Auto Create icon to move to the next step.

Step 4 – Implement Text Titles
From the top-left corner of the screen, click the “Titles” category. Then choose from the options available for the required title template.

Step 5 – Replace Needed Media Items
Review all the media items in the timeline, and replace any that you want with another option. The Replace icon allows you to seamlessly achieve this. You can also import new files to replace it with.

Step 6: Add Project to Timeline
Once you are satisfied with your slideshow video, click on the Timeline button. This will take you to Filmora’s editing environment where you can add effects and other elements to enhance the video.

Step 7 – Preview and Export Your Video
Click on the Play icon to preview the edited video. Then export it in MP4 format for quick upload to YouTube.

Other Useful Filmora Video Editing Features
- AI Portrait – Remove the background of your videos with high accuracy and choose over 70 portrait and sticker effects.
- AI Copywriting : Get inspiration for your video through AI-generated scripts, and automatically generate text during video editing.
- AI Image – Generate an image automatically by typing what you want. Choose from 3 resolutions and use the image directly for your video project
- Auto Reframe – Automatically resize your videos within minutes to use on both YouTube and Shorts.
- Auto Beat Sync – Automatically match the footage with music, giving your video a smooth flow with the music you choose.
Conclusion
Running a YouTube Channel is lucrative. Although it may take time to build a following, YouTube is a great platform for generating revenue. Most YouTubers have monetized their channels through the YPP program. The program allows you to earn revenue from the ads that show up in your videos. This means that a successful YouTube needs high-quality videos. We recommend Wondershare Filmora for editing your videos and improving their rate of engagement with the audience. This is a key step in building recurring revenue with YouTube monetization options.
Free Download Free Download Learn More
Part 1. How Much Do YouTubers Make Per View?
Are you curious about how much YouTubers make per view? Most people are. The Influencer Marketing Hub estimates that the average YouTuber makes $0.018 per view. These rates vary from $0.10 to $0.30 per ad view depending on the type of video and location.
The YouTube monetization rates vary significantly because of various factors:
- The number of views a video receives
- The number of clicks an ad receives
- Ad blockers
- Ad Quality
- Video length
Part 2. How Much Do YouTubers Make Per 1,000 Views
A YouTube channel is a great way to generate revenye. Quality content attracts a large audience, enabling a way to generate ad revenue. Although it may be difficult to grow a YouTube channel, the revenue generated is worth. The youtube monetization rates determine the amount you can earn for every 1,000 views on your videos.
Allowing advertiser to run their ads on your channel through Google AdSense is an effective way of monetizing YouTube Content. The advertisers pay YouTube to display their products on the platform. YouTube then pays YouTubers for displaying the ads on their videos. Although the YouTube monetization rates may vary, overall revenue generated is usually substantial.
Each view will generate $0.10 to $0.30 or an average of $0.018. The YouTuber will be paid $18 on average for a video with 1,000 ad views. The amount paid depends on the CPM (Cost per Mille), which is the cost of advertising to 1,000 people. Brands will incur between $4 and $24 on YouTube to advertise on YouTube. However, the revenue generated by the Youtuber will be lower because not all the 1,000 views will be ad views.
Most YouTubers report to earn around $5 to $7 from 1,000 views of their videos. Here is a breakdown of the earnings from this:
- Top talent on YouTube will likely earn $5 per 1,000
- Garnering 1 million views will earn the YouTuber $5,000
- Garnering 1 million views with 5 videos will earn the YouTuber $25,000
The figures above are just estimates. YouTubers often make more or less this amount.
Part 3. How Many Views Do YouTubers Need to Get Paid?
To get paid from revenues, you need to be eligible for the YouTube Partner Program (YPP). The following is the eligibility criteria.
The specific eligibility criteria include the following:
- Subscribers - At least 1,000
- YouTube Reach – At least 4,000 valid public watch hours in the past 12 months or at least 10M public Shorts views in the last 90 days
- YouTube Shorts Reach -
- Sign and agree to the terms and conditions
- Have an AdSense account
- Get reviewed and approved
Once approved for the YPP, you have the potential to start earning through ads. The revenue-sharing program allows you to earn income for the ads that show on your channel. Specifically, Google will pay you 68% of the revenue from the ads displayed with AdSense. For instance, a video that generates $1,000 from AdSense revenue will pay the YouTuber $680.
Part 4. The Top 6 Highest Paid YouTubers
YouTube creates a clear path for the birth of a new breed of celebrities. They have a huge following, and grow their wealth by sharing content with them. Let’s have a look at the top 6 paid YouTubers right now:
- Beast (Jimmy Donaldson) - $54 Million
- Jake Paul - $45 million
- Markiplier - $38 Million
- Rhett and Link - $30 million
- Unspeakable - $28.5 million
- Nastya - $28 million
1. Mr. Beast (Jimmy Donaldson) - $54 Million
Ranked first among the highest-paid YouTubers, Jimmy has the most popular channel. With more than 150 million subscribers, he creates videos about challenges, pranks, and giveaways. The videos have accumulated billions of views, contributing to his estimated net worth of over $100 million. Another important source of income is the Mr. Beast Burger app and menu that lets fans order MrBeast-banded meals from over 1,600 restaurants across the country.
2. Jake Paul - $45 million
Jake Paul is a renowned American professional boxer. Widely famous on social media, his YouTube is also one of the most highly ranked. He shares different kinds of videos from his boxing games. He also does pranks and reviews about different products.
3. Markiplier - $38 Million
Markiplier makes videos about playing games. The YouTube channel, which started in 2021 is renowned for moving merch. In addition to ad revenue, Markiplier records high sales of T-shirts, hoodies, and other items tied to the Unus Annus series.
4. Rhett and Link - $30 million
This YouTube channel started as the duo hosting a nerdy daily talk show called Good Mythical Morning. It quickly grew into an empire with brand extensions and spinoffs that boosted its views and earnings on YouTube.
5. Unspeakable - $28.5 million
Unspeakable talks about Minecraft in the channel. Nathan Graham posts videos of himself playing this and other games. He also posts other kinds of entertaining content such as filling a room with live alligators. His creativity has allowed him to collaborate with brands in making different ads and promotions.
6. Nastya - $28 million
Nastya immigrated from Russia with her parents. With over 88 million subscribers on her channel, she chronicles her life in prosaic installments. In 2021, she did a Spotter deal and added other brand extensions like merchandise and NFT collection that contributed added income.
Part 5. Edit Your Videos for Monetization with Wondershare Filmora
The amount of money a YouTuber earns depends on several factors. However, the amount can be increased by uploading quality videos. YouTube will quality and engaging content attract more audience, increasing the opportunities for revenue generation. Wondershare Filmora is one such software, that allows you to tell your story in a better way.
Free Download For Win 7 or later(64-bit)
Free Download For macOS 10.14 or later
With the integration of AI, Filmora now offers a wide range of editing features that you can use to automate editing. Instantly generate images, remove image background, and now. These features help create visually appealing and engaging videos that will increase the chances of monetization on YouTube. One of the AI features that stands out is Instant Mode.
Filmora Instant Mode
The Instant Mode helps beginners design slideshow videos with minimal effort. You probably have no video editing experience or a professional content creator with no time to make more videos. With Instant Mode, you can create a video within minutes. Let’s have a look at the steps involved:
Step 1 – Start Instant Mode on Filmora
After opening Filmora on your device, click on Instant Mode. This feature is on the left side of the screen.
Step 2 – Choose a Template
From the Instant Mode window, choose the video template you want to use. Click on it and play to preview the Video. Once satisfied, click om the Download Slideshow button to start editing your video.
Step 3 – Import Media Items
Click on the Import Your Media icon, and add all the media files you want to use for the video. Make sure to import more media files for better use, and press the Auto Create icon to move to the next step.
Step 4 – Implement Text Titles
From the top-left corner of the screen, click the “Titles” category. Then choose from the options available for the required title template.
Step 5 – Replace Needed Media Items
Review all the media items in the timeline, and replace any that you want with another option. The Replace icon allows you to seamlessly achieve this. You can also import new files to replace it with.
Step 6: Add Project to Timeline
Once you are satisfied with your slideshow video, click on the Timeline button. This will take you to Filmora’s editing environment where you can add effects and other elements to enhance the video.
Step 7 – Preview and Export Your Video
Click on the Play icon to preview the edited video. Then export it in MP4 format for quick upload to YouTube.
Other Useful Filmora Video Editing Features
- AI Portrait – Remove the background of your videos with high accuracy and choose over 70 portrait and sticker effects.
- AI Copywriting : Get inspiration for your video through AI-generated scripts, and automatically generate text during video editing.
- AI Image – Generate an image automatically by typing what you want. Choose from 3 resolutions and use the image directly for your video project
- Auto Reframe – Automatically resize your videos within minutes to use on both YouTube and Shorts.
- Auto Beat Sync – Automatically match the footage with music, giving your video a smooth flow with the music you choose.
Conclusion
Running a YouTube Channel is lucrative. Although it may take time to build a following, YouTube is a great platform for generating revenue. Most YouTubers have monetized their channels through the YPP program. The program allows you to earn revenue from the ads that show up in your videos. This means that a successful YouTube needs high-quality videos. We recommend Wondershare Filmora for editing your videos and improving their rate of engagement with the audience. This is a key step in building recurring revenue with YouTube monetization options.
Also read:
- [New] Optimal Income Mastering YouTube Channel Profitability on Mobile
- [New] Optimizing Data Preservation Top 5 Cloud Storage Providers
- [New] Professional Filmmaking Made Easy with Right Lenses
- [Updated] Unveiling the Powerhouse Q500 Typhoon for 2024
- A Course In Sorcery | Free Book
- Drag and Drop Not Working in Windows 11? Try These Fixes
- In 2024, Expert Advice for Aspiring YouTube Stars - The Art of Reaction Videos (3 Essential Steps)
- In 2024, Extracting Images From Videos in Windows 11 Photos
- In 2024, Niche Networking Smaller Biz's Video Strategies
- In 2024, Top 10 Password Cracking Tools For Xiaomi Redmi A2+
- In 2024, Unraveling YouTube's Monetization Shifts
- Maximizing Engagement How to Pick Perfect YouTube Collaborators for 2024
- Order Matters! How to Enjoy Every Magical Moment of the Harry Potter Series Properly
- Title: 2024 Approved Integrating Chroma Keying Into Your Edit Suite
- Author: Thomas
- Created at : 2025-01-14 02:58:08
- Updated at : 2025-01-16 02:31:05
- Link: https://youtube-help.techidaily.com/2024-approved-integrating-chroma-keying-into-your-edit-suite/
- License: This work is licensed under CC BY-NC-SA 4.0.