

"2024 Approved Key YouTube Policies Every Channel Owner Must Understand"
Key YouTube Policies Every Channel Owner Must Understand
YouTube has become more than an entertainment now. Most content creators are using the platform to earn and bring their skills to some use. Good knowledge of YouTube Community Guidelines would work in the long run.
The article introduces the YouTube Community and covers how to make community posts on YouTube. Additionally, stay tuned to find out how to get the community tab on YouTube. So let us begin!
In this article
02 How to Make A Community Post on YouTube?
03 How to Get Community Tab on YouTube?
04 How to Make Good Use of Community Tab on YouTube?
Part 1: What is YouTube Community?
Before getting into YouTube community posts, it is crucial to understand what YouTube Community is and how it affects the content creators. The YouTube community is an extensive range of viewers or followers that one needs to grow their channel. Creating a connection with the viewers helps because you have loyal followers; you have got it all.
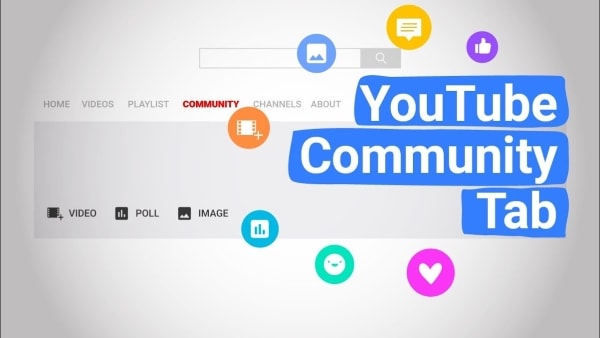
It is because the trusted followers would go above and beyond to share your content to their social media accounts and give you instant feedback. YouTube community tab works like a charm for creators to engage with the audience. They can use YouTube community posts such as polls, ask questions, use GIFs, and interact with the community.
Part 2: How to Make A Community Post on YouTube?
The first question to arise in one’s mind revolves around how to make a community post on YouTube. The community post YouTube helps in interaction with the general public and community. To make community posts YouTube via computer and mobile device, follow the guidelines below in detail.
Community Post YouTube Via Computer
The steps below shall help the reader to make a YouTube community post through the system.
Step 1: Launch YouTube from your browser and log in to your account. Now, click on the “Upload” button located at the top right corner of the screen.

Step 2: Tap on “Create Post” and type the message in the textbox. You can insert an image, GIF, or video as required. Now, pick the type of post.
Step 3: Hit “Post” afterward. The “Community” posts can be accessed from the “Community” tab in your account channel.

Community Post YouTube Via Mobile Phone
To know How to make community posts on YouTube mobile, follow the guidelines below:
Step 1: Launch the YouTube application from your iPhone or Android. Hit the “Create” icon that looks like a video camera located in the top right corner.

Step 2: Click on “Create Post,” add the post to the textbox and upload any required media. Choose the type of post and tap “Post.”
Part 3: How to Get Community Tab on YouTube?
The vital concern to be addressed in this section spins around how to enable a community tab on YouTube. On October 12, 2021, YouTube updated the policy that stated that a channel must have a minimal 500+ subscribers to get community tab YouTube.

Before October, the threshold for subscribers used to be 1000+. Now it has been reduced so that most channels can communicate and engage with the audience. The content creators can access the community tab on YouTube faster by following some pointers and tips.
For once, they can interact with the audience more and find ways to keep them in a loop. It creates a strong community of followers and subscribers. To do so, the account owners can reply to every comment, ask different questions, and pin the best comments. Additionally, you can ask for feedback and opinions in the comment tab to enable the community tab on YouTube.
Ask people their take on a certain stereotype, have a tip from viewers that can be shared with the community, and how they want to see the future. It also makes the community ponder upon the cruel realities of the world and express themselves out loud. You can also make more quality content videos to be a part of the community for good.
Part 4: How to Make Good Use of Community Tab on YouTube?
The users know how to get the community tab on your YouTube channel and how to post community posts on YouTube. It is time to know how to make good use of the community tab on YouTube. Having this knowledge shall help the new and old content creators to use their skills and bring good to the world.
So, without wasting any time, let us begin the process.
Showcase Behind the Scenes and Bloopers
Most viewers crave authenticity more than ever. The regular videos and updates on a channel and scripted and well-crafted, so there is no window for error. However, upload your life updates and BTS scenes from video production to engage the audience and use the community tab to its full potential.
Cross Channel Promotion Process
The community tab helps promote your various vlog or podcasts. It means that you can support new creators in the market and establish a cross-channel promotion network. Engaging with other creators helps the audience know about your community tab YouTube.
Use Teasers and Promos
Using different teasers and promos plays a significant role in developing the well-deserved hype for the show or video. It compels the audience to stay tuned to whatever the channel is bringing to the table. Moreover, the time between working on the video and uploading it can be filled by teasers that promote the upcoming project big time.
Exceptional and Planned Giveaways
Giveaways appear to be a devious plan to lure in the audience. However, if your content is worthy enough to stick around, you don’t need to worry much. Therefore, plan a giveaway and set some rules for it. The circle of interest is widely enhanced using this tactic from the platform of community tab on YouTube.
Hosting Q/A Sessions
Another effective way to use the YouTube community tab to its full potential revolves around hosting a Questions and Answer Session. The general public likes to relate to the bloggers and influencers and know about them. A Q/A session sparks the connection between the two where the viewers ask different personal and professional questions.
It is a huge possibility that you gain new followers, and they stick to the way you communicate and give importance to your subscribers.
Ask for Inspiration and Video
The most common practice of renowned content creators is to engage the audience and ask them for inspiration in the following video. You can ask your subscribers what they want to see you act on and what topic should be covered. Do not hesitate to use polls and gauge interest in general and stereotypical subjects.
Conclusion
YouTube has become a one-stop shop for watching impeccable content and earning through the creation of media. It is vital to know YouTube community guidelines to work better and efficiently.
To create good intros and outros for your YouTube channels, incorporate the usage of Wondershare Filmora . It offers some moving effects and transitions to create a spell-bound impact on the viewers.
Versatile Video Editor - Wondershare Filmora
An easy yet powerful editor
Numerous effects to choose from
Detailed tutorials provided by the official channel
02 How to Make A Community Post on YouTube?
03 How to Get Community Tab on YouTube?
04 How to Make Good Use of Community Tab on YouTube?
Part 1: What is YouTube Community?
Before getting into YouTube community posts, it is crucial to understand what YouTube Community is and how it affects the content creators. The YouTube community is an extensive range of viewers or followers that one needs to grow their channel. Creating a connection with the viewers helps because you have loyal followers; you have got it all.
It is because the trusted followers would go above and beyond to share your content to their social media accounts and give you instant feedback. YouTube community tab works like a charm for creators to engage with the audience. They can use YouTube community posts such as polls, ask questions, use GIFs, and interact with the community.
Part 2: How to Make A Community Post on YouTube?
The first question to arise in one’s mind revolves around how to make a community post on YouTube. The community post YouTube helps in interaction with the general public and community. To make community posts YouTube via computer and mobile device, follow the guidelines below in detail.
Community Post YouTube Via Computer
The steps below shall help the reader to make a YouTube community post through the system.
Step 1: Launch YouTube from your browser and log in to your account. Now, click on the “Upload” button located at the top right corner of the screen.
Step 2: Tap on “Create Post” and type the message in the textbox. You can insert an image, GIF, or video as required. Now, pick the type of post.
Step 3: Hit “Post” afterward. The “Community” posts can be accessed from the “Community” tab in your account channel.
Community Post YouTube Via Mobile Phone
To know How to make community posts on YouTube mobile, follow the guidelines below:
Step 1: Launch the YouTube application from your iPhone or Android. Hit the “Create” icon that looks like a video camera located in the top right corner.
Step 2: Click on “Create Post,” add the post to the textbox and upload any required media. Choose the type of post and tap “Post.”
Part 3: How to Get Community Tab on YouTube?
The vital concern to be addressed in this section spins around how to enable a community tab on YouTube. On October 12, 2021, YouTube updated the policy that stated that a channel must have a minimal 500+ subscribers to get community tab YouTube.
Before October, the threshold for subscribers used to be 1000+. Now it has been reduced so that most channels can communicate and engage with the audience. The content creators can access the community tab on YouTube faster by following some pointers and tips.
For once, they can interact with the audience more and find ways to keep them in a loop. It creates a strong community of followers and subscribers. To do so, the account owners can reply to every comment, ask different questions, and pin the best comments. Additionally, you can ask for feedback and opinions in the comment tab to enable the community tab on YouTube.
Ask people their take on a certain stereotype, have a tip from viewers that can be shared with the community, and how they want to see the future. It also makes the community ponder upon the cruel realities of the world and express themselves out loud. You can also make more quality content videos to be a part of the community for good.
Part 4: How to Make Good Use of Community Tab on YouTube?
The users know how to get the community tab on your YouTube channel and how to post community posts on YouTube. It is time to know how to make good use of the community tab on YouTube. Having this knowledge shall help the new and old content creators to use their skills and bring good to the world.
So, without wasting any time, let us begin the process.
Showcase Behind the Scenes and Bloopers
Most viewers crave authenticity more than ever. The regular videos and updates on a channel and scripted and well-crafted, so there is no window for error. However, upload your life updates and BTS scenes from video production to engage the audience and use the community tab to its full potential.
Cross Channel Promotion Process
The community tab helps promote your various vlog or podcasts. It means that you can support new creators in the market and establish a cross-channel promotion network. Engaging with other creators helps the audience know about your community tab YouTube.
Use Teasers and Promos
Using different teasers and promos plays a significant role in developing the well-deserved hype for the show or video. It compels the audience to stay tuned to whatever the channel is bringing to the table. Moreover, the time between working on the video and uploading it can be filled by teasers that promote the upcoming project big time.
Exceptional and Planned Giveaways
Giveaways appear to be a devious plan to lure in the audience. However, if your content is worthy enough to stick around, you don’t need to worry much. Therefore, plan a giveaway and set some rules for it. The circle of interest is widely enhanced using this tactic from the platform of community tab on YouTube.
Hosting Q/A Sessions
Another effective way to use the YouTube community tab to its full potential revolves around hosting a Questions and Answer Session. The general public likes to relate to the bloggers and influencers and know about them. A Q/A session sparks the connection between the two where the viewers ask different personal and professional questions.
It is a huge possibility that you gain new followers, and they stick to the way you communicate and give importance to your subscribers.
Ask for Inspiration and Video
The most common practice of renowned content creators is to engage the audience and ask them for inspiration in the following video. You can ask your subscribers what they want to see you act on and what topic should be covered. Do not hesitate to use polls and gauge interest in general and stereotypical subjects.
Conclusion
YouTube has become a one-stop shop for watching impeccable content and earning through the creation of media. It is vital to know YouTube community guidelines to work better and efficiently.
To create good intros and outros for your YouTube channels, incorporate the usage of Wondershare Filmora . It offers some moving effects and transitions to create a spell-bound impact on the viewers.
Versatile Video Editor - Wondershare Filmora
An easy yet powerful editor
Numerous effects to choose from
Detailed tutorials provided by the official channel
Top 10 Video Capture Tools for Blogging Platforms
Best 10 Screen Recorders for YouTube

Richard Bennett
Mar 27, 2024• Proven solutions
If you are interested in making tutorial videos by capturing videos from your computer screen then following details will definitely help you. It is possible to share wonderful details with screen recorder tools that are discussed below in this article:
Looking for Screen recorders for your smartphone? Kindly check this screen recorder Apps for iPhone>>
![]()

The All-in-One Screen Recorder & Video Editor
- Record desktop screen, voiceover, and webcam simultaneously
- Edit recorded clips quickly with a wide range of professional tools
- Built-in plentiful templates and effects
- Export to MP4, MOV, MKV, GIF and multiple formats
For Win 7 or later (64-bit)
For macOS 10.12 or later
 Secure Download
Top 10 Screen Recorders for YouTube video creators
Note: We resolutely oppose all forms of copyright-infringing downloads. This tutorial is only for downloading YouTube videos/audio materials from your own channel.
For Windows
1. Wondershare Filmora
Wondershare Filmora is an easy-to-use while light screen recorder for PC and Mac. It allows you to record desktop screen by customizing areas you like, and you can record popular games at up to 120fps without lagging. What’s more, Filmora also offers you a built-in video editing tool that allows you to add annotations, personalize cursor effects, and crop, trim, cut your recorded footage as you like.


Price:
Free trial/$49.99 per year/$79.99 for perpetual
2. Cam Studio:
It is an open-source screen recorder for YouTube that can be learned within few minutes and results in higher quality video outcomes. Offers a small file size along with the facility to convert from AVI to SWF.
Pros:
It allows users to add captions to videos and possesses a built-in help file.
Cons:
The website suffers from few bugs.
Price:
It is 100% free for use.
3. iSpring Free Cam:
Users are likely to get built in type video/audio editor with this screen recorder that has intuitive interface with professional screencasts.
Pros:
High Quality resolution with no time limits and it also records user’s voice along with computer sounds.
Cons:
Do not allow webcam type recording and output file format use to be WMV only.
Price:
Free tool for screen recording needs.
4. ShareX:
ShareX is a well-known open source type ad free tool that comes with numerous customization features. It is targeted for professional video developers who need advanced editing options.
Pros:
Custom colour effects with watermarks where you can easily import existing photos, music or videos from your device.
Cons:
It does not possess video editor, webcam recording feature and is little complicated to use for beginners.
Price:
Can be used for free.
5. MadCap Mimic:
Here is a highly advanced multimedia tool with interactive simulation options. Users can access this screen recorder for YouTube with three different modes as like full motion, automatic and manual.
Pros:
Automatically saved content for future needs, wide variety of video effects, fast technical support and results in highly interactive content.
Cons:
Occasional bugs are reported and users can access free trial only for 30 days.
Price:
For full year version you need to pay $144 whereas life time access can be obtained by paying only $428.
For Mac
1. Camtasia 2:
This is a comprehensive tool for your screen recording needs where you can also connect external devices for input. Users will be able to enjoy smooth editing features with its studio like platform, layered timeline and fast mixing.
Pros:
It is fully interactive screen recorder that can be used as an interactive mobile application. This tool is supported by Windows, Android and iPhone devices.
Cons:
Aimed for professional users only.
Price:
Although free trial is available for few days but actual featured version can be accessed after payment of $99.
2. ScreenFlow:
Here is a popular paid offering for all professionals who are interested to create interactive educational videos. There are unlimited powerful features with easy to use interface and one can import input from externally connected devices as like iPad, iPod and iPhones etc.
Pros:
High class motion control features with attractive zooming facility so that you can manage videos from all views.
Cons:
Difficult to use for beginners due to advanced design tools.
Price:
Screen Flow packages are available on payment of $99 and more.
3. Snapz Pro X:
Snapz Pro X offers various tutorials along with training videos so that users can avail resizable video creation options with a straightforward type interface. The live preview feature allows users to generate customized videos with easy corrections. Snapz Pro X is commonly used by professionals for learning and training related video creations as it offers lesser mistakes.
Pros:
It offers live preview, selective region capture facility and high end pixel perfection services.
Cons:
Free or trial version comes with unwanted watermarks.
Price:
Cheaper option as compared to above two tools as it can be accessed by paying only $69.
4. Screencast-o-Matic:
You will be glad to know about this online screen recorder for YouTube that can be accessed by anyone with installation of a specially designed launcher. The screen recording length can go up to 15 minutes and resolution quality offered goes up to 720p. The free version can be accessed by anyone but if you need advanced features then you have to spend some money.
Pros:
Offers real time editing as well as recording for video shooting; users need not to download this tool on their personal device rather it can be accessed online with ease.
Cons:
Video quality is little poor as compared to other tools.
Price:
The free version is available with limited features whereas fully featured tool is accessible with a payment of $15/ year.
5. QuickTime:
It is one of the latest screen recorder tool for all Mac users that can grab audio from microphone but not compatible with system audio. If you need to use a video creator tool without spending even a single penny then QuickTime software is best option for you.
Pros:
It is available for free and can be used by beginners as well as professionals easily. QuickTime is compatible with almost all versions of Mac devices.
Cons:
It is a restricted solution for screen recording with limited tools and features. QuickTime is not preferred for game recording videos due to low-resolution outputs.
Price:
Available for free.
Richard Bennett
Richard Bennett is a writer and a lover of all things video.
Follow @Richard Bennett
Richard Bennett
Mar 27, 2024• Proven solutions
If you are interested in making tutorial videos by capturing videos from your computer screen then following details will definitely help you. It is possible to share wonderful details with screen recorder tools that are discussed below in this article:
Looking for Screen recorders for your smartphone? Kindly check this screen recorder Apps for iPhone>>
![]()
The All-in-One Screen Recorder & Video Editor
- Record desktop screen, voiceover, and webcam simultaneously
- Edit recorded clips quickly with a wide range of professional tools
- Built-in plentiful templates and effects
- Export to MP4, MOV, MKV, GIF and multiple formats
For Win 7 or later (64-bit)
For macOS 10.12 or later
Secure Download
Top 10 Screen Recorders for YouTube video creators
Note: We resolutely oppose all forms of copyright-infringing downloads. This tutorial is only for downloading YouTube videos/audio materials from your own channel.
For Windows
1. Wondershare Filmora
Wondershare Filmora is an easy-to-use while light screen recorder for PC and Mac. It allows you to record desktop screen by customizing areas you like, and you can record popular games at up to 120fps without lagging. What’s more, Filmora also offers you a built-in video editing tool that allows you to add annotations, personalize cursor effects, and crop, trim, cut your recorded footage as you like.
Price:
Free trial/$49.99 per year/$79.99 for perpetual
2. Cam Studio:
It is an open-source screen recorder for YouTube that can be learned within few minutes and results in higher quality video outcomes. Offers a small file size along with the facility to convert from AVI to SWF.
Pros:
It allows users to add captions to videos and possesses a built-in help file.
Cons:
The website suffers from few bugs.
Price:
It is 100% free for use.
3. iSpring Free Cam:
Users are likely to get built in type video/audio editor with this screen recorder that has intuitive interface with professional screencasts.
Pros:
High Quality resolution with no time limits and it also records user’s voice along with computer sounds.
Cons:
Do not allow webcam type recording and output file format use to be WMV only.
Price:
Free tool for screen recording needs.
4. ShareX:
ShareX is a well-known open source type ad free tool that comes with numerous customization features. It is targeted for professional video developers who need advanced editing options.
Pros:
Custom colour effects with watermarks where you can easily import existing photos, music or videos from your device.
Cons:
It does not possess video editor, webcam recording feature and is little complicated to use for beginners.
Price:
Can be used for free.
5. MadCap Mimic:
Here is a highly advanced multimedia tool with interactive simulation options. Users can access this screen recorder for YouTube with three different modes as like full motion, automatic and manual.
Pros:
Automatically saved content for future needs, wide variety of video effects, fast technical support and results in highly interactive content.
Cons:
Occasional bugs are reported and users can access free trial only for 30 days.
Price:
For full year version you need to pay $144 whereas life time access can be obtained by paying only $428.
For Mac
1. Camtasia 2:
This is a comprehensive tool for your screen recording needs where you can also connect external devices for input. Users will be able to enjoy smooth editing features with its studio like platform, layered timeline and fast mixing.
Pros:
It is fully interactive screen recorder that can be used as an interactive mobile application. This tool is supported by Windows, Android and iPhone devices.
Cons:
Aimed for professional users only.
Price:
Although free trial is available for few days but actual featured version can be accessed after payment of $99.
2. ScreenFlow:
Here is a popular paid offering for all professionals who are interested to create interactive educational videos. There are unlimited powerful features with easy to use interface and one can import input from externally connected devices as like iPad, iPod and iPhones etc.
Pros:
High class motion control features with attractive zooming facility so that you can manage videos from all views.
Cons:
Difficult to use for beginners due to advanced design tools.
Price:
Screen Flow packages are available on payment of $99 and more.
3. Snapz Pro X:
Snapz Pro X offers various tutorials along with training videos so that users can avail resizable video creation options with a straightforward type interface. The live preview feature allows users to generate customized videos with easy corrections. Snapz Pro X is commonly used by professionals for learning and training related video creations as it offers lesser mistakes.
Pros:
It offers live preview, selective region capture facility and high end pixel perfection services.
Cons:
Free or trial version comes with unwanted watermarks.
Price:
Cheaper option as compared to above two tools as it can be accessed by paying only $69.
4. Screencast-o-Matic:
You will be glad to know about this online screen recorder for YouTube that can be accessed by anyone with installation of a specially designed launcher. The screen recording length can go up to 15 minutes and resolution quality offered goes up to 720p. The free version can be accessed by anyone but if you need advanced features then you have to spend some money.
Pros:
Offers real time editing as well as recording for video shooting; users need not to download this tool on their personal device rather it can be accessed online with ease.
Cons:
Video quality is little poor as compared to other tools.
Price:
The free version is available with limited features whereas fully featured tool is accessible with a payment of $15/ year.
5. QuickTime:
It is one of the latest screen recorder tool for all Mac users that can grab audio from microphone but not compatible with system audio. If you need to use a video creator tool without spending even a single penny then QuickTime software is best option for you.
Pros:
It is available for free and can be used by beginners as well as professionals easily. QuickTime is compatible with almost all versions of Mac devices.
Cons:
It is a restricted solution for screen recording with limited tools and features. QuickTime is not preferred for game recording videos due to low-resolution outputs.
Price:
Available for free.
Richard Bennett
Richard Bennett is a writer and a lover of all things video.
Follow @Richard Bennett
Also read:
- In 2024, Exploring Video Realms Significant Post-VidCon Conclaves
- In 2024, Give a Striking Edge to Play Button Visuals
- In 2024, Top 10 Global YouTube Stars with Mass Following
- In 2024, Making Yields with Content The Creator's Money Map
- Instant Inspiration The Easy Guide to Building Custom YouTube Music Mixes (Web/App) for 2024
- Flow & Flourish with These Elite Yogis Online for 2024
- In 2024, Naming Rules and Guidelines How to Ensure Originality in Streaming
- 2024 Approved Quantifying the Fortune of Mr. Beast
- [New] Silly Screens Top YouTube Humorists Worth Your Time
- 2024 Approved Unlock Creative Potentials YouTube Trailers with Filmora
- Reasons for Oppo Reno 11 5G Stuck on Startup Screen and Ways To Fix Them | Dr.fone
- In 2024, Digital Solutions to Remove Background Noise From Home Recordings
- How to Temporarily Turn Off Your PC's Firewall
- How to Quickly Fix Bluetooth Not Working on Motorola G24 Power | Dr.fone
- How to Change Location on TikTok to See More Content On your Motorola Moto G13 | Dr.fone
- New In 2024, Splice App Review A Close Examination of Its Video Editing Features
- [New] In 2024, Premium Steadicam Brands for Drones and Camera Work
- Updated The Ultimate Guide to Minitool Movie Maker and Its Alternatives
- [New] Quick Clicks, Big Smiles Crafting Memes Easily
- [New] Pro 3 Camera Insight Mastering Video on the Go with ION
- Title: "2024 Approved Key YouTube Policies Every Channel Owner Must Understand"
- Author: Thomas
- Created at : 2024-06-28 04:38:04
- Updated at : 2024-06-29 04:38:04
- Link: https://youtube-help.techidaily.com/2024-approved-key-youtube-policies-every-channel-owner-must-understand/
- License: This work is licensed under CC BY-NC-SA 4.0.
