
:max_bytes(150000):strip_icc():format(webp)/duet-c82ee94b39e24788bcfd51d1eea24288.jpg)
"2024 Approved Making the Leap Set Up a Sports Vlog on macOS"
Making the Leap: Set Up a Sports Vlog on macOS
How to Create a Sports YouTube Channel on Mac?

Richard Bennett
Dec 14, 2023• Proven solutions
It is no secret that there is a huge audience of sports, including e-sports and gaming, on YouTube who appreciates high-quality content. These viewers are searching for sports YouTubers who create insightful and entertaining content that isn’t only rich in terms of content but production as well. It means that sports channels on YouTube have to rely on special video editing effects to ensure they are delivering what their viewers expect.
That being said, it is usually not easy for aspiring sports YouTubers to start since they have little to no experience when it comes to creating premium sports videos for YouTube. This article will help you out in terms of starting a new YouTube sports channel, especially if you are a mac user.
- Section1. Necessary Elements of a YouTube Sports Channel
- Section2. Must Use Feature for Making a Sports YouTube Channel
- Section3. Which Video Editing Software Has these Features?

Section 1. Necessary Elements of a YouTube Sports Channel
If you want to start a YouTube sports channel, you need to keep in mind that sports videos are fundamentally different from other types of videos. This requires you to have a strong grasp not only on content but video editing as well. Here are some of the top elements that every YouTube sports channel needs.
1.Insightful Producer Perspective
First of all, you should try to have a clear and comprehensive understanding of the sport you are going to talk about on your channel. If you are just an amateur or a casual fan, you will need to do more preparation as a sports YouTuber.

2.Brief and Clear Delivery
The second most important thing is to communicate your perspective in an entertaining, brief, and interactive manner so your viewers remain engaged and keep coming back to your channel. If you fail to communicate properly, your viewers will go somewhere else to watch what they are looking for.
3.Advanced Video Editing
Apart from the content, you need to make yourself familiar with using advanced video editing features such as picture-in-picture, screen recording, and audio recording. These allow you to provide a high-quality viewing experience to your YouTube channel audience.
4.Branded Intro & Outro
You need to set yourself apart with the impactful branding of your sports YouTube channel. It means that the software you are using on your Mac needs to have smart editing features including the ability to add cool intros and outros that become the trademark of your sports channel.
You May Also Like:
- YouTuber Skillshare: Essential Video Cutting Skills For YouTubers>>>
- What is the Best MP4 Cutter for YouTubers On Mac?>>>
Section 2. Must Use Feature for Making a Sports YouTube Channel
There are many features that you may need in your sports content creation. High video quality will bring more views and attract more fans to your YouTube channel. Here are some features you may use in making sports videos.
1. Making a Sports YouTube Channel - Screen Recording
One of the top features that you must use in your sports content creation is screen recording. It is a vital feature for all sports YouTubers and it is used extensively for multiple reasons:
- It gives content creators the ability to give demonstrations in a clear and convenient manner that is easily understandable.
- Screen recording also allows them to create how-to and tutorial videos for games and other sports.
- They can also use this feature to record a video clip that may not be easy to include in the final video.
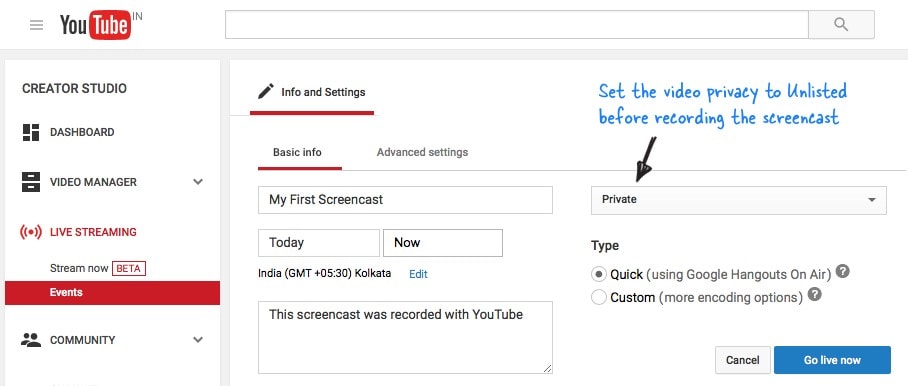
This feature will give your audience the opportunity to understand your point clearly without having to visualize everything in their heads. Everything you say would be right in front of them in the form of screen recording and they can easily get your perspective.
2. Making a Sports YouTube Channel- Picture in Picture
Another key feature that is widely used by YouTube sports channels is picture-in-picture, especially those who engage in live commentary while the game or match is still being played. As a Mac YouTube channel producer, you must use this feature to gain the following advantages:
- Picture in Picture allows you to stay visible to your audience while commentating or giving your opinion on a game.
- It also provides you with the ability to divert more focus on the game so the bigger part of the screen is dedicated to sports.
- You can also switch between the smaller and bigger video sections when necessary, for example during a break or interval.
- It gives you the opportunity to make your YouTube channel more personalized with your own take on picture-in-picture.
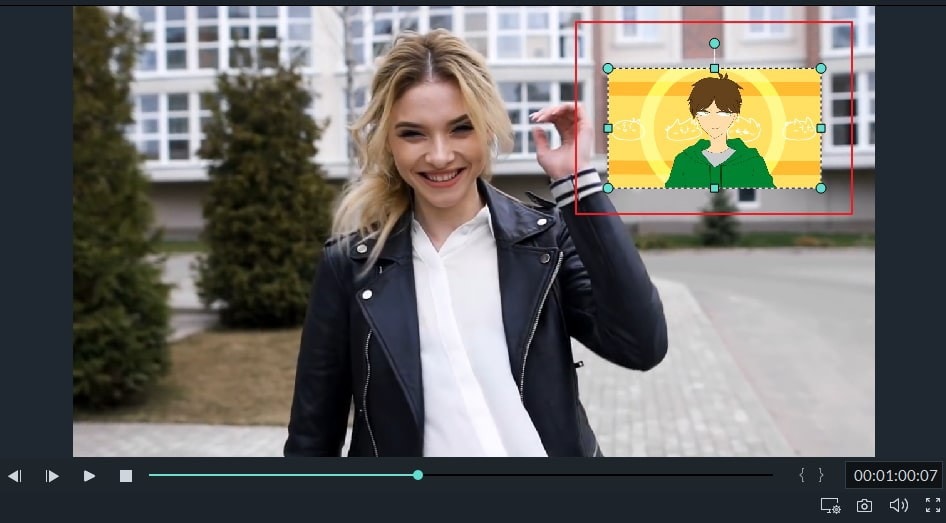
Picture in picture is a great feature for sports YouTubers on Mac as it keeps the video entertaining and personalized. Without using a picture-in-picture feature, you will find it difficult to compete with other sports YouTube channels.
3. Making a Sports YouTube Channel - Audio Recording
There are times when you cannot use the native audio of the sports video and need to add your own. It means that you need to record your own audio file and add it to the video before uploading it to your YouTube channel. This feature allows you to:
- Edit the audio of your sports video to make it more customizable according to your target audience.
- Remove the audio that might cause copyright issues and add your own to ensure your content remains original.
- Add your own remarks, commentary, and opinions in the video in full or in parts to make it more engaging and interactive.
- Make videos where you just need background music and don’t need the original audio such as montages, tributes, etc.


Clear and crisp audio recording is necessary to ensure that the video you upload on your sports YouTube channel is of high quality. Low-quality audio will damage the whole experience and leave a bad taste in the mouth of your viewers.
You May Also Like: Edit Audios in Wondershare Filmora For Mac
Filmstock Stock Media Library ](https://filmstock.wondershare.com/creative-theme-sports?spm=rs.filmora%5Fweb&source%5Fchannel=seo%5Farticle )
Section 3. What Video Editing Software Has these Features?
There are many video editing software applications that enable you to use the above-mentioned features. However, if you are just starting out and want to become a producer of your own YouTube sports channel using Mac, here are some of your options:
1. WonderShare Filmora X - Make sports channel editing easier
If you are just getting ready to do a YouTube sports channel and do not have any experience, Filmora is a good choice. There is no video editing software that provides better value.
This software contains most of the features and functions needed to create sports videos, such as audio and screen recording along with pip capability, and picture-in-picture. You can also use Filmora X to add cool branded intros and outros to customize your sports videos.
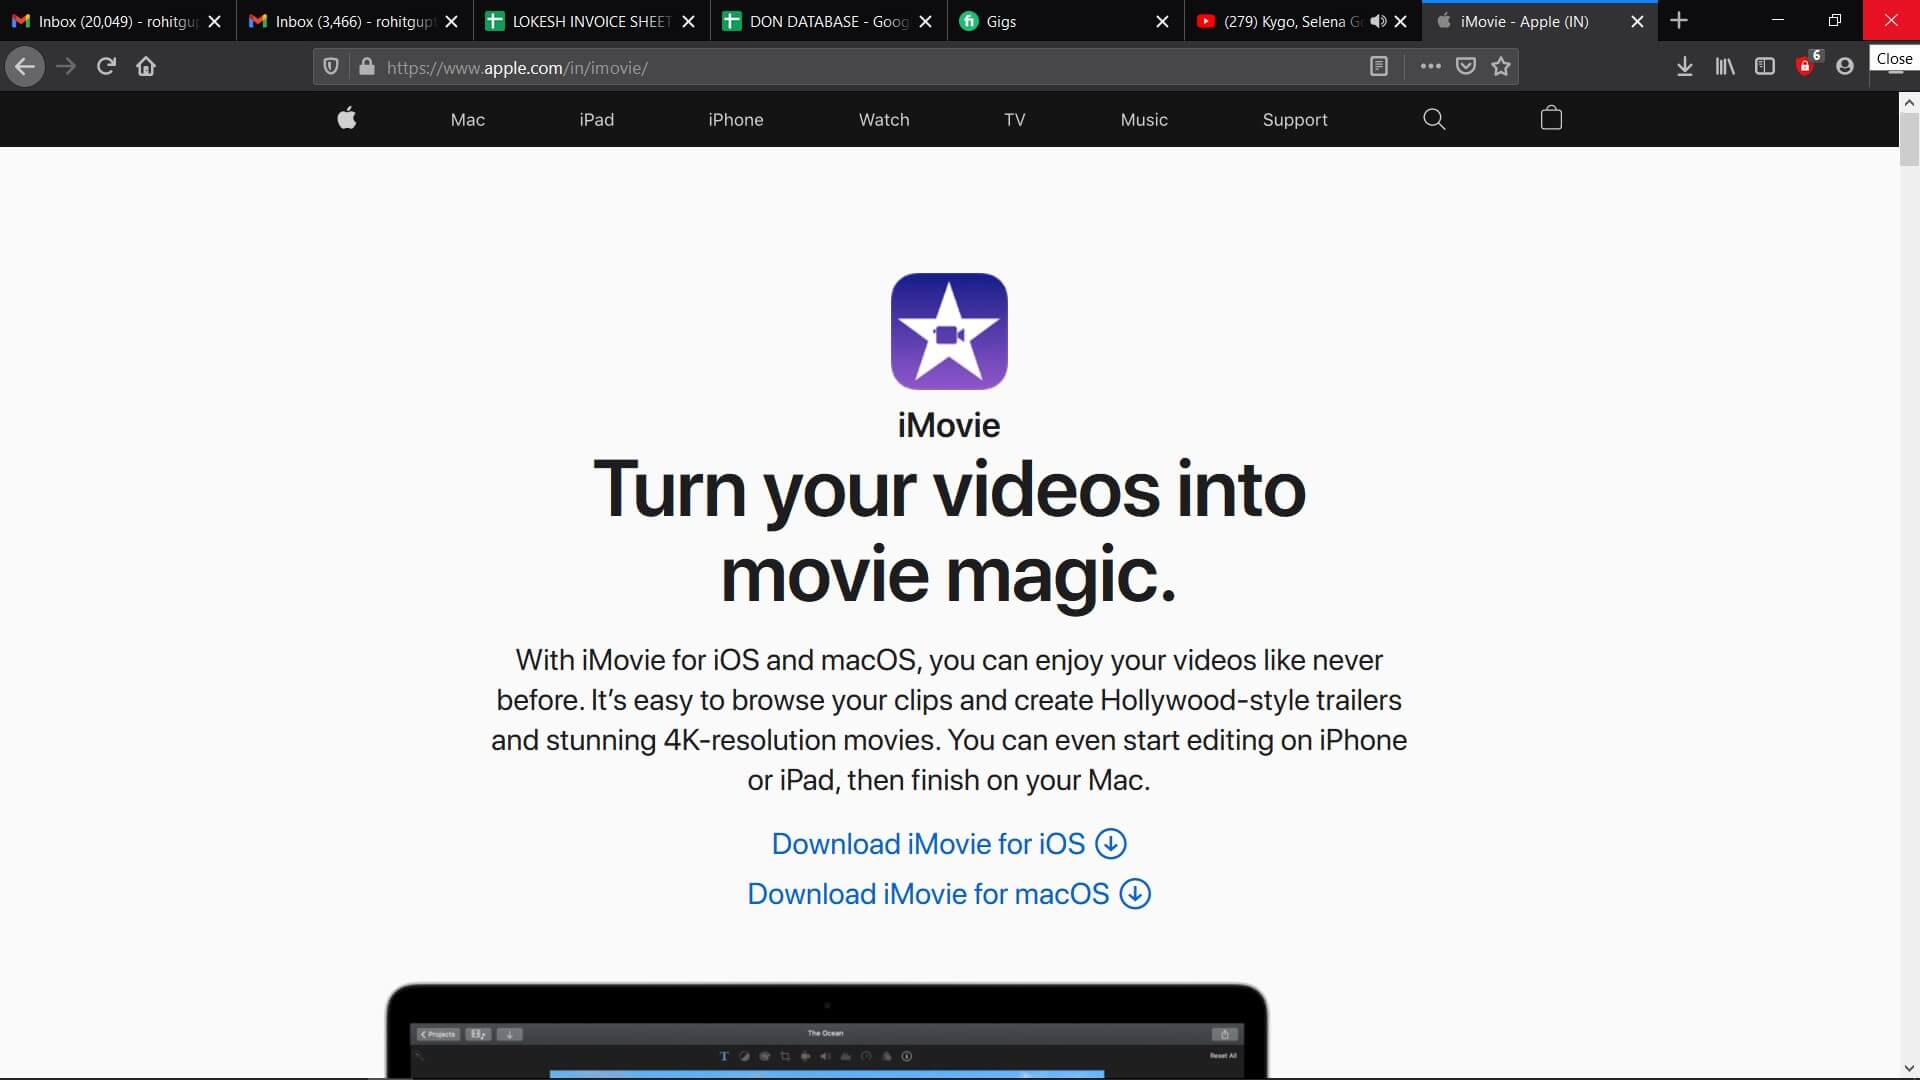
2.iMovie - Build-in software for Mac users
If you don’t want to rely on third-party software, the default built-in video editing software on Mac provides you with the basic editing features you may need.
3.Adobe Premiere Elements - Professional software to edit sport videos
If you want professional-grade software and don’t really care about the price, you can get Adobe Premiere Elements. Keep in mind that it is a highly advanced software for professionals and you may not need a wide variety of features offered here.
Richard Bennett
Richard Bennett is a writer and a lover of all things video.
Follow @Richard Bennett
Richard Bennett
Dec 14, 2023• Proven solutions
It is no secret that there is a huge audience of sports, including e-sports and gaming, on YouTube who appreciates high-quality content. These viewers are searching for sports YouTubers who create insightful and entertaining content that isn’t only rich in terms of content but production as well. It means that sports channels on YouTube have to rely on special video editing effects to ensure they are delivering what their viewers expect.
That being said, it is usually not easy for aspiring sports YouTubers to start since they have little to no experience when it comes to creating premium sports videos for YouTube. This article will help you out in terms of starting a new YouTube sports channel, especially if you are a mac user.
- Section1. Necessary Elements of a YouTube Sports Channel
- Section2. Must Use Feature for Making a Sports YouTube Channel
- Section3. Which Video Editing Software Has these Features?
Section 1. Necessary Elements of a YouTube Sports Channel
If you want to start a YouTube sports channel, you need to keep in mind that sports videos are fundamentally different from other types of videos. This requires you to have a strong grasp not only on content but video editing as well. Here are some of the top elements that every YouTube sports channel needs.
1.Insightful Producer Perspective
First of all, you should try to have a clear and comprehensive understanding of the sport you are going to talk about on your channel. If you are just an amateur or a casual fan, you will need to do more preparation as a sports YouTuber.
2.Brief and Clear Delivery
The second most important thing is to communicate your perspective in an entertaining, brief, and interactive manner so your viewers remain engaged and keep coming back to your channel. If you fail to communicate properly, your viewers will go somewhere else to watch what they are looking for.
3.Advanced Video Editing
Apart from the content, you need to make yourself familiar with using advanced video editing features such as picture-in-picture, screen recording, and audio recording. These allow you to provide a high-quality viewing experience to your YouTube channel audience.
4.Branded Intro & Outro
You need to set yourself apart with the impactful branding of your sports YouTube channel. It means that the software you are using on your Mac needs to have smart editing features including the ability to add cool intros and outros that become the trademark of your sports channel.
You May Also Like:
- YouTuber Skillshare: Essential Video Cutting Skills For YouTubers>>>
- What is the Best MP4 Cutter for YouTubers On Mac?>>>
Section 2. Must Use Feature for Making a Sports YouTube Channel
There are many features that you may need in your sports content creation. High video quality will bring more views and attract more fans to your YouTube channel. Here are some features you may use in making sports videos.
1. Making a Sports YouTube Channel - Screen Recording
One of the top features that you must use in your sports content creation is screen recording. It is a vital feature for all sports YouTubers and it is used extensively for multiple reasons:
- It gives content creators the ability to give demonstrations in a clear and convenient manner that is easily understandable.
- Screen recording also allows them to create how-to and tutorial videos for games and other sports.
- They can also use this feature to record a video clip that may not be easy to include in the final video.
This feature will give your audience the opportunity to understand your point clearly without having to visualize everything in their heads. Everything you say would be right in front of them in the form of screen recording and they can easily get your perspective.
2. Making a Sports YouTube Channel- Picture in Picture
Another key feature that is widely used by YouTube sports channels is picture-in-picture, especially those who engage in live commentary while the game or match is still being played. As a Mac YouTube channel producer, you must use this feature to gain the following advantages:
- Picture in Picture allows you to stay visible to your audience while commentating or giving your opinion on a game.
- It also provides you with the ability to divert more focus on the game so the bigger part of the screen is dedicated to sports.
- You can also switch between the smaller and bigger video sections when necessary, for example during a break or interval.
- It gives you the opportunity to make your YouTube channel more personalized with your own take on picture-in-picture.
Picture in picture is a great feature for sports YouTubers on Mac as it keeps the video entertaining and personalized. Without using a picture-in-picture feature, you will find it difficult to compete with other sports YouTube channels.
3. Making a Sports YouTube Channel - Audio Recording
There are times when you cannot use the native audio of the sports video and need to add your own. It means that you need to record your own audio file and add it to the video before uploading it to your YouTube channel. This feature allows you to:
- Edit the audio of your sports video to make it more customizable according to your target audience.
- Remove the audio that might cause copyright issues and add your own to ensure your content remains original.
- Add your own remarks, commentary, and opinions in the video in full or in parts to make it more engaging and interactive.
- Make videos where you just need background music and don’t need the original audio such as montages, tributes, etc.
Clear and crisp audio recording is necessary to ensure that the video you upload on your sports YouTube channel is of high quality. Low-quality audio will damage the whole experience and leave a bad taste in the mouth of your viewers.
You May Also Like: Edit Audios in Wondershare Filmora For Mac
Filmstock Stock Media Library ](https://filmstock.wondershare.com/creative-theme-sports?spm=rs.filmora%5Fweb&source%5Fchannel=seo%5Farticle )
Section 3. What Video Editing Software Has these Features?
There are many video editing software applications that enable you to use the above-mentioned features. However, if you are just starting out and want to become a producer of your own YouTube sports channel using Mac, here are some of your options:
1. WonderShare Filmora X - Make sports channel editing easier
If you are just getting ready to do a YouTube sports channel and do not have any experience, Filmora is a good choice. There is no video editing software that provides better value.
This software contains most of the features and functions needed to create sports videos, such as audio and screen recording along with pip capability, and picture-in-picture. You can also use Filmora X to add cool branded intros and outros to customize your sports videos.
2.iMovie - Build-in software for Mac users
If you don’t want to rely on third-party software, the default built-in video editing software on Mac provides you with the basic editing features you may need.
3.Adobe Premiere Elements - Professional software to edit sport videos
If you want professional-grade software and don’t really care about the price, you can get Adobe Premiere Elements. Keep in mind that it is a highly advanced software for professionals and you may not need a wide variety of features offered here.
Richard Bennett
Richard Bennett is a writer and a lover of all things video.
Follow @Richard Bennett
A Simple Path to Enhanced YouTube Sign-Ups - Create Animated Subscription Bar Using Filmora
How to Make Your YouTube Animated Subscribe Button Easily With Filmora
Richard Bennett
Mar 27, 2024• Proven solutions
The main goal of every content creator is to increase its audience to expand its reach and views. To do so, it’s essential to provide something unique and different to the viewer. Without providing them the content they are looking for, it is impossible to grow your channel and reach. Once your content is ready and you are getting many views, it is essential to make these potential viewers your permanent viewers. The animated subscribe button will help you achieve this goal. While your viewers are watching your videos, you must remind them about subscribing to your channel for receiving such incredible content in the future. Subscribe animation plays a vital role in converting your viewers into subscribers.
There are so many platforms on the internet from where you can get Youtube subscribe button animation free, and you can also purchase these subscribe png gifs. But creating your own animated subscribe button can make you stand out from the crowd and make your videos unique and exclusive. Because it enables you to design it the way you want according to your brand, so, let’s create your own subscribe animation using Wondershare Filmora .
Step-By-Step guide
Step 1: To get started,open Filmora X. On your upper left corner, click on the “Sample Colors,” select the Green color and drag it to Video Track into the timeline. We are using a Green background to easily remove it using the green screen feature in Filmora to use it in our future projects after exporting it, without creating it again. Adjust the duration of this track according to your requirement. In my case, I am trying to make an animated subscribe button of 5 seconds.
Step 2: Lock this track by clicking on the lock icon to work on subscribe animation without disturbing the background easily.
Step 3: Now it’s time to design the subscribe png gif. Go to the Sample colors again and drag the red color into the time above the green background.
Step 4: Double click on the red color in the timeline and adjust its size. Make it look like a subscribe button that is a rectangle and place it at the bottom center of the background. You can put it anywhere you want it to appear in your future videos.
Step 5: Now, let’s add Subscribe text into the button. Go to the Title and select any style that you like. “Basic 6” will work perfectly fine for this purpose. Drag and drop it into the timeline above all tracks.
Step 6: Double click on the Title on the timeline and edit it with “Subscribe” and place it under the red rectangle and click OK.
Step 7: We have put a cursor that can click on the animated subscribe button. You can use Google Search to find a transparent cursor. Make sure to save it in png format. Download it and import it into Filmora.
Step 8: Drag and drop the cursor into the timeline and place it above all the other three tracks to make it prominent. Adjust the size of the cursor place it on the Subscribe button where you want it to appear.
Step 9: Now, it’s time to animate the design using keyframes. First of all, let’s animate the red rectangle. Double click on the red color on the timeline. Go to the ‘Animation’ tab and then click ‘Customize.’ Move to the 1 second in the timeline and click ‘Add.’
Step 10: Now go back to the beginning in the timeline and adjust the scale to 0%. It will make the rectangle pop up when you play the clip.
Step 11: Text needs to be animated as well to match it with the rectangle. Double click on the text in the timeline and click ‘ADVANCED.’
Step 12: In this Advance text editor, go to the ‘Animation’ tab and select any animation that you like. On the timeline under the preview screen, adjusts the dark areas according to the time you set on the rectangle, which was 1 second. We want the text to appear on the screen in 1 second, like the rectangle. Also, adjust the ending time when you want the text to disappear again. We have set it on 4 seconds. Which means it will start to fade after 4 seconds.
Step 13: Now, to animate the mouse cursor, we will use the same process we used for a rectangle that is key framing. Double click on the cursor track on the timeline and move the time on your timeline to a point when you want the cursor to appear. Now add a key frame by clicking ‘Add’.
Step 14: Now jump back to a point in your timeline, when the cursor will start appearing from outside the screen. Move the cursor outside the screen from where you want it to start moving toward the subscribe animation.
Step 15: To animate the click of the cursor, move ahead a little bit into your timeline and scale down the cursor to around 70%. Move it a little further and scale it up to 100%.
Step 16: You can add the sound of mouse click to make it more realistic. You can find this sound anywhere on the internet. Download it and import it into Filmora. Now place it into the timeline where it can match the movement of the cursor.
Step 17: Now it’s time to make this subscribe animation button disappear. Move forward into the time to the end, at around 4 seconds. Double click on the red button in the timeline and add a key frame at its actual scale.
Step 18: After that, move further in the timeline to the end and make its scale 0. It will make it disappear.
Step 19: Do the same with the cursor. Double click on the cursor in the time and add a key frame at its actual position.
Step 20: Move ahead when you want it to disappear. Move the cursor out of the screen and click ‘OK’.
Step 21: Your Subscribe png gif is ready to be exported and used in your videos. Click on export and choose from various formats and options to choose from while exporting it.
You may also like: How to Get People to Subscribe Channel
Conclusion:Your own Animated Subscribe Button is ready to be used in your future videos and projects. This is a ready-to-use subscribe button that can be easily used using the green screen effect in Filmora. Just import the clip, remove the green screen, and you are good to go. You can also customize this Subscribe Animation using your channel and more. Keep experimenting with new things using Filmora.
Richard Bennett
Richard Bennett is a writer and a lover of all things video.
Follow @Richard Bennett
Richard Bennett
Mar 27, 2024• Proven solutions
The main goal of every content creator is to increase its audience to expand its reach and views. To do so, it’s essential to provide something unique and different to the viewer. Without providing them the content they are looking for, it is impossible to grow your channel and reach. Once your content is ready and you are getting many views, it is essential to make these potential viewers your permanent viewers. The animated subscribe button will help you achieve this goal. While your viewers are watching your videos, you must remind them about subscribing to your channel for receiving such incredible content in the future. Subscribe animation plays a vital role in converting your viewers into subscribers.
There are so many platforms on the internet from where you can get Youtube subscribe button animation free, and you can also purchase these subscribe png gifs. But creating your own animated subscribe button can make you stand out from the crowd and make your videos unique and exclusive. Because it enables you to design it the way you want according to your brand, so, let’s create your own subscribe animation using Wondershare Filmora .
Step-By-Step guide
Step 1: To get started,open Filmora X. On your upper left corner, click on the “Sample Colors,” select the Green color and drag it to Video Track into the timeline. We are using a Green background to easily remove it using the green screen feature in Filmora to use it in our future projects after exporting it, without creating it again. Adjust the duration of this track according to your requirement. In my case, I am trying to make an animated subscribe button of 5 seconds.
Step 2: Lock this track by clicking on the lock icon to work on subscribe animation without disturbing the background easily.
Step 3: Now it’s time to design the subscribe png gif. Go to the Sample colors again and drag the red color into the time above the green background.
Step 4: Double click on the red color in the timeline and adjust its size. Make it look like a subscribe button that is a rectangle and place it at the bottom center of the background. You can put it anywhere you want it to appear in your future videos.
Step 5: Now, let’s add Subscribe text into the button. Go to the Title and select any style that you like. “Basic 6” will work perfectly fine for this purpose. Drag and drop it into the timeline above all tracks.
Step 6: Double click on the Title on the timeline and edit it with “Subscribe” and place it under the red rectangle and click OK.
Step 7: We have put a cursor that can click on the animated subscribe button. You can use Google Search to find a transparent cursor. Make sure to save it in png format. Download it and import it into Filmora.
Step 8: Drag and drop the cursor into the timeline and place it above all the other three tracks to make it prominent. Adjust the size of the cursor place it on the Subscribe button where you want it to appear.
Step 9: Now, it’s time to animate the design using keyframes. First of all, let’s animate the red rectangle. Double click on the red color on the timeline. Go to the ‘Animation’ tab and then click ‘Customize.’ Move to the 1 second in the timeline and click ‘Add.’
Step 10: Now go back to the beginning in the timeline and adjust the scale to 0%. It will make the rectangle pop up when you play the clip.
Step 11: Text needs to be animated as well to match it with the rectangle. Double click on the text in the timeline and click ‘ADVANCED.’
Step 12: In this Advance text editor, go to the ‘Animation’ tab and select any animation that you like. On the timeline under the preview screen, adjusts the dark areas according to the time you set on the rectangle, which was 1 second. We want the text to appear on the screen in 1 second, like the rectangle. Also, adjust the ending time when you want the text to disappear again. We have set it on 4 seconds. Which means it will start to fade after 4 seconds.
Step 13: Now, to animate the mouse cursor, we will use the same process we used for a rectangle that is key framing. Double click on the cursor track on the timeline and move the time on your timeline to a point when you want the cursor to appear. Now add a key frame by clicking ‘Add’.
Step 14: Now jump back to a point in your timeline, when the cursor will start appearing from outside the screen. Move the cursor outside the screen from where you want it to start moving toward the subscribe animation.
Step 15: To animate the click of the cursor, move ahead a little bit into your timeline and scale down the cursor to around 70%. Move it a little further and scale it up to 100%.
Step 16: You can add the sound of mouse click to make it more realistic. You can find this sound anywhere on the internet. Download it and import it into Filmora. Now place it into the timeline where it can match the movement of the cursor.
Step 17: Now it’s time to make this subscribe animation button disappear. Move forward into the time to the end, at around 4 seconds. Double click on the red button in the timeline and add a key frame at its actual scale.
Step 18: After that, move further in the timeline to the end and make its scale 0. It will make it disappear.
Step 19: Do the same with the cursor. Double click on the cursor in the time and add a key frame at its actual position.
Step 20: Move ahead when you want it to disappear. Move the cursor out of the screen and click ‘OK’.
Step 21: Your Subscribe png gif is ready to be exported and used in your videos. Click on export and choose from various formats and options to choose from while exporting it.
You may also like: How to Get People to Subscribe Channel
Conclusion:Your own Animated Subscribe Button is ready to be used in your future videos and projects. This is a ready-to-use subscribe button that can be easily used using the green screen effect in Filmora. Just import the clip, remove the green screen, and you are good to go. You can also customize this Subscribe Animation using your channel and more. Keep experimenting with new things using Filmora.
Richard Bennett
Richard Bennett is a writer and a lover of all things video.
Follow @Richard Bennett
- Title: "2024 Approved Making the Leap Set Up a Sports Vlog on macOS"
- Author: Thomas
- Created at : 2024-05-31 12:48:53
- Updated at : 2024-06-01 12:48:53
- Link: https://youtube-help.techidaily.com/2024-approved-making-the-leap-set-up-a-sports-vlog-on-macos/
- License: This work is licensed under CC BY-NC-SA 4.0.
