
"2024 Approved Perfect Harmony Strategies for Top-Tier Audio Recording"
Perfect Harmony: Strategies for Top-Tier Audio Recording
10 Recording Tips for Recording Audio with High Quality

Richard Bennett
Oct 26, 2023• Proven solutions
Getting the best sound for your recording is not as simplistic as buying an expensive microphone. There are many different things you can do to record your audio more clearly. Here are 10 recording tips to record high-quality audio.
1. Silence everything you don’t want your microphone to record
2. Put your mobile phone in airplane mode
3. Minimize echo
4. Block wind from reaching your microphone
5. Upgrade your microphone
6. Adjust your levels
7. Start with a sound cue if you’re planning to do some syncing in post
8. Get close to the sound
9. ADR
10. Record Ambient Sound
Bonus Tip-Record Your Audio with Wondershare Filmora
Wondershare Filmora has great recording features that enable you to record screen , voiceover, and webcam. Just connect the recording device to your computer, and start the recording in Wondershare Filmora and you will get high-quality audio. And you can also easily pick a song from the royalty-free music library on Wondershare Filmora. These audio features on Filmora are rare and very simple to use, you only need to click a few times and your video will have a new sound and background song.


1. Silence everything you don’t want your microphone to record
When you’re recording audio, you have to be more aware of the subtle sounds that drone on in your background. These sounds may include humming from machines with fans, buzzing from lights, and jingling from your pet’s collar. Observe your recording space and find ways to silence everything that you don’t want in your audio recording.
2. Put your mobile phone in airplane mode
Although it may be quite obvious to turn your phone’s ring tone off when you’re recording, it may not be as obvious to put your phone in airplane mode. When phones receive calls or perform searches as part of their background processes, they emit signals that can get picked up by your recording system. Avoid ruining good takes with unwanted sounds of phone signals by putting your phones in airplane mode.
3. Minimize echo
If you are recording yourself talk or sing, make sure to set up your recording space in a way where the sound projected from your voice bounces minimally off the walls and back to your microphone. Bare walls and hardwood floors will cause a lot of bouncing. Make use of materials that will absorb your sound rather than bounce it, like a thick rug or a comforter. If you want your voice to echo, that’s something you should do in post-production.
4. Block wind from reaching your microphone
Although it might not sound so loud and distracting to the naked ear, wind sounds terribly loud through a microphone recording and can cause your audio to clip (distortion of waveform due to output of sound exceeding maximum capacity or 0 dB point). This includes the “wind” that comes out of your mouth when you pronounce words starting with the letter “p.” Use pop filters, windscreens, and deadcats to block wind from reaching your microphone.
5. Upgrade your microphone
As much as you try to control all the noise in your surroundings, your greatest recording limitation will come from the hardware that you use. Improve your recordings by plugging in an external microphone into your camera’s microphone jack or record audio completely separately with a professional microphone.
Need help with deciding on a microphone to buy? Check out our recommended list of microphones.
6. Adjust your levels
Before pressing the record button, see how loudly your microphone picks up the sound you wish to record. Adjust your levels (sensitivity of your microphone) until the sound sits in between -6 dBs and -12dBs. This range gives the source of your sound some room to get louder without the recorded audio getting clipped. When you first listen to audio recorded within this range, it may sound very quiet. No need to worry though because you can increase the volume later in editing.
7. Start with a sound cue if you’re planning to do some syncing in post
If you’re recording separate audio that you plan to sync to your video later in editing, start your recording with a short and loud sound cue like a clap or a high pitched “beep” tone. Later, when you’re editing, it’ll be much easier for you to find the section where your video and additional audio match.
8. Get close to the sound
Unless you’re aiming to record ambient sound, bring your microphone close to the source of sound you are wanting to record. The closer your microphone is to the source of sound, the lower your sensitivity setting can be on your microphone. As a result of lowering your levels, sounds you are not meaning to record will also sound fainter.
9. ADR
When you need to record a scene in a loud setting where you have very little control over the noise, record additional vocals later and replace the original vocals through a process called automated dialogue replacement.
10. Record Ambient Sound
Remember to record ambient sound or “room tone.” You can use these recordings to fill in the blanks if you run out of audio and also smooth out parts of your audio where you hear pops, clicks, and other unwanted noise.
Richard Bennett
Richard Bennett is a writer and a lover of all things video.
Follow @Richard Bennett
Richard Bennett
Oct 26, 2023• Proven solutions
Getting the best sound for your recording is not as simplistic as buying an expensive microphone. There are many different things you can do to record your audio more clearly. Here are 10 recording tips to record high-quality audio.
1. Silence everything you don’t want your microphone to record
2. Put your mobile phone in airplane mode
3. Minimize echo
4. Block wind from reaching your microphone
5. Upgrade your microphone
6. Adjust your levels
7. Start with a sound cue if you’re planning to do some syncing in post
8. Get close to the sound
9. ADR
10. Record Ambient Sound
Bonus Tip-Record Your Audio with Wondershare Filmora
Wondershare Filmora has great recording features that enable you to record screen , voiceover, and webcam. Just connect the recording device to your computer, and start the recording in Wondershare Filmora and you will get high-quality audio. And you can also easily pick a song from the royalty-free music library on Wondershare Filmora. These audio features on Filmora are rare and very simple to use, you only need to click a few times and your video will have a new sound and background song.
1. Silence everything you don’t want your microphone to record
When you’re recording audio, you have to be more aware of the subtle sounds that drone on in your background. These sounds may include humming from machines with fans, buzzing from lights, and jingling from your pet’s collar. Observe your recording space and find ways to silence everything that you don’t want in your audio recording.
2. Put your mobile phone in airplane mode
Although it may be quite obvious to turn your phone’s ring tone off when you’re recording, it may not be as obvious to put your phone in airplane mode. When phones receive calls or perform searches as part of their background processes, they emit signals that can get picked up by your recording system. Avoid ruining good takes with unwanted sounds of phone signals by putting your phones in airplane mode.
3. Minimize echo
If you are recording yourself talk or sing, make sure to set up your recording space in a way where the sound projected from your voice bounces minimally off the walls and back to your microphone. Bare walls and hardwood floors will cause a lot of bouncing. Make use of materials that will absorb your sound rather than bounce it, like a thick rug or a comforter. If you want your voice to echo, that’s something you should do in post-production.
4. Block wind from reaching your microphone
Although it might not sound so loud and distracting to the naked ear, wind sounds terribly loud through a microphone recording and can cause your audio to clip (distortion of waveform due to output of sound exceeding maximum capacity or 0 dB point). This includes the “wind” that comes out of your mouth when you pronounce words starting with the letter “p.” Use pop filters, windscreens, and deadcats to block wind from reaching your microphone.
5. Upgrade your microphone
As much as you try to control all the noise in your surroundings, your greatest recording limitation will come from the hardware that you use. Improve your recordings by plugging in an external microphone into your camera’s microphone jack or record audio completely separately with a professional microphone.
Need help with deciding on a microphone to buy? Check out our recommended list of microphones.
6. Adjust your levels
Before pressing the record button, see how loudly your microphone picks up the sound you wish to record. Adjust your levels (sensitivity of your microphone) until the sound sits in between -6 dBs and -12dBs. This range gives the source of your sound some room to get louder without the recorded audio getting clipped. When you first listen to audio recorded within this range, it may sound very quiet. No need to worry though because you can increase the volume later in editing.
7. Start with a sound cue if you’re planning to do some syncing in post
If you’re recording separate audio that you plan to sync to your video later in editing, start your recording with a short and loud sound cue like a clap or a high pitched “beep” tone. Later, when you’re editing, it’ll be much easier for you to find the section where your video and additional audio match.
8. Get close to the sound
Unless you’re aiming to record ambient sound, bring your microphone close to the source of sound you are wanting to record. The closer your microphone is to the source of sound, the lower your sensitivity setting can be on your microphone. As a result of lowering your levels, sounds you are not meaning to record will also sound fainter.
9. ADR
When you need to record a scene in a loud setting where you have very little control over the noise, record additional vocals later and replace the original vocals through a process called automated dialogue replacement.
10. Record Ambient Sound
Remember to record ambient sound or “room tone.” You can use these recordings to fill in the blanks if you run out of audio and also smooth out parts of your audio where you hear pops, clicks, and other unwanted noise.
Richard Bennett
Richard Bennett is a writer and a lover of all things video.
Follow @Richard Bennett
The Ultimate Tutorial: Transferring YouTube Videos to Dailymotion
How to Transfer Video From YouTube to Dailymotion?

Ollie Mattison
Mar 27, 2024• Proven solutions
It is significant for a business to stay connected to its customers and videos are a wonderful medium to build that connect! Dailymotion gives you a golden opportunity and platform to share your videos on websites other than YouTube. This means that you can transfer your videos from YouTube to dailymotion in few minutes and increase the audience. There is no direct transfer feature in YouTube and hence this post will help in guiding how can you transfer the video content from YouTube to Dailymotion!
- Method 1: Download YouTube video and upload to Dailymotion
- Method 2: Sync YouTube videos to Dailymotion
Note: We resolutely oppose all forms of copyright-infringing downloads. This tutorial is only for downloading YouTube videos/audio materials from your own channel.
Method 1: Download YouTube video and upload to Dailymotion
This one is little longer but many people vote for it as a safer one! All you have to do is to login to your YouTube official account and download all the videos that you have uploaded in MP4 format by clicking on Edit option appearing at right of the video.
Ready to learn How to Download YouTube Videos . It’s easy, fun and a great way to share your movies with the world.
Save it to the desired folder on your PC and navigate to the Dailymotion account page. Sign in with your credentials and click on upload video. Browse the video from the location where you saved, give it a title and description.
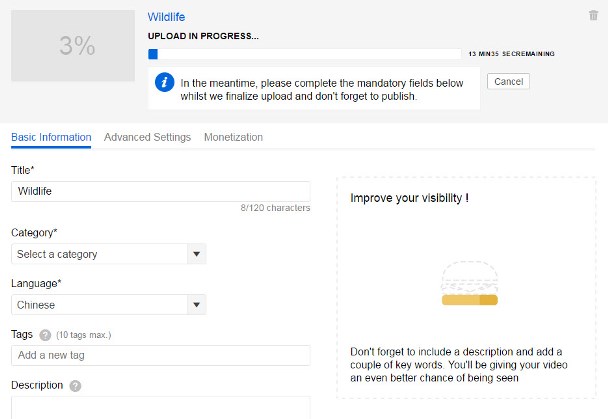
Next, click on channel drop-down menu and choose a category which best describes your video. Besides this, you would see a ‘Tags’ text box. You can add one or more tags (maximum 10) and select the privacy options as per your requirement. Tags act as a criterion for SEO optimization and help people in finding your video. Finally, just click on save to upload the video on dailymotion.
Method 2: Sync YouTube videos to Dailymotion
You can do this by liaising with Freedom MCN Network as it allows you to grow faster on Dailymotion. All you have to do is to search for ‘dashboard.tm’ on Google and sign in using you email and password. It will direct you to Dailymotion page; you can also opt to sign in with your Facebook credentials. When you will press enter and login, the first screen only will show the prompt if you want to synch YouTube and Dailymotion channels? Since, our answer is yes, the screen will ask you to login into your YouTube account and the screen will navigate you to the login into Google account linked to your YouTube account. Just like in all apps, you have to allow Freedom to access the data from your YouTube account. The next screen will list down number of videos that have been uploaded to your YouTube Account and the ones which are already synched with Dailymotion will have a check against their name. The ones which are not synched will have a box; you can simply check it and click on ‘Synch videos’ at the top right corner.

It will ask for your email address to get notifications, put in your email ID and click on Sync. Once they are active and synched you will receive a notification on your email with a subject ‘Done reuploading’ followed by the tile of the video. This simply means that you need not upload any video separately on dailymotion, you can simply synch it with YouTube and put in your efforts of uploading only once!
Ollie Mattison
Ollie Mattison is a writer and a lover of all things video.
Follow @Ollie Mattison
Ollie Mattison
Mar 27, 2024• Proven solutions
It is significant for a business to stay connected to its customers and videos are a wonderful medium to build that connect! Dailymotion gives you a golden opportunity and platform to share your videos on websites other than YouTube. This means that you can transfer your videos from YouTube to dailymotion in few minutes and increase the audience. There is no direct transfer feature in YouTube and hence this post will help in guiding how can you transfer the video content from YouTube to Dailymotion!
- Method 1: Download YouTube video and upload to Dailymotion
- Method 2: Sync YouTube videos to Dailymotion
Note: We resolutely oppose all forms of copyright-infringing downloads. This tutorial is only for downloading YouTube videos/audio materials from your own channel.
Method 1: Download YouTube video and upload to Dailymotion
This one is little longer but many people vote for it as a safer one! All you have to do is to login to your YouTube official account and download all the videos that you have uploaded in MP4 format by clicking on Edit option appearing at right of the video.
Ready to learn How to Download YouTube Videos . It’s easy, fun and a great way to share your movies with the world.
Save it to the desired folder on your PC and navigate to the Dailymotion account page. Sign in with your credentials and click on upload video. Browse the video from the location where you saved, give it a title and description.
Next, click on channel drop-down menu and choose a category which best describes your video. Besides this, you would see a ‘Tags’ text box. You can add one or more tags (maximum 10) and select the privacy options as per your requirement. Tags act as a criterion for SEO optimization and help people in finding your video. Finally, just click on save to upload the video on dailymotion.
Method 2: Sync YouTube videos to Dailymotion
You can do this by liaising with Freedom MCN Network as it allows you to grow faster on Dailymotion. All you have to do is to search for ‘dashboard.tm’ on Google and sign in using you email and password. It will direct you to Dailymotion page; you can also opt to sign in with your Facebook credentials. When you will press enter and login, the first screen only will show the prompt if you want to synch YouTube and Dailymotion channels? Since, our answer is yes, the screen will ask you to login into your YouTube account and the screen will navigate you to the login into Google account linked to your YouTube account. Just like in all apps, you have to allow Freedom to access the data from your YouTube account. The next screen will list down number of videos that have been uploaded to your YouTube Account and the ones which are already synched with Dailymotion will have a check against their name. The ones which are not synched will have a box; you can simply check it and click on ‘Synch videos’ at the top right corner.
It will ask for your email address to get notifications, put in your email ID and click on Sync. Once they are active and synched you will receive a notification on your email with a subject ‘Done reuploading’ followed by the tile of the video. This simply means that you need not upload any video separately on dailymotion, you can simply synch it with YouTube and put in your efforts of uploading only once!
Ollie Mattison
Ollie Mattison is a writer and a lover of all things video.
Follow @Ollie Mattison
Also read:
- [New] Elevating Your Game in Drone Racing & Top 5 Speedy FPV Drones for 2024
- [New] Securing a Slot in YouTube Finding Your Market
- [Updated] 2024 Approved The Complete Guide to the Latest in LG’s Ultra-Clear Monitoring
- 2024 Approved Free, Easy-to-Use Online Editors for Quick Postings
- 2024 Approved Transforming Footage The Ultimate Guide to YouTube Video Editing
- Apple Collaborates with Microsoft on Project Titan: Integrating Bing Search Into Siri for Enhanced iOS/iPadOS Experience
- In 2024, 3 Ways to Change Location on Facebook Marketplace for Realme Narzo N55 | Dr.fone
- In 2024, Unlocking YouTube's Full Potential with Top Video Formats
- The Rise of a Monetary Maestro Ajey's YouTube Earnings Story for 2024
- Title: 2024 Approved Perfect Harmony Strategies for Top-Tier Audio Recording
- Author: Thomas
- Created at : 2024-12-12 17:40:26
- Updated at : 2024-12-16 16:31:39
- Link: https://youtube-help.techidaily.com/2024-approved-perfect-harmony-strategies-for-top-tier-audio-recording/
- License: This work is licensed under CC BY-NC-SA 4.0.