
:max_bytes(150000):strip_icc():format(webp)/178665671_HighRes-56a532a83df78cf77286de1b.jpg)
"2024 Approved Prime 7 Cameras Elevating Virtual Event Coverage and Vlogging"
Prime 7 Cameras Elevating Virtual Event Coverage and Vlogging
Best 7 DSLR Vlogging Cameras

Shanoon Cox
Nov 01, 2022• Proven solutions
DSLR cameras are great for vloggers who are serious about filmmaking. But with so many DSLR cameras to choose from, it can be difficult to make a decision on one. We have come up with a list of seven of the best DSLR vlogging cameras to help you with your search.
WHAT TO LOOK FOR IN A VLOGGING CAMERA
1. Fully articulated screen (flip screen)
2. Good continual autofocus while recording video
3. Good focus priority through face recognition
4. Touch to focus
5. Good low-light performance
6. external mic jack, hot/cold shoe bracket
7. optical image stabilization
8. good battery life
Check out my full list of 10 Things To Look For In A Vlogging Camera to understand the importance of these camera features.
THE 7 BEST DSLR CAMERAS FOR VLOGGING
| Camera | Release Date | Sensor Size | Flip Screen | Mic Port | Price | |
|---|---|---|---|---|---|---|
| CanonEOS6D Mark II | 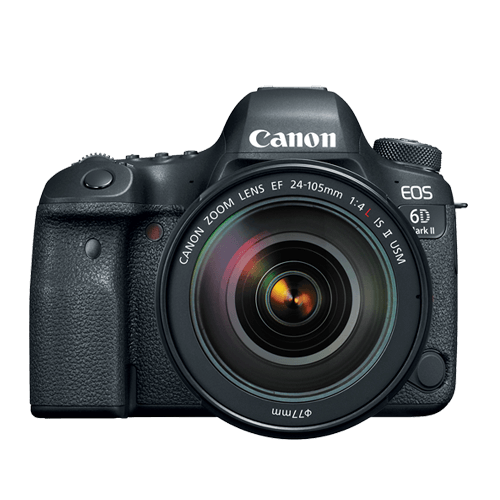 |
June2017 | Full frame(35.9 x 24 mm) | Fully Articulated | Yes | $$ |
| CanonEOS RebelSL2 | 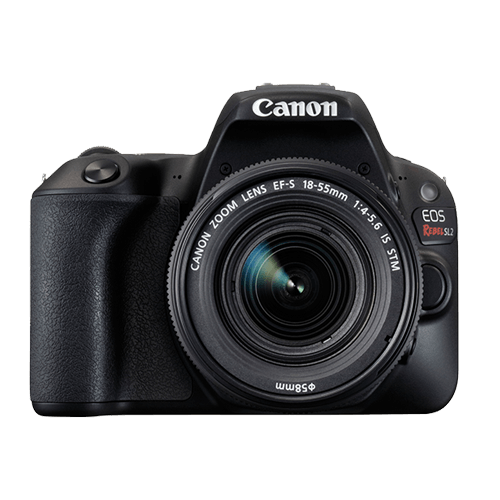 |
June2017 | APS-C(22.3 x 14.9 mm) | Fully Articulated | Yes | $ |
| CanonEOS RebelT7i | 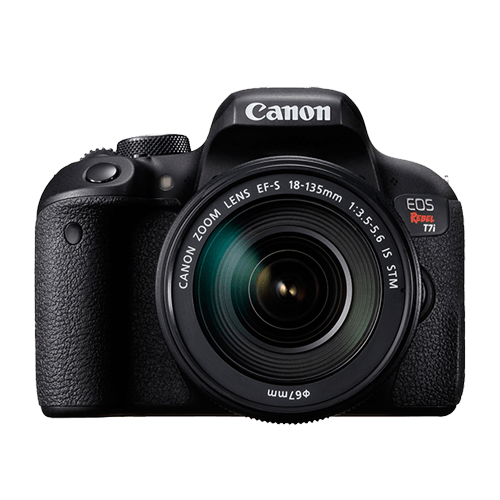 |
February2017 | APS-C(22.3 x 14.9 mm) | Fully Articulated | Yes | $- |
| CanonEOS77D | 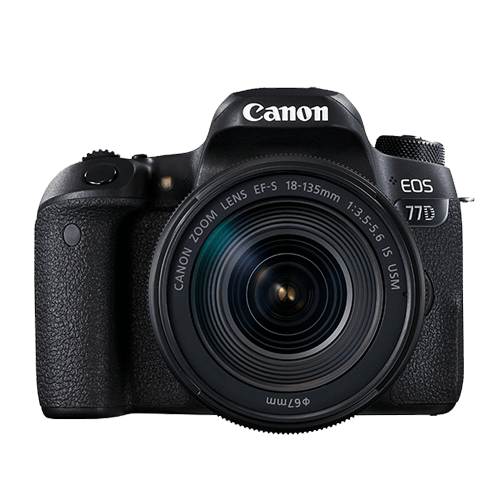 |
February2017 | APS-C(22.3 x 14.9 mm) | Fully Articulated | Yes | $- |
| NikonD5600 |  |
November2016 | APS-C(23.5 x 15.6 mm) | Fully Articulated | Yes | $- |
| CanonEOS5D Mark IV |  |
August2017 | Full frame(36 x 24 mm) | No | Yes | $$$ |
| CanonEOS80D |  |
February2016 | APS-C(22.5 x 15 mm) | Fully Articulated | Yes | $$ |
|
Best daily DSLR camera for vlogging: Canon EOS T7i The camera you use to record your daily vlogs doesn’t have to be the best camera on the market. It just has to offer enough options to make the process of making a vlog as smooth as it can possibly be. The T7i is not the most powerful DSLR camera out there, but its 24.2 MP APS-C CMOS sensor and a DIGIC 7 image processor are more than enough to meet the needs of most daily vloggers. You can record full HD 1080p videos at 60 fps and use this camera to create HDR and time-lapse movies. You can set the T7i’s ISO up as high as 51200, which is pretty good. The T7i’s dual pixel CMOS AF system makes sure that the camera focuses quickly and it helps you avoid creating video clips that are out focus. There’s also a built-in Wi-FI with an NFC feature that enables you to share your videos with a smartphone device you connect to the camera. PROS - Long battery life - Remarkable image quality at high ISO values CONS - Can’t record 4K videos - Viewfinder is tiny |
|---|---|
|
Best entry-level DSLR camera for vlogging: Canon EOS SL2 The Canon EOS SL2 was released just a year ago and it wins our 2018 vote for the best entry-level DSLR camera for vlogging. The SL2 packs a lot of features in a compact camera body. The camera only weighs 1 lb, which is considered light among most DSLR cameras. Many vloggers may enjoy the fact that they can hold up this light camera in front of themselves with more ease. Like a lot of entry-level DSLR cameras, the SL2 comes with an APS-C crop sensor. With ISO capabilities that can reach up to 51200, you’ll be able to film up to full HD 1080p videos at 60 fps, even under low light conditions. All recent Canon cameras perform very well when it comes to autofocus and the SL2 is no exception. It does, however, have fewer points of focus. The SL2 comes with a 9-point AF system. The SL2 also has a fully-articulated screen and a microphone jack. PROS - Microphone jack - Wi-Fi connectivity CONS - No 4K video support - Optical image stabilizer could be better |
|
Best mid-range DSLR camera for vlogging: Canon EOS 80D The Canon EOS 80D is the successor of the 70D which was at one time considered by many YouTubers the ultimate DSLR camera for vlogging. The 80D is a larger camera than the SL2, weighing 1.61 lbs. In its larger build, this camera additionally (compared to the SL2) packs a 45-point AF system, longer battery life, a headphone port, and it is environmentally sealed so you can shoot in tough conditions. This camera’s great performance in autofocusing makes it a great mid-range DSLR camera for vlogging. PROS - Feature-rich - Continuous AF feature performs beautifully while recording high-res videos CONS - Just one SD card slot - PC sync connection features could be better |
|
Best professional DSLR camera for vlogging: Canon EOS 6D Mark II There’s a lot of DSLR cameras that come with a fully-articulated screen and a microphone jack, but the Canon EOS 6D Mark II is actually the only one in the market that comes equipped with both of those, plus a full-frame sensor. It is its full-frame sensor that really sets this camera apart from the other vlogging DLSR cameras. Because of its full-frame sensor, this camera performs much better in low light conditions. With this larger sensor, you’ll also be able to capture footage that looks more cinematic with high-quality bokeh (more blur to your out-of-focus areas). The 6D Mark II also has great battery life compared to all the reviewed cameras above. Unfortunately, this camera does not shoot in 4K. PROS - ISO sensitivity goes up to 102400 - Amazing touchscreen controls CONS - No 4K video recording option - No USB 3.0 |
Want to compare even more cameras? Check out…
12 Best Vlogging Cameras
Top 11 Cheap Vlogging Cameras
8 Best Mirrorless Cameras For Vlogging
12 Best Vlogging Cameras With A Flip Screen
Shanoon Cox
Shanoon Cox is a writer and a lover of all things video.
Follow @Shanoon Cox
Shanoon Cox
Nov 01, 2022• Proven solutions
DSLR cameras are great for vloggers who are serious about filmmaking. But with so many DSLR cameras to choose from, it can be difficult to make a decision on one. We have come up with a list of seven of the best DSLR vlogging cameras to help you with your search.
WHAT TO LOOK FOR IN A VLOGGING CAMERA
1. Fully articulated screen (flip screen)
2. Good continual autofocus while recording video
3. Good focus priority through face recognition
4. Touch to focus
5. Good low-light performance
6. external mic jack, hot/cold shoe bracket
7. optical image stabilization
8. good battery life
Check out my full list of 10 Things To Look For In A Vlogging Camera to understand the importance of these camera features.
THE 7 BEST DSLR CAMERAS FOR VLOGGING
| Camera | Release Date | Sensor Size | Flip Screen | Mic Port | Price | |
|---|---|---|---|---|---|---|
| CanonEOS6D Mark II | |
June2017 | Full frame(35.9 x 24 mm) | Fully Articulated | Yes | $$ |
| CanonEOS RebelSL2 | |
June2017 | APS-C(22.3 x 14.9 mm) | Fully Articulated | Yes | $ |
| CanonEOS RebelT7i | |
February2017 | APS-C(22.3 x 14.9 mm) | Fully Articulated | Yes | $- |
| CanonEOS77D | |
February2017 | APS-C(22.3 x 14.9 mm) | Fully Articulated | Yes | $- |
| NikonD5600 | |
November2016 | APS-C(23.5 x 15.6 mm) | Fully Articulated | Yes | $- |
| CanonEOS5D Mark IV | |
August2017 | Full frame(36 x 24 mm) | No | Yes | $$$ |
| CanonEOS80D | |
February2016 | APS-C(22.5 x 15 mm) | Fully Articulated | Yes | $$ |
|
Best daily DSLR camera for vlogging: Canon EOS T7i The camera you use to record your daily vlogs doesn’t have to be the best camera on the market. It just has to offer enough options to make the process of making a vlog as smooth as it can possibly be. The T7i is not the most powerful DSLR camera out there, but its 24.2 MP APS-C CMOS sensor and a DIGIC 7 image processor are more than enough to meet the needs of most daily vloggers. You can record full HD 1080p videos at 60 fps and use this camera to create HDR and time-lapse movies. You can set the T7i’s ISO up as high as 51200, which is pretty good. The T7i’s dual pixel CMOS AF system makes sure that the camera focuses quickly and it helps you avoid creating video clips that are out focus. There’s also a built-in Wi-FI with an NFC feature that enables you to share your videos with a smartphone device you connect to the camera. PROS - Long battery life - Remarkable image quality at high ISO values CONS - Can’t record 4K videos - Viewfinder is tiny |
|---|---|
|
Best entry-level DSLR camera for vlogging: Canon EOS SL2 The Canon EOS SL2 was released just a year ago and it wins our 2018 vote for the best entry-level DSLR camera for vlogging. The SL2 packs a lot of features in a compact camera body. The camera only weighs 1 lb, which is considered light among most DSLR cameras. Many vloggers may enjoy the fact that they can hold up this light camera in front of themselves with more ease. Like a lot of entry-level DSLR cameras, the SL2 comes with an APS-C crop sensor. With ISO capabilities that can reach up to 51200, you’ll be able to film up to full HD 1080p videos at 60 fps, even under low light conditions. All recent Canon cameras perform very well when it comes to autofocus and the SL2 is no exception. It does, however, have fewer points of focus. The SL2 comes with a 9-point AF system. The SL2 also has a fully-articulated screen and a microphone jack. PROS - Microphone jack - Wi-Fi connectivity CONS - No 4K video support - Optical image stabilizer could be better |
|
Best mid-range DSLR camera for vlogging: Canon EOS 80D The Canon EOS 80D is the successor of the 70D which was at one time considered by many YouTubers the ultimate DSLR camera for vlogging. The 80D is a larger camera than the SL2, weighing 1.61 lbs. In its larger build, this camera additionally (compared to the SL2) packs a 45-point AF system, longer battery life, a headphone port, and it is environmentally sealed so you can shoot in tough conditions. This camera’s great performance in autofocusing makes it a great mid-range DSLR camera for vlogging. PROS - Feature-rich - Continuous AF feature performs beautifully while recording high-res videos CONS - Just one SD card slot - PC sync connection features could be better |
|
Best professional DSLR camera for vlogging: Canon EOS 6D Mark II There’s a lot of DSLR cameras that come with a fully-articulated screen and a microphone jack, but the Canon EOS 6D Mark II is actually the only one in the market that comes equipped with both of those, plus a full-frame sensor. It is its full-frame sensor that really sets this camera apart from the other vlogging DLSR cameras. Because of its full-frame sensor, this camera performs much better in low light conditions. With this larger sensor, you’ll also be able to capture footage that looks more cinematic with high-quality bokeh (more blur to your out-of-focus areas). The 6D Mark II also has great battery life compared to all the reviewed cameras above. Unfortunately, this camera does not shoot in 4K. PROS - ISO sensitivity goes up to 102400 - Amazing touchscreen controls CONS - No 4K video recording option - No USB 3.0 |
Want to compare even more cameras? Check out…
12 Best Vlogging Cameras
Top 11 Cheap Vlogging Cameras
8 Best Mirrorless Cameras For Vlogging
12 Best Vlogging Cameras With A Flip Screen
Shanoon Cox
Shanoon Cox is a writer and a lover of all things video.
Follow @Shanoon Cox
Crafting Professionalism: The Best Practices for Post-Upload Editing
How to Edit Uploaded/ Published YouTube Videos

Richard Bennett
Mar 27, 2024• Proven solutions
YouTube Video Editor gives you the capacity to edit your video straight from the YouTube platform; these include videos that has already been published or shared. In the first part, we’re going to teach you how to edit your published YouTube videos without losing video ID and URL, in the second part, we offer an advanced video editing tips for edit published videos.
Note: From 20th September 2017 users will no longer be able to use the complimentary editing suite. Check the best YouTube video editor alternatives from this complete guide.
If you want to hide or remove some videos of your or other people’s YouTube channel, you can check this article.
Simply want to do all the stuff on your phone? check this out.
Advanced Tips to Edit Uploaded/ Published YouTube Videos
It is true that YouTube Editor provides us a handy platform that allows us to edit existing YouTube videos in an efficient ways. However, the tools they provide are too basic. If you want to perform a more complex editing, you will need an offline editor such as Windows Movie Maker, iMovei or Adobe Premiere. But if you are looking for an simple while powerful tool, we highly recommend Wondershare Filmora . It is highly compatible with different image, audio, and video format. It is just as simple as importing the video and editing them.
The downside, however, is that you will lose the original ID of the video. This may serve as a problem if you have already shared the video before since the views may disappear. A good solution to this problem is to place an annotation to the old video telling your followers that you have created a better quality of the video then direct them to the link.
Check how to engage your audience to stay tuned from this video below:


Edit Existing YouTube Videos
Let me walk you through a familiar situation, you spend all night trying to make your video perfect, uploaded it on your YouTube channel and shred it to your social media accounts. Then you noticed that you need to repair something. The normal approach back then is to delete the video, re-edit using offline tools and then re-upload it again. Clearly, this process takes too much time. Furthermore, it changes the ID of your video which means that the previous embed will no longer work.
Note: Under this situation, you can’t add more footage or effects to the existing videos.
1. Sigin in
The first thing you need to do to edit uploaded/published YouTube videos is to sign-in with your Google account.

2. Locate the video you want to edit
After signing-in, you now have the option to view all your uploaded videos. Go My Channel > Choose YouTube Studio (it’s a beta version right now).

Click the “Videos” button, and you will see all your uploaded videos here. Choose the one you want to edit

3. Edit YouTube videos
Click on the video you want to edit, and you can see all the info about this video, including title, description, visibility, etc. Choose “Editor” at the left side of the interface, and you will be led to the YouTube video editor’s interface, You can now trim the existing YouTube video by dragging the sliders on the timeline.

4. Save
After you are happy with your edited video, you can now click save.
Note: In case you are not happy with the video that you edited, you can always revert back to your original video. Videos with more than 1,000 views will be saved as a new video after the editing. You may also add notes and annotation to your Videos. This annotation may appear alongside with the video depending on the time that you want it to appear.
Related article: How to add annotation to your YouTube video
Richard Bennett
Richard Bennett is a writer and a lover of all things video.
Follow @Richard Bennett
Richard Bennett
Mar 27, 2024• Proven solutions
YouTube Video Editor gives you the capacity to edit your video straight from the YouTube platform; these include videos that has already been published or shared. In the first part, we’re going to teach you how to edit your published YouTube videos without losing video ID and URL, in the second part, we offer an advanced video editing tips for edit published videos.
Note: From 20th September 2017 users will no longer be able to use the complimentary editing suite. Check the best YouTube video editor alternatives from this complete guide.
If you want to hide or remove some videos of your or other people’s YouTube channel, you can check this article.
Simply want to do all the stuff on your phone? check this out.
Advanced Tips to Edit Uploaded/ Published YouTube Videos
It is true that YouTube Editor provides us a handy platform that allows us to edit existing YouTube videos in an efficient ways. However, the tools they provide are too basic. If you want to perform a more complex editing, you will need an offline editor such as Windows Movie Maker, iMovei or Adobe Premiere. But if you are looking for an simple while powerful tool, we highly recommend Wondershare Filmora . It is highly compatible with different image, audio, and video format. It is just as simple as importing the video and editing them.
The downside, however, is that you will lose the original ID of the video. This may serve as a problem if you have already shared the video before since the views may disappear. A good solution to this problem is to place an annotation to the old video telling your followers that you have created a better quality of the video then direct them to the link.
Check how to engage your audience to stay tuned from this video below:
Edit Existing YouTube Videos
Let me walk you through a familiar situation, you spend all night trying to make your video perfect, uploaded it on your YouTube channel and shred it to your social media accounts. Then you noticed that you need to repair something. The normal approach back then is to delete the video, re-edit using offline tools and then re-upload it again. Clearly, this process takes too much time. Furthermore, it changes the ID of your video which means that the previous embed will no longer work.
Note: Under this situation, you can’t add more footage or effects to the existing videos.
1. Sigin in
The first thing you need to do to edit uploaded/published YouTube videos is to sign-in with your Google account.
2. Locate the video you want to edit
After signing-in, you now have the option to view all your uploaded videos. Go My Channel > Choose YouTube Studio (it’s a beta version right now).
Click the “Videos” button, and you will see all your uploaded videos here. Choose the one you want to edit
3. Edit YouTube videos
Click on the video you want to edit, and you can see all the info about this video, including title, description, visibility, etc. Choose “Editor” at the left side of the interface, and you will be led to the YouTube video editor’s interface, You can now trim the existing YouTube video by dragging the sliders on the timeline.
4. Save
After you are happy with your edited video, you can now click save.
Note: In case you are not happy with the video that you edited, you can always revert back to your original video. Videos with more than 1,000 views will be saved as a new video after the editing. You may also add notes and annotation to your Videos. This annotation may appear alongside with the video depending on the time that you want it to appear.
Related article: How to add annotation to your YouTube video
Richard Bennett
Richard Bennett is a writer and a lover of all things video.
Follow @Richard Bennett
- Title: "2024 Approved Prime 7 Cameras Elevating Virtual Event Coverage and Vlogging"
- Author: Thomas
- Created at : 2024-05-31 12:43:29
- Updated at : 2024-06-01 12:43:29
- Link: https://youtube-help.techidaily.com/2024-approved-prime-7-cameras-elevating-virtual-event-coverage-and-vlogging/
- License: This work is licensed under CC BY-NC-SA 4.0.
