
:max_bytes(150000):strip_icc():format(webp)/trends_MontyRakusen_Getty-5a4aa079482c5200362b0987.jpg)
"2024 Approved Proven Performers The Best of 8 Mirrorless Cameras for Video Creators"
Proven Performers: The Best of 8 Mirrorless Cameras for Video Creators
8 Best Mirrorless Cameras Vloggers Should Know

Richard Bennett
Nov 01, 2022• Proven solutions
Mirrorless cameras are great for vloggers wanting a powerful camera without the weight and size of a DSLR camera. As mirrorless cameras are becoming better with all the advancements in camera technology, more and more DSLR camera vloggers are switching over to vlogging with a mirrorless camera. Below is our list and review of the eight best mirrorless cameras for vlogging.
WHAT TO LOOK FOR IN A VLOGGING CAMERA
1. Fully articulated screen (flip screen)
2. Good continual autofocus while recording video
3. Good focus priority through face recognition
4. Touch to focus
5. Good low-light performance
6. external mic jack, hot/cold shoe bracket
7. optical image stabilization
8. good battery life
Check out my full list of 10 Things To Look For In A Vlogging Camera to understand the importance of these camera features.
THE 8 BEST MIRRORLESS CAMERAS FOR VLOGGING (2018)
| Camera | Release Date | Sensor Size | Flip Screen | Mic Port | Price | |
|---|---|---|---|---|---|---|
| CanonEOSM50 | 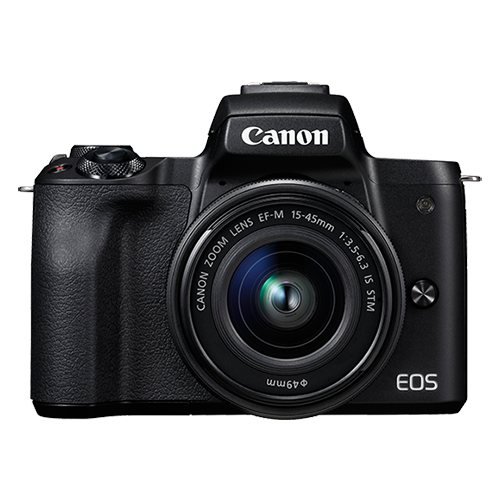 |
February2018 | APS-C(22.3 x 14.9 mm) | Fully Articulated | Yes | $- |
| PanasonicLumixDC-GH5S | 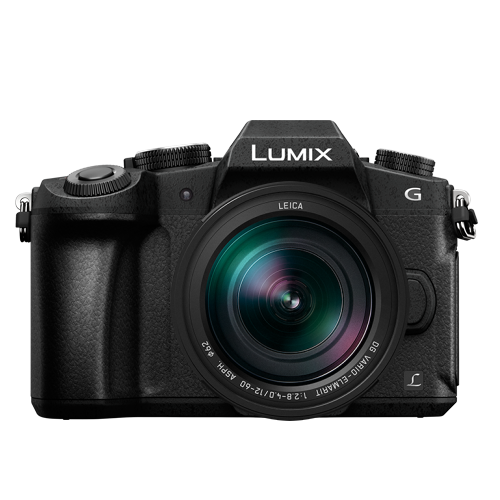 |
January2018 | Four Thirds(19.2 x 13 mm) | Fully Articulated | Yes | $$$ |
| SonyAlphaa7R III |  |
October2017 | Full Frame(35.9 x 24 mm) | Tilting | Yes | $$$ |
| CanonEOSM100 | 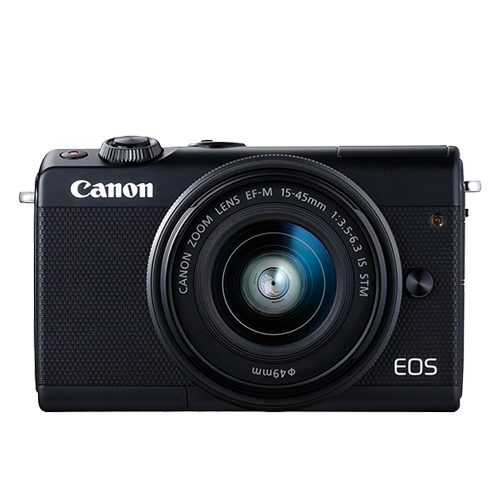 |
August2017 | APS-C(22.3 x 14.9 mm) | Flip Up | No | $ |
| CanonEOSM6 | 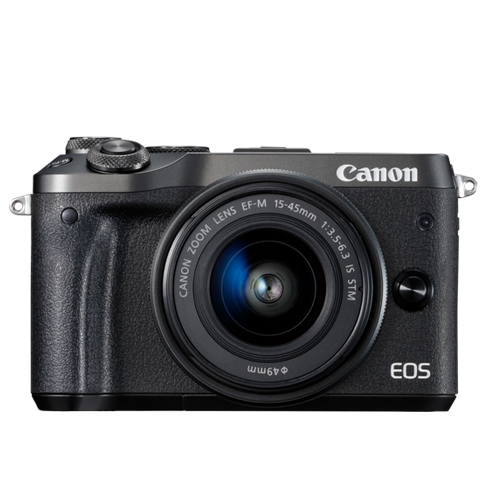 |
February2017 | APS-C(22.3 x 14.9 mm) | Flip Up | Yes | $- |
| SonyAlphaa6500 | 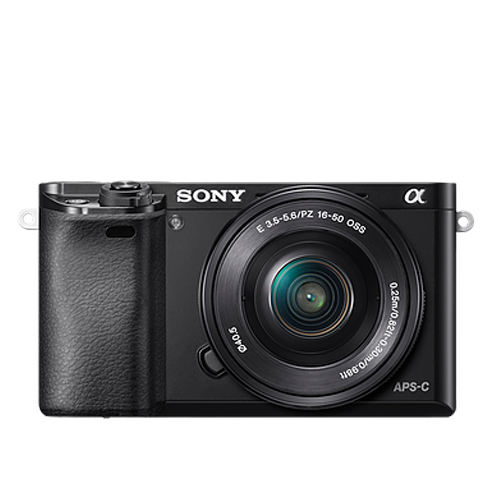 |
October2016 | APS-C(23.5 x 15.6 mm) | Tilting | Yes | $$- |
| PanasonicLumixDMC-G85 | 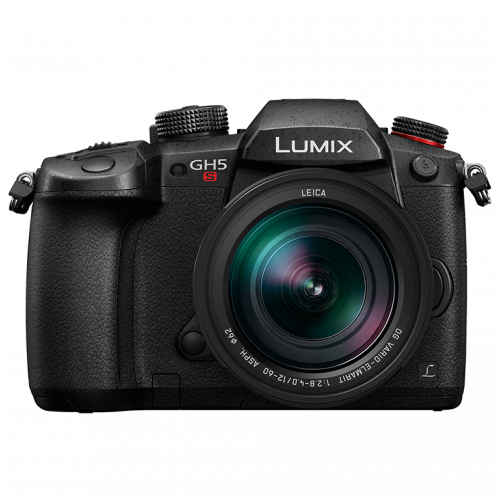 |
September2016 | Four Thirds(17.3 x 13 mm) | Fully Articulated | Yes | $- |
| PanasonicLumixDMC-G7 | 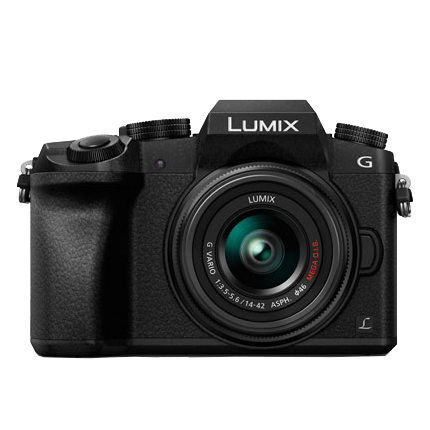 |
May2015 | Four Thirds(17.3 x 13 mm) | Fully Articulated | Yes | $ |
|
Best daily mirrorless camera for vlogging: Canon EOS M50 The Canon EOS M50 is Canon’s first mirrorless camera that comes equipped with both a fully-articulated screen and an external microphone jack. It came out only a few months ago and is already considered one of the best mirrorless cameras for vlogging. The M50 is also the only camera on our list that you can buy at a prosumer’s budget that shoots 4K video. Yes, the Sony a7R III and Panasonic GH5S also shoot 4K video, but they are much more expensive. With Canon’s new DIGIC 8 Image Processor, the camera’s dual-pixel autofocusing system will perform even better. PROS - Can shoot UHD 4K videos at 23.98 fps - Has a 2.36m-dot OLED electronic viewfinder CONS - No image stabilization - Battery life could be longer |
|---|---|
|
Best entry-level mirrorless camera for vlogging: Canon EOS M100 The Canon EOS M100 is a small, but powerful mirrorless camera for vlogging. This camera can shoot full HD 1080p videos at 60 fps. It cannot shoot 4K video, unfortunately. It uses its DIGIC 7 Image Processor and dual-pixel autofocusing system to ensure that your vlogs are always in focus. The M100 provides great ISO sensitivity options - it can reach up to ISO 25600. With its built-in Wi-Fi with NFC, you can transfer your media seamlessly to a computer. PROS - Affordable - Great connectivity options CONS - Lacks advanced video recording features - No viewfinder |
|
Best mid-range mirrorless camera for vlogging: Canon EOS M50 The Canon EOS M50 wins this category as well in our books. It is the only camera on our list that shoots 4K video that is priced much lower than the Sony a7R III and the Panasonic GH7S. In case you missed it, check out my review on the Canon EOS M50. |
|
Best professional mirrorless camera for vlogging: Panasonic Lumix DC-GH5S Originally, Panasonic had released it’s GH5 as a hybrid camera that handles both photography and videography well. In response to hearing customers’ interest in a more video-focused camera, Panasonic came up with the GH5S. In our list of the top mirrorless cameras, the Panasonic GH5S and the Sony a7R III are the two professional mirrorless cameras that can record 4K video. Between the two, though, the GH5S wins as the best professional mirrorless camera for vlogging because it sports a fully-articulated screen. Its micro four-thirds sensor is smaller than the a7R III’s full-frame sensor. Even with a smaller sensor, though, the GH5S is made to still autofocus well in low lighting conditions. Another amazing feature is its ability to record 240 fps slow-motion video at full HD 1080p. PROS - ISO sensitivity goes up to 204800 - High video bit rates CONS - Expensive - The camera body weighs about 1.5 lbs |
Want to compare even more cameras? Check out…
12 Best Vlogging Cameras (2018)
Top 11 Cheap Vlogging Cameras (2018)
7 Best DSLR Cameras For Vlogging (2018)
12 Best Vlogging Cameras With A Flip Screen (2018)
Richard Bennett
Richard Bennett is a writer and a lover of all things video.
Follow @Richard Bennett
Richard Bennett
Nov 01, 2022• Proven solutions
Mirrorless cameras are great for vloggers wanting a powerful camera without the weight and size of a DSLR camera. As mirrorless cameras are becoming better with all the advancements in camera technology, more and more DSLR camera vloggers are switching over to vlogging with a mirrorless camera. Below is our list and review of the eight best mirrorless cameras for vlogging.
WHAT TO LOOK FOR IN A VLOGGING CAMERA
1. Fully articulated screen (flip screen)
2. Good continual autofocus while recording video
3. Good focus priority through face recognition
4. Touch to focus
5. Good low-light performance
6. external mic jack, hot/cold shoe bracket
7. optical image stabilization
8. good battery life
Check out my full list of 10 Things To Look For In A Vlogging Camera to understand the importance of these camera features.
THE 8 BEST MIRRORLESS CAMERAS FOR VLOGGING (2018)
| Camera | Release Date | Sensor Size | Flip Screen | Mic Port | Price | |
|---|---|---|---|---|---|---|
| CanonEOSM50 | |
February2018 | APS-C(22.3 x 14.9 mm) | Fully Articulated | Yes | $- |
| PanasonicLumixDC-GH5S | |
January2018 | Four Thirds(19.2 x 13 mm) | Fully Articulated | Yes | $$$ |
| SonyAlphaa7R III | |
October2017 | Full Frame(35.9 x 24 mm) | Tilting | Yes | $$$ |
| CanonEOSM100 | |
August2017 | APS-C(22.3 x 14.9 mm) | Flip Up | No | $ |
| CanonEOSM6 | |
February2017 | APS-C(22.3 x 14.9 mm) | Flip Up | Yes | $- |
| SonyAlphaa6500 | |
October2016 | APS-C(23.5 x 15.6 mm) | Tilting | Yes | $$- |
| PanasonicLumixDMC-G85 | |
September2016 | Four Thirds(17.3 x 13 mm) | Fully Articulated | Yes | $- |
| PanasonicLumixDMC-G7 | |
May2015 | Four Thirds(17.3 x 13 mm) | Fully Articulated | Yes | $ |
|
Best daily mirrorless camera for vlogging: Canon EOS M50 The Canon EOS M50 is Canon’s first mirrorless camera that comes equipped with both a fully-articulated screen and an external microphone jack. It came out only a few months ago and is already considered one of the best mirrorless cameras for vlogging. The M50 is also the only camera on our list that you can buy at a prosumer’s budget that shoots 4K video. Yes, the Sony a7R III and Panasonic GH5S also shoot 4K video, but they are much more expensive. With Canon’s new DIGIC 8 Image Processor, the camera’s dual-pixel autofocusing system will perform even better. PROS - Can shoot UHD 4K videos at 23.98 fps - Has a 2.36m-dot OLED electronic viewfinder CONS - No image stabilization - Battery life could be longer |
|---|---|
|
Best entry-level mirrorless camera for vlogging: Canon EOS M100 The Canon EOS M100 is a small, but powerful mirrorless camera for vlogging. This camera can shoot full HD 1080p videos at 60 fps. It cannot shoot 4K video, unfortunately. It uses its DIGIC 7 Image Processor and dual-pixel autofocusing system to ensure that your vlogs are always in focus. The M100 provides great ISO sensitivity options - it can reach up to ISO 25600. With its built-in Wi-Fi with NFC, you can transfer your media seamlessly to a computer. PROS - Affordable - Great connectivity options CONS - Lacks advanced video recording features - No viewfinder |
|
Best mid-range mirrorless camera for vlogging: Canon EOS M50 The Canon EOS M50 wins this category as well in our books. It is the only camera on our list that shoots 4K video that is priced much lower than the Sony a7R III and the Panasonic GH7S. In case you missed it, check out my review on the Canon EOS M50. |
|
Best professional mirrorless camera for vlogging: Panasonic Lumix DC-GH5S Originally, Panasonic had released it’s GH5 as a hybrid camera that handles both photography and videography well. In response to hearing customers’ interest in a more video-focused camera, Panasonic came up with the GH5S. In our list of the top mirrorless cameras, the Panasonic GH5S and the Sony a7R III are the two professional mirrorless cameras that can record 4K video. Between the two, though, the GH5S wins as the best professional mirrorless camera for vlogging because it sports a fully-articulated screen. Its micro four-thirds sensor is smaller than the a7R III’s full-frame sensor. Even with a smaller sensor, though, the GH5S is made to still autofocus well in low lighting conditions. Another amazing feature is its ability to record 240 fps slow-motion video at full HD 1080p. PROS - ISO sensitivity goes up to 204800 - High video bit rates CONS - Expensive - The camera body weighs about 1.5 lbs |
Want to compare even more cameras? Check out…
12 Best Vlogging Cameras (2018)
Top 11 Cheap Vlogging Cameras (2018)
7 Best DSLR Cameras For Vlogging (2018)
12 Best Vlogging Cameras With A Flip Screen (2018)
Richard Bennett
Richard Bennett is a writer and a lover of all things video.
Follow @Richard Bennett
Harnessing Technology: The Art of Capturing iOS Devices in Media
How to Record your iPhone or iPad Screen for YouTube
Richard Bennett
Mar 27, 2024• Proven solutions
There are a lot of reasons why you might want to use footage recorded from the screen of your apple device in your YouTube videos. Some people like to make YouTube tutorials about iPhone or iPad apps, others like to share their gaming experiences, and some need to use footage taken from their devices for presentations. Even if you do not think these kinds of videos suit your vlog, screen recording is a useful tool to have on your belt. You never know when one of your subscribers is going to ask you about your favorite mobile games.
Basically, there are three ways to record YouTube video on iPhone/iPad, including the built-in screen recorder (if you have updated to iOS 11 ), connecting iPhone to Mac and the last, some third party screen recorder. In this article, you will learn the three powerful methods one by one.
- Part1: Recording your iPhone screen in iOS 11
- Part2: Wired Using QuickTime on your Mac
- Part3: Wirelessly Using AirPlay and Reflector
Note: We resolutely oppose all forms of copyright-infringing downloads. This tutorial is only for downloading YouTube videos/audio materials from your own channel.
1. Recording your iPhone screen in iOS 11
You can find more information in this article: How to Record iPhone/iPad’s Screen in iOS 11 >>


2. Wired Using QuickTime on your Mac
If you have a Mac then you already have all the software you need.
Step 1: Connect your tablet or smartphone to your computer using a USB port, and then open QuickTime on your Mac. In QuickTime select ‘File’ and ‘New Movie Recording’. A recording window will pop up.
Step 2: In the recording window there will be a red ‘record’ button. Next to that button there will be an arrow. Click the arrow and a menu of recording options will appear. In the section where it says ‘Camera’ select your iPhone or iPad. In this menu you can also choose whether or not to record audio from your device, such sound effects from games.
Step 3: Once you are finished in this menu click record to begin recording the screen of your device. Click ‘stop’ when you are finished recording.
Although you can download a version of QuickTime for PC, the PC version does not have a screen recording option. If you have a PC you will need to use the second method.
3. Wirelessly Using AirPlay and Reflector(For Mac or PC!)
If you either prefer to do things wirelessly or own a PC then you will need to use a slightly more round-about method. Rather than recording directly from your iPhone you will be mirroring your device’s interface onto your computer screen and then recording it there.
Step 1: First, you will need to download a third party mirroring app. Reflector is the popular choice. You can download Reflector at Airsquirrels.com .Next, you need to have Apple’s Airplay on your device. Make sure Reflector that your computer and device are connected to the same wifi network.
Step 2: Open Reflector on your PC. Initially it will tell you there is no device connected.
Step 3: Open AirPlay on your device and make sure mirroring is turned on. Your computer’s name will show up as a receiver option. Select it.
Step 4: This will cause the display of your smartphone or tablet to pop up on your computer screen. Once your device is being mirrored on your computer, record your computer screen.
You can record your Mac or PC screen using Filmora Video Editor. Using Filmora you can crop out and record only your iPhone display instead of your entire computer screen. You can download the latest version of Filmora Video Editor at Filmora.wondershare.com.
If you have a Mac you can also record your computer screen in QuickTime following the same steps listed above, until it comes time to choose your camera. Then you record your desktop instead of your device. There are a few different screen recording programs you can download for PC.
Conclusion
After reading the three ways to record YouTube on iPhone/iPad, I am sure you want to give it a try. If you have any questions, please let us know!
Richard Bennett
Richard Bennett is a writer and a lover of all things video.
Follow @Richard Bennett
Richard Bennett
Mar 27, 2024• Proven solutions
There are a lot of reasons why you might want to use footage recorded from the screen of your apple device in your YouTube videos. Some people like to make YouTube tutorials about iPhone or iPad apps, others like to share their gaming experiences, and some need to use footage taken from their devices for presentations. Even if you do not think these kinds of videos suit your vlog, screen recording is a useful tool to have on your belt. You never know when one of your subscribers is going to ask you about your favorite mobile games.
Basically, there are three ways to record YouTube video on iPhone/iPad, including the built-in screen recorder (if you have updated to iOS 11 ), connecting iPhone to Mac and the last, some third party screen recorder. In this article, you will learn the three powerful methods one by one.
- Part1: Recording your iPhone screen in iOS 11
- Part2: Wired Using QuickTime on your Mac
- Part3: Wirelessly Using AirPlay and Reflector
Note: We resolutely oppose all forms of copyright-infringing downloads. This tutorial is only for downloading YouTube videos/audio materials from your own channel.
1. Recording your iPhone screen in iOS 11
You can find more information in this article: How to Record iPhone/iPad’s Screen in iOS 11 >>
2. Wired Using QuickTime on your Mac
If you have a Mac then you already have all the software you need.
Step 1: Connect your tablet or smartphone to your computer using a USB port, and then open QuickTime on your Mac. In QuickTime select ‘File’ and ‘New Movie Recording’. A recording window will pop up.
Step 2: In the recording window there will be a red ‘record’ button. Next to that button there will be an arrow. Click the arrow and a menu of recording options will appear. In the section where it says ‘Camera’ select your iPhone or iPad. In this menu you can also choose whether or not to record audio from your device, such sound effects from games.
Step 3: Once you are finished in this menu click record to begin recording the screen of your device. Click ‘stop’ when you are finished recording.
Although you can download a version of QuickTime for PC, the PC version does not have a screen recording option. If you have a PC you will need to use the second method.
3. Wirelessly Using AirPlay and Reflector(For Mac or PC!)
If you either prefer to do things wirelessly or own a PC then you will need to use a slightly more round-about method. Rather than recording directly from your iPhone you will be mirroring your device’s interface onto your computer screen and then recording it there.
Step 1: First, you will need to download a third party mirroring app. Reflector is the popular choice. You can download Reflector at Airsquirrels.com .Next, you need to have Apple’s Airplay on your device. Make sure Reflector that your computer and device are connected to the same wifi network.
Step 2: Open Reflector on your PC. Initially it will tell you there is no device connected.
Step 3: Open AirPlay on your device and make sure mirroring is turned on. Your computer’s name will show up as a receiver option. Select it.
Step 4: This will cause the display of your smartphone or tablet to pop up on your computer screen. Once your device is being mirrored on your computer, record your computer screen.
You can record your Mac or PC screen using Filmora Video Editor. Using Filmora you can crop out and record only your iPhone display instead of your entire computer screen. You can download the latest version of Filmora Video Editor at Filmora.wondershare.com.
If you have a Mac you can also record your computer screen in QuickTime following the same steps listed above, until it comes time to choose your camera. Then you record your desktop instead of your device. There are a few different screen recording programs you can download for PC.
Conclusion
After reading the three ways to record YouTube on iPhone/iPad, I am sure you want to give it a try. If you have any questions, please let us know!
Richard Bennett
Richard Bennett is a writer and a lover of all things video.
Follow @Richard Bennett
- Title: "2024 Approved Proven Performers The Best of 8 Mirrorless Cameras for Video Creators"
- Author: Thomas
- Created at : 2024-05-31 12:42:50
- Updated at : 2024-06-01 12:42:50
- Link: https://youtube-help.techidaily.com/2024-approved-proven-performers-the-best-of-8-mirrorless-cameras-for-video-creators/
- License: This work is licensed under CC BY-NC-SA 4.0.
