
"2024 Approved Step-by-Step Adding Captions to YouTube Clips"
Step-by-Step: Adding Captions to YouTube Clips
How To Add Captions to YouTube Videos

Richard Bennett
Mar 27, 2024• Proven solutions
By captioning your YouTube videos you help to make them accessible to more potential viewers. Subtitles are useful to viewers who have hearing impairments, whose first language is different from yours, or who are unable to watch your video with sound. Closed captioning can also be useful for you as a YouTuber because it helps with your SEO, or search engine optimization. Practicing better SEO can get your videos ranked higher in search results. Google and YouTube both index subtitles and transcripts much like they do your video’s description, unless you use automated captions.
This article will first explain how you can turn on subtitles for the videos you watch and then walk you through adding captions to your own videos.
How To Turn On Captions on YouTube
In order for you to be able to view subtitles for a YouTube video the uploader of the video will need to have added them, unless you change your account settings to display automatic captions.

To toggle subtitles on and off click on the Closed Captioning icon in the bottom right of your video player.
If the creator of the video has not added captions then you can enable automatic captions by going into your Account Settings and selecting Playback. Check the box next to Always Show Captions, and then check Show Automatic Captions by Speech Recognition. These captions may be flawed, but you will still be able to see the more accurate user submitted captions on videos that have them. The Always Show Captions feature may be useful not only to the hearing impaired, but to users who do not speak the same language as the video producer.
If you want to change the language of the subtitles click on the settings icon (the one that looks like a gear) next to the closed captioning icon and choose your language next to Subtitles/CC . If the language you want is not there select Auto-Translate and then pick a language. Google Translate will be used to generate subtitles in your chosen language.
Adding YouTube Captions in 4 Steps
1. Go to Video Manager in your Creator Studio and then look at your videos. Decide which one you want to add captions to.
2. Click on the drop-down menu next to the video you want to add captions to and choose Subtitles and CC.
3. Select Add New Subtitles or CC.
4. Choose whether to create your captions, upload a file that has them, transcribe your video, use automatic captioning, or use captioning software.
Create Subtitles or Closed Captions will allow you to create your subtitles on YouTube.
Upload A File allows you to upload a pre-made subtitle file from your computer. Supported file types include SubRip (.srt) and SubViewer (.sbv). You cannot use a word or PDF document for your subtitles.
Transcribe and Set Timings is where you can type a transcript of your video and set timings to sync it to your video. This differs from Create Subtitles or Closed Captions in that your transcript is all typed in to one text field.
Use Automatic Captioning will automatically use speech recognition technology to create captions. You can edit these auto-generated captions later if there are mistakes.
Use Captioning Software or Services is what you choose if you want to use a program or service to create the subtitles for your video.
The easiest way to add subtitles to your videos is to use Automatic Captioning. However, Automatic Captioning is imperfect and may result in your viewers getting a sloppy, skewed, interpretation of your video. Automatic captions are also not indexed by YouTube and Google the way subtitles you create or upload are. This means that they will not have any value to your SEO strategy. If you do not input your own captions or transcript you are missing out on an opportunity for better search engine rankings. Automatic Captions are great if you do not have time to input subtitles and need a temporary solution, though.
Richard Bennett
Richard Bennett is a writer and a lover of all things video.
Follow @Richard Bennett
Richard Bennett
Mar 27, 2024• Proven solutions
By captioning your YouTube videos you help to make them accessible to more potential viewers. Subtitles are useful to viewers who have hearing impairments, whose first language is different from yours, or who are unable to watch your video with sound. Closed captioning can also be useful for you as a YouTuber because it helps with your SEO, or search engine optimization. Practicing better SEO can get your videos ranked higher in search results. Google and YouTube both index subtitles and transcripts much like they do your video’s description, unless you use automated captions.
This article will first explain how you can turn on subtitles for the videos you watch and then walk you through adding captions to your own videos.
How To Turn On Captions on YouTube
In order for you to be able to view subtitles for a YouTube video the uploader of the video will need to have added them, unless you change your account settings to display automatic captions.
To toggle subtitles on and off click on the Closed Captioning icon in the bottom right of your video player.
If the creator of the video has not added captions then you can enable automatic captions by going into your Account Settings and selecting Playback. Check the box next to Always Show Captions, and then check Show Automatic Captions by Speech Recognition. These captions may be flawed, but you will still be able to see the more accurate user submitted captions on videos that have them. The Always Show Captions feature may be useful not only to the hearing impaired, but to users who do not speak the same language as the video producer.
If you want to change the language of the subtitles click on the settings icon (the one that looks like a gear) next to the closed captioning icon and choose your language next to Subtitles/CC . If the language you want is not there select Auto-Translate and then pick a language. Google Translate will be used to generate subtitles in your chosen language.
Adding YouTube Captions in 4 Steps
1. Go to Video Manager in your Creator Studio and then look at your videos. Decide which one you want to add captions to.
2. Click on the drop-down menu next to the video you want to add captions to and choose Subtitles and CC.
3. Select Add New Subtitles or CC.
4. Choose whether to create your captions, upload a file that has them, transcribe your video, use automatic captioning, or use captioning software.
Create Subtitles or Closed Captions will allow you to create your subtitles on YouTube.
Upload A File allows you to upload a pre-made subtitle file from your computer. Supported file types include SubRip (.srt) and SubViewer (.sbv). You cannot use a word or PDF document for your subtitles.
Transcribe and Set Timings is where you can type a transcript of your video and set timings to sync it to your video. This differs from Create Subtitles or Closed Captions in that your transcript is all typed in to one text field.
Use Automatic Captioning will automatically use speech recognition technology to create captions. You can edit these auto-generated captions later if there are mistakes.
Use Captioning Software or Services is what you choose if you want to use a program or service to create the subtitles for your video.
The easiest way to add subtitles to your videos is to use Automatic Captioning. However, Automatic Captioning is imperfect and may result in your viewers getting a sloppy, skewed, interpretation of your video. Automatic captions are also not indexed by YouTube and Google the way subtitles you create or upload are. This means that they will not have any value to your SEO strategy. If you do not input your own captions or transcript you are missing out on an opportunity for better search engine rankings. Automatic Captions are great if you do not have time to input subtitles and need a temporary solution, though.
Richard Bennett
Richard Bennett is a writer and a lover of all things video.
Follow @Richard Bennett
Stream Masters List: Elite Software & Devices for Youtubers
Best YouTube Live Streaming Software and Hardware You Should Know
Richard Bennett
Mar 27, 2024• Proven solutions
- Part1.Best Software for Live Streaming Video to YouTube
- Part2.Best Software for Live Streaming Game to YouTube
- Part3.Best Software for Live Streaming Mobile to YouTube
- Part4.Hardware for Live Streaming to YouTube
Best Video Editor for You


Best Software for Live Streaming Video to YouTube
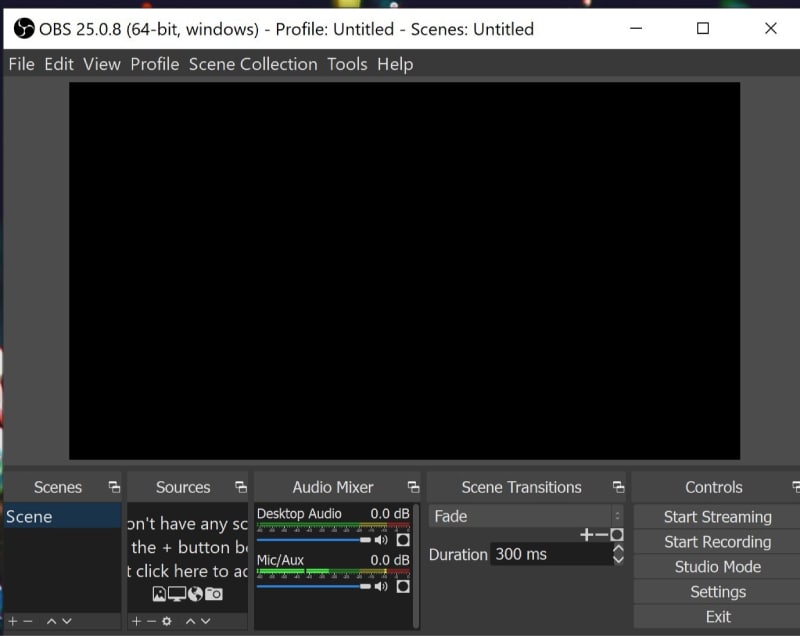
1.OBS:
Price: It is available for free.
OBS or Open Source Broadcaster is a popular recording and live streaming software tool that can be easily operated by all beginners. The best is that you can avail this software tool as an open source so it is possible to customize things as per need.
Key Features:
- It works perfectly on Linux, Mac and Windows.
- Advanced video editing tool with customized transitions.
- Filters, audio mixers, noise suppressor and automatic gain booster added for development of classic videos.
- Users can easily access light and dark themes as per their need.
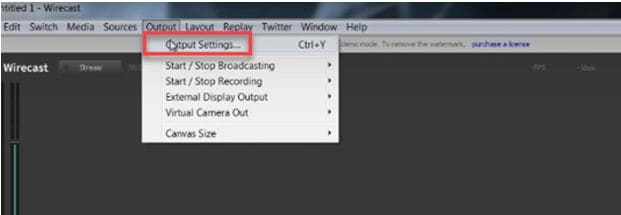
2. Wirecast Play:
Price:
- Wirecast Play 6: Free/ $9.99
- Wirecast Play Studio 6: $279
- Wirecast Play Pro 6: $549.
Wirecast play allows users to enjoy professional kind of stuff with impressive live recording facilities. Users can easily encode all live streams over multiple platforms or servers.
- The professional version of this software tool allows users to add web stream, Ip cameras and input sources.
- It possesses so many professional level editing features such as advanced audio controls, virtual sets, reply and live scoreboards.
- With its interactive user interface, Wirecast is rated as one of the most useful multicamera type live streaming package.
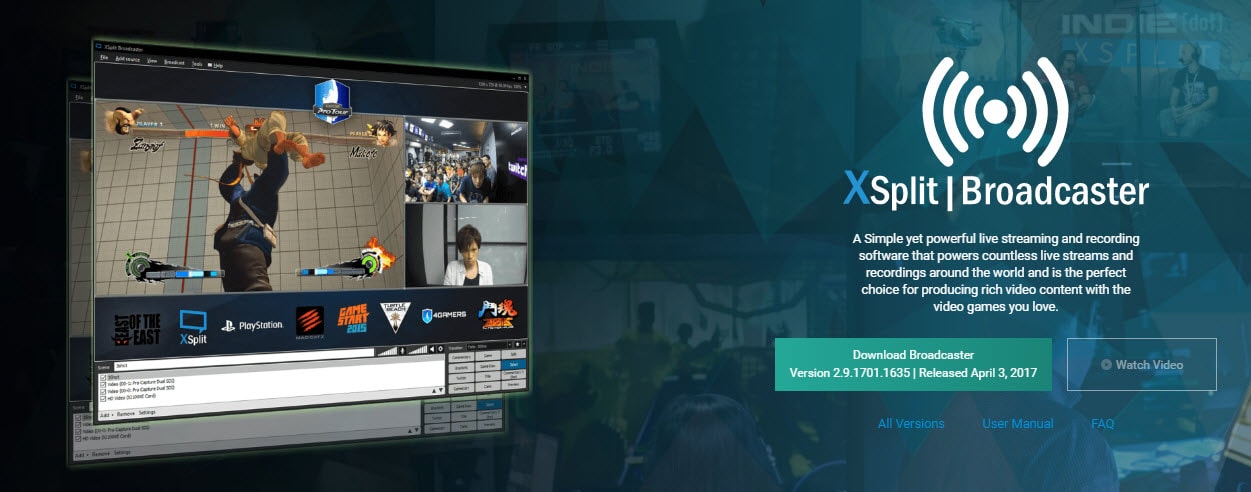
3. XSplit Broadcaster:
Price: Free and Paid
Here is a simple yet highly powerful live streaming software tool that can produce rich video content with its impressive user interface. It possesses all basic video development tools along with audio support feature. You will be glad to know that Xsplit offers Full HD recording ability; other then this you can access social features, in game annotations, in game production control as well as unique live production features.
Key Features:
- XSplit supports almost all capture cards.
- It possesses so many custom integrations and plugins.
- Easy video editing supported with professional production tools.
- You will be able to access notifications and chat option for organizing uploads in interactive manner.
Best Software for Live Streaming Game to YouTube
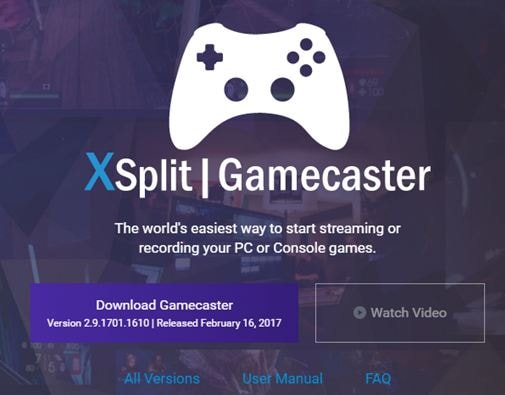
1. XSplit Gamecaster:
Price: Free and Paid
If you love gaming then Xsplit can assist you to share your memorable gaming moments on social media sites so that viewers can come to know about your creativity. Xsplit Gamecaster works perfectly with console games as well as on personal computers.
Key Features:
- It extends its support to all latest capture card designs.
- Users can easily switch to webcam mode and background can be easily removed.
- It offers loads of professional quality editing features.
- There are so many customizable integrations and plugins.
- Chat and notification feature supported.
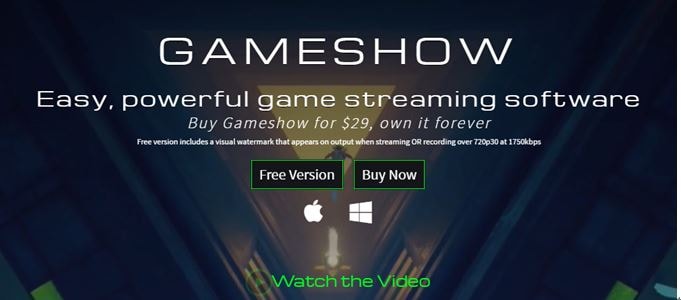
2. Gameshow (Mac/Win):
Price: $29
It is possible to start live streaming within few seconds using your gameshow oftware tool. Gameshow will help you to pick right template, adjust widgets and start streaming content within few seconds. It is possible to stream content directly to all popular social media platforms like Hitbox, YouTube and Twitch.
Key Features:
- It offers multiple layer combinations for development of interactive videos.
- Users will have complete control over scene development.
- It is possible to create playlists using transitions and customized timing effects.
- It works with low CPU usage hence will not affect your device performance.
Best Software for Live Streaming Mobile to YouTube
1. Airserver:
Price: $7.99 to $11.99 only for educational needs, $14.99- Consumer License and $19.99 for Business License.
AirServer is one of the most advanced and interactive screen mirroring type software receiver tools for Xbox, PC and Mac etc. Using this tool, users can easily receive content from chromcast device, Apple TV, Miracast Streams, Google Cast and AirPlay etc.
Key Features:
- It is designed with zero client footprint feature that means everything is just ready for your needs and you will not even need any third party support.
- This software tool enables collaboration between various applications that are working on different platforms.
- It is compatible with Windows, Chrombook and Android platform.
- Comes with retina quality mirroring that can effectively improve picture quality.
2. Wirecast Go (iOS device only):
Price: Free and upgrades demand payment of $5.99 only.
It is possible to stream rich video content from iPhone directly to Youtube using Wirecast platform. Users will be able to stream their interactive videos with effective editing and customization tools like text, replays and graphics etc. This software tool is compatible with iPod Touch, iPad and iPhone.
Key Features:
- One click type YouTube streaming option.
- Unlimited streaming available even for free version users.
- One can easily add graphics, logos and images for stream content.
- It replays all highlights for live broadcasts.
Hardware for Live Streaming to YouTube
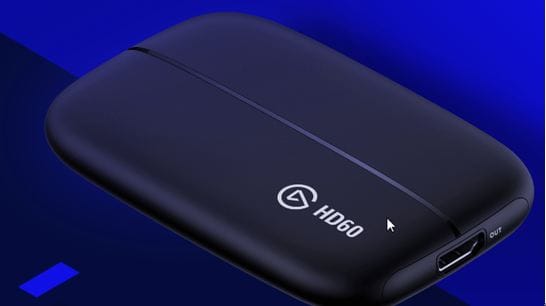
1. Elgato Game Capture HD 60:
Price: $179.95 only
Elgato Game Capture HD 60 is well known for its wide range of compatibility, efficiency and set of powerful features that assists in top quality content development. You can develop videos with 1080p resolution at 60fps frame rate using Elgato tool.
Key Features:
- Rich content quality with Full HD video support.
- It can easily record your overlays, webcam, audio and gameplay with additional facility to separate them as per need so that users can access anything upon selection.
- Easy editing functions that assist in direct upload.
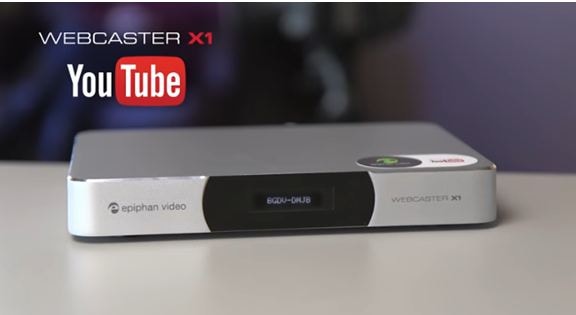
2. Webcaster X1 for YouTube:
Price: $329.95 only.
Webcaster allows users to enjoy interactive video uploading experience while offering easy connectivity to DSLR and dedicated Video camera units so that videos can be directly sent to YouTube.
Key Features:
- It offers easy setup options and starts automatically when you pair it up with a device using pairing code.
- This software tool can accept high quality audio content via HDMI inputs.
- It is possible to use advanced configuration options like keyboard, mouse and monitor connectivity for precise live streaming.
- One can easily make selections between Wi-Fi and Ethernet connections for content uploading.
Richard Bennett
Richard Bennett is a writer and a lover of all things video.
Follow @Richard Bennett
Richard Bennett
Mar 27, 2024• Proven solutions
- Part1.Best Software for Live Streaming Video to YouTube
- Part2.Best Software for Live Streaming Game to YouTube
- Part3.Best Software for Live Streaming Mobile to YouTube
- Part4.Hardware for Live Streaming to YouTube
Best Video Editor for You
Best Software for Live Streaming Video to YouTube
1.OBS:
Price: It is available for free.
OBS or Open Source Broadcaster is a popular recording and live streaming software tool that can be easily operated by all beginners. The best is that you can avail this software tool as an open source so it is possible to customize things as per need.
Key Features:
- It works perfectly on Linux, Mac and Windows.
- Advanced video editing tool with customized transitions.
- Filters, audio mixers, noise suppressor and automatic gain booster added for development of classic videos.
- Users can easily access light and dark themes as per their need.
2. Wirecast Play:
Price:
- Wirecast Play 6: Free/ $9.99
- Wirecast Play Studio 6: $279
- Wirecast Play Pro 6: $549.
Wirecast play allows users to enjoy professional kind of stuff with impressive live recording facilities. Users can easily encode all live streams over multiple platforms or servers.
- The professional version of this software tool allows users to add web stream, Ip cameras and input sources.
- It possesses so many professional level editing features such as advanced audio controls, virtual sets, reply and live scoreboards.
- With its interactive user interface, Wirecast is rated as one of the most useful multicamera type live streaming package.
3. XSplit Broadcaster:
Price: Free and Paid
Here is a simple yet highly powerful live streaming software tool that can produce rich video content with its impressive user interface. It possesses all basic video development tools along with audio support feature. You will be glad to know that Xsplit offers Full HD recording ability; other then this you can access social features, in game annotations, in game production control as well as unique live production features.
Key Features:
- XSplit supports almost all capture cards.
- It possesses so many custom integrations and plugins.
- Easy video editing supported with professional production tools.
- You will be able to access notifications and chat option for organizing uploads in interactive manner.
Best Software for Live Streaming Game to YouTube
1. XSplit Gamecaster:
Price: Free and Paid
If you love gaming then Xsplit can assist you to share your memorable gaming moments on social media sites so that viewers can come to know about your creativity. Xsplit Gamecaster works perfectly with console games as well as on personal computers.
Key Features:
- It extends its support to all latest capture card designs.
- Users can easily switch to webcam mode and background can be easily removed.
- It offers loads of professional quality editing features.
- There are so many customizable integrations and plugins.
- Chat and notification feature supported.
2. Gameshow (Mac/Win):
Price: $29
It is possible to start live streaming within few seconds using your gameshow oftware tool. Gameshow will help you to pick right template, adjust widgets and start streaming content within few seconds. It is possible to stream content directly to all popular social media platforms like Hitbox, YouTube and Twitch.
Key Features:
- It offers multiple layer combinations for development of interactive videos.
- Users will have complete control over scene development.
- It is possible to create playlists using transitions and customized timing effects.
- It works with low CPU usage hence will not affect your device performance.
Best Software for Live Streaming Mobile to YouTube
1. Airserver:
Price: $7.99 to $11.99 only for educational needs, $14.99- Consumer License and $19.99 for Business License.
AirServer is one of the most advanced and interactive screen mirroring type software receiver tools for Xbox, PC and Mac etc. Using this tool, users can easily receive content from chromcast device, Apple TV, Miracast Streams, Google Cast and AirPlay etc.
Key Features:
- It is designed with zero client footprint feature that means everything is just ready for your needs and you will not even need any third party support.
- This software tool enables collaboration between various applications that are working on different platforms.
- It is compatible with Windows, Chrombook and Android platform.
- Comes with retina quality mirroring that can effectively improve picture quality.
2. Wirecast Go (iOS device only):
Price: Free and upgrades demand payment of $5.99 only.
It is possible to stream rich video content from iPhone directly to Youtube using Wirecast platform. Users will be able to stream their interactive videos with effective editing and customization tools like text, replays and graphics etc. This software tool is compatible with iPod Touch, iPad and iPhone.
Key Features:
- One click type YouTube streaming option.
- Unlimited streaming available even for free version users.
- One can easily add graphics, logos and images for stream content.
- It replays all highlights for live broadcasts.
Hardware for Live Streaming to YouTube
1. Elgato Game Capture HD 60:
Price: $179.95 only
Elgato Game Capture HD 60 is well known for its wide range of compatibility, efficiency and set of powerful features that assists in top quality content development. You can develop videos with 1080p resolution at 60fps frame rate using Elgato tool.
Key Features:
- Rich content quality with Full HD video support.
- It can easily record your overlays, webcam, audio and gameplay with additional facility to separate them as per need so that users can access anything upon selection.
- Easy editing functions that assist in direct upload.
2. Webcaster X1 for YouTube:
Price: $329.95 only.
Webcaster allows users to enjoy interactive video uploading experience while offering easy connectivity to DSLR and dedicated Video camera units so that videos can be directly sent to YouTube.
Key Features:
- It offers easy setup options and starts automatically when you pair it up with a device using pairing code.
- This software tool can accept high quality audio content via HDMI inputs.
- It is possible to use advanced configuration options like keyboard, mouse and monitor connectivity for precise live streaming.
- One can easily make selections between Wi-Fi and Ethernet connections for content uploading.
Richard Bennett
Richard Bennett is a writer and a lover of all things video.
Follow @Richard Bennett
Also read:
- [New] Premier Cutting Suites on Linux Systems
- [Updated] 4 Ways to Record Internal Android Audio (No Rooting)
- [Updated] Chortle Circle Spooky Androids with a Twist
- [Updated] Unleashing the Full Potential of Your Channel in Studio for 2024
- [Updated] Unlock Advanced Splitting with Non-Xsplit Apps for 2024
- 2024 Approved Explore Sites Where You Can Procure Youtube Affiliate Partnerships
- 2024 Approved Navigating AdSense A Step-by-Step Approach for YouTubers
- 2024 Approved Silent to Clear The Ultimate Guide to Professional Audio Recording
- 2024 Approved The Art of Thumbnail Design Choosing Best Fonts
- 2024 Approved Uncover These Ten YouTube Sources with the Fastest Growth Rates
- In 2024, How to Change Location on TikTok to See More Content On your Meizu 21 | Dr.fone
- In 2024, The Fast Track to Hot Photos on Pexels
- New In 2024, Animate Like a Pro The Top 7 Drawing Software for Aspiring Animators
- Syncing Scaled Screen Sequences
- Title: 2024 Approved Step-by-Step Adding Captions to YouTube Clips
- Author: Thomas
- Created at : 2024-12-08 11:04:25
- Updated at : 2024-12-09 21:11:37
- Link: https://youtube-help.techidaily.com/2024-approved-step-by-step-adding-captions-to-youtube-clips/
- License: This work is licensed under CC BY-NC-SA 4.0.