"2024 Approved The Investor's Handbook for Monetized Youtubers"
The Investor’s Handbook for Monetized Youtubers
Building a following on a YouTube channel to monetize it can be difficult. It is even more difficult to turn it into a full-time occupation, especially if you are a beginner. So, it makes sense buying monetized YouTube channel. When you buy a monetized YouTube channel, it relieves you of the struggle of churning out high-quality content that connects with an audience. You also get a fully functional stream of generating additional income. In this article, we explore the top sites that offer monetized YouTube channel for sale, giving you an easier start on the platform.
YouTube Monetization Editor A cross-platform for editing any kind of videos and add creative effects to make them more attarctive!
Free Download Free Download Learn More

Part 1. Top 10 Sites to Buy Monetized YouTube Channels
Investing in a pre-existing, monetized YouTube channel is a great idea. It saves you time, allowing you to focus on creating quality content. However, make sure you buy a monetized YouTube channel from a reliable seller. Let’s have a look at the top sites to buy monetized YouTube channels:
1. UseViral
This is one of the best options available to buy monetize YouTube channel. They offer precious monetized YouTube channel packages. Your new channel will be ready for monetization with more than 4,000 watch time hours and a 1,000+ subscriber base.
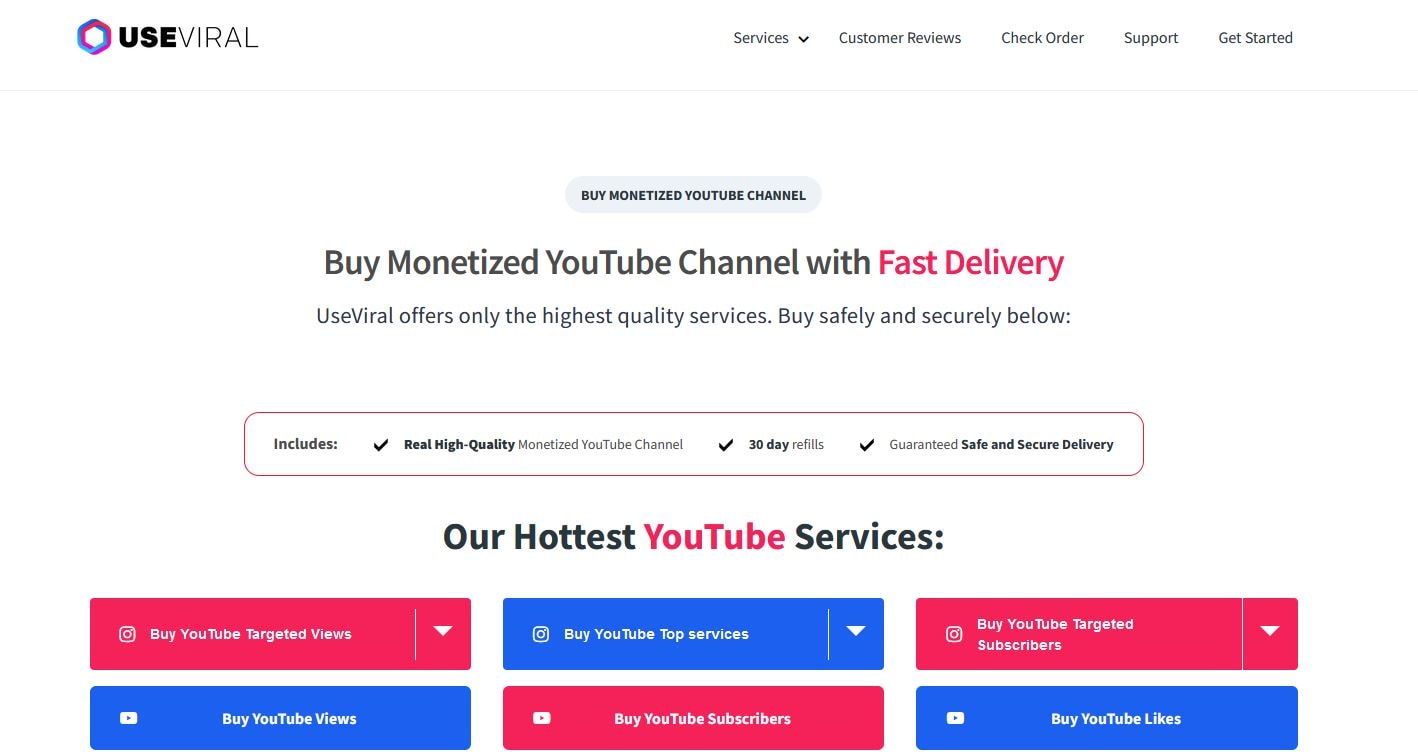
To get your monetized channel, you will be required to fill out a brief questionnaire. Explain your ideal market and video production needs to allow the UseViral team to understand what you are looking for. They let you know what you are paying for any extras.
Price: $599
Customer Rating: 9.5/10
2. SlidesMedia
This is a well-known social media growth strategist that allows you to buy a monetized YouTube channel. The site stands out for offering assistance with growing the YouTube channel and other social media platforms.

SlidesMedia promises to use only human editors on your YouTube channel. They give you a channel with genuine content. You also get the assurance that the content is not bot-generated..
Price: $529 - $2400.
Customer Rating: 9.3/10
3. AudienceGain
AudienceGain is a popular social media marketing platform. They offer a wide range of services, including selling monetized YouTube channels.
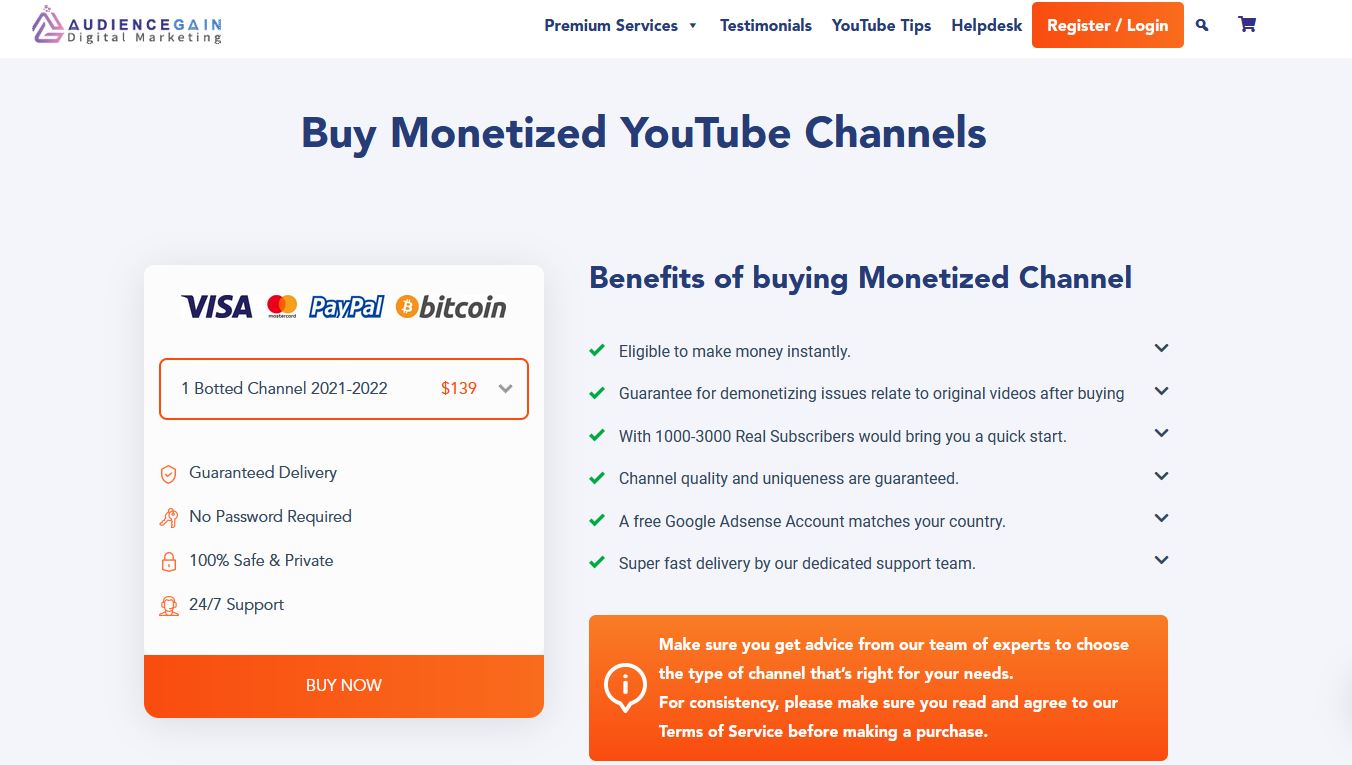
With a proven track record, AudienceGain stands out for offering quality customer service. They support you before, during, and after the purchase. They also provide organically grown channels to make sure you are not demonetized.
Price: $ 129 - $390
Customer Rating: 9.5/10
4. Fameswap
This is a flexible marketplace for selling and buying monetized YouTube channels. The site stands out for being selective in the kind of channels it features.
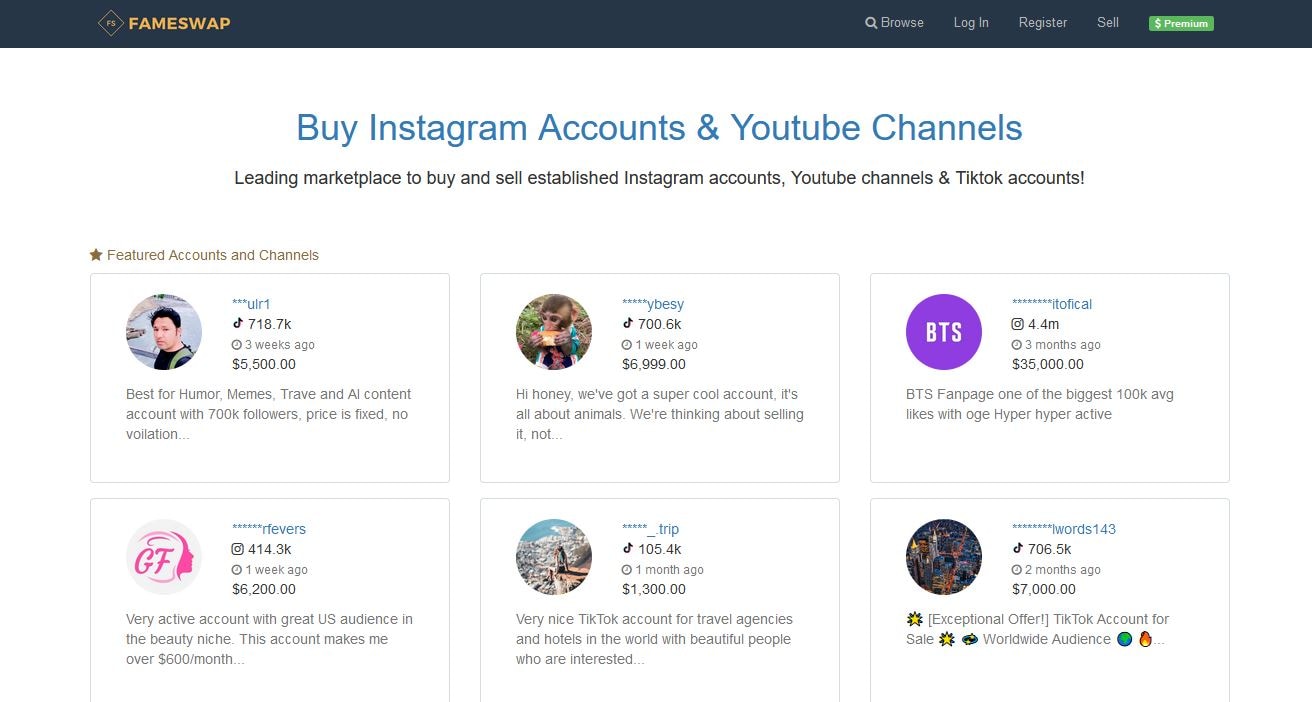
Fameswap offers a safe method of communication between vendors and buyers through an internal messaging system. You can invest in a channel that you are interested in, ranging from topics like fashion and beauty to entertainment and sports.
Price: Customized pricing
Customer Rating: 8.5/10
5. Eazy Viral
Another excellent choice is to buy a monetized YouTube channel. It allows you to choose from numerous channel types. Users also specify the number of subscribers and watch times they want.
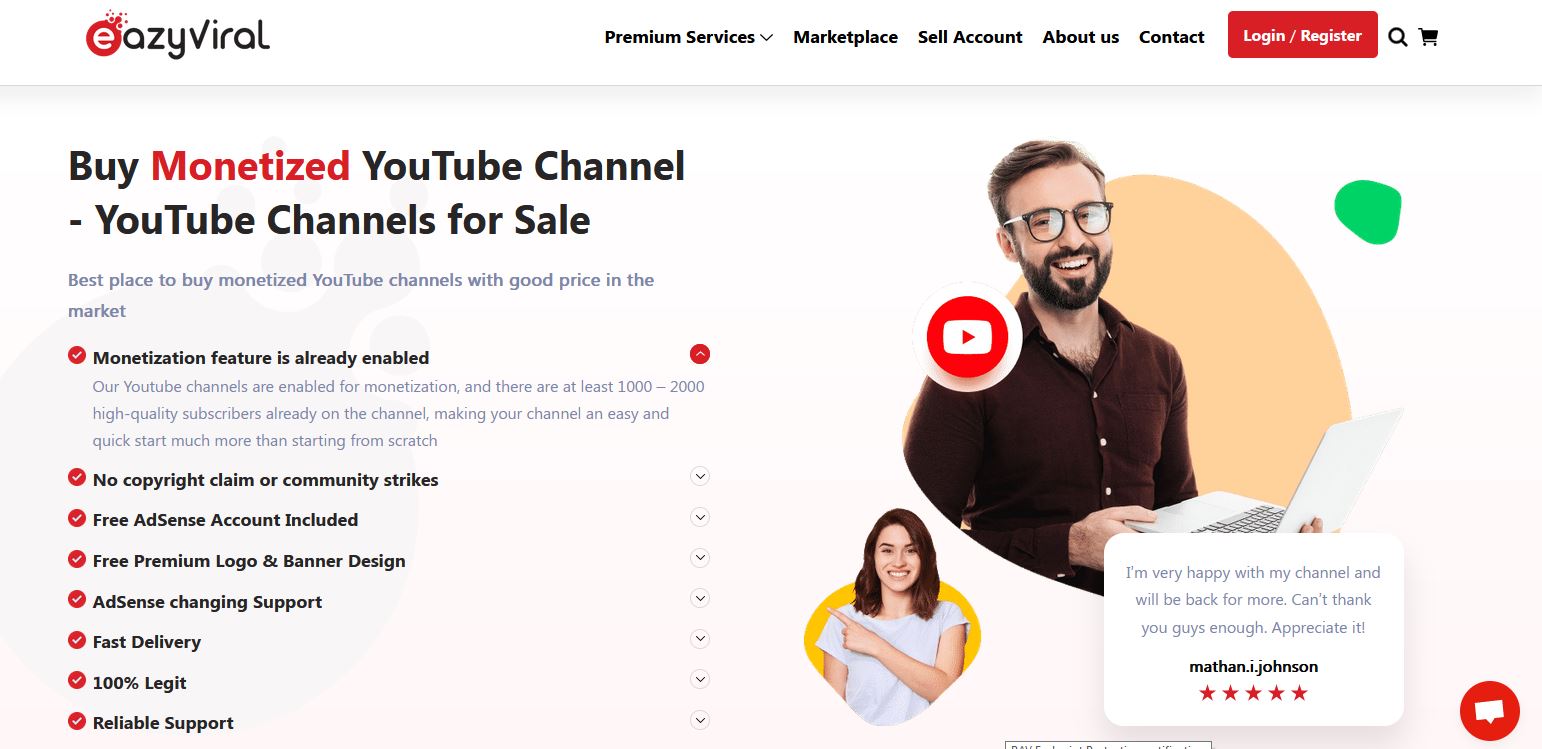
Eazy Viral promises quality content that will not infringe on the rights of others. They also make it simple to monetize your videos and safeguard your AdSense account.
Price: $249 - $1100
Customer Rating: 9/10
6. EazySMM
With EazySMM, you get a unique starting point on your YouTube journey. Choose a YouTube monetized channel for sale on a niche you are interested in at a low price to get started.
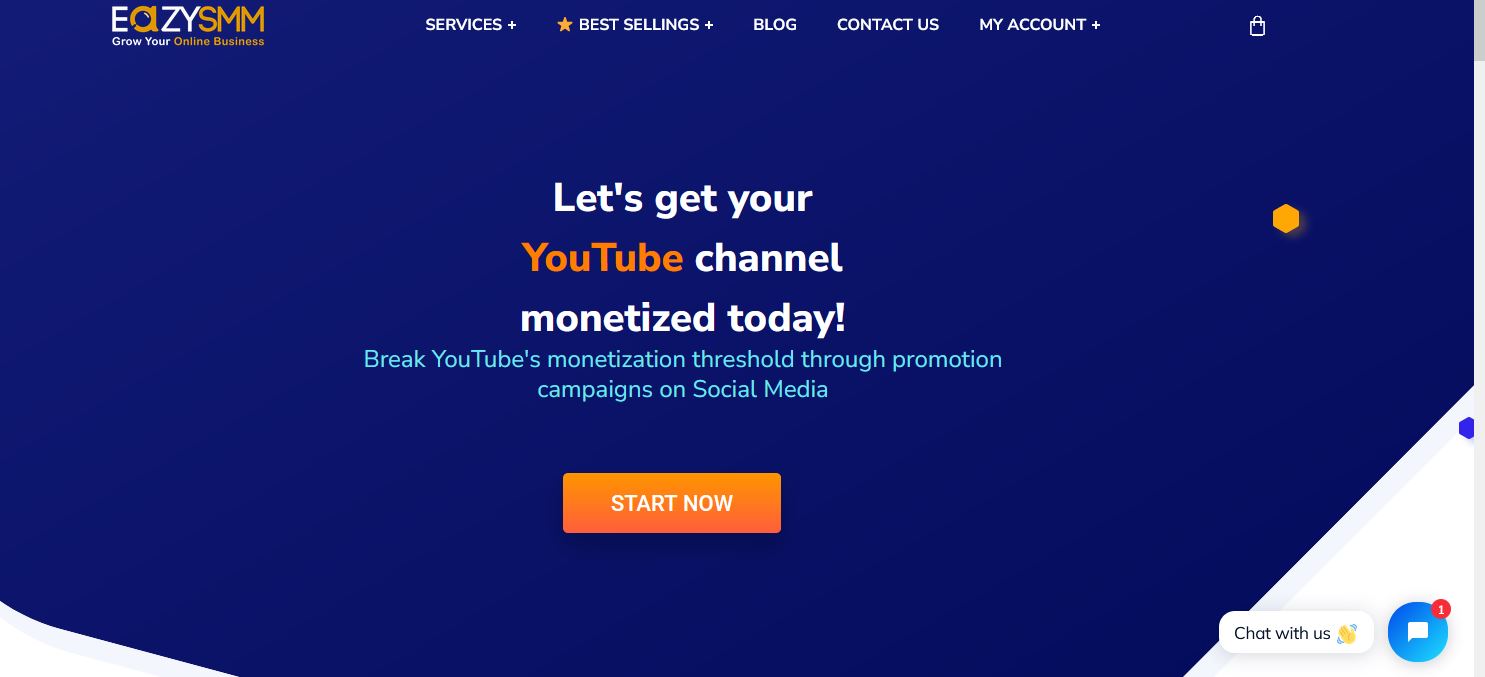
EazySMM watches over its clients to make sure they are growing organically. They promise genuine channel views and subscriptions. Their services are also quick, delivering monetized channels within 12 to 48 hours of the purchase.
Price: Custom Pricing
Customer Rating: 8/10
7. 123accs
This platform allows you to buy YouTube channels that have not yet made money. You can then monetize the channel since it has already met the YouTube Partner Program eligibility criteria.
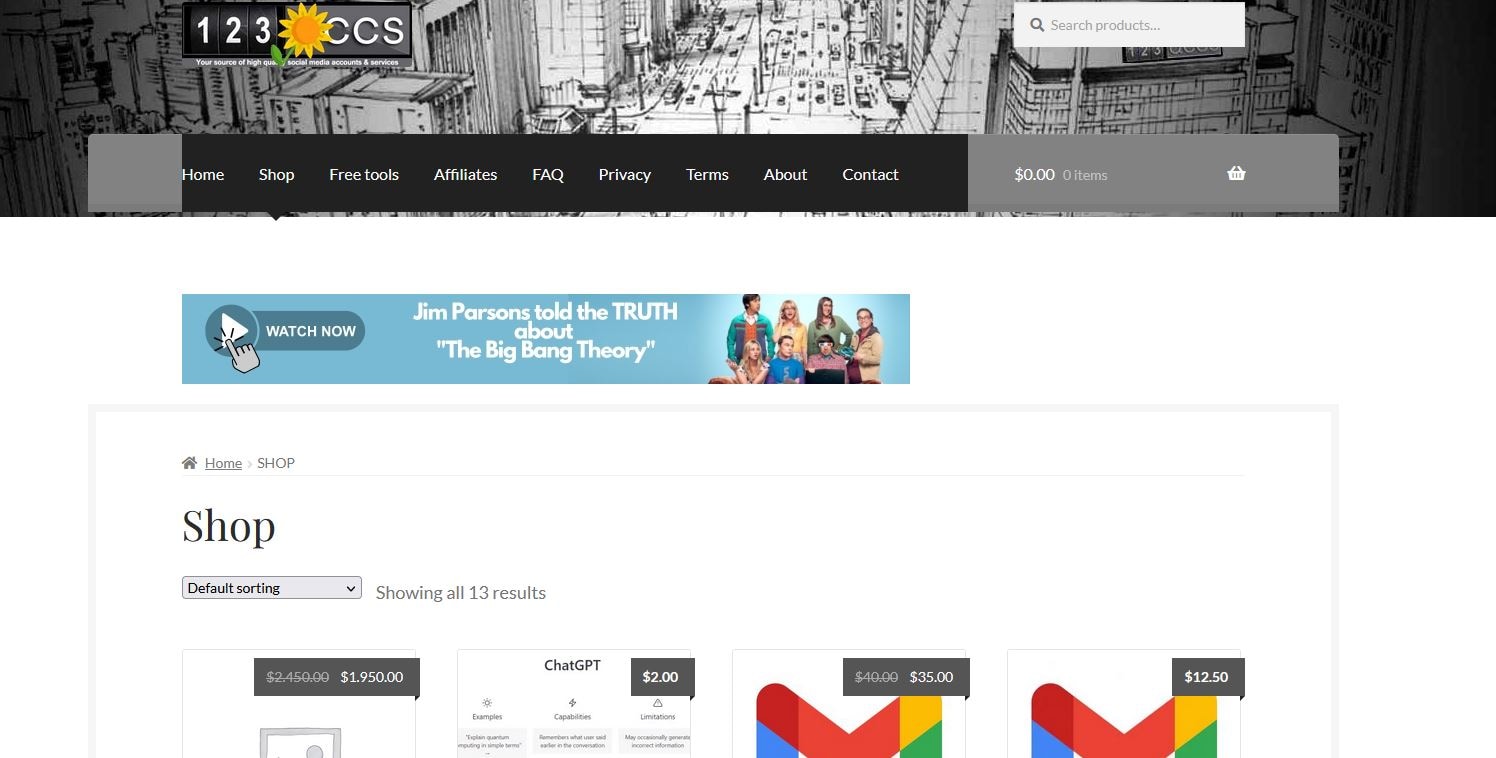
123accs offers new and affordable PVA accounts. Therefore, you can use the service to buy a monetized YouTube channel. Available options include 5 PVA accounts, 25 UK followers, 10 US follower accounts, and more.
Price: Custom Pricing
Customer Rating: 8/10
8. PlayerUp
PlayerUp offers monetized YouTube channels for sale in its marketplace. The platform offers authentic and affordable channels that users can rely on.
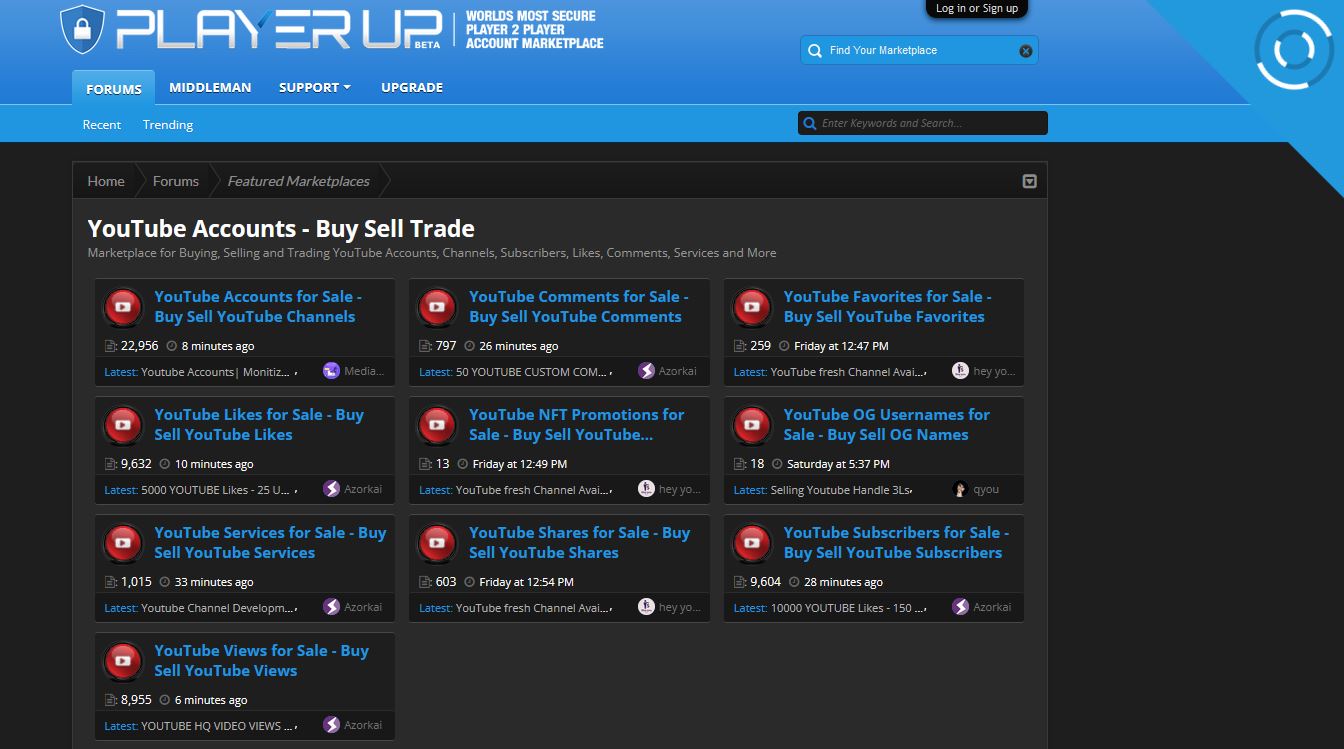
The high quality of the videos posted in the channels under sale will make them stand out in marketing campaigns. This is also a great platform for buying branded content and advanced filters.
Price: Custom Pricing
Customer Rating: 7.5/10
9. Trustiu
This is a great choice for for satisfying shopping experience. The platform makes it easy to purchase YouTube channels almost instantly.

Trustiu stands out for its affordable prices and a wide selection of choices. Users also have the freedom to choose the language they want for their channels.
Price: Custom Pricing
Customer Rating: 7.5/10
10. Accs Market
This social media marketplace allows you to buy monetized YouTube channels in a matter of few steps. Choose channels in entertainment of lifestyle niches.
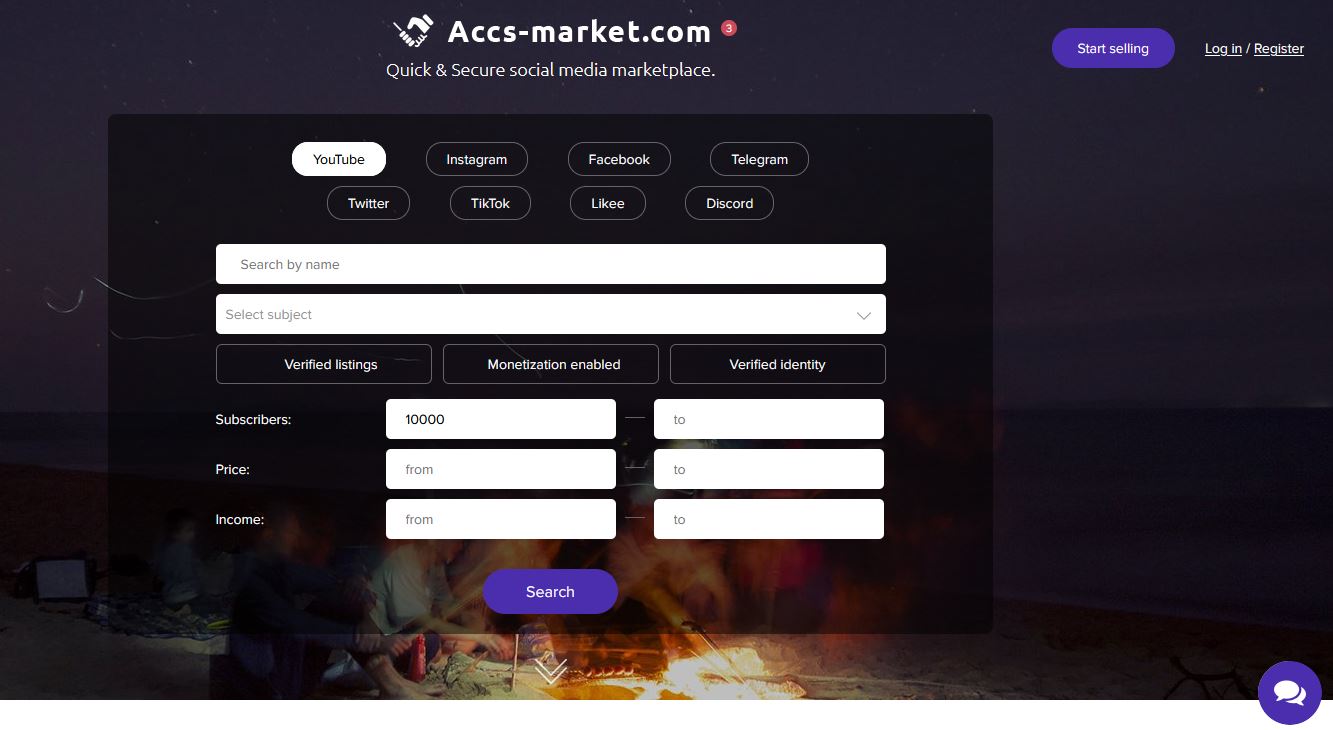
Accs market offers an affordable option for any type of video genre for sellers. From TV shows to movies, Accs Market has something for you.
Part 2. Editing YouTube Videos for Monetization with Wondershare Filmora
In addition to buying a monetized YouTube channel, you will need to create quality videos to remain relevant. This requires good video editing software. With Wondershare Filmora, you can edit any kind of video and add creative effects to make it more interesting. With the option to edit on your desktop or phone on the go, the software gives you more versatility.
Free Download For Win 7 or later(64-bit)
Free Download For macOS 10.14 or later
Wondershare offers a wide range of features that make video editing fun and easy. From automation tools to video enhancement, you can do a lot to your video on the same platform. The most useful features for YouTube monetization include:
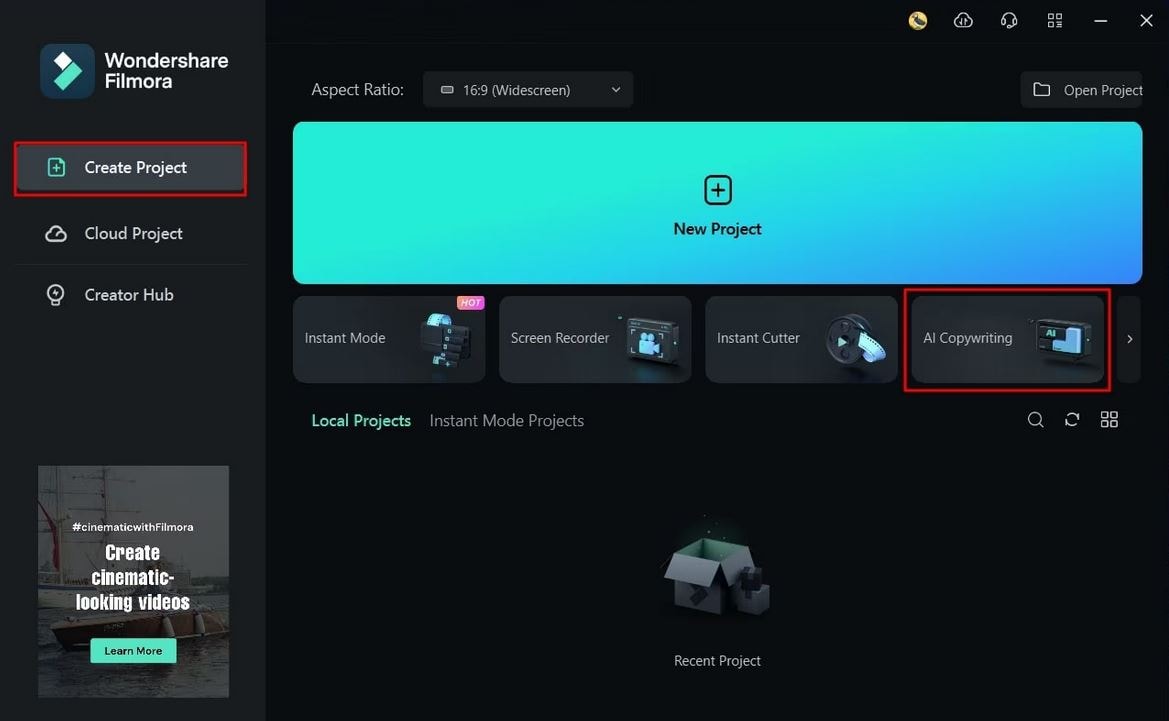
1. AI Copywriting
This feature integrates the ChatGPT API, allowing you to get inspiration through AI-generating scripts. You can also generate text during video editing, as well as YouTube Titles and Descriptions.
2. Auto Synchronization
The auto-synchronization feature allows you to effortlessly match your audio with the video. This makes it sound more clear and gives your audience a better watching experience.

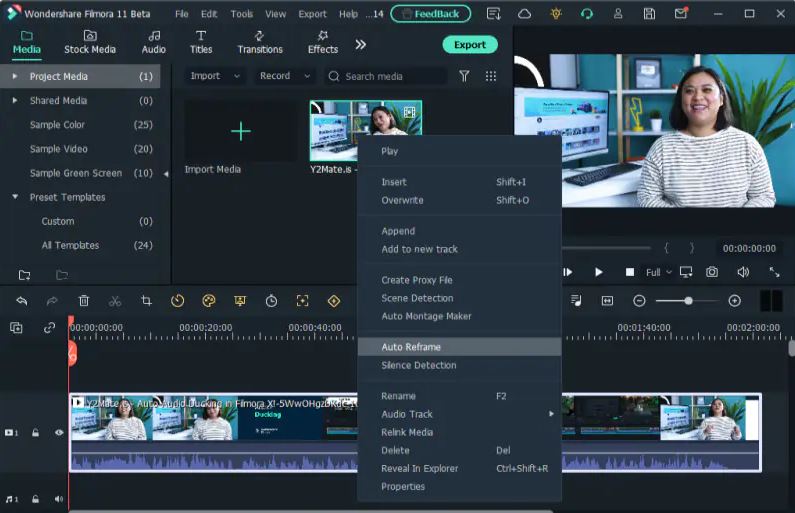
3. Auto Reframe
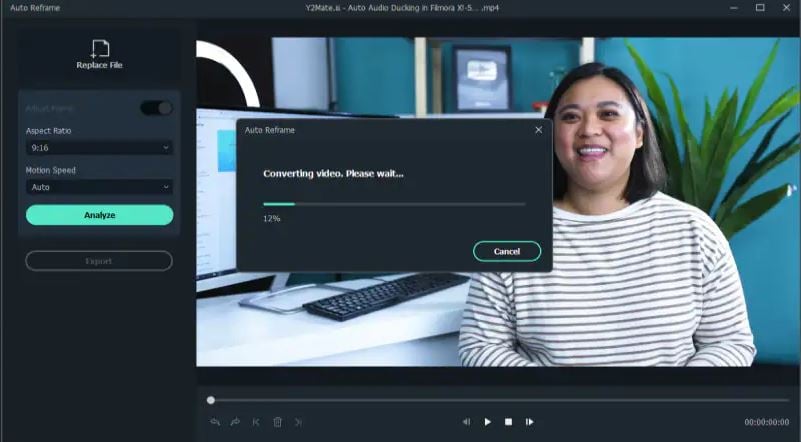
With the rise of YouTube Shorts, reframing your videos is now more of a necessity than an option. You need to appeal to both YouTube viewers and those who consume content in the vertical orientation. The Filmora Auto Reframe feature allows you to automatically resize your videos with no editing skills needed. To use this feature:
Step 1Start the Auto Reframe Feature
One of the ways is by clicking on the Auto Reframe option when you launch Filmora. The other option is to import the media and right-click on it to find the Auto Reframe feature.
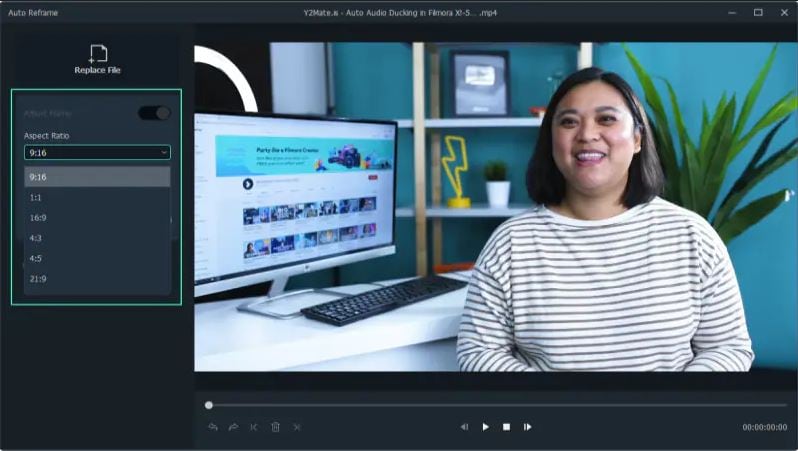
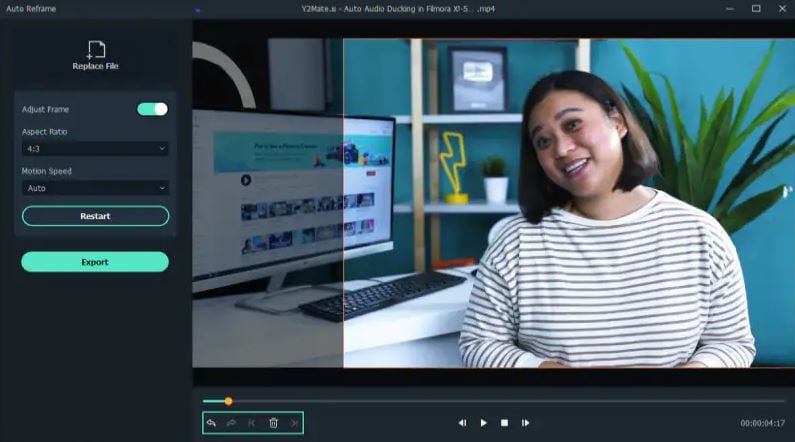
Step 2Adjust the Aspect Ratio and Motion Speed
Define the aspect ratio in the dialogue box that opens. A widescreen has an aspect ratio of 16:9 while a vertical one is 9:16.
Step 3Analyze and Auto Reframe the Video
After adjusting the settings, tap on the Analysis option. This will prompt Filmora to analyze your video for completion. The video will be automatically reframed to your specified aspect ratio and speed.
Step 4Preview and Export the Reframed Video
You can now preview the final video to make sure it runs as desired. Make any changes if necessary, and export the reframed video in MP4 format, ready for uploading to YouTube.
Conclusion
The first step to running a successful channel is to be accepted into the YouTube Partner Program. However, building a YouTube Channel from 0 views to meet the eligibility status can be difficult. That’s why buying a monetized YouTube channel is a great place to start. You will only need to focus on creating highly engaging content to continue earning and growing your channel. To ensure that the content you create is of high quality, we recommend using Wondershare Filmora. The video editing software comes with fantastic features that help you create great videos for your channel.
Free Download Free Download Learn More
Part 1. Top 10 Sites to Buy Monetized YouTube Channels
Investing in a pre-existing, monetized YouTube channel is a great idea. It saves you time, allowing you to focus on creating quality content. However, make sure you buy a monetized YouTube channel from a reliable seller. Let’s have a look at the top sites to buy monetized YouTube channels:
1. UseViral
This is one of the best options available to buy monetize YouTube channel. They offer precious monetized YouTube channel packages. Your new channel will be ready for monetization with more than 4,000 watch time hours and a 1,000+ subscriber base.
To get your monetized channel, you will be required to fill out a brief questionnaire. Explain your ideal market and video production needs to allow the UseViral team to understand what you are looking for. They let you know what you are paying for any extras.
Price: $599
Customer Rating: 9.5/10
2. SlidesMedia
This is a well-known social media growth strategist that allows you to buy a monetized YouTube channel. The site stands out for offering assistance with growing the YouTube channel and other social media platforms.
SlidesMedia promises to use only human editors on your YouTube channel. They give you a channel with genuine content. You also get the assurance that the content is not bot-generated..
Price: $529 - $2400.
Customer Rating: 9.3/10
3. AudienceGain
AudienceGain is a popular social media marketing platform. They offer a wide range of services, including selling monetized YouTube channels.
With a proven track record, AudienceGain stands out for offering quality customer service. They support you before, during, and after the purchase. They also provide organically grown channels to make sure you are not demonetized.
Price: $ 129 - $390
Customer Rating: 9.5/10
4. Fameswap
This is a flexible marketplace for selling and buying monetized YouTube channels. The site stands out for being selective in the kind of channels it features.
Fameswap offers a safe method of communication between vendors and buyers through an internal messaging system. You can invest in a channel that you are interested in, ranging from topics like fashion and beauty to entertainment and sports.
Price: Customized pricing
Customer Rating: 8.5/10
5. Eazy Viral
Another excellent choice is to buy a monetized YouTube channel. It allows you to choose from numerous channel types. Users also specify the number of subscribers and watch times they want.
Eazy Viral promises quality content that will not infringe on the rights of others. They also make it simple to monetize your videos and safeguard your AdSense account.
Price: $249 - $1100
Customer Rating: 9/10
6. EazySMM
With EazySMM, you get a unique starting point on your YouTube journey. Choose a YouTube monetized channel for sale on a niche you are interested in at a low price to get started.
EazySMM watches over its clients to make sure they are growing organically. They promise genuine channel views and subscriptions. Their services are also quick, delivering monetized channels within 12 to 48 hours of the purchase.
Price: Custom Pricing
Customer Rating: 8/10
7. 123accs
This platform allows you to buy YouTube channels that have not yet made money. You can then monetize the channel since it has already met the YouTube Partner Program eligibility criteria.
123accs offers new and affordable PVA accounts. Therefore, you can use the service to buy a monetized YouTube channel. Available options include 5 PVA accounts, 25 UK followers, 10 US follower accounts, and more.
Price: Custom Pricing
Customer Rating: 8/10
8. PlayerUp
PlayerUp offers monetized YouTube channels for sale in its marketplace. The platform offers authentic and affordable channels that users can rely on.
The high quality of the videos posted in the channels under sale will make them stand out in marketing campaigns. This is also a great platform for buying branded content and advanced filters.
Price: Custom Pricing
Customer Rating: 7.5/10
9. Trustiu
This is a great choice for for satisfying shopping experience. The platform makes it easy to purchase YouTube channels almost instantly.
Trustiu stands out for its affordable prices and a wide selection of choices. Users also have the freedom to choose the language they want for their channels.
Price: Custom Pricing
Customer Rating: 7.5/10
10. Accs Market
This social media marketplace allows you to buy monetized YouTube channels in a matter of few steps. Choose channels in entertainment of lifestyle niches.
Accs market offers an affordable option for any type of video genre for sellers. From TV shows to movies, Accs Market has something for you.
Part 2. Editing YouTube Videos for Monetization with Wondershare Filmora
In addition to buying a monetized YouTube channel, you will need to create quality videos to remain relevant. This requires good video editing software. With Wondershare Filmora, you can edit any kind of video and add creative effects to make it more interesting. With the option to edit on your desktop or phone on the go, the software gives you more versatility.
Free Download For Win 7 or later(64-bit)
Free Download For macOS 10.14 or later
Wondershare offers a wide range of features that make video editing fun and easy. From automation tools to video enhancement, you can do a lot to your video on the same platform. The most useful features for YouTube monetization include:
1. AI Copywriting
This feature integrates the ChatGPT API, allowing you to get inspiration through AI-generating scripts. You can also generate text during video editing, as well as YouTube Titles and Descriptions.
2. Auto Synchronization
The auto-synchronization feature allows you to effortlessly match your audio with the video. This makes it sound more clear and gives your audience a better watching experience.
3. Auto Reframe
With the rise of YouTube Shorts, reframing your videos is now more of a necessity than an option. You need to appeal to both YouTube viewers and those who consume content in the vertical orientation. The Filmora Auto Reframe feature allows you to automatically resize your videos with no editing skills needed. To use this feature:
Step 1Start the Auto Reframe Feature
One of the ways is by clicking on the Auto Reframe option when you launch Filmora. The other option is to import the media and right-click on it to find the Auto Reframe feature.
Step 2Adjust the Aspect Ratio and Motion Speed
Define the aspect ratio in the dialogue box that opens. A widescreen has an aspect ratio of 16:9 while a vertical one is 9:16.
Step 3Analyze and Auto Reframe the Video
After adjusting the settings, tap on the Analysis option. This will prompt Filmora to analyze your video for completion. The video will be automatically reframed to your specified aspect ratio and speed.
Step 4Preview and Export the Reframed Video
You can now preview the final video to make sure it runs as desired. Make any changes if necessary, and export the reframed video in MP4 format, ready for uploading to YouTube.
Conclusion
The first step to running a successful channel is to be accepted into the YouTube Partner Program. However, building a YouTube Channel from 0 views to meet the eligibility status can be difficult. That’s why buying a monetized YouTube channel is a great place to start. You will only need to focus on creating highly engaging content to continue earning and growing your channel. To ensure that the content you create is of high quality, we recommend using Wondershare Filmora. The video editing software comes with fantastic features that help you create great videos for your channel.
Key Lights and Soft Shadows for Vloggers
Lighting Tips for Vlogging: How to Light

Richard Bennett
Mar 27, 2024• Proven solutions
One of the best things you can do for your video quality is to ensure you have great lighting. Viewers find poor lighting distracting and it’s hard for them to see how great your content is if they are busy thinking about why your video is so dark. By creating a great lighting set up you can ensure that the people watching your videos are only thinking about how much they’re enjoying them.
Going outside and using natural light is the cheapest way to get a lot of light for your videos. If your vlog is not suited to the great outdoors then you need to get more strategic. You can turn on all the lights in your living room and still end up with a dark, grainy, video.
Video Lighting Basics: Three Point Lighting

The most common technique of lighting a scene is called three-point lighting. It involves three different sources of light in the shot and is used by portrait photographers, which is also a great method for lighting your vlog.
The brightest source of light is also known as the key light which need to be high quality. A window will work, but if you do not have access to one where you are filming then consider an LED panel light or a softbox light like the ones used in portrait photography.
This first light will create a dramatic shadow across half of your face. You want to reduce this shadow, but not get rid of it completely.
Rather than setting up another light source on the opposite side of the camera, put up a reflector to bounce some light back onto your face. This reflector is called your ‘Fill Light’.
The fill light is less bright than the primary source of light and it is placed on the side opposite to the key light. Its purpose is to reduce shadows produced by the key light and the reflector will need to be mounted on a stand.
The final step to creating three point lighting is to set up another light behind you. This is your ‘Backlight’, and it will help you stand out from your background. Backlight or Hair light is always placed behind and above the subject to create separation between the subject in the shot and the background. This basic lighting technique can be applied in almost every scene you shoot, which is why it is important to keep an open mind and to continue experimenting with possible light setups.
Watch Video! Top Lighting Tips for Vlogging
Lightning Tips for Aspiring YouTube Videographers
Becoming the master of light will take some time and practice, so it is crucial to remain curious and anxious to learn new tricks throughout that process if you want to continually become better. These tips will help you make the first steps on that journey.
1. Focus Your Key Light
Try to focus your Key Light so that it lights only you and not your background. Do this by mounting anything that can cast a shadow onto your Key Light to control the area where the light hits. If you are using a window for your Key Light then you can use a curtain. If you use a softbox light then your light will already be somewhat focused.
2. Use Natural Lighting
The light provided by the Sun is still the best light source, you can have in your video. The trouble is that natural light changes quickly, which makes it highly unpredictable. The best way to deal with this challenge is to come prepared to the set and to get the shot you want as quickly as you can.
3. Try DIY Lightning
Literally, anything from candles to LED light bulbs can serve as a source of light in a shot. You just need to pay attention to the light temperature, because warmer light sources may highlight reds and yellows that can make your footage look less realistic.
4. Use Lightning Kits
This is by far the best option if you want to be in complete control of the light on your set. You can adjust the intensity of the lights, use filters, diffusers and all sorts of other accessories to create the light that flatters the subjects of your videos. The only downside is that you’ll have to spend a considerable amount of money if you want to have a professional lighting kit.
5. Set up reflectors
Sets of reflectors are often under $50, so they are fairly affordable. However, some vloggers choose to forgo purchasing reflectors and make their own out of tinfoil.

If your strong main light is too hard on your eyes then you can use a translucent ‘reflector’ to soften it. Set your translucent reflector, or other screen, up in front of your main light to diffuse it.
If you are hosting a beauty vlog then you might consider a slightly different set up. Instead of having your main light off to one side set it up directly in front of you so your entire face is lit evenly. It is still a good idea to use fill lights in this set up to give you some dimension, and a backlight is even more essential for helping you stand out from the background. The even light hitting your face will also make you look flat if you do not use a backlight.

If you are using all of the lighting options available to you and your video still looks too dark then you can try brightening it by opening up the aperture of your camera lens/setting a lower f-stop. Letting more light into your camera can help your footage look brighter, although you also run the risk of making things look overexposed/ washed out if you are not careful.
If you are stuck shooting in low light conditions it is best to use a lens with a wider aperture/lower f-stop. This will make the best of the light you do have.
Richard Bennett
Richard Bennett is a writer and a lover of all things video.
Follow @Richard Bennett
Richard Bennett
Mar 27, 2024• Proven solutions
One of the best things you can do for your video quality is to ensure you have great lighting. Viewers find poor lighting distracting and it’s hard for them to see how great your content is if they are busy thinking about why your video is so dark. By creating a great lighting set up you can ensure that the people watching your videos are only thinking about how much they’re enjoying them.
Going outside and using natural light is the cheapest way to get a lot of light for your videos. If your vlog is not suited to the great outdoors then you need to get more strategic. You can turn on all the lights in your living room and still end up with a dark, grainy, video.
Video Lighting Basics: Three Point Lighting
The most common technique of lighting a scene is called three-point lighting. It involves three different sources of light in the shot and is used by portrait photographers, which is also a great method for lighting your vlog.
The brightest source of light is also known as the key light which need to be high quality. A window will work, but if you do not have access to one where you are filming then consider an LED panel light or a softbox light like the ones used in portrait photography.
This first light will create a dramatic shadow across half of your face. You want to reduce this shadow, but not get rid of it completely.
Rather than setting up another light source on the opposite side of the camera, put up a reflector to bounce some light back onto your face. This reflector is called your ‘Fill Light’.
The fill light is less bright than the primary source of light and it is placed on the side opposite to the key light. Its purpose is to reduce shadows produced by the key light and the reflector will need to be mounted on a stand.
The final step to creating three point lighting is to set up another light behind you. This is your ‘Backlight’, and it will help you stand out from your background. Backlight or Hair light is always placed behind and above the subject to create separation between the subject in the shot and the background. This basic lighting technique can be applied in almost every scene you shoot, which is why it is important to keep an open mind and to continue experimenting with possible light setups.
Watch Video! Top Lighting Tips for Vlogging
Lightning Tips for Aspiring YouTube Videographers
Becoming the master of light will take some time and practice, so it is crucial to remain curious and anxious to learn new tricks throughout that process if you want to continually become better. These tips will help you make the first steps on that journey.
1. Focus Your Key Light
Try to focus your Key Light so that it lights only you and not your background. Do this by mounting anything that can cast a shadow onto your Key Light to control the area where the light hits. If you are using a window for your Key Light then you can use a curtain. If you use a softbox light then your light will already be somewhat focused.
2. Use Natural Lighting
The light provided by the Sun is still the best light source, you can have in your video. The trouble is that natural light changes quickly, which makes it highly unpredictable. The best way to deal with this challenge is to come prepared to the set and to get the shot you want as quickly as you can.
3. Try DIY Lightning
Literally, anything from candles to LED light bulbs can serve as a source of light in a shot. You just need to pay attention to the light temperature, because warmer light sources may highlight reds and yellows that can make your footage look less realistic.
4. Use Lightning Kits
This is by far the best option if you want to be in complete control of the light on your set. You can adjust the intensity of the lights, use filters, diffusers and all sorts of other accessories to create the light that flatters the subjects of your videos. The only downside is that you’ll have to spend a considerable amount of money if you want to have a professional lighting kit.
5. Set up reflectors
Sets of reflectors are often under $50, so they are fairly affordable. However, some vloggers choose to forgo purchasing reflectors and make their own out of tinfoil.
If your strong main light is too hard on your eyes then you can use a translucent ‘reflector’ to soften it. Set your translucent reflector, or other screen, up in front of your main light to diffuse it.
If you are hosting a beauty vlog then you might consider a slightly different set up. Instead of having your main light off to one side set it up directly in front of you so your entire face is lit evenly. It is still a good idea to use fill lights in this set up to give you some dimension, and a backlight is even more essential for helping you stand out from the background. The even light hitting your face will also make you look flat if you do not use a backlight.
If you are using all of the lighting options available to you and your video still looks too dark then you can try brightening it by opening up the aperture of your camera lens/setting a lower f-stop. Letting more light into your camera can help your footage look brighter, although you also run the risk of making things look overexposed/ washed out if you are not careful.
If you are stuck shooting in low light conditions it is best to use a lens with a wider aperture/lower f-stop. This will make the best of the light you do have.
Richard Bennett
Richard Bennett is a writer and a lover of all things video.
Follow @Richard Bennett
Also read:
- [New] Maximizing Vimeo Videos Sharing Strategies
- [New] Premium Cutters The 8 Must-Have Linux Apps
- [New] Strategic Income Generation Through YouTube, As Per Sourav Joshi's Playbook
- 2024 Approved Scrutinizing the Economics Behind Short Video Earnings
- Comprehensive Guide: Eliminating Constant Failures in Mobile Gameplay for World of Tanks Blitz
- Easy Methods for Downloading & Upgrading Microsoft Surface's Essential Drivers
- Enhancing Social Interactions: Invite to Facebook Messaging
- In 2024, How to Mirror Lava Blaze 2 to Mac? | Dr.fone
- In 2024, Maximize Screen TV Playback for YouTube Clips
- In 2024, The Art of Video Edits Easy Techniques on Your Windows PC
- Will the iPogo Get You Banned and How to Solve It On Motorola Edge 2023 | Dr.fone
- Title: 2024 Approved The Investor's Handbook for Monetized Youtubers
- Author: Thomas
- Created at : 2025-01-06 16:32:04
- Updated at : 2025-01-10 16:36:58
- Link: https://youtube-help.techidaily.com/2024-approved-the-investors-handbook-for-monetized-youtubers/
- License: This work is licensed under CC BY-NC-SA 4.0.