

"2024 Approved Top 5 YouTube Video Marketing Strategies"
Top 5 YouTube Video Marketing Strategies
YouTube is undoubtedly the most famous video sharing platform in the world. More than 5 billion videos are watched every single minute on YouTube. And the ever-growing user base has propelled YouTube to the status of 2nd most popular social media platform in the world, and the second most visited website after Google in 2021.
YouTube marketing is great for both businesses and individuals who want to make careers out of YouTube. Many businesses make use of YouTube ads to get their products to their customers and it’s really effective. However, you can make more organic traffic using YouTube video marketing. With a successful YouTube video marketing strategy, you can generate leads without any ad investments.
And in this guide, we will discuss some YouTube video marketing tips that will help you get more subscribers and build your brand outreach.
Tip #1: Create A Roadmap Leading To Your Main Goal
A roadmap is basically a level by level approach to your vision. Instead of just looking at the end plan, you are building your platform up through short attainable goals. There is immense power in setting short term goals. Some serious questions that you should ask yourself are:
Step 1: Start with the question of why you need a YouTube channel in the first place! Decide on what your channel should be about and how the viewers are going to benefit from it.
Step 2: The next step is to prepare a content plan. Here must decide the type of videos and how often it will be published on your channel.
Step 3: What is your target in terms of subscribers and traffic conversion. Do you plan to take the audience to a separate landing or are you planning on making money solely from YouTube?
Planning out such specifics will help you build your platform gradually to the main goal.
Tip #2: Do tests within your strategy
Understanding the audience preferences is paramount to the success of YouTube channels. There are some important tests that you can do to understand the genre that you are targeting.
a. Test video duration
Nobody likes to see a 2 hour long YouTube video unless it’s super interesting. Thankfully, there have been studies that have been conducted to measure the audience reaction to videos of different lengths.
By default, when you create a YouTube account, the maximum upload length is restricted to just 15 minutes. You can go past this limit by verifying your account on YouTube.
When you look at the most trending videos on YouTube, they generally fall within 10 minutes. The average video size on YouTube is 4.4 minutes .
For example, let us look at YouTube videos that explain the same concept, but with different video lengths and see if the audience engagement differs with the videos. we have ensured that both videos are from channels who have a similar subscriber count in order to eliminate disproportionality that arises from viewer base.
This video gives an excellent explanation of the string theory. The Video is From TED-Ed and you can see the audience response in the comments where they praise Physicist Brian Greene for his talk. Note that the video has 2.4 million views.
Now, look at the above video that explains String Theory in less than half the time from TED-Ed. Notice how the video has more than four times the views with an impressive 10 million views. It comes to show that if you can condense your content in such a way that you can get the maximum meaning across in minimum time, you will rack up more views!
b. Test different formats/scenarios
Having a monotonous nature throughout your videos can be quite tiring for the viewer after some time. Make sure to mix things up a bit by introducing new types of video formats or scenarios that keeps the users engaged.
Such a format change will also be invaluable in testing the audience reaction to the different types of videos that you make. These new formats can be in the form of a separate video series that is different from your main content. It can also be something that directly engages the viewers like a live video stream, Ask Me Anything or Q&A type of content, etc.
For example, let us take one among the most popular cooking channels on YouTube – Tasty. If you were to browse through their content, you can see how they got their fame with cookery videos that are short and sweet like the one below:
However, they do not just stick to that same format all the time. you can also see how they mix in lengthier videos of different format. For example:
And many videos that aren’t specifically cooking at all!
And it is evident that these new formats have also become crowd favorites. Now do all their videos hit the 1 million mark? No, that just shows they are constantly testing out the waters go ahead with what works and discard what doesn’t!
c. Try Giveaways and gifts
You can boost the viewership and subscriber count for your channel by setting up occasional giveaways or gifts to the viewers. Make sure that you set the winning criteria to have the viewers subscribe to the channel.
For example, let’s take another popular YouTube channel Unbox Therapy. On Jun 27, 2018, the channel did an announcement that they were giving 106 OnePlus 6 smartphones!
And the result of the announcement was evident in the subscribers count.
From June 23rd to June 27th, 2018, Unbox therapy had gained 12,583 subscribers. However, from the announcement date that is June 27th to June 30th, 2018, the channel saw an increase of a whopping 52,173 subscribers ! Till date, the video has over 14 million views
We do not advise you to try this out when you are just starting your YouTube career. Only venture out to such investments when you are stable when it comes to earnings.
Tip#3: Ask your audience for Feedback
All your videos must be created with the audience in mind. However, sometimes what you may think would work might not fit well with the audience. Hence, it is imperative that you understand their likes and dislikes.
And the best way to improve your videos is to take suggestions from the audience themselves. You can ask them specific questions on how to improve your videos or what they want to see in your future creations. Take notes on what they have to offer and start building your content taking in those suggestions.
There is also another facet to incorporating audience feedback as it projects your YouTube channel to be responsive to the audience, something that is vital to building a strong and loyal viewer base on YouTube.
Tip #4: Analyse your YouTube videos traffic sources
YouTube has made it easier for you to track the sources from which your videos are getting the views. Sign in to YouTube Studio Beta and the click Reach from the Analytics menu provided on the left panel. Now click on Traffic source types.
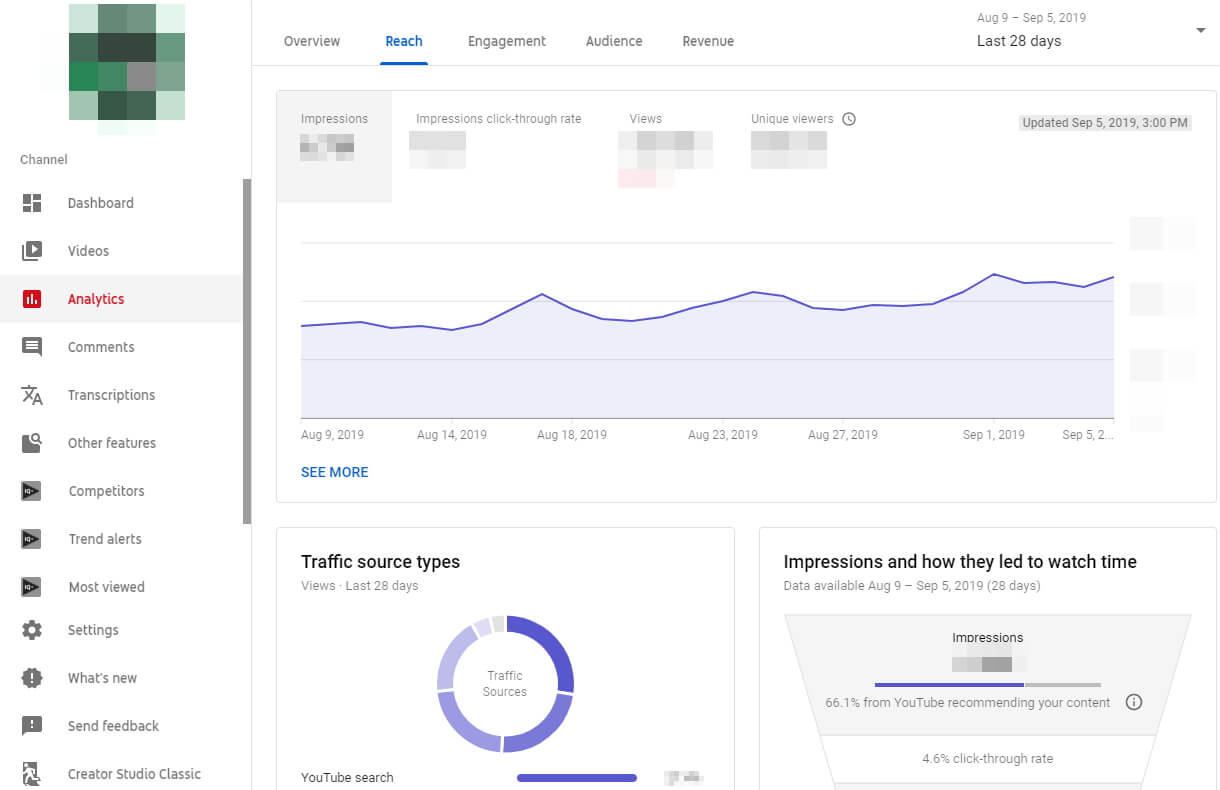
In this window, you can see the different sources that led viewers to your video. Generally, it can be a mix of websites, YouTube recommendation’s, YouTube search, etc. Metrics like Watch Time gives you an idea of how long viewers watch your videos and Audience Retention shows how consistent they are at watching them. These are just two of the many metrics you can use to your advantage.
Analyzing YouTube videos will help you structure your future videos in a way that it is more susceptible to being clicked.
Tip #5: Track the effectiveness of your videos
You must have an eye on the metrics that your videos garner over the days. While the number of views, likes, and dislikes are great indicators in determining the popularity of the videos, but there are many more factors at play.
Your video ranking is important as it determines the position of your videos when a keyword is typed into the search box. The ranks are calculated by the YouTube algorithm, but you have a certain degree of power in raising the ranks by leveraging the following parameters of the video;
Thumbnail: The first thing that the viewer is going it see when they are browsing through a list of videos is the thumbnail. Make sure that it is attractive and stands out!
Title: The next element that gets the most attention from both the user and the YouTube algorithm is the title. Ensure that the main keyword you are targeting is included in the title.
Description: This is where you can play a lot with keywords, both short and long tail. Be very descriptive about your video, but do not just use a big chunk of text. The description must be succinct and informative. It can also have links to your landing page or sponsors.
Tags: Tags are words or phrases that are used to help YouTube better understand the video. Make sure the tags that you are giving are related to the video that they represent.
Category: YouTube has some predefined categories and the videos that you upload must be put in the right one to get maximum reach.
Subtitles: Subtitles do not carry much weight in terms of SEO or ranking, but they are a much-appreciated addition in the audience point of view.
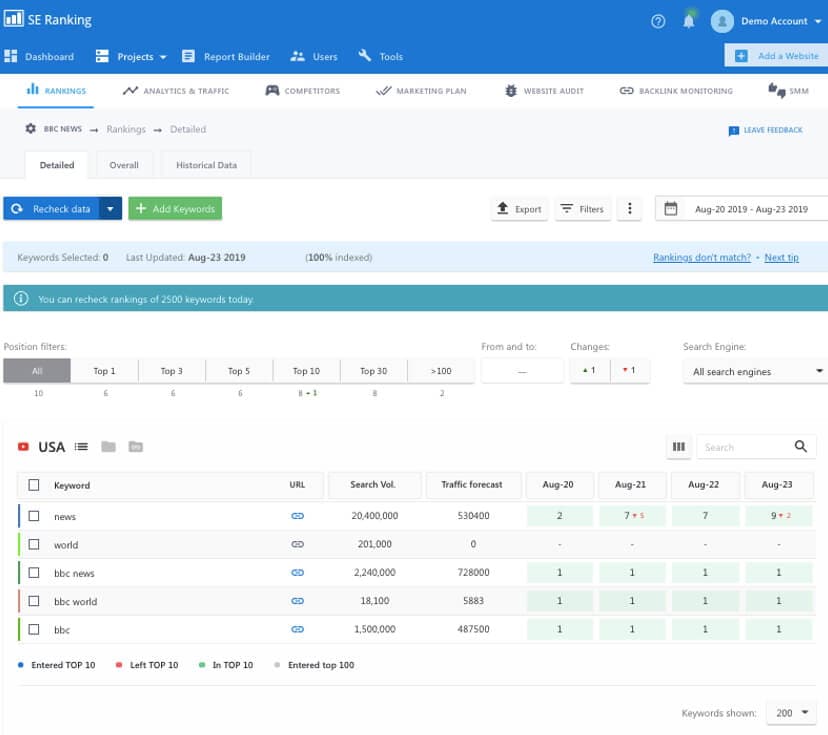
Yes, it can be quite meticulous but the results are worth the effort. Having a rank tracker like the one from SE Ranking or Tubebuddy can be quite handy at times like these. The software basically tracks everything about your videos and presents them in a neatly organized dashboard, which is cuts the effort significantly for YouTube marketers.
Do not leave the video by itself to garner views, it often fails to register any results because elements like the title, description and the keywords play an important role in getting the videos to the users.
You may also like: How to Convert YouTube to MP4 Safely? [Step by Step Guide] >>
Tip #6: Choose a suitable video creator
Creating attractive videos is a key to make success in Youtube video marketing. So you will need to have a suitable video editor to help you. There are quite a few choices in marketing now, such as Adobe Premiere Pro. However, there is a better choice for most average users - Filmora Video Editor , which provides powerful video editing features and huge transitions, effects, and filters resources.
To know more about Filmora Video Editor, visit its page: https://filmora.wondershare.com/video-editor/

Conclusion
YouTube marketing has evolved over the years to a point where you need a carefully crafted plan to have a successful YouTube career. In this guide, we have mentioned some useful YouTube marketing tips that will help you alo12ng the way.
The greatest takeaway from this guide should be that you must be patient and have persistence. Do not stop what you are doing just because you didn’t see any results on day one. Keep the fire burning and you will reach there in no time!
This video gives an excellent explanation of the string theory. The Video is From TED-Ed and you can see the audience response in the comments where they praise Physicist Brian Greene for his talk. Note that the video has 2.4 million views.
Now, look at the above video that explains String Theory in less than half the time from TED-Ed. Notice how the video has more than four times the views with an impressive 10 million views. It comes to show that if you can condense your content in such a way that you can get the maximum meaning across in minimum time, you will rack up more views!
b. Test different formats/scenarios
Having a monotonous nature throughout your videos can be quite tiring for the viewer after some time. Make sure to mix things up a bit by introducing new types of video formats or scenarios that keeps the users engaged.
Such a format change will also be invaluable in testing the audience reaction to the different types of videos that you make. These new formats can be in the form of a separate video series that is different from your main content. It can also be something that directly engages the viewers like a live video stream, Ask Me Anything or Q&A type of content, etc.
For example, let us take one among the most popular cooking channels on YouTube – Tasty. If you were to browse through their content, you can see how they got their fame with cookery videos that are short and sweet like the one below:
However, they do not just stick to that same format all the time. you can also see how they mix in lengthier videos of different format. For example:
And many videos that aren’t specifically cooking at all!
And it is evident that these new formats have also become crowd favorites. Now do all their videos hit the 1 million mark? No, that just shows they are constantly testing out the waters go ahead with what works and discard what doesn’t!
c. Try Giveaways and gifts
You can boost the viewership and subscriber count for your channel by setting up occasional giveaways or gifts to the viewers. Make sure that you set the winning criteria to have the viewers subscribe to the channel.
For example, let’s take another popular YouTube channel Unbox Therapy. On Jun 27, 2018, the channel did an announcement that they were giving 106 OnePlus 6 smartphones!
And the result of the announcement was evident in the subscribers count.
From June 23rd to June 27th, 2018, Unbox therapy had gained 12,583 subscribers. However, from the announcement date that is June 27th to June 30th, 2018, the channel saw an increase of a whopping 52,173 subscribers ! Till date, the video has over 14 million views
We do not advise you to try this out when you are just starting your YouTube career. Only venture out to such investments when you are stable when it comes to earnings.
Tip#3: Ask your audience for Feedback
All your videos must be created with the audience in mind. However, sometimes what you may think would work might not fit well with the audience. Hence, it is imperative that you understand their likes and dislikes.
And the best way to improve your videos is to take suggestions from the audience themselves. You can ask them specific questions on how to improve your videos or what they want to see in your future creations. Take notes on what they have to offer and start building your content taking in those suggestions.
There is also another facet to incorporating audience feedback as it projects your YouTube channel to be responsive to the audience, something that is vital to building a strong and loyal viewer base on YouTube.
Tip #4: Analyse your YouTube videos traffic sources
YouTube has made it easier for you to track the sources from which your videos are getting the views. Sign in to YouTube Studio Beta and the click Reach from the Analytics menu provided on the left panel. Now click on Traffic source types.
In this window, you can see the different sources that led viewers to your video. Generally, it can be a mix of websites, YouTube recommendation’s, YouTube search, etc. Metrics like Watch Time gives you an idea of how long viewers watch your videos and Audience Retention shows how consistent they are at watching them. These are just two of the many metrics you can use to your advantage.
Analyzing YouTube videos will help you structure your future videos in a way that it is more susceptible to being clicked.
Tip #5: Track the effectiveness of your videos
You must have an eye on the metrics that your videos garner over the days. While the number of views, likes, and dislikes are great indicators in determining the popularity of the videos, but there are many more factors at play.
Your video ranking is important as it determines the position of your videos when a keyword is typed into the search box. The ranks are calculated by the YouTube algorithm, but you have a certain degree of power in raising the ranks by leveraging the following parameters of the video;
Thumbnail: The first thing that the viewer is going it see when they are browsing through a list of videos is the thumbnail. Make sure that it is attractive and stands out!
Title: The next element that gets the most attention from both the user and the YouTube algorithm is the title. Ensure that the main keyword you are targeting is included in the title.
Description: This is where you can play a lot with keywords, both short and long tail. Be very descriptive about your video, but do not just use a big chunk of text. The description must be succinct and informative. It can also have links to your landing page or sponsors.
Tags: Tags are words or phrases that are used to help YouTube better understand the video. Make sure the tags that you are giving are related to the video that they represent.
Category: YouTube has some predefined categories and the videos that you upload must be put in the right one to get maximum reach.
Subtitles: Subtitles do not carry much weight in terms of SEO or ranking, but they are a much-appreciated addition in the audience point of view.
Yes, it can be quite meticulous but the results are worth the effort. Having a rank tracker like the one from SE Ranking or Tubebuddy can be quite handy at times like these. The software basically tracks everything about your videos and presents them in a neatly organized dashboard, which is cuts the effort significantly for YouTube marketers.
Do not leave the video by itself to garner views, it often fails to register any results because elements like the title, description and the keywords play an important role in getting the videos to the users.
You may also like: How to Convert YouTube to MP4 Safely? [Step by Step Guide] >>
Tip #6: Choose a suitable video creator
Creating attractive videos is a key to make success in Youtube video marketing. So you will need to have a suitable video editor to help you. There are quite a few choices in marketing now, such as Adobe Premiere Pro. However, there is a better choice for most average users - Filmora Video Editor , which provides powerful video editing features and huge transitions, effects, and filters resources.
To know more about Filmora Video Editor, visit its page: https://filmora.wondershare.com/video-editor/
Conclusion
YouTube marketing has evolved over the years to a point where you need a carefully crafted plan to have a successful YouTube career. In this guide, we have mentioned some useful YouTube marketing tips that will help you alo12ng the way.
The greatest takeaway from this guide should be that you must be patient and have persistence. Do not stop what you are doing just because you didn’t see any results on day one. Keep the fire burning and you will reach there in no time!
Unlock Creative Potential with These Top 9 Free Editors
9 Best Free and Easy Editing Apps You Should Know

Richard Bennett
Dec 14, 2023• Proven solutions
Have you ever made a video 100% on your phone using a mobile video editing app?
If you’ve just started off on YouTube, there’s a good chance your main camera is the one in your phone. Actually, there’s a good chance of that even if you’ve been making YouTube videos for a while now.
Since you’re shooting videos on your phone, why shouldn’t you edit them there too? Here are 9 free video editing apps you can use for YouTube.
Note: This is not a ranked list. The apps will appear in alphabetical order.
- Adobe Premiere Clip (Android or iOS)
- Cameo (iOS)
- Clips (iOS)
- Filmora (Android or iOS)
- Funimate (Android or iOS)
- iMovie (iOS)
- Movie Maker Filmmaker by Alive (Android or iOS)
- PowerDirector (Android)
- Vlogit (Android or iOS)
Adobe Premiere Clip (Android or iOS )

Key Points:
- Automatic using clips. Times them to music
- Guides you with pop-up tips
- No text/title overlays
- Exports directly to YouTube
Adobe Premiere Pro is a professional-grade desktop editor, and Adobe Premiere Clip lives up to the quality standards set by its big-brother software. It is missing some features you might want for YouTube videos, like title effects, but it does have some bells and whistles. There’s a good selection of filters.

Making changes to your picture, like adjusting the exposure or the prevalence of highlights or shadows, is just a matter of sliding bars. The tools for splitting and duplicating clips are easy to find too. You just toggle between the two icons right above your video – the one that looks like a shutter and the one that looks like adjustment bars – to switch between the picture tools and the other tools.

You cannot add what you might normally think of as a title effect in Adobe Premiere Clip, so it’ll be hard to fully complete your video. You can add text cards to put in-between your video clips, but you can’t overlay the title on top of a clip.
You can share your video directly to YouTube when you export.
Cameo (iOS)

Key Points:
- Easy-to-apply themes
- Customizable titles
- Limited features
- Exports to 4K (if your clips are 4K)
Vimeo is a video sharing site with more of a ‘filmmaker’ focus than YouTube, so it isn’t a surprise that their mobile editing app Cameo can export high-quality 4K videos.
Like some of the other apps on this list, Cameo does not have a huge variety of functions. You can reorder your clips, trim them, add titles, and apply themes (essentially filter and title combos).
There are three icons on the main interface: Scissors, a Music Note, and Filters.
The Scissors will take you to the trimming screen, where you can make your clip shorter or longer.

You can also add a title in the trimming screen, but you will not be able to change the font style or color until you are in the Filter screen.
In the Filter screen (tap the overlapping filters icon on the main interface) you will be able to adjust the color of your text by tapping on the circle with the A in it. Tapping where it says ‘Font’ will change your font style.

You can also tap on Themes and choose a premade style.

Here’s what ‘Crush’ looks like applied:

My font was changed, and there’s also a filter now. In order to apply a filter, you must start with a theme.
Clips (iOS)

Key Points:
- Great selection of stickers
- Lacks some basic tools
- Simple interface
Clips is an intuitive app with a lot of options for decorating your videos. It is lacking in some of the more basic editings features you might expect (i.e. you cannot split clips or do any color correction), but it has a lot of fun features like stickers and emojis that could make up for that depending on your needs.

There are also more traditional effects, like filters and titles. There are a wide range of title options in styles that are popular on YouTube, and a fairly standard filter selection.

While you cannot split clips in this app, but trimming and reordering them is easy. For trimming, you just select the clip and then Trim to open a screen where you can drag the start and end points of the clip.
To rearrange your clips, just tap the clip you want to move and hold down. You’ll be able to drag it to a new location.
It’d be hard to rely on Clips exclusively as your YouTube video editor, but it’s well suited for Instagram or for making quick ‘on-the-go’ videos.
Filmora (Android or iOS)

Key Points:
- Export directly to YouTube
- 16:9 or 1:1 for Instagram
- Includes effects like transitions, filters, and overlays
- End-roll logo
You can make a complete video easily just by tapping and dragging in Filmora, and there are even effects like filters, transitions, and overlays you can add to make your video more polished.
After importing your media into Filmora (you can import videos and photos saved on your phone, or media which has been uploaded to a social media account like Facebook or Instagram) you can change the order of your clips by tapping one, pressing down for a moment, and then dragging your clips where you want them.
Trimming a clip is as simple as tapping on it and then Duration. You’ll get this screen where you can adjust the length easily by dragging the markers to beginning or endpoints.

Cropping and zooming are simple too.

Filmora comes with pre-made themes you can apply which include titles, filters, and other effects. These might not be ideal if you already have branding you like to use for YouTube, but in some situations, they can make video creation a lot faster.

Filmora comes loaded with music, or you can even import your own music from your phone.
Once you’re done, tap ‘save’ in the top right corner of your screen to export your video. From the save screen, you’ll be able to export your video directly to YouTube.

One potential drawback is that Filmora will add its own logo to the end of your exported video. This logo will not distract from your video content since it is added at the end and never overlaps any of your clips, but it still might not be ideal for all creators.
Funimate (Android or iOS )

Key Points:
- Easily add text and shapes
- Rainbow doodling
- Shake effects
- Small ‘Funimate’ watermark in videos from the free version
Funimate is lives up to the ‘fun’ promise in its name. It’s designed mostly for music videos/Musical.ly and while it is missing a lot of more typical editing options, there are a few free tools in Funimate that other apps just don’t have.
For example, there are shake and distortion effects available through Funimate that you usually only find in desktop software.
You can also draw rainbow designs on your video with your finger – no other app on this list can do that.
The text tool in Funimate is easy to use, and there are cool looking glow effects you can apply in the color selection screen. Those options are also available when you’re adding shapes, likes stars and sparkles.
Funimate is not built for typical editing, which is both its strength and its weakness. Trimming your clips is its own stage which you must complete before you start adding effects, and you cannot split clips or add multiple clips.
The free version of Funimate does add a small watermark to your videos in the bottom-right corner, but it is subtle enough that I almost missed it completely while reviewing the app.
iMovie (iOS)

Key Points:
- Trailer templates
- Themes
- Limited tools and resources
iMovie’s mobile app is designed for ease and includes things like ‘trailer templates’ and themes that allow you to make a video quickly and with minimal effort.
This streamlined app is limited in its features. Other apps on this list have left out color correction tools or clip splitting tools and instead loaded up on decorative features like stickers, emojis, and overlays. iMovie has left out these tools and does not have an abundance of decorative features either.
There are filters, themes, and titles, however.
The titles are simple but polished, and you’ll find all the standard types of filters.
The themes include a variety of graphics and are applied to your entire video, not individual clips. You can also apply one filter to your entire video.
iMovie also includes a decent selection of transitions, which you can apply easily by tapping the area between two clips.
Movie Maker Filmmaker by Alive (Android or iOS )

Key Points:
- Good title tool
- Stickers
- Change clip duration
- 16:9 or 1:1
Movie Maker Filmmaker (the app will be labeled ‘Alive’ in on your phone) has a lot of features that will help you put together a fun YouTube video. There’s a great selection of stickers, filters, and overlays and they’re all easy to apply. You just click on what you want and resize/reposition it in the player.

This app is missing a lot of basic editing features, however. You cannot adjust things like brightness or saturation. This won’t be a problem if you’re happy with your clips as-is, but it’s a bit odd to not have those options.
There is a text tool and while it is fairly basic, it is also flexible. There is a good selection of fonts to choose from, and you can also choose whether or not you want a colored background, and if your text should have a shadow.
Once you’ve decided on the look of your text you can drag it, resize it, and tilt it however you want in the preview screen.
A slightly odd feature of this app is that it doesn’t save your video to your phone or export it directly to YouTube. Instead, it saves it – and shares it – within the app and gives you the option of sharing it with YouTube after.
Power Director (Android)

Key Points:
- A timeline like desktop software
- All the basic editing features
- Lots of transitions
- Videos from the free version will be watermarked
The first thing you’ll notice when you open up Power Director is that the interface looks a lot like the interface of a lot of desktop editors with a very classic timeline. This familiarity could make it easy to jump into if you’re used to editing on your laptop.
However, Power Director is a bit less intuitive than most of the other apps on this list. I wouldn’t go so far as to say it’s difficult to use – it isn’t, it’s much easier than a lot of desktop software – but among mobile apps designed for streamlined efficiency it does stand out as being a bit harder to dive into.
That is partly because there’s a lot you can do with it. It has the tools you would expect in an editor. You can split and trim clips, and you have all the standard color tools including some that most mobile apps leave out.
A lot of apps have Brightness, Contrast, and Saturation, but PowerDirector also has Color Temperature and Tint.
In addition to editing tools, PowerDirector has bells and whistles like filters –
- and a ton of great transitions.
One drawback of PowerDirector is that the free version will watermark your videos. This watermark is not intrusive, but it isn’t as subtle as the Funimate one either.
You can export videos from PowerDirector directly to YouTube.
Vlogit (Android or iOS )

Key Points:
- Easy thumbnail maker
- Export directly to YouTube
- Animated stickers
Vlogit is also an app from the creators of the Filmora Video Editor. It isn’t quite as intuitive as Filmora, but the major benefit of Vlogit for YouTube creators is that it was designed with you in mind. It has features like animated stickers, emojis, and a thumbnail maker which were included specifically because YouTubers and vloggers need them.
All the usual adjustments you might want to make, like saturation or sharpness, are easy in Vlogit. So are adjustments to the length or crop of clips.
After you save your video you’ll have the option of creating a thumbnail using a screenshot from your video. You can add a colored border, text, emojis, and more!
Once you’re done, you can export directly to YouTube. Like Filmora, Vlogit does have a post-video logo roll.
Have you ever used a free mobile app to edit one of your YouTube videos? What did you use, and were you happy with the results?
Richard Bennett
Richard Bennett is a writer and a lover of all things video.
Follow @Richard Bennett
Richard Bennett
Dec 14, 2023• Proven solutions
Have you ever made a video 100% on your phone using a mobile video editing app?
If you’ve just started off on YouTube, there’s a good chance your main camera is the one in your phone. Actually, there’s a good chance of that even if you’ve been making YouTube videos for a while now.
Since you’re shooting videos on your phone, why shouldn’t you edit them there too? Here are 9 free video editing apps you can use for YouTube.
Note: This is not a ranked list. The apps will appear in alphabetical order.
- Adobe Premiere Clip (Android or iOS)
- Cameo (iOS)
- Clips (iOS)
- Filmora (Android or iOS)
- Funimate (Android or iOS)
- iMovie (iOS)
- Movie Maker Filmmaker by Alive (Android or iOS)
- PowerDirector (Android)
- Vlogit (Android or iOS)
Adobe Premiere Clip (Android or iOS )
Key Points:
- Automatic using clips. Times them to music
- Guides you with pop-up tips
- No text/title overlays
- Exports directly to YouTube
Adobe Premiere Pro is a professional-grade desktop editor, and Adobe Premiere Clip lives up to the quality standards set by its big-brother software. It is missing some features you might want for YouTube videos, like title effects, but it does have some bells and whistles. There’s a good selection of filters.
Making changes to your picture, like adjusting the exposure or the prevalence of highlights or shadows, is just a matter of sliding bars. The tools for splitting and duplicating clips are easy to find too. You just toggle between the two icons right above your video – the one that looks like a shutter and the one that looks like adjustment bars – to switch between the picture tools and the other tools.
You cannot add what you might normally think of as a title effect in Adobe Premiere Clip, so it’ll be hard to fully complete your video. You can add text cards to put in-between your video clips, but you can’t overlay the title on top of a clip.
You can share your video directly to YouTube when you export.
Cameo (iOS)
Key Points:
- Easy-to-apply themes
- Customizable titles
- Limited features
- Exports to 4K (if your clips are 4K)
Vimeo is a video sharing site with more of a ‘filmmaker’ focus than YouTube, so it isn’t a surprise that their mobile editing app Cameo can export high-quality 4K videos.
Like some of the other apps on this list, Cameo does not have a huge variety of functions. You can reorder your clips, trim them, add titles, and apply themes (essentially filter and title combos).
There are three icons on the main interface: Scissors, a Music Note, and Filters.
The Scissors will take you to the trimming screen, where you can make your clip shorter or longer.
You can also add a title in the trimming screen, but you will not be able to change the font style or color until you are in the Filter screen.
In the Filter screen (tap the overlapping filters icon on the main interface) you will be able to adjust the color of your text by tapping on the circle with the A in it. Tapping where it says ‘Font’ will change your font style.
You can also tap on Themes and choose a premade style.
Here’s what ‘Crush’ looks like applied:
My font was changed, and there’s also a filter now. In order to apply a filter, you must start with a theme.
Clips (iOS)
Key Points:
- Great selection of stickers
- Lacks some basic tools
- Simple interface
Clips is an intuitive app with a lot of options for decorating your videos. It is lacking in some of the more basic editings features you might expect (i.e. you cannot split clips or do any color correction), but it has a lot of fun features like stickers and emojis that could make up for that depending on your needs.
There are also more traditional effects, like filters and titles. There are a wide range of title options in styles that are popular on YouTube, and a fairly standard filter selection.
While you cannot split clips in this app, but trimming and reordering them is easy. For trimming, you just select the clip and then Trim to open a screen where you can drag the start and end points of the clip.
To rearrange your clips, just tap the clip you want to move and hold down. You’ll be able to drag it to a new location.
It’d be hard to rely on Clips exclusively as your YouTube video editor, but it’s well suited for Instagram or for making quick ‘on-the-go’ videos.
Filmora (Android or iOS)
Key Points:
- Export directly to YouTube
- 16:9 or 1:1 for Instagram
- Includes effects like transitions, filters, and overlays
- End-roll logo
You can make a complete video easily just by tapping and dragging in Filmora, and there are even effects like filters, transitions, and overlays you can add to make your video more polished.
After importing your media into Filmora (you can import videos and photos saved on your phone, or media which has been uploaded to a social media account like Facebook or Instagram) you can change the order of your clips by tapping one, pressing down for a moment, and then dragging your clips where you want them.
Trimming a clip is as simple as tapping on it and then Duration. You’ll get this screen where you can adjust the length easily by dragging the markers to beginning or endpoints.
Cropping and zooming are simple too.
Filmora comes with pre-made themes you can apply which include titles, filters, and other effects. These might not be ideal if you already have branding you like to use for YouTube, but in some situations, they can make video creation a lot faster.
Filmora comes loaded with music, or you can even import your own music from your phone.
Once you’re done, tap ‘save’ in the top right corner of your screen to export your video. From the save screen, you’ll be able to export your video directly to YouTube.
One potential drawback is that Filmora will add its own logo to the end of your exported video. This logo will not distract from your video content since it is added at the end and never overlaps any of your clips, but it still might not be ideal for all creators.
Funimate (Android or iOS )
Key Points:
- Easily add text and shapes
- Rainbow doodling
- Shake effects
- Small ‘Funimate’ watermark in videos from the free version
Funimate is lives up to the ‘fun’ promise in its name. It’s designed mostly for music videos/Musical.ly and while it is missing a lot of more typical editing options, there are a few free tools in Funimate that other apps just don’t have.
For example, there are shake and distortion effects available through Funimate that you usually only find in desktop software.
You can also draw rainbow designs on your video with your finger – no other app on this list can do that.
The text tool in Funimate is easy to use, and there are cool looking glow effects you can apply in the color selection screen. Those options are also available when you’re adding shapes, likes stars and sparkles.
Funimate is not built for typical editing, which is both its strength and its weakness. Trimming your clips is its own stage which you must complete before you start adding effects, and you cannot split clips or add multiple clips.
The free version of Funimate does add a small watermark to your videos in the bottom-right corner, but it is subtle enough that I almost missed it completely while reviewing the app.
iMovie (iOS)
Key Points:
- Trailer templates
- Themes
- Limited tools and resources
iMovie’s mobile app is designed for ease and includes things like ‘trailer templates’ and themes that allow you to make a video quickly and with minimal effort.
This streamlined app is limited in its features. Other apps on this list have left out color correction tools or clip splitting tools and instead loaded up on decorative features like stickers, emojis, and overlays. iMovie has left out these tools and does not have an abundance of decorative features either.
There are filters, themes, and titles, however.
The titles are simple but polished, and you’ll find all the standard types of filters.
The themes include a variety of graphics and are applied to your entire video, not individual clips. You can also apply one filter to your entire video.
iMovie also includes a decent selection of transitions, which you can apply easily by tapping the area between two clips.
Movie Maker Filmmaker by Alive (Android or iOS )
Key Points:
- Good title tool
- Stickers
- Change clip duration
- 16:9 or 1:1
Movie Maker Filmmaker (the app will be labeled ‘Alive’ in on your phone) has a lot of features that will help you put together a fun YouTube video. There’s a great selection of stickers, filters, and overlays and they’re all easy to apply. You just click on what you want and resize/reposition it in the player.
This app is missing a lot of basic editing features, however. You cannot adjust things like brightness or saturation. This won’t be a problem if you’re happy with your clips as-is, but it’s a bit odd to not have those options.
There is a text tool and while it is fairly basic, it is also flexible. There is a good selection of fonts to choose from, and you can also choose whether or not you want a colored background, and if your text should have a shadow.
Once you’ve decided on the look of your text you can drag it, resize it, and tilt it however you want in the preview screen.
A slightly odd feature of this app is that it doesn’t save your video to your phone or export it directly to YouTube. Instead, it saves it – and shares it – within the app and gives you the option of sharing it with YouTube after.
Power Director (Android)
Key Points:
- A timeline like desktop software
- All the basic editing features
- Lots of transitions
- Videos from the free version will be watermarked
The first thing you’ll notice when you open up Power Director is that the interface looks a lot like the interface of a lot of desktop editors with a very classic timeline. This familiarity could make it easy to jump into if you’re used to editing on your laptop.
However, Power Director is a bit less intuitive than most of the other apps on this list. I wouldn’t go so far as to say it’s difficult to use – it isn’t, it’s much easier than a lot of desktop software – but among mobile apps designed for streamlined efficiency it does stand out as being a bit harder to dive into.
That is partly because there’s a lot you can do with it. It has the tools you would expect in an editor. You can split and trim clips, and you have all the standard color tools including some that most mobile apps leave out.
A lot of apps have Brightness, Contrast, and Saturation, but PowerDirector also has Color Temperature and Tint.
In addition to editing tools, PowerDirector has bells and whistles like filters –
- and a ton of great transitions.
One drawback of PowerDirector is that the free version will watermark your videos. This watermark is not intrusive, but it isn’t as subtle as the Funimate one either.
You can export videos from PowerDirector directly to YouTube.
Vlogit (Android or iOS )
Key Points:
- Easy thumbnail maker
- Export directly to YouTube
- Animated stickers
Vlogit is also an app from the creators of the Filmora Video Editor. It isn’t quite as intuitive as Filmora, but the major benefit of Vlogit for YouTube creators is that it was designed with you in mind. It has features like animated stickers, emojis, and a thumbnail maker which were included specifically because YouTubers and vloggers need them.
All the usual adjustments you might want to make, like saturation or sharpness, are easy in Vlogit. So are adjustments to the length or crop of clips.
After you save your video you’ll have the option of creating a thumbnail using a screenshot from your video. You can add a colored border, text, emojis, and more!
Once you’re done, you can export directly to YouTube. Like Filmora, Vlogit does have a post-video logo roll.
Have you ever used a free mobile app to edit one of your YouTube videos? What did you use, and were you happy with the results?
Richard Bennett
Richard Bennett is a writer and a lover of all things video.
Follow @Richard Bennett
Also read:
- Fresh Funds Finds Economical Monetization Platforms for Beginners for 2024
- 2024 Approved Stand Out with Custom YouTube Imagery
- In 2024, Syncing Words and Images Lyric Video Magic with Lyric Video Maker
- In 2024, Pro Video Creators' Guide to Ideal Laptops
- In 2024, Pocket-Friendly Pro Mics for YouTube Enthusiasts
- 2024 Approved Social Media Video Trends for SMBs
- 2024 Approved Mastering Quick Video Pace Adjustments on YouTube
- In 2024, The Yearly Revelation of Cost-Effective Editing Apps
- Top 6 YouTube Outro Makers-Lots of FREE Options for 2024
- In 2024, The Compreenas Guide to Seamless Time Marking in YouTube Videos (Desktop/Mobile)
- [New] Smart Sharing The Leading Shortened URL Services for Youtubers
- In 2024, Transcribe Without Breaking the Bank Learn How with Our Free Guide
- In 2024, Unleash Creativity with Top 10 YouTube Short Video Editors
- In 2024, How to Use Creative Commons Copyright Licenses?
- In 2024, How to Get People to Subscribe by Asking the Right Way
- 2024 Approved Unraveling the Complexity of YouTube Analytics Analysis
- 2024 Approved Micro Movie Moments Actors in Audio Arts
- In 2024, Paving the Way for YouTube Wealth Reaching a Threshold of 500 Subs
- From the Ground Up Building a New, Dynamic YouTube Chanel for 2024
- In 2024, Take Control A Compreeved Guide to iPhone/iPad Screen Recordings on YouTube
- 2024 Approved The Ultimate Guide Tackling YouTube Shorts Issues
- 2024 Approved Infographic Insights Small Business Video Mastery
- In 2024, Perfecting Video Segmentation for Enhanced Viewing Experience on YouTube
- In 2024, No-Splurge Audio Devices for YT Beginners
- 2024 Approved Film Fan's Choice Cutting-Edge YouTube Channels
- 2024 Approved Optimal FLV to YouTube Transformers in a Ranking List
- Making Money Fast The Pathway to Success in YouTube Shorts for 2024
- Mastering YouTube's Aesthetics Enhancing Your Videos for 2024
- Mastering YouTube Screens' Final Touches for 2024
- [New] Parodic Play Writing and Producing Humor Videos
- Expert Recorder Choice for High-Quality YouTube Content for 2024
- Integrating iMovie Productions Into YouTube for 2024
- In 2024, The Artist's Toolbox Essential Video Tips for Musicians on YouTube
- [New] Maximize Views with These 14 Premier YouTube Gaming Videos
- Title: "2024 Approved Top 5 YouTube Video Marketing Strategies"
- Author: Thomas
- Created at : 2024-05-31 12:49:05
- Updated at : 2024-06-01 12:49:05
- Link: https://youtube-help.techidaily.com/2024-approved-top-5-youtube-video-marketing-strategies/
- License: This work is licensed under CC BY-NC-SA 4.0.
