
"2024 Approved Twinkling Typefaces The Essence of Bouncy Text"
Twinkling Typefaces: The Essence of Bouncy Text
How to Create Animated Bouncing Text

Liza Brown
Mar 27, 2024• Proven solutions
Earlier, you learned how to have a bounce text effect in Adobe After Effects . However, because AE is a complex application and has a steep learning curve, this section explains the two alternative ways to get the same effect on your existing video footage.
Method 1: How to Create Bouncing Text in Filmora Video Editor?
When talking about Wondershare Filmora , the application is populated with several presets for texts and titles, animations, effects, filters, and much more.
These pre-built templates not only make your task easier, they also save your decent amount of time that you would spend while working with After Effects or any other similar app that requires you to build things from scratch.
You can follow the instructions given below to add animated bounce text to any of your video footages with Filmora:
Step 1: Add a Footage to Timeline
Launch Wondershare Filmora on your Windows or Mac PC. By default, the aspect ratio of the project is set to 16:9. Click anywhere inside the Media window at the upper-left section, and select and import footage you want to add bounce text to.
Step 2: Insert Text and Add Bounce Effect
Click Titles from the standard toolbar at the top, and click and drag your preferred title template from the Library to the timeline. In case you don’t want any specific animation or style on the title, you can use the default title.
In the timeline, double-click the title you just added, use the upper-left section to edit the text, go to the Animation tab from the left pane, scroll down the list, and double-click the Up Down 1 or Up Down 2 preset to apply the bounce effect to the credits. Click OK to save the changes and to get back to the main window.

Step 3: Add Shake Filters
Go to Effects from the standard toolbar, expand the Filters category from the left pane, and click Shake. From the Library window, click and drag your preferred shake filter to the timeline. Here, I will choose Mild.

You can customize the default effect by double-clicking the shake filter in the timeline, using the sliders in the upper-left area of the interface to make necessary adjustments, and then clicking OK to save the changes and to get back to the previous interface.

Step 4: Export the Final Output
Click EXPORT from the top of the interface, go to the Local tab in the Export box, choose your preferred output format from the list in the left, make required customizations from the right pane, and click EXPORT from the bottom-right corner to export the video.

Now, you can add the bouncing text video and the background video to the timeline, and then place the bouncing text video above the background video track.
Double click the text track, go to the Chroma Key effect, select the Color Picker tool, and click anywhere in the Preview window to get things right. Finally, export the entire project to your preferred output format as explained in Step 4.
As explained before, Wondeshare Filmora makes the entire process of creating and adding bounce text effect pretty simple. With all the pre-build templates, and the versatility of the options that can be used to customize those presets, you can come up with the effects that are usually obtained when you start generating them from the scratch.


Method 2: Generate Animated Bouncing Texts Online
If you don’t want any heavy and resource-intensive app on your PC merely for some special text effects, you can try any of the online solutions instead. The benefit of using any such web app is that all the processing is done on site’s server, and it is only a web browser and an Internet connection that you need to have at your side.
Some most trusted websites to generate bounce text are listed below:
1. ENGFTO
Website: https://engfto.com/index/create%5Fanimated%5Fbouncing%5Ftext/0-26

You can follow the instructions given below to use Engfto to generate bouncing text for your footages:
Step 1: Get to the Animated Bouncing Text Page
Launch your favorite web browser, and go to the link given above to get to the Engfto’s animated bouncing text page.
Step 2: Customize Text and Preferences
Modify the values in the fields under the SIZE AREA and TEXT sections to customize the text area, the text itself, its size, and font. Next, adjust the values in the fields under the EFFECT PARAMETERS section to get the required bounce effect. Also, use the fields under the BACKGROUND section to either change the background color, or pick a background image from your PC.
Step 3: Obtain the Animated Text
Click the SAVE GIF ANIMATION button from the lower section of the page to download the animated text to your PC.
2. Loading.io
The instructions given below explain how to use Loading.io to get animated bounce text effect for your footages:
Step 1: Get to the Loading.io Webpage
Launch your favorite web browser and go to https://loading.io/animation/text/ .
Step 2: Customize the Text and Choose Animation Effect

Use the options available on the webpage to type your text, and change its font, color, background, transparency level etc. Select Bounce (or any of its variants) from the Animation drop-down list, and adjust the speed using the Speed slider.
Step 3: Obtain the Text
Click your preferred option from next to the Download As section to download the animated text to your PC.
Note: Regardless of the web solution you choose to generate and obtain animated bounce text, you will still need a post-production tool to add the downloaded text to your footage.
Conclusion
Generating bounce text effect is much simpler when you use Wondershare Filmora or any of the online solutions as explained in Method 2. While the former gives you more flexibility when it comes to customizations, the latter doesn’t require any app to be installed on your PC. In addition, many times the web apps offer their services for free, and therefore they are preferred by the novice users who are not much into post-production processes.
Liza Brown
Liza Brown is a writer and a lover of all things video.
Follow @Liza Brown
Liza Brown
Mar 27, 2024• Proven solutions
Earlier, you learned how to have a bounce text effect in Adobe After Effects . However, because AE is a complex application and has a steep learning curve, this section explains the two alternative ways to get the same effect on your existing video footage.
Method 1: How to Create Bouncing Text in Filmora Video Editor?
When talking about Wondershare Filmora , the application is populated with several presets for texts and titles, animations, effects, filters, and much more.
These pre-built templates not only make your task easier, they also save your decent amount of time that you would spend while working with After Effects or any other similar app that requires you to build things from scratch.
You can follow the instructions given below to add animated bounce text to any of your video footages with Filmora:
Step 1: Add a Footage to Timeline
Launch Wondershare Filmora on your Windows or Mac PC. By default, the aspect ratio of the project is set to 16:9. Click anywhere inside the Media window at the upper-left section, and select and import footage you want to add bounce text to.
Step 2: Insert Text and Add Bounce Effect
Click Titles from the standard toolbar at the top, and click and drag your preferred title template from the Library to the timeline. In case you don’t want any specific animation or style on the title, you can use the default title.
In the timeline, double-click the title you just added, use the upper-left section to edit the text, go to the Animation tab from the left pane, scroll down the list, and double-click the Up Down 1 or Up Down 2 preset to apply the bounce effect to the credits. Click OK to save the changes and to get back to the main window.
Step 3: Add Shake Filters
Go to Effects from the standard toolbar, expand the Filters category from the left pane, and click Shake. From the Library window, click and drag your preferred shake filter to the timeline. Here, I will choose Mild.
You can customize the default effect by double-clicking the shake filter in the timeline, using the sliders in the upper-left area of the interface to make necessary adjustments, and then clicking OK to save the changes and to get back to the previous interface.
Step 4: Export the Final Output
Click EXPORT from the top of the interface, go to the Local tab in the Export box, choose your preferred output format from the list in the left, make required customizations from the right pane, and click EXPORT from the bottom-right corner to export the video.
Now, you can add the bouncing text video and the background video to the timeline, and then place the bouncing text video above the background video track.
Double click the text track, go to the Chroma Key effect, select the Color Picker tool, and click anywhere in the Preview window to get things right. Finally, export the entire project to your preferred output format as explained in Step 4.
As explained before, Wondeshare Filmora makes the entire process of creating and adding bounce text effect pretty simple. With all the pre-build templates, and the versatility of the options that can be used to customize those presets, you can come up with the effects that are usually obtained when you start generating them from the scratch.
Method 2: Generate Animated Bouncing Texts Online
If you don’t want any heavy and resource-intensive app on your PC merely for some special text effects, you can try any of the online solutions instead. The benefit of using any such web app is that all the processing is done on site’s server, and it is only a web browser and an Internet connection that you need to have at your side.
Some most trusted websites to generate bounce text are listed below:
1. ENGFTO
Website: https://engfto.com/index/create%5Fanimated%5Fbouncing%5Ftext/0-26
You can follow the instructions given below to use Engfto to generate bouncing text for your footages:
Step 1: Get to the Animated Bouncing Text Page
Launch your favorite web browser, and go to the link given above to get to the Engfto’s animated bouncing text page.
Step 2: Customize Text and Preferences
Modify the values in the fields under the SIZE AREA and TEXT sections to customize the text area, the text itself, its size, and font. Next, adjust the values in the fields under the EFFECT PARAMETERS section to get the required bounce effect. Also, use the fields under the BACKGROUND section to either change the background color, or pick a background image from your PC.
Step 3: Obtain the Animated Text
Click the SAVE GIF ANIMATION button from the lower section of the page to download the animated text to your PC.
2. Loading.io
The instructions given below explain how to use Loading.io to get animated bounce text effect for your footages:
Step 1: Get to the Loading.io Webpage
Launch your favorite web browser and go to https://loading.io/animation/text/ .
Step 2: Customize the Text and Choose Animation Effect
Use the options available on the webpage to type your text, and change its font, color, background, transparency level etc. Select Bounce (or any of its variants) from the Animation drop-down list, and adjust the speed using the Speed slider.
Step 3: Obtain the Text
Click your preferred option from next to the Download As section to download the animated text to your PC.
Note: Regardless of the web solution you choose to generate and obtain animated bounce text, you will still need a post-production tool to add the downloaded text to your footage.
Conclusion
Generating bounce text effect is much simpler when you use Wondershare Filmora or any of the online solutions as explained in Method 2. While the former gives you more flexibility when it comes to customizations, the latter doesn’t require any app to be installed on your PC. In addition, many times the web apps offer their services for free, and therefore they are preferred by the novice users who are not much into post-production processes.
Liza Brown
Liza Brown is a writer and a lover of all things video.
Follow @Liza Brown
Beyond Tubes: The Ultimate Video Share Sites
YouTube Alternatives: 3 Best Video Sharing Sites

Richard Bennett
Mar 27, 2024• Proven solutions
YouTube is a great platform where almost everyone goes to watches videos. It is not the best platform for every video creator, though. This article will introduce you to some YouTube alternatives.
There are a lot of reasons you might want to learn about other websites like YouTube. You might want a site with less ads, or different ways of monetizing. YouTube can sometimes remove videos unfairly, so you may want a site where copyright claims are handled by people instead of robots. A lot of users simply want a site that is more like YouTube was when it was younger. There are features, like customizable channel pages, which have been discarded over the years.
YouTube Alternatives: 3 Best Video Sharing Sites
Here is a list of other places where you can upload videos:
1. Dailymotion
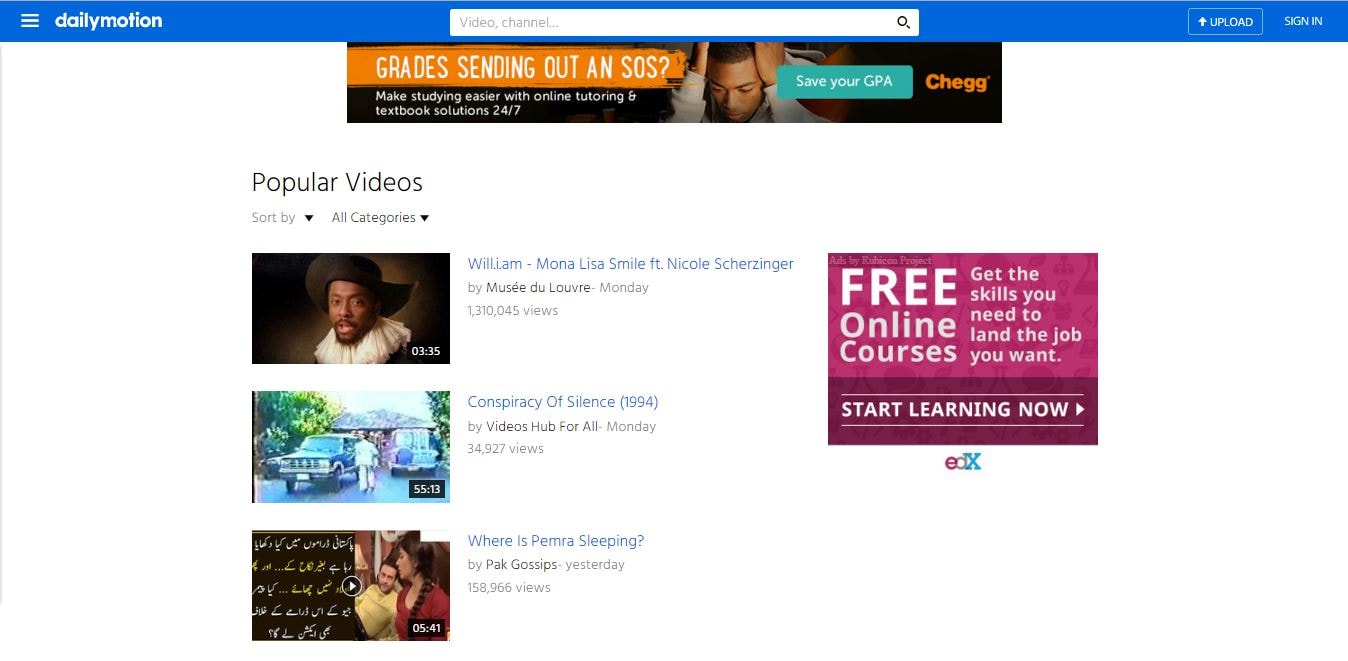
This may be the second most popular free video sharing website, and it is very similar to YouTube in appearance. Like YouTube, Dailymotion recommends videos to users based on what is trending as well as their personal viewing habits. Also like YouTube, there are ads in and around videos and you have the option of monetizing your content to earn ad revenue. There is more than one way to become a Dailymotion partner, though. You can sell a subscription for your channel instead of monetizing ads in your videos.
The main difference between Dailymotion and YouTube is that where YouTube has an abundance of both amateur and professional quality video, Dailymotion skews towards professional. There are personal vlogs and cat videos, but these are less the norm on Dailymotion than on YouTube. You may find less competition in your genre here. However, you should be aware that the expectations of viewers might be higher.
2. Vimeo
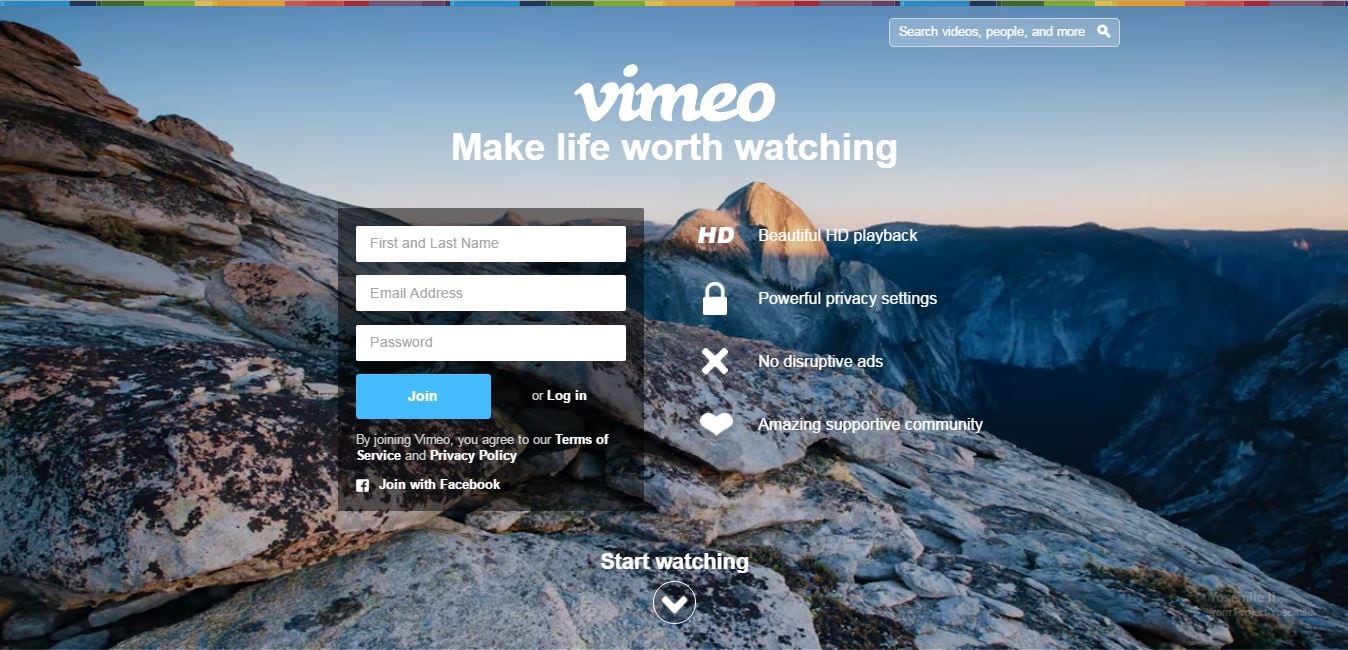
Although Vimeo is also a very popular video site, it is very different from YouTube. Everything from appearance to the types of comments left on videos is vastly different. The front page of this site does not display trending videos, for example. Instead it features high quality creative content that has been reviewed and singled out by Vimeo’s staff as some of the best the site has to offer.
There also are not any ads on Vimeo, whereas YouTube is full of them.
If you create, or are interested in creating, short films then this is where you should be posting. Many festival quality shorts are posted to Vimeo. There are vlogs there too, but they tend to be by serious video creators. The community on Vimeo tends to be a lot friendlier than YouTube so if you are still an amateur, but have dreams of being a pro, then this is probably still the site for you. You should be able to find real constructive criticism here rather than trolls.
Vimeo has a wider variety of privacy settings than YouTube. You can make videos watchable by everyone, just certain people, or require a password.
3. ZippCast
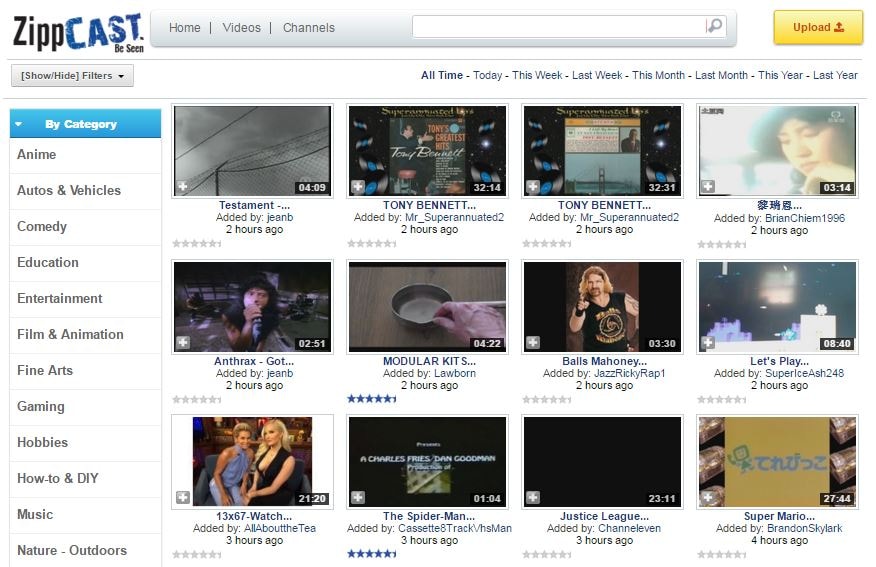
ZippCast is praised by some for being very similar to pre-Google YouTube. While the expectations for video quality may be slightly higher on DailyMotion than YouTube, and are much higher on Vimeo, they are basically the same on ZippCast. Comedy, gaming, music, animation, and vlogging are the most popular categories and almost all content is posted by average people with average skill levels. One of the ways in which ZippCast is like the ‘old’ YouTube is that you can customize the design of your channel.
One of the things users appreciate most about ZippCast is that identifying and removing copyrighted videos is done by humans rather than an automated system, like on YouTube. This means that if you use copyrighted content that is licensed to you or protected by fair use your video should not be taken down. It is common for YouTubers to have their videos unfairly removed, although disputing the copyright claim will usually result in getting the video restored.
Although it is definitely large enough to be considered an alternative to YouTube, ZippCast has been unreliable in the past (i.e shutting down randomly) and has lost the trust of many users.
Richard Bennett
Richard Bennett is a writer and a lover of all things video.
Follow @Richard Bennett
Richard Bennett
Mar 27, 2024• Proven solutions
YouTube is a great platform where almost everyone goes to watches videos. It is not the best platform for every video creator, though. This article will introduce you to some YouTube alternatives.
There are a lot of reasons you might want to learn about other websites like YouTube. You might want a site with less ads, or different ways of monetizing. YouTube can sometimes remove videos unfairly, so you may want a site where copyright claims are handled by people instead of robots. A lot of users simply want a site that is more like YouTube was when it was younger. There are features, like customizable channel pages, which have been discarded over the years.
YouTube Alternatives: 3 Best Video Sharing Sites
Here is a list of other places where you can upload videos:
1. Dailymotion
This may be the second most popular free video sharing website, and it is very similar to YouTube in appearance. Like YouTube, Dailymotion recommends videos to users based on what is trending as well as their personal viewing habits. Also like YouTube, there are ads in and around videos and you have the option of monetizing your content to earn ad revenue. There is more than one way to become a Dailymotion partner, though. You can sell a subscription for your channel instead of monetizing ads in your videos.
The main difference between Dailymotion and YouTube is that where YouTube has an abundance of both amateur and professional quality video, Dailymotion skews towards professional. There are personal vlogs and cat videos, but these are less the norm on Dailymotion than on YouTube. You may find less competition in your genre here. However, you should be aware that the expectations of viewers might be higher.
2. Vimeo
Although Vimeo is also a very popular video site, it is very different from YouTube. Everything from appearance to the types of comments left on videos is vastly different. The front page of this site does not display trending videos, for example. Instead it features high quality creative content that has been reviewed and singled out by Vimeo’s staff as some of the best the site has to offer.
There also are not any ads on Vimeo, whereas YouTube is full of them.
If you create, or are interested in creating, short films then this is where you should be posting. Many festival quality shorts are posted to Vimeo. There are vlogs there too, but they tend to be by serious video creators. The community on Vimeo tends to be a lot friendlier than YouTube so if you are still an amateur, but have dreams of being a pro, then this is probably still the site for you. You should be able to find real constructive criticism here rather than trolls.
Vimeo has a wider variety of privacy settings than YouTube. You can make videos watchable by everyone, just certain people, or require a password.
3. ZippCast
ZippCast is praised by some for being very similar to pre-Google YouTube. While the expectations for video quality may be slightly higher on DailyMotion than YouTube, and are much higher on Vimeo, they are basically the same on ZippCast. Comedy, gaming, music, animation, and vlogging are the most popular categories and almost all content is posted by average people with average skill levels. One of the ways in which ZippCast is like the ‘old’ YouTube is that you can customize the design of your channel.
One of the things users appreciate most about ZippCast is that identifying and removing copyrighted videos is done by humans rather than an automated system, like on YouTube. This means that if you use copyrighted content that is licensed to you or protected by fair use your video should not be taken down. It is common for YouTubers to have their videos unfairly removed, although disputing the copyright claim will usually result in getting the video restored.
Although it is definitely large enough to be considered an alternative to YouTube, ZippCast has been unreliable in the past (i.e shutting down randomly) and has lost the trust of many users.
Richard Bennett
Richard Bennett is a writer and a lover of all things video.
Follow @Richard Bennett
Also read:
- [New] How to Flip Your Video Collection in a Flash
- [New] In 2024, Prime 10 Terraria Game Enhancements
- [New] Optimal Gameplay Tools on the Big Screen
- [New] Prime 8 Edits Suites on Linux OS
- [Updated] 2024 Approved Crafting the Ideal Set of Keywords for Your Youtube Videos
- Borrow Top-Rated Game Titles for Free at Your Local Library - Learn How Now!
- Comparing Reading Experiences: Google Play Vs. Amazon Audible Book Recordings
- Does Airplane Mode Turn off GPS Location On Huawei P60? | Dr.fone
- In 2024, Hilarity Highway The Funniest YouTube Videos on Twitter
- In 2024, Precision Techniques for Efficient Keying Processes
- In 2024, Shaking Up the Status Quo Unique Naming Tips for Filmmakers
- Monetizing Popularity Pay Per Million Views for 2024
- Top-Rated Network Servers & Cabinets - The Ultimate Guide for 2E24
- Unleash Ultimate Gaming Experience: Top-Rated Speaker System Goes On Sale at Best Buy - Spotted by ZDNet
- Title: 2024 Approved Twinkling Typefaces The Essence of Bouncy Text
- Author: Thomas
- Created at : 2025-02-15 01:22:43
- Updated at : 2025-02-20 09:06:02
- Link: https://youtube-help.techidaily.com/2024-approved-twinkling-typefaces-the-essence-of-bouncy-text/
- License: This work is licensed under CC BY-NC-SA 4.0.