
:max_bytes(150000):strip_icc()/Childlearningonline_WillieBThomas_Getty-3e51600a64d742a0b5db4fadacead069.jpg)
"2024 Approved Unveiling the Secrets of Professional Free YouTube Transcription"
Unveiling the Secrets of Professional Free YouTube Transcription
How to Transcribe a YouTube Video for FREE

Richard Bennett
Mar 27, 2024• Proven solutions
If you want to transcribe your videos to make the dialogs and speeches available in text format, you can use YouTube Transcribe feature that the streaming site offers for free. In this article, I’ll share with you a couple of methods to transcribe a YouTube video for free.
- Part 1: Transcribe YouTube Video Automatically for Free [2 Ways]
- Part 2: Transcribe YouTube Video to Text Online with Third-Party Service
- Part 3: Benefits of Transcribing YouTube Videos
- Part 4: YouTube Video Transcription FAQs
Part 1: How to Transcribe YouTube Video Automatically for Free [2 Ways]
Besides the basic video editing features on the YouTube platform, you can now quickly transcribe YouTube videos to the text as well. The good thing is, you can either use the automatic transcription feature that YouTube offers, or upload it manually while adjusting the timing as you go further.
Below are the two methods to transcribe your YouTube videos for free:
Method 1: Use the Automated Transcription Service on YouTube
As the name suggests, YouTube automatic transcription service works automatically. This means you don’t even have to click the ‘Transcribe’ button anymore to transcribe a YouTube video, and the website takes care of it on its own. All you need to do is, choose English as the language of the video when setting up subtitles. You can follow the instructions given below to do so:
Step 1 Upload a Video
Sign in to your YouTube account, click your profile picture from the top-right corner, and click YouTube Studio from the menu. Next, click CREATE from the upper-right corner, click Upload videos from the menu, and drag and drop a video from your computer to the Upload videos box that appears next.

Step 2 Select Transcription Language
On the Details page of the next box that appears, scroll down and click MORE OPTIONS, and select English in the Video language drop-down list under the Language, subtitles, and closed captions (CC) section.

Step 3 Publish the Video
Follow the on-screen instructions from this point to publish the video, and wait while YouTube automatically transcribes and adds the close captions to it.
Note: Depending on the duration of the clip, the time YouTube would take to transcribe may vary.
After YouTube has transcribed the video, you can download the transcription file in your preferred format. The instructions are given below explain how you can do so:
- Get to the Subtitles Window
While on the YouTube Studio page, click Subtitles from the left pane to go to the Channel subtitles page. And then click the video you want to modify.
- Get to Classic Studio
In the video subtitle page of the target video, hover mouse on the Published Automatic status under the Subtitles column, click the Options icon (with three vertical dots) that appears, and click Edit on Classic Studio.

- Download Transcription File
Click and open the Actions drop-down list from the top-left corner of the left pane, click your preferred transcription format including .vtt, .srt and .sbv from the list, and save the file on your local hard disk.

Method 2: Get YouTube Transcription when Watching
In addition, if you are watching any other video, you can make YouTube transcribe that for you as well. You can follow the instructions given below to get the YouTube video to text transcription:
Step 1: Play the Video
Go to the video on YouTube and start playing it. Make sure NOT to get to full-screen mode as doing so would hide the option to transcribe the clip.
Step 2: Enable Transcription
Click the More icon (with three horizontal dots) from under the bottom-right corner of the video player, and click Open transcript to see the video transcription in the Transcript pane that appears in the right.
Step 3: Manage Timestamps
Click the Options icon (with three vertical dots) from the top-right corner of the Transcript pane, and click Toggle timestamp to enable or disable the timestamps in the video transcription.
Limitations of Using YouTube Transcribe
Although YouTube’s automatic transcription is a decent feature that saves you a lot of time, since Google uses machine learning algorithms to convert the speech to text, the level of accuracy may vary depending on the accent of the speaker, and the clarity of the audio the video has. Also, even sometime you may not be satisfied with the end-results.
Alternatively, you can use Kapwing to transcribe a YouTube video and download the transcription file with the below step-by-step instructions:
Step 1: Add YouTube Video
Copy the URL of YouTube video you want to transcribe, go to https://www.kapwing.com/subtitles , paste the URL in the Paste a URL field, wait while Kapwing fetches the content of the video, and opens the Add subtitles to Video page.
Step 2: Transcribe the Video
Click Auto-generate from the right window, and follow the on-screen instructions to transcribe YouTube video to text.

Step 3: Download the Transcription File
Click Download SRT from the left pane, and follow the instructions from there to download the transcription file in *.srt format.

Pros
- Kapwing is free to use
- The auto-transcription process is quick and less tedious
- Kapwing also allows manual transcription and uploading of an existing *.srt file
Cons
- The auto-transcribed text might lack accuracy as the task is done by the speech-to-text tools that work in the background
You can follow the step-by-step instructions to transcribe a YouTube video and download the transcription file using Kapwing:
Step 1: Add YouTube Video
Copy the URL of YouTube video you want to transcribe, go to https://www.kapwing.com/subtitles , paste the URL in the Paste a URL field, wait while Kapwing fetches the content of the video, and opens the Add subtitles to Video page.
Step 2: Transcribe the Video
Click Auto-generate from the right window, and follow the on-screen instructions to transcribe YouTube video to text.
Step 3: Download the Transcription File
Click Download SRT from the left pane, and follow the instructions from there to download the transcription file in *.srt format.
Pros
- Kapwing is free to use
- The auto-transcription process is quick and less tedious
- Kapwing also allows manual transcription and uploading of an existing *.srt file
Cons
- The auto-transcribed text might lack accuracy as the task is done by the speech-to-text tools that work in the background
Part 3: Benefits of Transcribing YouTube Videos
You may need video transcriptions for several reasons, such as analyzing the summary of the entire speech in the video, extracting a single phrase or quote that was spoken in the clip, or making the video helpful even for those suffering from hearing impairment. When you transcribe a YouTube video, the transcript can be useful in many ways. Some of the most common benefits of transcribing a video include:
- Search Engine Optimization
When you add subtitles, the text can appear in Google search results when someone types a similar phrase in the search box. This helps get more views to your videos, thus giving your channel popularity, and you, monetary gains in the long run.
- Accent
If the speaker in the video is from a different region and is using an accent that you are not much comfortable with, you can turn on the subtitles and read the dialogs along with the video.
- Repurposing on Blogs
If you own a blog that you have embedded your video to, the transcription could be used to add text to it so the target audience can get a fair idea of what the video is all about. This is useful because many people prefer reading over watching.
YouTube Video Transcription FAQs
1. How to Transcribe YouTube Video to Text
Usually the transcription files have *.srt extension that are globally accepted and supported by almost all media players. However, there might be instances when you want to have the subtitles in plain text.
That said, to convert an SRT file to TXT, you can:
- Right-click the SRT file
- Go to Rename
- Replace srt with txt and press Enter
- Click OK on the confirmation box that appears next to convert SRT to TXT
After this, you can simply double-click the file, and read and modify the transcribed content as needed.
2. How to Edit and Upload Edited Transcript to YouTube
If you made any modifications to the transcript that was automatically generated by YouTube or any other third-party transcription tool, you can follow the steps given below to upload the new file to the YouTube video:
- Go to YouTube Studio and then to the Channel subtitles page as explained earlier
- Expand the Languages column of the target video
- Click the Options icon that appears under the Subtitles column when you hover mouse on to it
- Click Edit on Classic Studio
- On the next page, click Edit from the top-right corner

- Click to open the Actions drop-down list from the upper-left corner
- Click Upload a file
- Follow the on-screen instructions from there to upload the modified transcription file
- Click Save Changes from the top-right corner of the page when done
Conclusion
If you are looking for a quick and easy way of adding subtitles to your videos, letting YouTube transcribe for you could be a good approach. However, because these auto-generated transcriptions are created by machine learning algorithms, their accuracy cannot be counted on. Therefore, the best way to get the job done accurately is, let YouTube auto-transcribe your video, download the transcription file, make the necessary changes to it, and then upload the file back to the video.
Richard Bennett
Richard Bennett is a writer and a lover of all things video.
Follow @Richard Bennett
Richard Bennett
Mar 27, 2024• Proven solutions
If you want to transcribe your videos to make the dialogs and speeches available in text format, you can use YouTube Transcribe feature that the streaming site offers for free. In this article, I’ll share with you a couple of methods to transcribe a YouTube video for free.
- Part 1: Transcribe YouTube Video Automatically for Free [2 Ways]
- Part 2: Transcribe YouTube Video to Text Online with Third-Party Service
- Part 3: Benefits of Transcribing YouTube Videos
- Part 4: YouTube Video Transcription FAQs
Part 1: How to Transcribe YouTube Video Automatically for Free [2 Ways]
Besides the basic video editing features on the YouTube platform, you can now quickly transcribe YouTube videos to the text as well. The good thing is, you can either use the automatic transcription feature that YouTube offers, or upload it manually while adjusting the timing as you go further.
Below are the two methods to transcribe your YouTube videos for free:
Method 1: Use the Automated Transcription Service on YouTube
As the name suggests, YouTube automatic transcription service works automatically. This means you don’t even have to click the ‘Transcribe’ button anymore to transcribe a YouTube video, and the website takes care of it on its own. All you need to do is, choose English as the language of the video when setting up subtitles. You can follow the instructions given below to do so:
Step 1 Upload a Video
Sign in to your YouTube account, click your profile picture from the top-right corner, and click YouTube Studio from the menu. Next, click CREATE from the upper-right corner, click Upload videos from the menu, and drag and drop a video from your computer to the Upload videos box that appears next.
Step 2 Select Transcription Language
On the Details page of the next box that appears, scroll down and click MORE OPTIONS, and select English in the Video language drop-down list under the Language, subtitles, and closed captions (CC) section.
Step 3 Publish the Video
Follow the on-screen instructions from this point to publish the video, and wait while YouTube automatically transcribes and adds the close captions to it.
Note: Depending on the duration of the clip, the time YouTube would take to transcribe may vary.
After YouTube has transcribed the video, you can download the transcription file in your preferred format. The instructions are given below explain how you can do so:
- Get to the Subtitles Window
While on the YouTube Studio page, click Subtitles from the left pane to go to the Channel subtitles page. And then click the video you want to modify.
- Get to Classic Studio
In the video subtitle page of the target video, hover mouse on the Published Automatic status under the Subtitles column, click the Options icon (with three vertical dots) that appears, and click Edit on Classic Studio.
- Download Transcription File
Click and open the Actions drop-down list from the top-left corner of the left pane, click your preferred transcription format including .vtt, .srt and .sbv from the list, and save the file on your local hard disk.
Method 2: Get YouTube Transcription when Watching
In addition, if you are watching any other video, you can make YouTube transcribe that for you as well. You can follow the instructions given below to get the YouTube video to text transcription:
Step 1: Play the Video
Go to the video on YouTube and start playing it. Make sure NOT to get to full-screen mode as doing so would hide the option to transcribe the clip.
Step 2: Enable Transcription
Click the More icon (with three horizontal dots) from under the bottom-right corner of the video player, and click Open transcript to see the video transcription in the Transcript pane that appears in the right.
Step 3: Manage Timestamps
Click the Options icon (with three vertical dots) from the top-right corner of the Transcript pane, and click Toggle timestamp to enable or disable the timestamps in the video transcription.
Limitations of Using YouTube Transcribe
Although YouTube’s automatic transcription is a decent feature that saves you a lot of time, since Google uses machine learning algorithms to convert the speech to text, the level of accuracy may vary depending on the accent of the speaker, and the clarity of the audio the video has. Also, even sometime you may not be satisfied with the end-results.
Alternatively, you can use Kapwing to transcribe a YouTube video and download the transcription file with the below step-by-step instructions:
Step 1: Add YouTube Video
Copy the URL of YouTube video you want to transcribe, go to https://www.kapwing.com/subtitles , paste the URL in the Paste a URL field, wait while Kapwing fetches the content of the video, and opens the Add subtitles to Video page.
Step 2: Transcribe the Video
Click Auto-generate from the right window, and follow the on-screen instructions to transcribe YouTube video to text.
Step 3: Download the Transcription File
Click Download SRT from the left pane, and follow the instructions from there to download the transcription file in *.srt format.
Pros
- Kapwing is free to use
- The auto-transcription process is quick and less tedious
- Kapwing also allows manual transcription and uploading of an existing *.srt file
Cons
- The auto-transcribed text might lack accuracy as the task is done by the speech-to-text tools that work in the background
You can follow the step-by-step instructions to transcribe a YouTube video and download the transcription file using Kapwing:
Step 1: Add YouTube Video
Copy the URL of YouTube video you want to transcribe, go to https://www.kapwing.com/subtitles , paste the URL in the Paste a URL field, wait while Kapwing fetches the content of the video, and opens the Add subtitles to Video page.
Step 2: Transcribe the Video
Click Auto-generate from the right window, and follow the on-screen instructions to transcribe YouTube video to text.
Step 3: Download the Transcription File
Click Download SRT from the left pane, and follow the instructions from there to download the transcription file in *.srt format.
Pros
- Kapwing is free to use
- The auto-transcription process is quick and less tedious
- Kapwing also allows manual transcription and uploading of an existing *.srt file
Cons
- The auto-transcribed text might lack accuracy as the task is done by the speech-to-text tools that work in the background
Part 3: Benefits of Transcribing YouTube Videos
You may need video transcriptions for several reasons, such as analyzing the summary of the entire speech in the video, extracting a single phrase or quote that was spoken in the clip, or making the video helpful even for those suffering from hearing impairment. When you transcribe a YouTube video, the transcript can be useful in many ways. Some of the most common benefits of transcribing a video include:
- Search Engine Optimization
When you add subtitles, the text can appear in Google search results when someone types a similar phrase in the search box. This helps get more views to your videos, thus giving your channel popularity, and you, monetary gains in the long run.
- Accent
If the speaker in the video is from a different region and is using an accent that you are not much comfortable with, you can turn on the subtitles and read the dialogs along with the video.
- Repurposing on Blogs
If you own a blog that you have embedded your video to, the transcription could be used to add text to it so the target audience can get a fair idea of what the video is all about. This is useful because many people prefer reading over watching.
YouTube Video Transcription FAQs
1. How to Transcribe YouTube Video to Text
Usually the transcription files have *.srt extension that are globally accepted and supported by almost all media players. However, there might be instances when you want to have the subtitles in plain text.
That said, to convert an SRT file to TXT, you can:
- Right-click the SRT file
- Go to Rename
- Replace srt with txt and press Enter
- Click OK on the confirmation box that appears next to convert SRT to TXT
After this, you can simply double-click the file, and read and modify the transcribed content as needed.
2. How to Edit and Upload Edited Transcript to YouTube
If you made any modifications to the transcript that was automatically generated by YouTube or any other third-party transcription tool, you can follow the steps given below to upload the new file to the YouTube video:
- Go to YouTube Studio and then to the Channel subtitles page as explained earlier
- Expand the Languages column of the target video
- Click the Options icon that appears under the Subtitles column when you hover mouse on to it
- Click Edit on Classic Studio
- On the next page, click Edit from the top-right corner
- Click to open the Actions drop-down list from the upper-left corner
- Click Upload a file
- Follow the on-screen instructions from there to upload the modified transcription file
- Click Save Changes from the top-right corner of the page when done
Conclusion
If you are looking for a quick and easy way of adding subtitles to your videos, letting YouTube transcribe for you could be a good approach. However, because these auto-generated transcriptions are created by machine learning algorithms, their accuracy cannot be counted on. Therefore, the best way to get the job done accurately is, let YouTube auto-transcribe your video, download the transcription file, make the necessary changes to it, and then upload the file back to the video.
Richard Bennett
Richard Bennett is a writer and a lover of all things video.
Follow @Richard Bennett
Quick & Simple: Access High-Res YouTube Images for Free Here
Best Free Downloaders: Download YouTube Thumbnail for Free[Online/Win/Mac]
Richard Bennett
Mar 27, 2024• Proven solutions
What is a YouTube thumbnail?
A YouTube thumbnail is nothing but the cover image shown on a video file on YouTube. It shows what you are going to talk about in the youtube video. A cool thumbnail will make the viewers want to click your video which in turn will help you to improve the traffic and number of clicks per video. Sometimes you may want to download youtube thumbnail from others. But it is very difficult to download a thumbnail directly from YouTube and many of you might not know that a thumbnail can be downloaded from elsewhere and then added to your content.
Here in this article, we will introduce the best 6 online tools available in the market to download YouTube thumbnail.
- 6 Online Tools to Download YouTube Thumbnail for Free
- Bonus Tips to Create a Clickable YouTube Thumbnail
6 Online Tools to Download YouTube Thumbnail for Free
Knowing the importance of YouTube thumbnails, you might now be wondering where to download the thumbnails for free. Let us have a look at some of the tools that can help you download YouTube thumbnail for free.
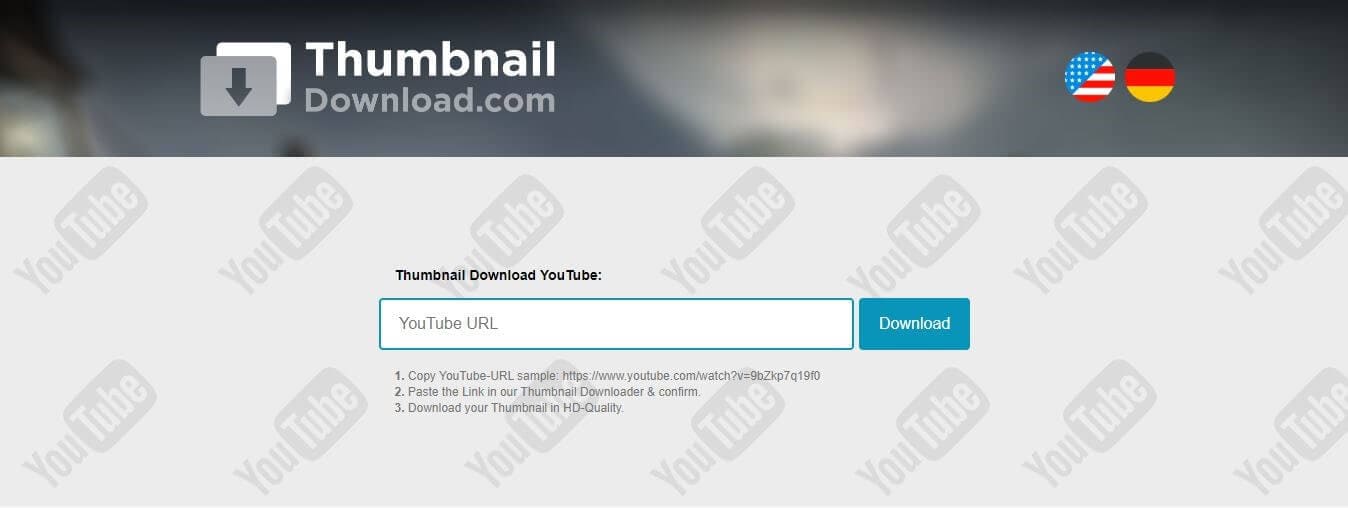
1. YouTube Thumbnail Image Tool
The YouTube Thumbnail Image Tool is a simple and free tool that helps you to download a thumbnail in four dimensions for your video, i.e. MQ 320*180, HQ 480*360, SD 640*480, and HD 1920*1080. Whether you are using a Windows or Mac OS, the thumbnail can be easily be downloaded via any browser.
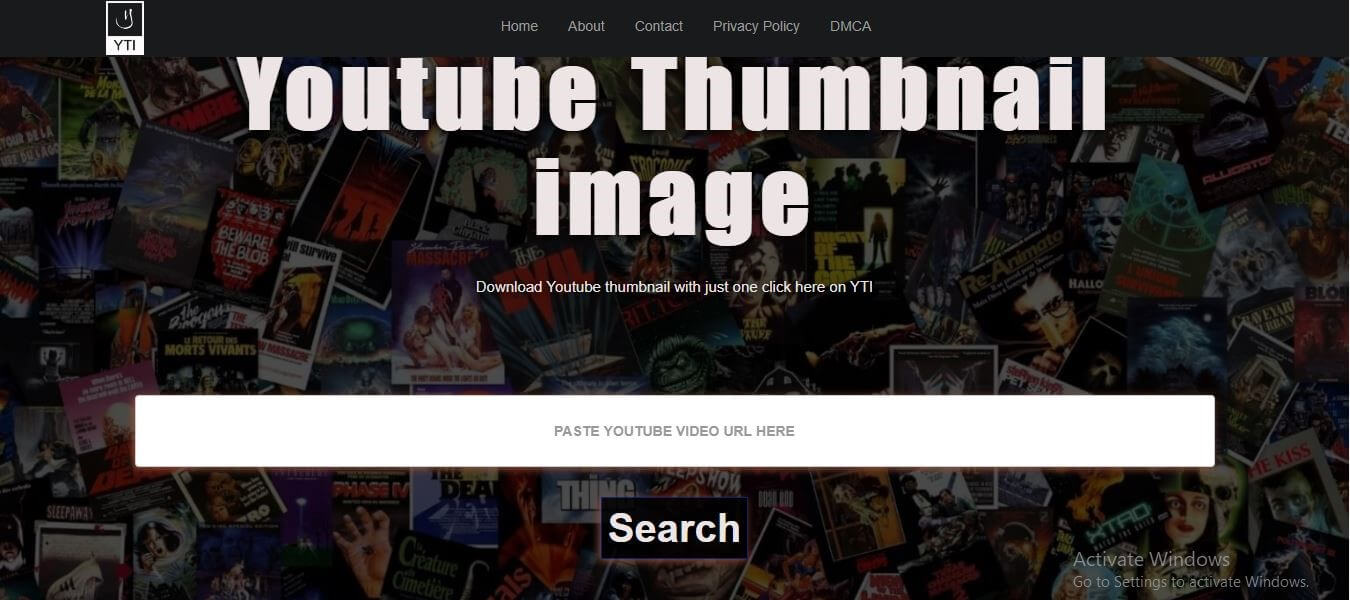
Steps to Download:
- Open any browser and open this youtube thumbnail image tool from Here
- Copy the link from your youtube video
- Paste the URL link of the video in the box and hit on Search
- You will be then displayed different qualities of the thumbnail. Choose one (HD is recommended) and hit the Download button
The selected quality of thumbnail will be downloaded to your storage which can later be used while uploading a video to YouTube.
2. Online YouTube Thumbnail Downloader
This online YouTube Thumbnail Downloader tool has a lot of features among which creating thumbnail for a YouTube video is one. This free online tool can easily be accessed both on Windows and Mac OS via any browser. This downloader can generate thumbnails for videos in HD, HQ 1080p, and 4K formats and the thumbnails will be available in SD, HD(720), and Full HD(1080).
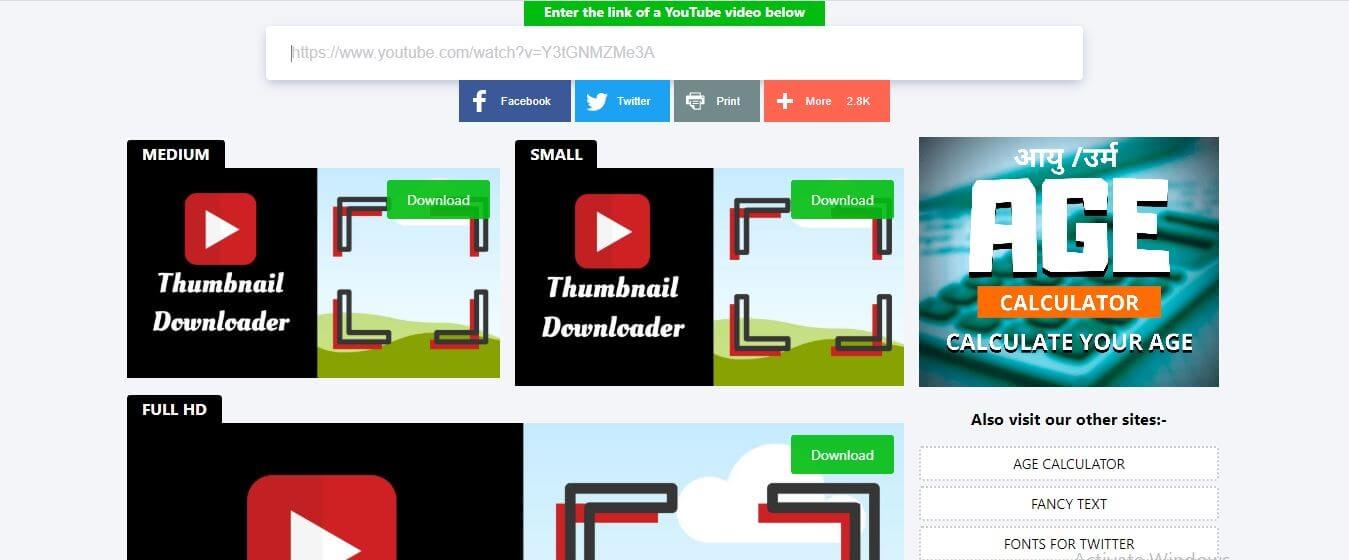
Steps to Download:
- Copy the link of the youtube video you wish to generate the thumbnail
- Click Here to open this free tool with your browser and paste the link in the box displayed at the top
- As soon as you paste the link, the available qualities of the thumbnail will be displayed just below the box
- Choose your desired quality of the image and hit on the Download button on the image you wish to download
The image will be downloaded and saved to your device instantly. You can now use it as a thumbnail for your YouTube video.
3. Thumbnail Save Tool
The Thumbnail Save Tool is also a free online tool which you can access from the browser of your Windows or Mac. It is a very simple tool that can generate thumbnails for HQ, HD, 1080P, and 4K videos instantly. Let us see how the thumbnail can be generated
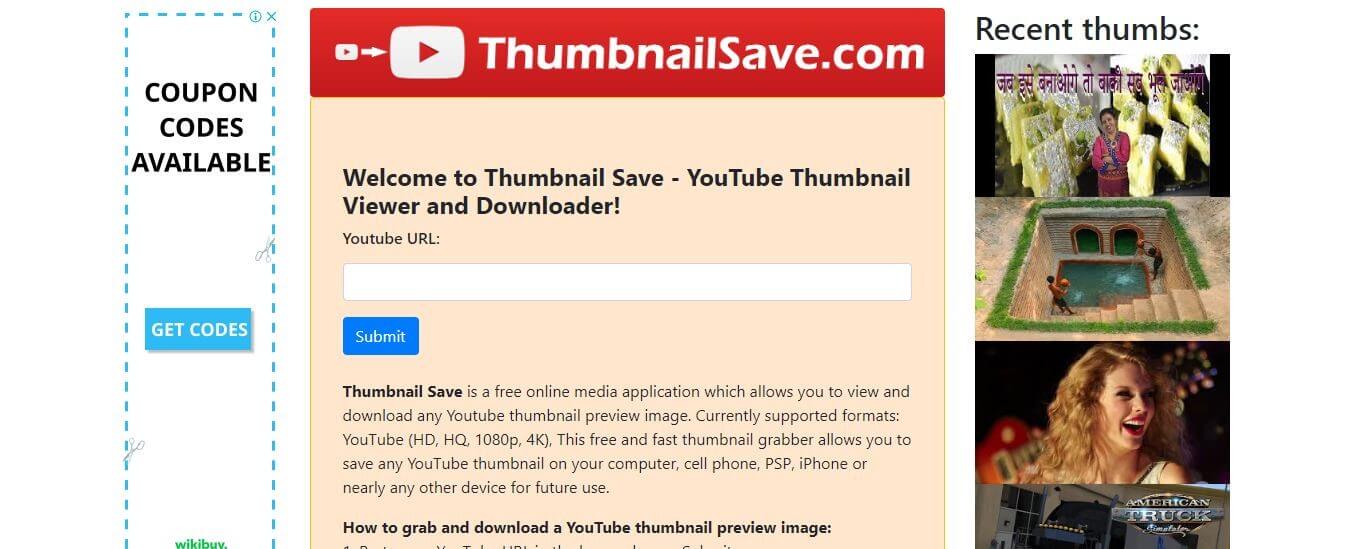
Steps to Download:
- Copy the URL of the video you want to create thumbnail
- Open this Thumbnail Save Tool from Here via your browser
- Paste the copied link in the box above Submit and hit Submit. Then the thumbnail will be generated instantly
- Now, to save the generated image to your device, right-click on the thumbnail and select the Save image as… option
The image will be saved to your device for later use as a thumbnail for your YouTube video.
4. YouTube Thumbnail Grabber
The YouTube thumbnail grabber is an online tool that can help you to download a thumbnail from a YouTube video for free. This tool can simply be accessed both by windows and Mac users through any browser. This tool helps you to download a thumbnail in any quality in some simple steps. Let us see how.
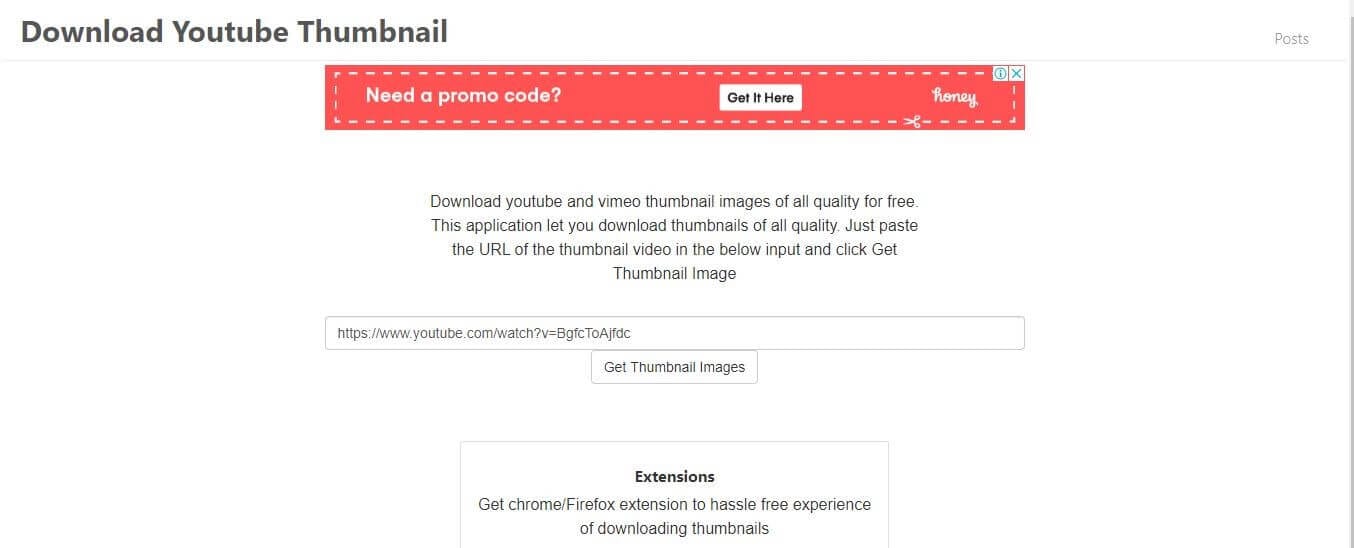
Steps to Download:
- Open this youtube thumbnail grabber from Here with any browser. Then Copy the link of the youtube video.
- Paste the link in the box displayed on the page and hit the Get Thumbnails Image tab
- Five different qualities of thumbnails will be generated among which you can choose your desired quality
- Hit the Download button below the image you chose
The thumbnail will be downloaded to your device for later use.
5. Thumbnail Download Tool
This thumbnail download tool allows generating thumbnails from video platforms like Dailymotion, Vimeo, Facebook, and YouTube. It is a free online tool that enables you to download the thumbnail of your video in the best quality. The tool can be accessed both on Windows and Mac OS without any issues. Let us see how the thumbnail can be downloaded for YouTube.
Steps to Download:
- Copy the URL link of the video you wish to generate a thumbnail
- Click Here to open this Thumbnail Download Tool with your browseron any browser of your Windows or iOS.
- Paste the copied link in the box and press the Download button
- Choose the picture size among the results displayed
- Save the picture to your PC
Your thumbnail image is now ready to be used.
6. YouTube Thumbnail Downloader
The YouTube Thumbnail Downloader is an online tool that can help you to create thumbnails for your YouTube videos and blogs. This tool will help you to download full HD 1080*720 images from YouTube for free, irrespective of the operative system you are using. Let us see how the thumbnail can be downloaded
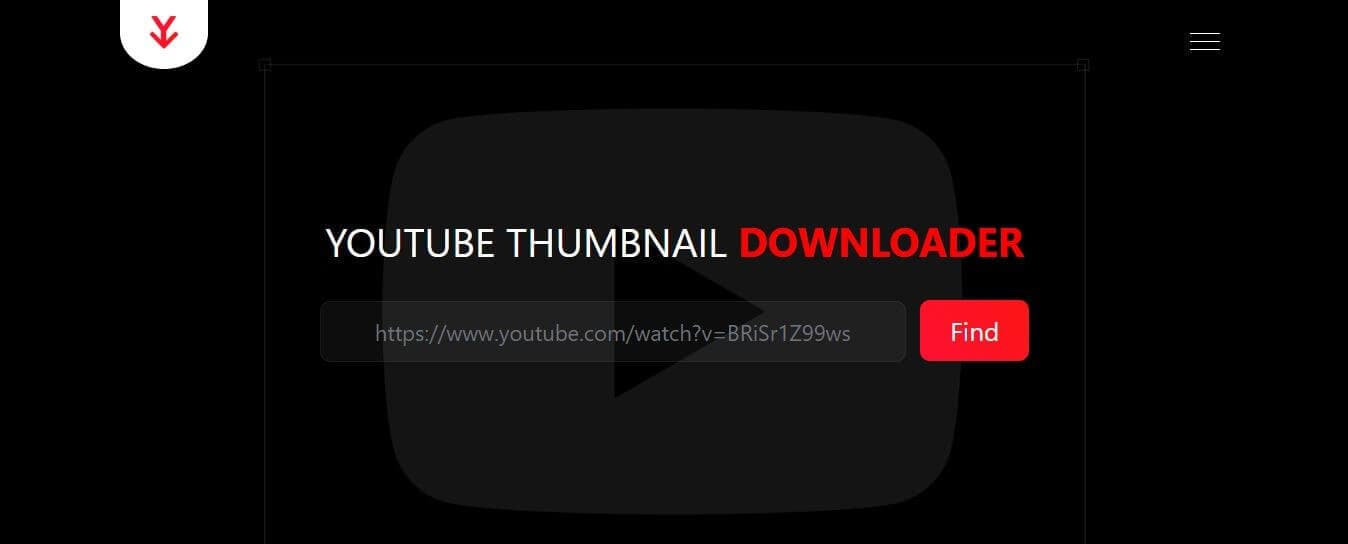
Steps to Download:
- Copy the link of any YouTube video you wish to generate a thumbnail
- Click Here in your browser and Paste the link in the box
- Hit the Find button. Then different qualities of the image will be displayed
- Select your desired quality and tap on the download icon on the respective image
The image will now be saved to your device
Bonus Tips to Create a Clickable YouTube Thumbnail
Don’t know how to create a clickable youtube thumbnail? Here we will recommend 5 tips for you!
1. Great thumbnail image quality and size
The thumbnail image quality should be good (HD/UHD). It should be bright. No matter what the device (a large TV) the viewers are using, care must be taken to avoid getting blurry thumbnails. The quality and the correct size of the thumbnail will create a positive image of the video in the user’s mind even before viewing the video. The video must be viewed from a variety of devices to test if the quality differs in different devices. Here are some specs for a perfect thumbnail
- The image formats should be in GIF, JPG PNG OR BMP
- The maximum size of the image must be 1280*720 px
- The minimum size 640*360 px
- The aspect ratio 16:9
- The maximum file size 2MB
2. Show a person in the Thumbnail image
A human face will get you closer to your audience. Our brain is wired in a way that a human face will draw its attention more than anything. So the users will naturally would an image with a human delivering the content rather than a robot or just a video of nonliving things. People tend to find a connection with the characters displayed on the thumbnail and hence prompting them to click on the video.
3. Use descriptive text in your thumbnail with branding elements
It is not completely possible to deliver a message through a picture and hence try to use descriptive texts. The texts should be clear enough and must be phrased in a manner that increases the curiosity or appeals to the emotions of the viewers. People tend to click a video just because of curiosity, wanting to know what the content is about. The type of font, color, and size also plays an important role in catching the attention of the audience.
4. Make Color Contrast between the text and background
Complementary colors will make your thumbnail stand out to some extent. Combining a yellow background with a purple foreground or green with red will make it easier to draw the attention of the browsers. Also, the use of analogous colors in the thumbnail makes it more attractive and pleasing to the eye.
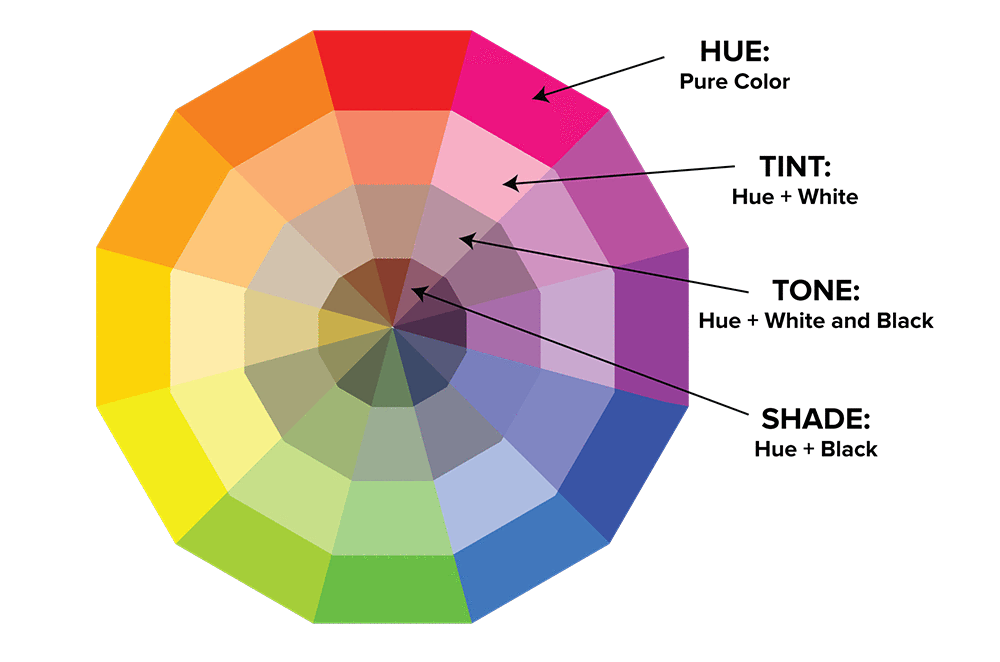
Image resource: Pinterest
Analogous colors are the colors that appear next to each other on a color wheel
5. Consistency
Consistency is something most of the people prefer and makes a thing more attractive. A thumbnail video with consistent text font, color tuning, visual effect, etc. will catch the eye of the users as it will stand apart in the whole webpage. Consistency adds to the standards of a video and will make people feel that this video is productive or from an authentic source
Create Your Own YouTube Thumbnail with Filmora for Free
Now that we have learned about how to download YouTube thumbnail for free and the rules you should follows, you may want to create a thumbnail. There are many Youtube thumbnail makers on the market that can help you create a YouTube thumbnail like Canva, PixStudio and more. However, we would like to be different today and recommend Filmora to you.
The benefits of using Filmora to create your YouTube thumbnail is that you don’t need to look for other softwares. You can make a thumbnail while you are editing your video with Filmora easily.
Wondering how can you do it? Here is a video guide for you.


Conclusion
Getting the proper size and quality of a YouTube thumbnail is very important for activities like blogging, designing, etc. Here in this article, we have described how to download YouTube thumbnail from the best free downloaders available online in simple steps. These Thumbnail downloading tools can be accessed from any device with an internet connection and will help you to download the perfect thumbnail image of your choice within minutes. Please leave your feedback about our suggestions in the comment box below.
Richard Bennett
Richard Bennett is a writer and a lover of all things video.
Follow @Richard Bennett
Richard Bennett
Mar 27, 2024• Proven solutions
What is a YouTube thumbnail?
A YouTube thumbnail is nothing but the cover image shown on a video file on YouTube. It shows what you are going to talk about in the youtube video. A cool thumbnail will make the viewers want to click your video which in turn will help you to improve the traffic and number of clicks per video. Sometimes you may want to download youtube thumbnail from others. But it is very difficult to download a thumbnail directly from YouTube and many of you might not know that a thumbnail can be downloaded from elsewhere and then added to your content.
Here in this article, we will introduce the best 6 online tools available in the market to download YouTube thumbnail.
- 6 Online Tools to Download YouTube Thumbnail for Free
- Bonus Tips to Create a Clickable YouTube Thumbnail
6 Online Tools to Download YouTube Thumbnail for Free
Knowing the importance of YouTube thumbnails, you might now be wondering where to download the thumbnails for free. Let us have a look at some of the tools that can help you download YouTube thumbnail for free.
1. YouTube Thumbnail Image Tool
The YouTube Thumbnail Image Tool is a simple and free tool that helps you to download a thumbnail in four dimensions for your video, i.e. MQ 320*180, HQ 480*360, SD 640*480, and HD 1920*1080. Whether you are using a Windows or Mac OS, the thumbnail can be easily be downloaded via any browser.
Steps to Download:
- Open any browser and open this youtube thumbnail image tool from Here
- Copy the link from your youtube video
- Paste the URL link of the video in the box and hit on Search
- You will be then displayed different qualities of the thumbnail. Choose one (HD is recommended) and hit the Download button
The selected quality of thumbnail will be downloaded to your storage which can later be used while uploading a video to YouTube.
2. Online YouTube Thumbnail Downloader
This online YouTube Thumbnail Downloader tool has a lot of features among which creating thumbnail for a YouTube video is one. This free online tool can easily be accessed both on Windows and Mac OS via any browser. This downloader can generate thumbnails for videos in HD, HQ 1080p, and 4K formats and the thumbnails will be available in SD, HD(720), and Full HD(1080).
Steps to Download:
- Copy the link of the youtube video you wish to generate the thumbnail
- Click Here to open this free tool with your browser and paste the link in the box displayed at the top
- As soon as you paste the link, the available qualities of the thumbnail will be displayed just below the box
- Choose your desired quality of the image and hit on the Download button on the image you wish to download
The image will be downloaded and saved to your device instantly. You can now use it as a thumbnail for your YouTube video.
3. Thumbnail Save Tool
The Thumbnail Save Tool is also a free online tool which you can access from the browser of your Windows or Mac. It is a very simple tool that can generate thumbnails for HQ, HD, 1080P, and 4K videos instantly. Let us see how the thumbnail can be generated
Steps to Download:
- Copy the URL of the video you want to create thumbnail
- Open this Thumbnail Save Tool from Here via your browser
- Paste the copied link in the box above Submit and hit Submit. Then the thumbnail will be generated instantly
- Now, to save the generated image to your device, right-click on the thumbnail and select the Save image as… option
The image will be saved to your device for later use as a thumbnail for your YouTube video.
4. YouTube Thumbnail Grabber
The YouTube thumbnail grabber is an online tool that can help you to download a thumbnail from a YouTube video for free. This tool can simply be accessed both by windows and Mac users through any browser. This tool helps you to download a thumbnail in any quality in some simple steps. Let us see how.
Steps to Download:
- Open this youtube thumbnail grabber from Here with any browser. Then Copy the link of the youtube video.
- Paste the link in the box displayed on the page and hit the Get Thumbnails Image tab
- Five different qualities of thumbnails will be generated among which you can choose your desired quality
- Hit the Download button below the image you chose
The thumbnail will be downloaded to your device for later use.
5. Thumbnail Download Tool
This thumbnail download tool allows generating thumbnails from video platforms like Dailymotion, Vimeo, Facebook, and YouTube. It is a free online tool that enables you to download the thumbnail of your video in the best quality. The tool can be accessed both on Windows and Mac OS without any issues. Let us see how the thumbnail can be downloaded for YouTube.
Steps to Download:
- Copy the URL link of the video you wish to generate a thumbnail
- Click Here to open this Thumbnail Download Tool with your browseron any browser of your Windows or iOS.
- Paste the copied link in the box and press the Download button
- Choose the picture size among the results displayed
- Save the picture to your PC
Your thumbnail image is now ready to be used.
6. YouTube Thumbnail Downloader
The YouTube Thumbnail Downloader is an online tool that can help you to create thumbnails for your YouTube videos and blogs. This tool will help you to download full HD 1080*720 images from YouTube for free, irrespective of the operative system you are using. Let us see how the thumbnail can be downloaded
Steps to Download:
- Copy the link of any YouTube video you wish to generate a thumbnail
- Click Here in your browser and Paste the link in the box
- Hit the Find button. Then different qualities of the image will be displayed
- Select your desired quality and tap on the download icon on the respective image
The image will now be saved to your device
Bonus Tips to Create a Clickable YouTube Thumbnail
Don’t know how to create a clickable youtube thumbnail? Here we will recommend 5 tips for you!
1. Great thumbnail image quality and size
The thumbnail image quality should be good (HD/UHD). It should be bright. No matter what the device (a large TV) the viewers are using, care must be taken to avoid getting blurry thumbnails. The quality and the correct size of the thumbnail will create a positive image of the video in the user’s mind even before viewing the video. The video must be viewed from a variety of devices to test if the quality differs in different devices. Here are some specs for a perfect thumbnail
- The image formats should be in GIF, JPG PNG OR BMP
- The maximum size of the image must be 1280*720 px
- The minimum size 640*360 px
- The aspect ratio 16:9
- The maximum file size 2MB
2. Show a person in the Thumbnail image
A human face will get you closer to your audience. Our brain is wired in a way that a human face will draw its attention more than anything. So the users will naturally would an image with a human delivering the content rather than a robot or just a video of nonliving things. People tend to find a connection with the characters displayed on the thumbnail and hence prompting them to click on the video.
3. Use descriptive text in your thumbnail with branding elements
It is not completely possible to deliver a message through a picture and hence try to use descriptive texts. The texts should be clear enough and must be phrased in a manner that increases the curiosity or appeals to the emotions of the viewers. People tend to click a video just because of curiosity, wanting to know what the content is about. The type of font, color, and size also plays an important role in catching the attention of the audience.
4. Make Color Contrast between the text and background
Complementary colors will make your thumbnail stand out to some extent. Combining a yellow background with a purple foreground or green with red will make it easier to draw the attention of the browsers. Also, the use of analogous colors in the thumbnail makes it more attractive and pleasing to the eye.
Image resource: Pinterest
Analogous colors are the colors that appear next to each other on a color wheel
5. Consistency
Consistency is something most of the people prefer and makes a thing more attractive. A thumbnail video with consistent text font, color tuning, visual effect, etc. will catch the eye of the users as it will stand apart in the whole webpage. Consistency adds to the standards of a video and will make people feel that this video is productive or from an authentic source
Create Your Own YouTube Thumbnail with Filmora for Free
Now that we have learned about how to download YouTube thumbnail for free and the rules you should follows, you may want to create a thumbnail. There are many Youtube thumbnail makers on the market that can help you create a YouTube thumbnail like Canva, PixStudio and more. However, we would like to be different today and recommend Filmora to you.
The benefits of using Filmora to create your YouTube thumbnail is that you don’t need to look for other softwares. You can make a thumbnail while you are editing your video with Filmora easily.
Wondering how can you do it? Here is a video guide for you.
Conclusion
Getting the proper size and quality of a YouTube thumbnail is very important for activities like blogging, designing, etc. Here in this article, we have described how to download YouTube thumbnail from the best free downloaders available online in simple steps. These Thumbnail downloading tools can be accessed from any device with an internet connection and will help you to download the perfect thumbnail image of your choice within minutes. Please leave your feedback about our suggestions in the comment box below.
Richard Bennett
Richard Bennett is a writer and a lover of all things video.
Follow @Richard Bennett
- Title: "2024 Approved Unveiling the Secrets of Professional Free YouTube Transcription"
- Author: Thomas
- Created at : 2024-05-31 12:48:50
- Updated at : 2024-06-01 12:48:50
- Link: https://youtube-help.techidaily.com/2024-approved-unveiling-the-secrets-of-professional-free-youtube-transcription/
- License: This work is licensed under CC BY-NC-SA 4.0.
