
:max_bytes(150000):strip_icc()/chatgpt-588fc25767134c248543d3de511ed5ea.jpg)
"Get Going on YouTube Video Upload Tutorial in Premiere for 2024"
Get Going on YouTube: Video Upload Tutorial in Premiere
How Do I Use Adobe Premiere To Upload YouTube Videos?

Benjamin Arango
Mar 27, 2024• Proven solutions
Whilst getting the editing and post work just right on any project is what we all aim for, the ultimate aim is for other people to see our creations, and the most popular way to achieve that is YouTube . Chances are, if you are producing video, you will be putting some of it on YouTube at some point, so let’s have a look at the most efficient way to get your work from Premiere to YouTube.
Check if your computer meet the Premiere System Requirements >>
This is a basic tutorial about Adobe Premiere, professional video editing software. However, if video editing is new to you, consider Wondershare Filmora , which is a powerful but easy-to-use tool for users just starting out. Download the free trial version below.
 Download Mac Version ](https://tools.techidaily.com/wondershare/filmora/download/ )
How Do I Use Adobe Premiere To Upload YouTube Videos
1. Master Copy
Before exporting your work, it is important to first create a master copy of your project that is ‘as is’, in that it reflects the settings and codecs used in the original footage.
To do this you simply select the sequence within the Timeline or in the Project Panel, and go through the menu tree via File > Export > Media to bring up the export dialogue.

To create your Master Copy, simply select the first option of ‘Match Sequence Settings’, this exports a file that is of the same quality as your original footage, essentially producing a digital copy of the work for archiving before anything else is done.
With you work safe and secure it is now time to look at ensuring the project is suitable for YouTube. With our sequence selected in the Timeline or Project Panel again, we go through the same File > Export > Media path to bring up the media export dialogue as before.
2. Container
The first option we have to consider is the file format that our finished video needs to be in. Here you should refer to YouTube for its guidelines, whilst they do accept a number of file formats, digging through the YouTube help system to find the settings for highest quality we find that they recommend MPEG4 as the container, using the codec.

We can also see further recommended settings in this screenshot that will be covered later.
The good news is that Premiere automatically selects the appropriate container for us when we select our codec, however it is worth knowing the file type YouTube is expecting just to check yourself.
3. Video Codec
So having established that YouTube recommends the MPEG4 container using the codec, the first option we need to look for in the media export dialogue is to select the appropriate Format.
This is the first drop down in the dialogue box, and in this case we simply select from the list.

Once you select you can check the ‘output name’ field and see that premiere is automatically set the output file to .mp4 which is exactly what we need.
4. Preset
The next field we come to is the ‘Preset’ dropdown menu. This is a major help to most people, as Adobe have very kindly included large numbers of presets to quickly adapt video settings to suit specific uses. They vary depending on the exact version of Premiere you are using, and each format type does have its own list of presets, as we can see has a large number for YouTube, but also has many presets for specific devices (presets for iPad, Kindle, Nook, various other tablets and phones, Vimeo and a host of others) to make getting the right settings that bit easier for us.

It is important here to select the correct preset from the various YouTube options. You want to select the resolution and frame rate that match your source file, for the best results. So, if your source file is 1080p with a frame rate of 29.97 fps then that is the YouTube setting you would select.
Once a preset is selected a summary of the settings is displayed below, normally these will be well suited to your project, however you can fine tune anything you wish by selecting the video or audio tabs at the bottom which give you the chance to adjust each parameter individually. If you do this, you can save these changes as a custom preset by clicking the button at the side of the Preset dropdown menu and simply use it on later projects by selecting it from the list the same as any other, a great time saving tool.

5. Rendering
Once you are satisfied with the settings, either from the Preset alone or if you have adjusted anything yourself, you are nearly ready to render the file and export it.
For YouTube it is recommended you select the ‘Use Maximum Render Quality’ option to maintain the best output you can, it does add time to the render process but if you value the quality of your work it is worthwhile.
Finally you can choose a suitable filename and the destination of the file by clicking on the ‘Output Name’ field.
I normally use a filename that includes the destination medium so I can differentiate between different versions of a project and know which one to upload where, in this case I include ‘youtube’, but if I were planning on uploading clips of the project to vimeo as well for instance there may be a cut of the project with ‘vimeo’ in the name too. The destination is personal preference, because I do use filenames to differentiate versions I can put the various iterations into a single project file, others have folder structures for each type of file , so all YouTube output goes into a single folder and so on, how you organize is entirely dependent on how you work.

Once those are selected clicking ‘Export’ starts the rendering process, and eventually (how long depends on the speed of your computer and the size and type of file involved), you will end up with your YouTube optimized video in the location you chose.
Here I created 4 key frames that let the ‘Animation’ object move around the ‘Demo Text’ Object and finally come to rest below it. Whilst this type of effect does look very effective on screen, such is the ease of use of After Effects it really is just a few minutes work to achieve.
Learn more details about How to add text in Premiere >>
6. Uploading
Now you have your file, the next step is to go to your YouTube account and log in if you need to.
On the top of your homepage on the right is the upload button, selecting that brings up the select file menu as below.

You can either drag your file into the window or click on it to open a standard file browser to locate the desired file, click and the upload will begin. The dropdown underneath allows you to set the video as Public, Unlisted or Private. You can change this at any time once the video is uploaded as well.
This opens the upload progress window, where you can add in a name, description and tags as well as add the video to a playlist or adjust the privacy settings as the video is uploading.

Once the upload as finished, you can do final adjustments to settings and choose a thumbnail for the video. The final step is to click the ‘Publish’ button and your video will be processed and go live.

Benjamin Arango
Benjamin Arango is a writer and a lover of all things video.
Follow @Benjamin Arango
Benjamin Arango
Mar 27, 2024• Proven solutions
Whilst getting the editing and post work just right on any project is what we all aim for, the ultimate aim is for other people to see our creations, and the most popular way to achieve that is YouTube . Chances are, if you are producing video, you will be putting some of it on YouTube at some point, so let’s have a look at the most efficient way to get your work from Premiere to YouTube.
Check if your computer meet the Premiere System Requirements >>
This is a basic tutorial about Adobe Premiere, professional video editing software. However, if video editing is new to you, consider Wondershare Filmora , which is a powerful but easy-to-use tool for users just starting out. Download the free trial version below.
Download Mac Version ](https://tools.techidaily.com/wondershare/filmora/download/ )
How Do I Use Adobe Premiere To Upload YouTube Videos
1. Master Copy
Before exporting your work, it is important to first create a master copy of your project that is ‘as is’, in that it reflects the settings and codecs used in the original footage.
To do this you simply select the sequence within the Timeline or in the Project Panel, and go through the menu tree via File > Export > Media to bring up the export dialogue.
To create your Master Copy, simply select the first option of ‘Match Sequence Settings’, this exports a file that is of the same quality as your original footage, essentially producing a digital copy of the work for archiving before anything else is done.
With you work safe and secure it is now time to look at ensuring the project is suitable for YouTube. With our sequence selected in the Timeline or Project Panel again, we go through the same File > Export > Media path to bring up the media export dialogue as before.
2. Container
The first option we have to consider is the file format that our finished video needs to be in. Here you should refer to YouTube for its guidelines, whilst they do accept a number of file formats, digging through the YouTube help system to find the settings for highest quality we find that they recommend MPEG4 as the container, using the codec.
We can also see further recommended settings in this screenshot that will be covered later.
The good news is that Premiere automatically selects the appropriate container for us when we select our codec, however it is worth knowing the file type YouTube is expecting just to check yourself.
3. Video Codec
So having established that YouTube recommends the MPEG4 container using the codec, the first option we need to look for in the media export dialogue is to select the appropriate Format.
This is the first drop down in the dialogue box, and in this case we simply select from the list.
Once you select you can check the ‘output name’ field and see that premiere is automatically set the output file to .mp4 which is exactly what we need.
4. Preset
The next field we come to is the ‘Preset’ dropdown menu. This is a major help to most people, as Adobe have very kindly included large numbers of presets to quickly adapt video settings to suit specific uses. They vary depending on the exact version of Premiere you are using, and each format type does have its own list of presets, as we can see has a large number for YouTube, but also has many presets for specific devices (presets for iPad, Kindle, Nook, various other tablets and phones, Vimeo and a host of others) to make getting the right settings that bit easier for us.
It is important here to select the correct preset from the various YouTube options. You want to select the resolution and frame rate that match your source file, for the best results. So, if your source file is 1080p with a frame rate of 29.97 fps then that is the YouTube setting you would select.
Once a preset is selected a summary of the settings is displayed below, normally these will be well suited to your project, however you can fine tune anything you wish by selecting the video or audio tabs at the bottom which give you the chance to adjust each parameter individually. If you do this, you can save these changes as a custom preset by clicking the button at the side of the Preset dropdown menu and simply use it on later projects by selecting it from the list the same as any other, a great time saving tool.
5. Rendering
Once you are satisfied with the settings, either from the Preset alone or if you have adjusted anything yourself, you are nearly ready to render the file and export it.
For YouTube it is recommended you select the ‘Use Maximum Render Quality’ option to maintain the best output you can, it does add time to the render process but if you value the quality of your work it is worthwhile.
Finally you can choose a suitable filename and the destination of the file by clicking on the ‘Output Name’ field.
I normally use a filename that includes the destination medium so I can differentiate between different versions of a project and know which one to upload where, in this case I include ‘youtube’, but if I were planning on uploading clips of the project to vimeo as well for instance there may be a cut of the project with ‘vimeo’ in the name too. The destination is personal preference, because I do use filenames to differentiate versions I can put the various iterations into a single project file, others have folder structures for each type of file , so all YouTube output goes into a single folder and so on, how you organize is entirely dependent on how you work.
Once those are selected clicking ‘Export’ starts the rendering process, and eventually (how long depends on the speed of your computer and the size and type of file involved), you will end up with your YouTube optimized video in the location you chose.
Here I created 4 key frames that let the ‘Animation’ object move around the ‘Demo Text’ Object and finally come to rest below it. Whilst this type of effect does look very effective on screen, such is the ease of use of After Effects it really is just a few minutes work to achieve.
Learn more details about How to add text in Premiere >>
6. Uploading
Now you have your file, the next step is to go to your YouTube account and log in if you need to.
On the top of your homepage on the right is the upload button, selecting that brings up the select file menu as below.
You can either drag your file into the window or click on it to open a standard file browser to locate the desired file, click and the upload will begin. The dropdown underneath allows you to set the video as Public, Unlisted or Private. You can change this at any time once the video is uploaded as well.
This opens the upload progress window, where you can add in a name, description and tags as well as add the video to a playlist or adjust the privacy settings as the video is uploading.
Once the upload as finished, you can do final adjustments to settings and choose a thumbnail for the video. The final step is to click the ‘Publish’ button and your video will be processed and go live.
Benjamin Arango
Benjamin Arango is a writer and a lover of all things video.
Follow @Benjamin Arango
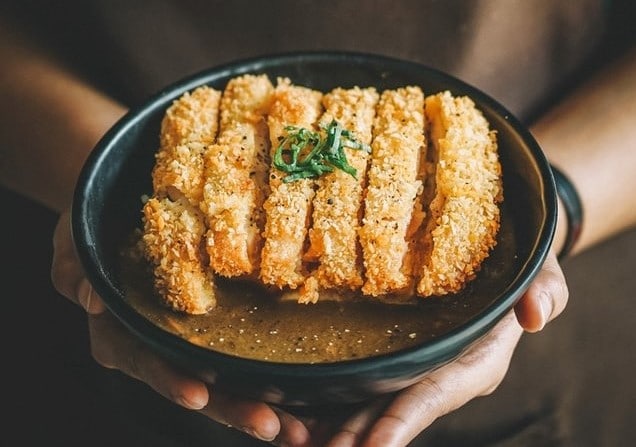
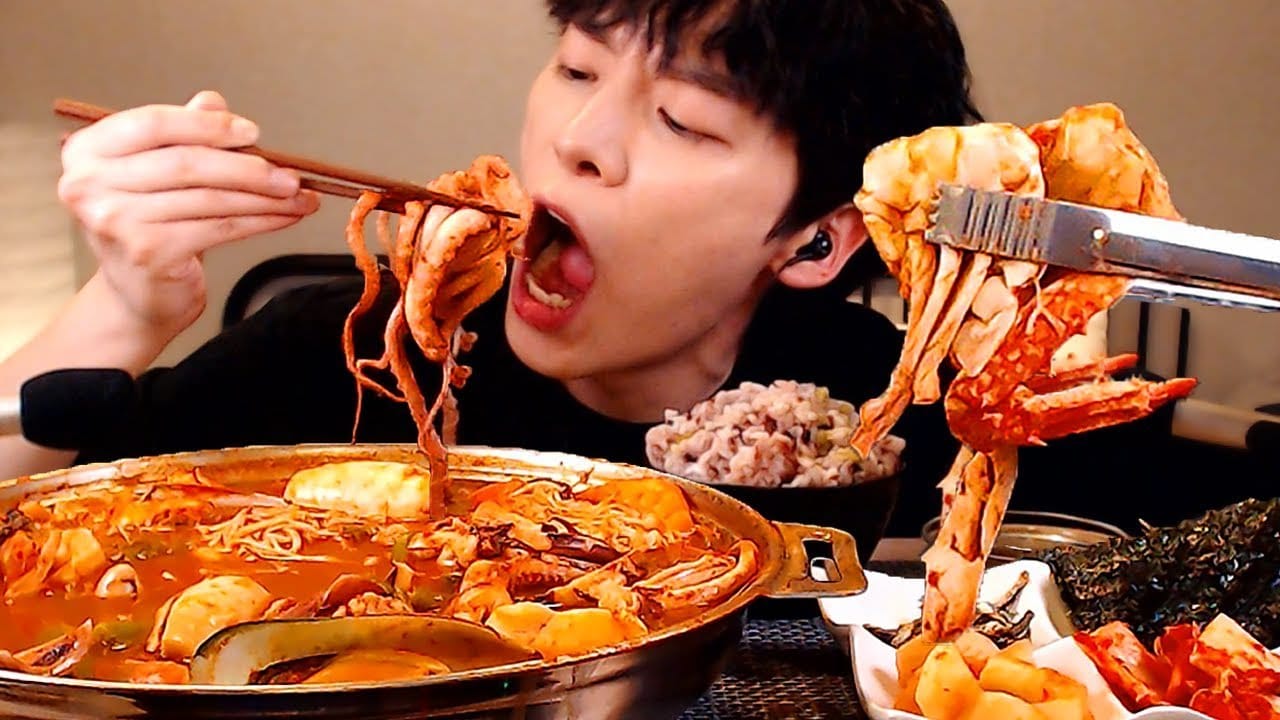
Behind the Scenes: The Genesis of a Mukbang Video
What is Mukbang and How to Make Mukbang Videos

Richard Bennett
Mar 27, 2024• Proven solutions
“Eating is not a crime. It’s not a moral issue. It’s normal. It’s enjoyable. It’s just is.” - Carrie Arnold.
It’s just binging, munching, and chewing, but why is the audience interested in watching other people who scarf plateful food? Doesn’t it sound crazy and strange? But, yes, at present, there are thousands of people who view the growing trend of Korean videos, “Mukbang.” Confused on what is this Mukbang video all about and why it is a most included subject on YouTube? We have an answer.
Mukbang is not only for those addicted to food obsession, yet many ordinary people love to watch it to cope with their loneliness. It provides them strange satisfaction for eating food, especially to the ones interested in ASMR. It has such immense popularity that some YouTube vloggers have earned millions of followers on their channel. The hosts of the Mukbang videos are famous as Broadcast Jockeys or Mukbanger. Let us explore some more facts about Mukbang, and we will meet the top 5 Mukbanger on YouTube.
- Part 1: What is Mukbang?
- Part 2: Top 5 Mukbangers on YouTube to Follow
- Part 3: How to Make a Mukbang ASMR Video?
- Part 4: Reveal the Untold Truth of Mukbang
What is Mukbang?
Mukbang is a widely popular trend and video genre on YouTube that stepped into Koreans’ minds around 2010. The viewers love to watch the host eating plenty of dishes while interacting with the audience. Mukbang is also famous as meokbang or an eating show. It came into existence by blending two South Korean words, “meokneun” (eating) and “bangsong” (broadcast). Nowadays, Mukbang ASMR has widespread acceptance all over the world. ASMR refers to Autonomous Sensory Meridian Response, the tingling sensation that one feels at the scalp and to the back of the neck.
Sometimes, Mukbang can negatively influence a person’s mental health, leading to an eating disorder. But instead of knowing its side effect first, it’s the time to know a few of the popular Mukbangers on YouTube to Follow.
Source: i.ytimg.com
Top 5 Mukbangers on YouTube to Follow
Meet these five famous Mukbangers rocking on YouTube with their Mukbang videos, but what makes them famous? Read this to find out, and you must follow them too.
1. [Dorothy] 도로시
Here is our first Mukbanger, Dorothy, whose channel has earned 4 million subscribers only because of her talent for eating any Korean dish. Known for her shorter videos with subbed English subtitles, Dorothy keeps the audience engaged and manages to stuff a massive quantity of food into her appetite. Among the Mukbanger artists, Dorothy is an expert in handling over spicy foods where dishes with ghost pepper powder are just a piece of cake!
2. Stephanie Soo
Stephanie Soo specializes in making over video featuring food reviews, cooking, and Mukbang content. Stephanie has a vast follower community due to her consistency in posting videos and collaborating with other Mukbangers on YouTube, where 439,032,546 views in just three years are her greatest accomplishment. Despite being a Mukbanger, Stephanie is a good storyteller as well!
3. Quang Tran
If you are a Mukbang ASMR video lover who wishes to explore the world and become one of the growing trends, Quang Tran is the best inspiration in line for you.
Quang Tran’s channel is full of Mukbang content, among which some are his cookery recipe videos that should give a try. With 2.04 million subscribers, Quang is a YouTube vlogger who is worth following!
4. Bloveslife (Bethany Gaskin)
Bethany Gaskin is known for her Bloveslife Mukbang channel, where she uploads her fun moments of enjoying her favorite dishes from 2017. Bethany enjoys a wide range of food varieties, including foreign ones that serve to be a significant reason behind her 3.1 million subscribers. Bethany’s way of approaching the viewers and interaction attracts the followers and keeps the views shuttering.
5. Peggie Neo
Peggie Neo, a food enthusiast, is famous for her pleasing Mukbang ASMR and food challenges. With cheese and chicken as favorites in her menu, she is known for her favorite video titled “Nuclear Fire noodles challenge Mukbang eating show.” Apart from Mukbanging, Peggie lists the top 1 on the roll of “Top rising creators in Singapore.”
How to Make a Mukbang ASMR Video: an Ultimate Guide
Are you planning to roll your sleeves and create your own Mukbang ASMR video? Watching the Mukbang video of other YouTube Vloggers can seem pleasurable, but the fun is to make your own Mukbang. This guide will assist you with your first Mukbang video. Keep in mind these points before indulging yourself in the world of Mukbangers.
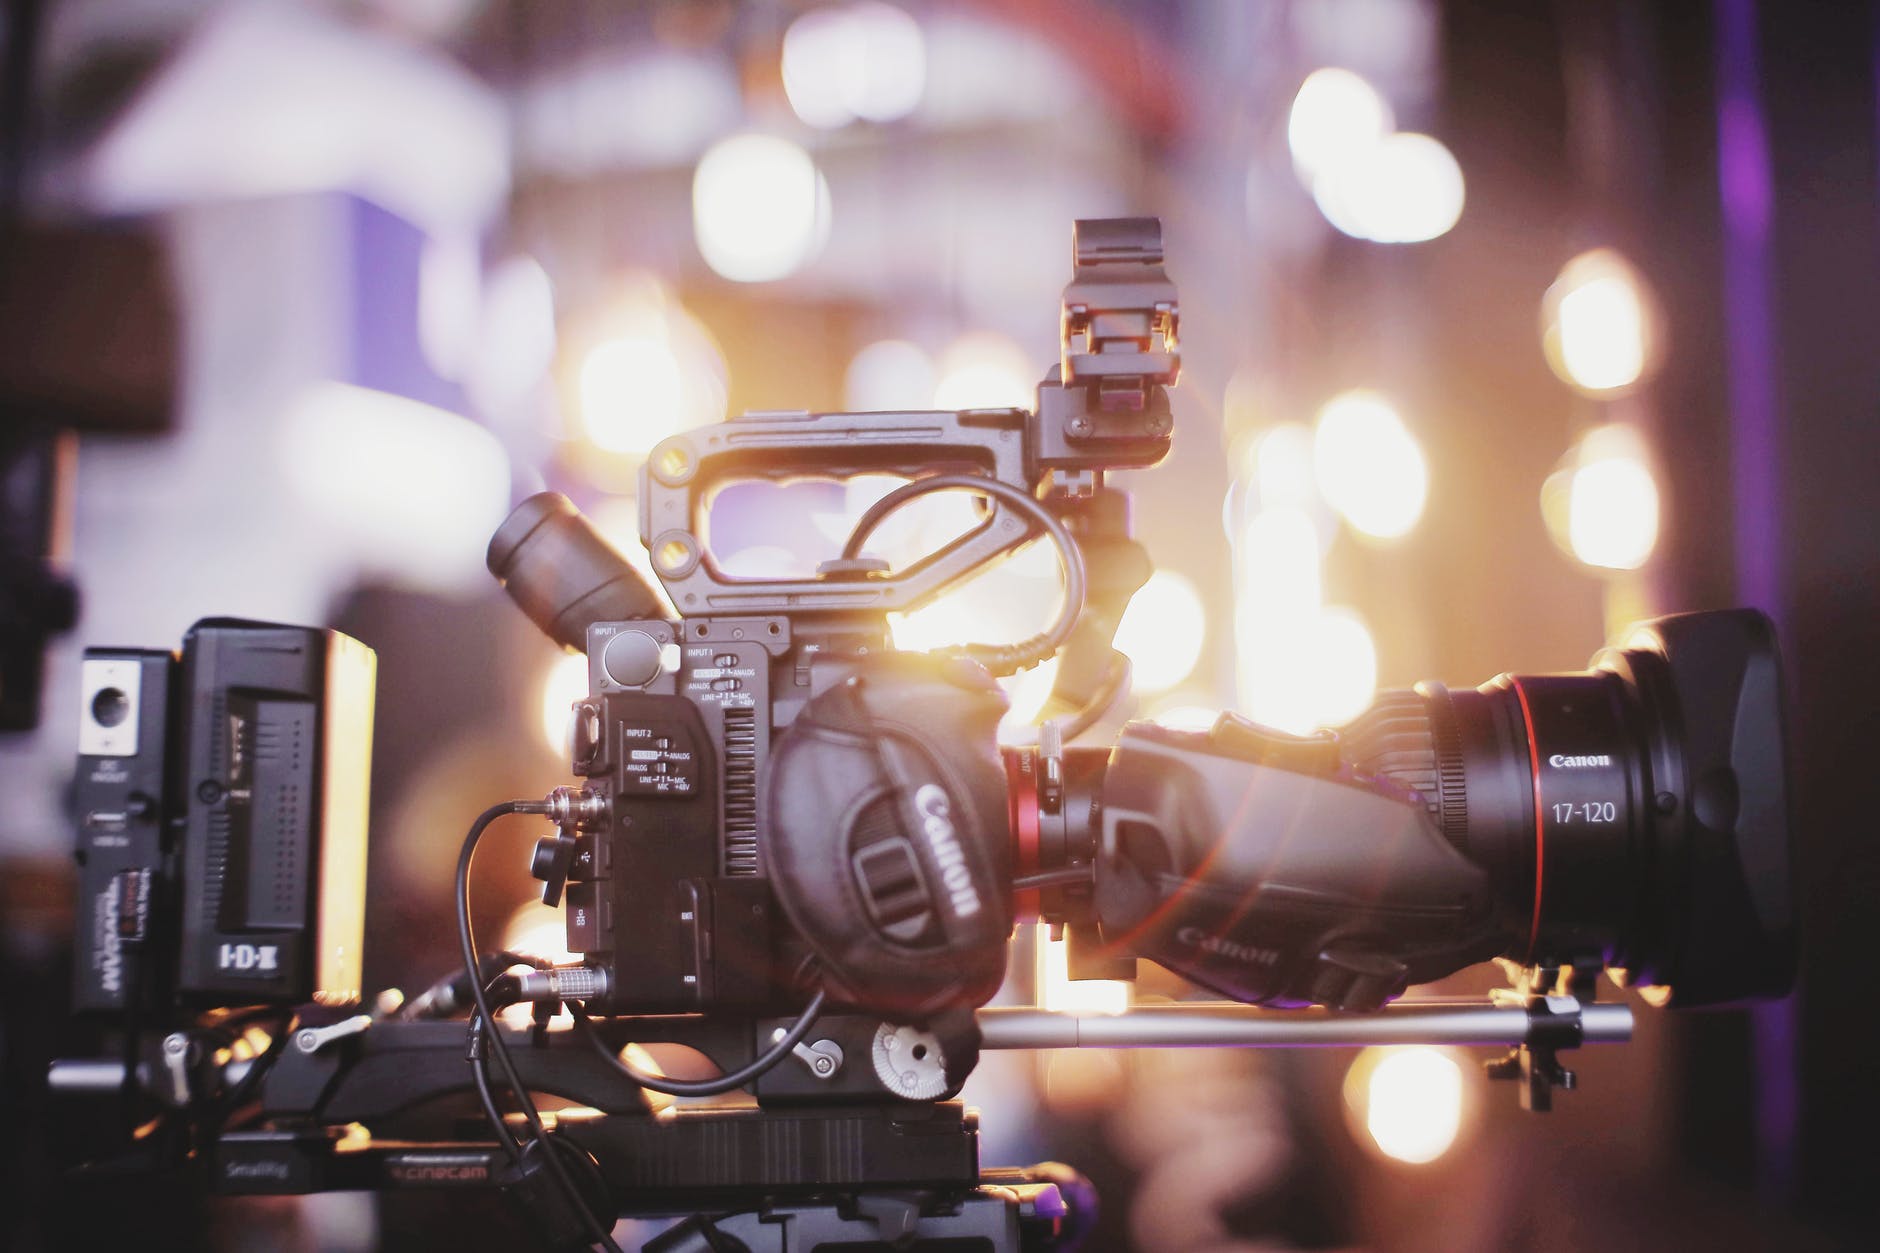
1. Get the right equipment
Always use a camera that features a wide-angle lens and can click high-quality pictures. It will assist in capturing the image of the dishes properly. The audience would like to hear ASMR affects. For this, it is crucial to set up the mic appropriately. That is what brings attractiveness to your Mukbang video.
2. Use the lightning
To capture the video correctly, you need to record the video with proper lighting setup. The best thing would be to record under sunlight. Otherwise, you can purchase a ring light. Make a trial video and check if it works or is there a need for a change in position.
3. Record in your favorite look
To create an appealing Mukbang video at home, vloggers work a lot on their looks. It is better to choose your favorite look. It attracts the audience and helps in interacting with them as well.
4. Select a challenge
Your Mukbang video can be interactive and exciting only when you add various challenges to it. Come up with an innovative idea, a unique set of challenges. You can try 100 plates noodle challenge or something else.
5. Add the right dish to your menu
Apart from everything, add the dishes that are easy to cook and gobble. However, record it so that the audience will crave for it by watching the video. Therefore, the menu is a significant part of your Mukbang video.
6. Edit the video
Recording the video is not sufficient. Editing the video will play the leading role in making it appealing to the audience. Here, you need to download and use the Filmora video editor. It is an ideal software for editing any video for YouTube Mukbangers.
Reveal the Untold Truth of Mukbang
Until now, we shared only the positive sides of Mukbang but are you aware of its negative side? The hidden truth of Mukbang is shocking. Over addiction to Mukbang videos can result in overeating and promoting poor eating habits, thus affecting health.
Some of the untold truth of Mukbang that we want you to know includes:
1. Mukbang causes overeating
being overly obsessive about the Mukbang YouTube channels are not acceptable in any way for your health. The popular Mukbangers spend some minutes consuming 4000 calories in a meal that is more than an average person should have. Such obsession results in overeating, which isn’t suitable for healthy living!
2. Mukbang may lead people to obtain deprived eating routine
Attempts to such Mukbanging videos would lead to weight gain instantly if not given proper notice. It can further lead to heart disease, diabetes, and a lot of other illnesses condition.
3. Mukbang promotes laziness
Laziness is a common aspect that surfaces after lousy eating habits. Mukbang videos place your mind in trance and hallucinations, which can be dangerous.
Conclusion
In the upcoming time, the popularity of Mukbang YouTube videos is not going to decrease. Between 2017-19, social media users searched Mukbang with more than 100,000 videos on YouTube. The number of Mukbangers is growing and taking inspirations from the famous YouTubers. Thus, you can also fulfill your dream of becoming a Mukbanger with some practice and the right equipment. Lastly, we spoke about each and everything related to Mukbang videos in this content. We hope you loved to give a read.
Richard Bennett
Richard Bennett is a writer and a lover of all things video.
Follow @Richard Bennett
Richard Bennett
Mar 27, 2024• Proven solutions
“Eating is not a crime. It’s not a moral issue. It’s normal. It’s enjoyable. It’s just is.” - Carrie Arnold.
It’s just binging, munching, and chewing, but why is the audience interested in watching other people who scarf plateful food? Doesn’t it sound crazy and strange? But, yes, at present, there are thousands of people who view the growing trend of Korean videos, “Mukbang.” Confused on what is this Mukbang video all about and why it is a most included subject on YouTube? We have an answer.
Mukbang is not only for those addicted to food obsession, yet many ordinary people love to watch it to cope with their loneliness. It provides them strange satisfaction for eating food, especially to the ones interested in ASMR. It has such immense popularity that some YouTube vloggers have earned millions of followers on their channel. The hosts of the Mukbang videos are famous as Broadcast Jockeys or Mukbanger. Let us explore some more facts about Mukbang, and we will meet the top 5 Mukbanger on YouTube.
- Part 1: What is Mukbang?
- Part 2: Top 5 Mukbangers on YouTube to Follow
- Part 3: How to Make a Mukbang ASMR Video?
- Part 4: Reveal the Untold Truth of Mukbang
What is Mukbang?
Mukbang is a widely popular trend and video genre on YouTube that stepped into Koreans’ minds around 2010. The viewers love to watch the host eating plenty of dishes while interacting with the audience. Mukbang is also famous as meokbang or an eating show. It came into existence by blending two South Korean words, “meokneun” (eating) and “bangsong” (broadcast). Nowadays, Mukbang ASMR has widespread acceptance all over the world. ASMR refers to Autonomous Sensory Meridian Response, the tingling sensation that one feels at the scalp and to the back of the neck.
Sometimes, Mukbang can negatively influence a person’s mental health, leading to an eating disorder. But instead of knowing its side effect first, it’s the time to know a few of the popular Mukbangers on YouTube to Follow.
Source: i.ytimg.com
Top 5 Mukbangers on YouTube to Follow
Meet these five famous Mukbangers rocking on YouTube with their Mukbang videos, but what makes them famous? Read this to find out, and you must follow them too.
1. [Dorothy] 도로시
Here is our first Mukbanger, Dorothy, whose channel has earned 4 million subscribers only because of her talent for eating any Korean dish. Known for her shorter videos with subbed English subtitles, Dorothy keeps the audience engaged and manages to stuff a massive quantity of food into her appetite. Among the Mukbanger artists, Dorothy is an expert in handling over spicy foods where dishes with ghost pepper powder are just a piece of cake!
2. Stephanie Soo
Stephanie Soo specializes in making over video featuring food reviews, cooking, and Mukbang content. Stephanie has a vast follower community due to her consistency in posting videos and collaborating with other Mukbangers on YouTube, where 439,032,546 views in just three years are her greatest accomplishment. Despite being a Mukbanger, Stephanie is a good storyteller as well!
3. Quang Tran
If you are a Mukbang ASMR video lover who wishes to explore the world and become one of the growing trends, Quang Tran is the best inspiration in line for you.
Quang Tran’s channel is full of Mukbang content, among which some are his cookery recipe videos that should give a try. With 2.04 million subscribers, Quang is a YouTube vlogger who is worth following!
4. Bloveslife (Bethany Gaskin)
Bethany Gaskin is known for her Bloveslife Mukbang channel, where she uploads her fun moments of enjoying her favorite dishes from 2017. Bethany enjoys a wide range of food varieties, including foreign ones that serve to be a significant reason behind her 3.1 million subscribers. Bethany’s way of approaching the viewers and interaction attracts the followers and keeps the views shuttering.
5. Peggie Neo
Peggie Neo, a food enthusiast, is famous for her pleasing Mukbang ASMR and food challenges. With cheese and chicken as favorites in her menu, she is known for her favorite video titled “Nuclear Fire noodles challenge Mukbang eating show.” Apart from Mukbanging, Peggie lists the top 1 on the roll of “Top rising creators in Singapore.”
How to Make a Mukbang ASMR Video: an Ultimate Guide
Are you planning to roll your sleeves and create your own Mukbang ASMR video? Watching the Mukbang video of other YouTube Vloggers can seem pleasurable, but the fun is to make your own Mukbang. This guide will assist you with your first Mukbang video. Keep in mind these points before indulging yourself in the world of Mukbangers.
1. Get the right equipment
Always use a camera that features a wide-angle lens and can click high-quality pictures. It will assist in capturing the image of the dishes properly. The audience would like to hear ASMR affects. For this, it is crucial to set up the mic appropriately. That is what brings attractiveness to your Mukbang video.
2. Use the lightning
To capture the video correctly, you need to record the video with proper lighting setup. The best thing would be to record under sunlight. Otherwise, you can purchase a ring light. Make a trial video and check if it works or is there a need for a change in position.
3. Record in your favorite look
To create an appealing Mukbang video at home, vloggers work a lot on their looks. It is better to choose your favorite look. It attracts the audience and helps in interacting with them as well.
4. Select a challenge
Your Mukbang video can be interactive and exciting only when you add various challenges to it. Come up with an innovative idea, a unique set of challenges. You can try 100 plates noodle challenge or something else.
5. Add the right dish to your menu
Apart from everything, add the dishes that are easy to cook and gobble. However, record it so that the audience will crave for it by watching the video. Therefore, the menu is a significant part of your Mukbang video.
6. Edit the video
Recording the video is not sufficient. Editing the video will play the leading role in making it appealing to the audience. Here, you need to download and use the Filmora video editor. It is an ideal software for editing any video for YouTube Mukbangers.
Reveal the Untold Truth of Mukbang
Until now, we shared only the positive sides of Mukbang but are you aware of its negative side? The hidden truth of Mukbang is shocking. Over addiction to Mukbang videos can result in overeating and promoting poor eating habits, thus affecting health.
Some of the untold truth of Mukbang that we want you to know includes:
1. Mukbang causes overeating
being overly obsessive about the Mukbang YouTube channels are not acceptable in any way for your health. The popular Mukbangers spend some minutes consuming 4000 calories in a meal that is more than an average person should have. Such obsession results in overeating, which isn’t suitable for healthy living!
2. Mukbang may lead people to obtain deprived eating routine
Attempts to such Mukbanging videos would lead to weight gain instantly if not given proper notice. It can further lead to heart disease, diabetes, and a lot of other illnesses condition.
3. Mukbang promotes laziness
Laziness is a common aspect that surfaces after lousy eating habits. Mukbang videos place your mind in trance and hallucinations, which can be dangerous.
Conclusion
In the upcoming time, the popularity of Mukbang YouTube videos is not going to decrease. Between 2017-19, social media users searched Mukbang with more than 100,000 videos on YouTube. The number of Mukbangers is growing and taking inspirations from the famous YouTubers. Thus, you can also fulfill your dream of becoming a Mukbanger with some practice and the right equipment. Lastly, we spoke about each and everything related to Mukbang videos in this content. We hope you loved to give a read.
Richard Bennett
Richard Bennett is a writer and a lover of all things video.
Follow @Richard Bennett
- Title: "Get Going on YouTube Video Upload Tutorial in Premiere for 2024"
- Author: Thomas
- Created at : 2024-05-31 12:38:37
- Updated at : 2024-06-01 12:38:37
- Link: https://youtube-help.techidaily.com/get-going-on-youtube-video-upload-tutorial-in-premiere-for-2024/
- License: This work is licensed under CC BY-NC-SA 4.0.
