
How To Become A Travel Vlogger | Guide of Travel Vlogging for 2024
How To Become A Travel Vlogger | Guide of Travel Vlogging
How To Become A Travel Vlogger | The Ultimate Guide of Travel Vlogging

Richard Bennett
Oct 26, 2023• Proven solutions
Want to become a travel vlogger?
Traveling around the world is one of life’s most exciting experiences – just ask anyone who has caught the travel bug. It is no wonder that travel videos are a big hit on YouTube. Any viewer can be instantly transported to another part of the world, all from the comfort of their seat.
With all the high-quality cameras and video editing software that are much more accessible to the general public now than even a few years ago, it has never been a better time to make a travel vlog.
Below, I have prepared a comprehensive guide on how to become a travel vlogger.
Create Your Travel Vlog with Wondershare FilmoraX
Wondershare FilmoraX is a video editing application that offers a lot of editing features that can be used both by a beginner and professionals alike. You can easily cut, split and trim your video, and apply transitions, filters, and texts, etc. to your travel vlog. What’s more, its advanced color grading settings and audio keyframing will add a unique flavor to your travel vlog. Just get started and make your video go viral!


PART 1: TRAVEL VLOGGING EQUIPMENT
In order to make travel videos, you’re going to need camera equipment. Below, I’ve prepared a comprehensive list of cameras and accessories that would be good for travel vlogging.
Filmstock Stock Media Library ](https://filmstock.wondershare.com/creative-theme-tourism?spm=rs.filmora%5Fweb&source%5Fchannel=seo%5Farticle )
1.1 Travel Vlogging Cameras
How To Choose A Vlogging Camera
When it comes to travel vlogging, you should look for a camera that ideally has the following eleven qualities:
- It has a fully articulated screen (flip screen)
- It has good continual autofocus while recording video
- It has good focus priority through face recognition
- It has touched to focus
- It has good low-light performance
- It has an external mic jack and a hot/cold shoe bracket
- It has optical image stabilization
- It is lightweight and portable
- It has a good battery life
- It is durable and weather-sealed
- It has hyper-lapse/timelapse/slow-motion shooting modes
For more information on why a lot of these features are ideal to have in a vlogging camera, check out my post on the Top 15 Best Cameras for Vlogging 2020 .
Cameras That Are Good For Travel Vlogging
Considering my list on what to look for in a travel vlogging camera, I’ve prepared a table below of thirteen cameras I’d recommend for travel vlogging:
| Camera | Release Date | Camera Type | Flip Screen | Mic Port | Price | |
|---|---|---|---|---|---|---|
| CanonEOSM50 | 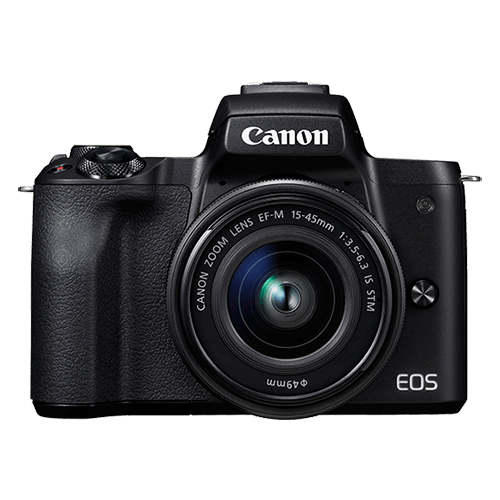 |
February2018 | Mirrorless | Fully Articulated | Yes | $- |
| PanasonicLumixDC-GH5S |  |
January2018 | Mirrorless | Fully Articulated | Yes | $$$ |
| GoProHero6 Black | 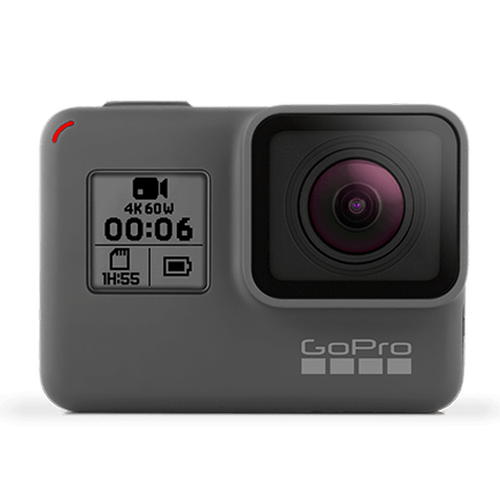 |
September2017 | Action Camera | No | Yes | $- |
| CanonEOSM100 | 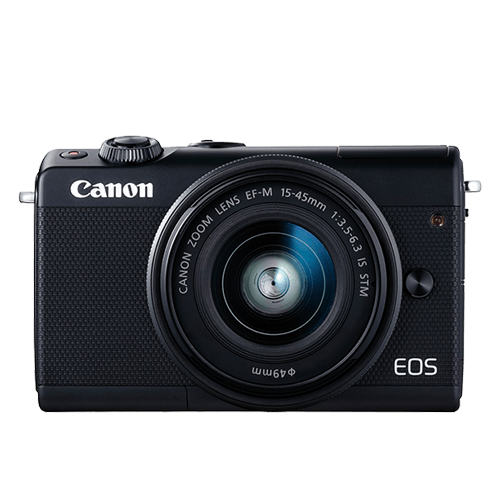 |
August2017 | Mirrorless | Flip-Up | No | $ |
| CanonEOS6D Mark II | 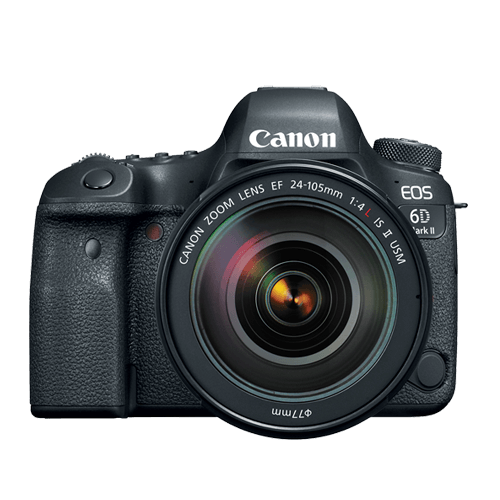 |
June2017 | Mid-size SLR | Fully Articulated | Yes | $$ |
| CanonEOS RebelSL2 | 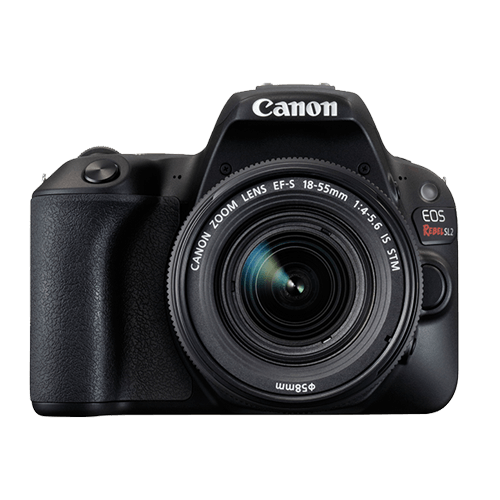 |
June2017 | Compact SLR | Fully Articulated | Yes | $ |
| CanonEOS RebelT7i | 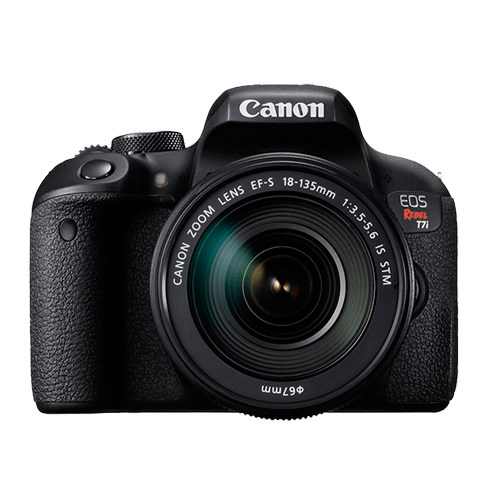 |
February2017 | Mid-size SLR | Fully Articulated | Yes | $- |
| CanonEOSM6 | 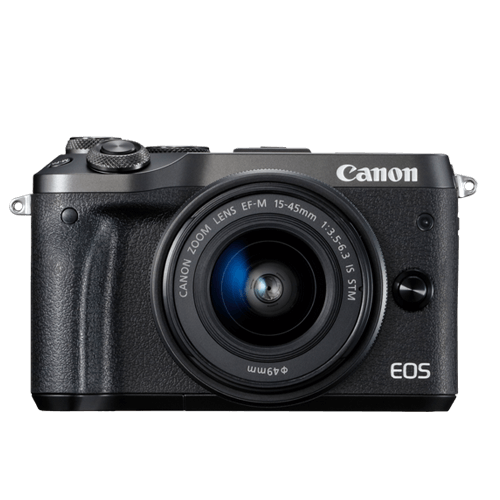 |
February2017 | Mirrorless | Flip-Up | Yes | $ |
| SonyCyber-Shot DSCRX 100 V | 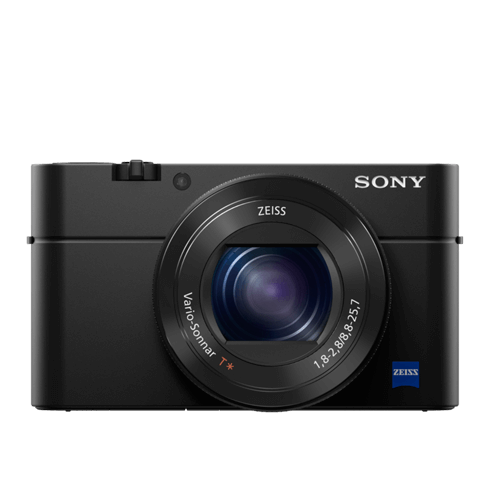 |
October2016 | Compact | Flip-Up | No | $- |
| PanasonicLumix DMCG85 | 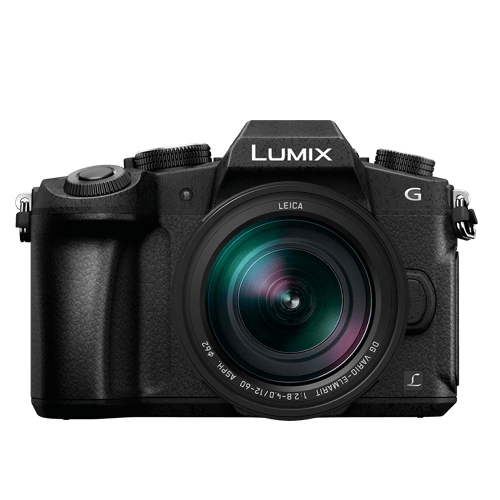 |
September2016 | Mirrorless | Fully Articulated | Yes | $- |
| PanasonicLumix DMCLX10 | 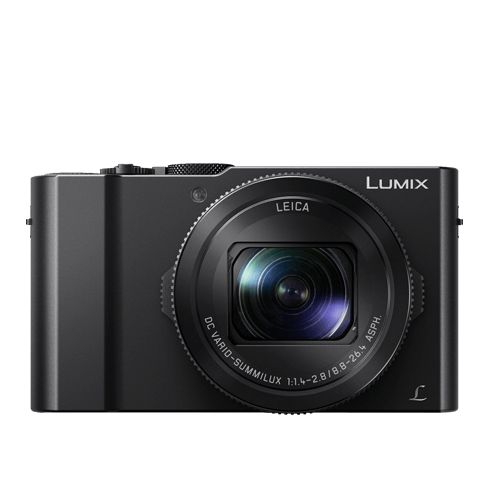 |
September2016 | Compact | Flip-Up | No | $ |
| CanonEOS80D | 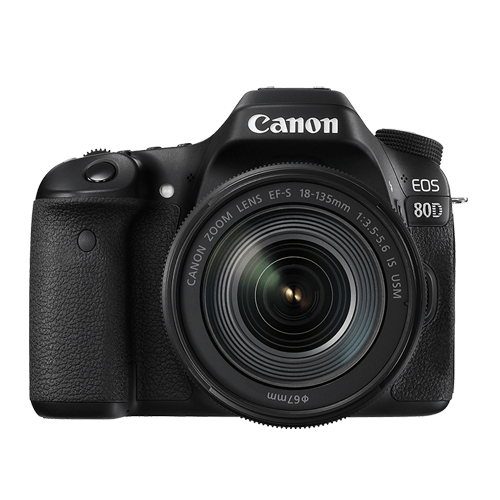 |
February2016 | Mid-size SLR | Fully Articulated | Yes | $$ |
| CanonPowerShotG7 X Mark II | 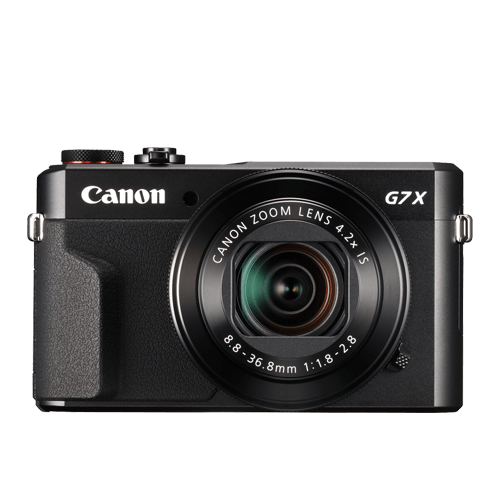 |
February2016 | Compact | Flip-Up | No | $ |
Lenses That Are Good For Travel Vlogging
Every travel vlogger should have a wide-angle lens. Wide-angle lenses fit much more of a scene into your camera frame, making it ideal for capturing establishing shots. You’ll also need a wide-angle lens if you plan on holding your camera out in front of yourself with an extended arm to get selfie footage.
As a travel vlogger, you’ll also want to show some close-up shots of the various subjects in your scene. If you don’t mind walking up to these subjects, the lens I recommend for this is a standard lens.
If, however, you want to be able to shoot these close-up shots from a farther distance, you’ll need a telephoto lens.
But you probably don’t want to carry and switch so many lenses as you travel, right? A convenient solution is to get a zoom lens that covers a wide range of focal lengths. For example, travel vlogger Sam Kolder shoots with a Canon EF 24-105mm f/4 lens – that’s a wide-angle lens, standard lens, and telephoto lens all in one lens!
If most of your travel video shooting will be done handheld, you should also definitely look for a lens equipped with optical image stabilization.
Check out my Best Camera Lens for YouTube to gain a more in-depth understanding of lenses and how they work.
1.2 Travel Vlogging Accessories
Camera Accessories That Are Good For Travel Vlogging
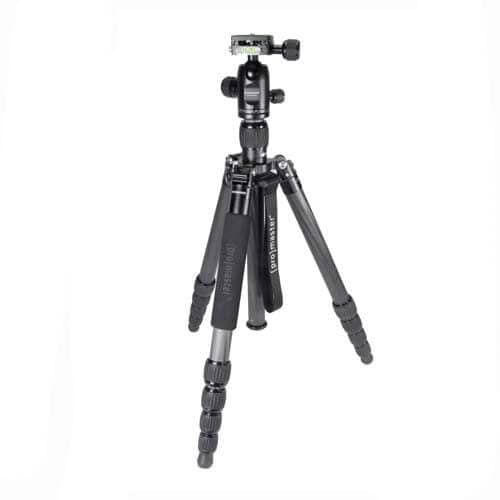 |
1. Tripod Record stabilized shots and timelapse footage with a tripod. |
|---|---|
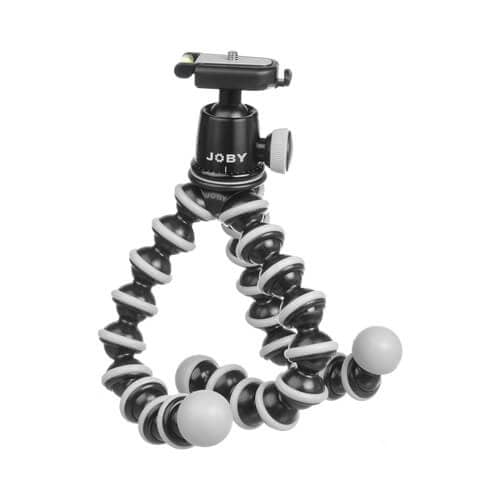 |
2. GorillaPod SLR-Zoom with Ballhead Wrap your camera around structures that your regular tripod can’t stay on. You can also hold out your camera further away from you using the GorillaPod as a selfie stick to fit in more of your background into your selfie shot. |
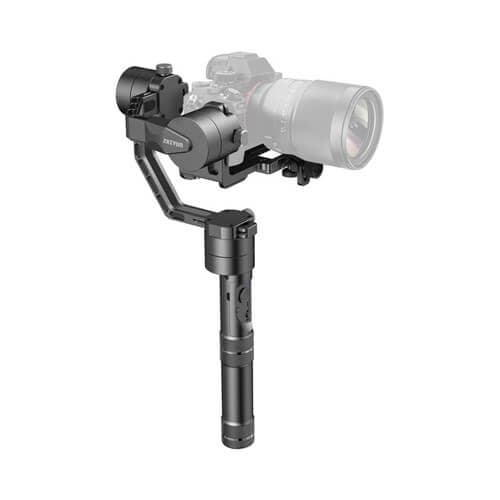 |
3. Stabilizing Gimbal Get super-smooth shots with a stabilizing gimbal. |
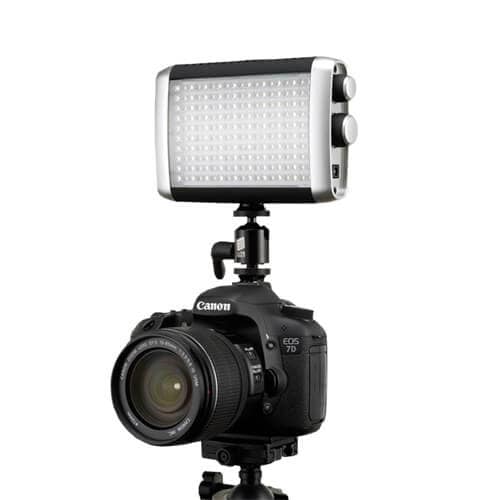 |
4. On-Camera LED Light Is there not enough light? Add an LED light to your camera’s hot/cold shoe. |
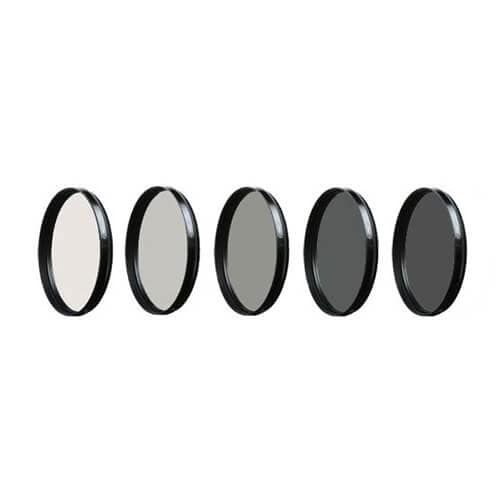 |
5. Neutral Density (ND) Filters Is it too bright outside to have your aperture wide open but you still want to get that cinematic look ? You can add ND filters to your lenses so that you can do just that in very bright conditions. |
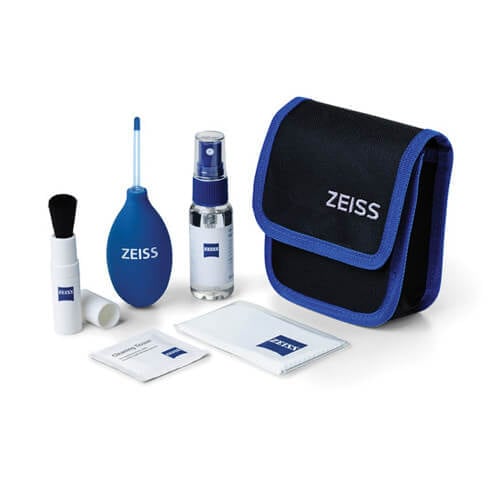 |
6. Camera Cleaning Kit While traveling, you can get all kinds of unwanted substances on your lens and in your camera like dust, dirt, fingerprints, raindrops, snow, and sand, to name a few. If you bring along a portable camera cleaning kit with you on your travels, you can remove those things immediately so that your shots won’t be affected. |
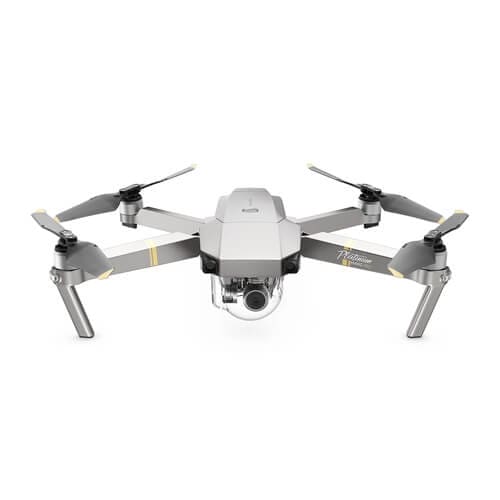 |
7. Drone When it comes to travel vlogging, wide shots that establish the scene and setting are important. Drones are great for taking these kinds of wide shots from high places that you would not be able to get to by foot. |
Smartphone Accessories That Are Good For Travel Vlogging
Using your smartphone as a travel vlogging device is a great idea! Your smartphone is a light and portable piece of equipment that you likely have with you at all times. Upgrade your smartphone travel vlogging setup with any of these 9 Best Smartphone Camera Accessories For Vloggers:
- RAVPower Portable Charger
- Arkon Tripod Mount
- Mega Tiny Anti-Gravity Case
- FLII Selfie Ring Light
- Rode VideoMic Me
- Aukey Optic 3-in-1 Smartphone Lens Set
- iOgrapher Go for Android and iPhone
- Manfrotto TwistGrip System
- Zhiyun Smooth-Q 3-Axis Handheld Gimbal Stabilizer for Smartphones
Read more about each one of these items in my post The 9 Best Smartphone Camera Accessories For Vloggers .
Camera Mounted Shotgun Microphones for Travel Vlogging
 |
 |
 |
 |
|---|
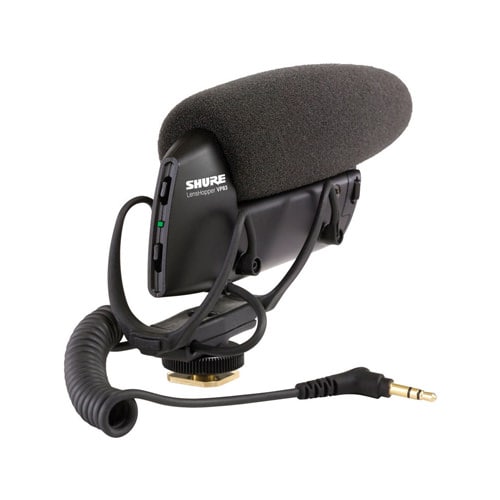
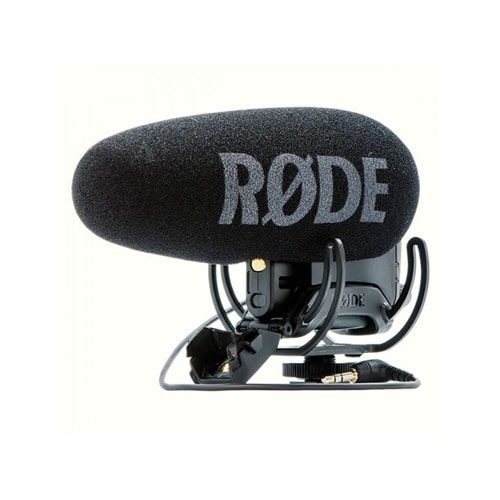
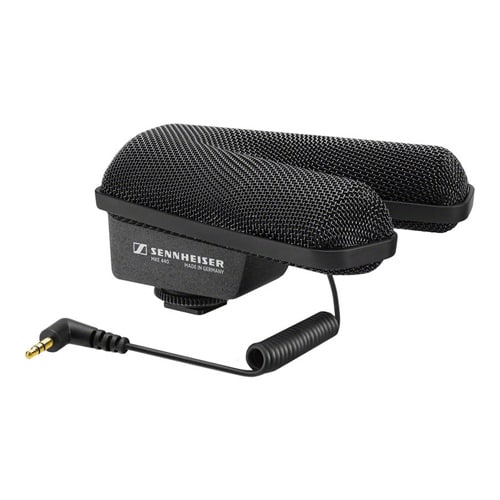
These four shotgun microphones can mount directly onto your camera’s hot/cold shoe:
- Rode VideoMic Go
- Shure VP83
- Rode VideoMic Pro+
- Sennheiser MKE 440
Read more about each one of them in our post about The 19 Best YouTube Microphones 2020 – Options for Music, Voiceovers, Vlogging, and more!
Other Useful Travel Vlogging Accessories
- Camera backpack
- Extra batteries
- Memory cards
- External hard drive
- Power plugs and cables
- USB card reader
- Universal plug
- D-ring clips (to prevent your equipment from slipping out of your grasp)
- Smartphone SD card tray key (if you’re storing your recorded footage in your SD card)
PART 2: TRAVEL VLOGGING IDEAS
If you’re needing some travel video ideas either to get you started or to bring some fresh content into your channel, here are ten travel video ideas that you can try.
1. Travel Vlog
Travel vlogging, the kind where you film yourself just going about your day in a different part of the world, is a great way to not only document your travel moments and memories for yourself, but also a great way to share your experience with others.
Rather than being too picky with your video shots and possibly ending up with a lack of footage to work with, shoot as much as you can.
Try to capture your thoughts and feelings around the things you taste, smell, see and hear. Sharing these details can help your viewers feel more like they’re with you on your travels.
2. Tips or Tricks for Traveling
Although learning from mistakes during your travels can be a rewarding experience, most people want to avoid them and, rather, enjoy their trip as much as they possibly can. After all, travel, for most people, happens in intervals that seem too short. You can help this sizable group by offering travel tips and tricks.
Prepare a list of tips and tricks, a shot list of all the footage you’ll need to go along with those tips, and then capture all your footage. As you go through your list, you can then cut away to your associated travel shots.
3. Video Tour of a Location
Many people are curious about different parts of the world and would love to join a tour without the high cost of flights, hotels, meals, and admission tickets. Give them that experience by making a video tour.
4. Review An Attraction or Experience
A lot of travelers having a limited amount of time and money to enjoy their chosen travel destinations want to know which attractions and experiences to prioritize and which ones to skip. Help them make their decision by making a video review.
5. Timelapse Videos
All you need in addition to your camera is a tripod to get started with making timelapse videos. Your tripod stabilizes your shot as your camera captures all the changes that take place in a given location.
When your footage is sped up, your viewers can appreciate all the changes that take place that they may not have had the patience to sit through in real-time. It’s also interesting to observe the passage of time in a different way.
6. Average Daily Cost
Before going on a trip, many people try to make a budget and figure out how much money to exchange into foreign currency. Making a good budget and getting just enough foreign cash, though, requires you to know how much, on average, things cost.
Make a helpful video on the average cost of daily expenses including meals and transportation like Paolo did in the above video “Average Daily Cost in Tokyo Japan | Is it Expensive?.” His video actually helped me a lot when I was trying to come up with a budget for my recent trip to Japan.
7. Interview Locals
People don’t travel only to see popular attractions. A lot of people travel to connect with and understand people from different parts of the world.
Interviewing locals and sharing their thoughts can help to provide that kind of connection.
8. What’s in My Backpack?
Packing for a trip can say a lot about who you are as a person because it involves prioritizing items based on your personal values.
For your next trip, share a little part of yourself with your audience through a video about the things you’ve packed in your bag.
9. Talk About Your Own Home City
When you’ve lived in your own home city for so long, you might forget that people all over the world may marvel at the things you take for granted because all those things just happen to be at your doorstep.
Take advantage of the expert that you already are in your own home city and make an informative video for others who are taking a trip there.
10. How To Become a Travel Vlogger
After you’ve done a lot of travel vlogging and learned so much along the way, you can make a video about how to be a travel vlogger.
In the above video, Andrew Santos teaches how to make a travel video, all while hilariously poking fun at many of the cliché trends in the travel genre.
PART 3: TRAVEL VIDEO EDITING
Video Editing Software
When it comes to editing your travel video together, there are different kinds of software you can do that with.
| FREE VIDEO EDITING SOFTWARE | PAID VIDEO EDITING SOFTWARE |
|---|---|
| OpenShot Video Editor (Windows, Mac, Linux) ShotCut (Windows, Mac, Linux) Hitfilm Express (Windows, Mac) VideoPad Video Editor (Windows) Lightworks (Windows, Mac, Linux) VSDC Video Editor (Windows) Machete Video Editor Lite (Windows) Avidemux (Windows, Mac, Linux, BSD) Read more about each software in our post about The Best Free Video Editing Software for YouTube – Top 8 Reviews . | Wondershare Filmora X (Windows, Mac) - start at $49.99 for one year license and Free trial Final Cut Pro (Mac) - $299.99, Free trial Vegas Movie Studio (Windows) - $49.99 |
Travel-Themed Video Effects
If you use Filmora Video Editor, you can also take advantage of a variety of travel-themed video effects packs, like the one shown in the above video, filled with titles, transitions, filters, overlays, and other visual elements.
For my recent trip to Japan, I actually used Filmora Effects’ Japanese set.
At the 2:10 mark of the above video, I used an overlay of falling cherry blossom leaves. At the 3:03 mark of the same video, I used an anime-themed overlay.
At the 2:48 mark of the above video, I used a shoji door transition.
Music Libraries
Music is an important component of a lot of travel videos. Here’s where you can get them:
| ROYALTY-FREE MUSIC LIBRARIES | PAID MUSIC LIBRARIES | PAID SUBSCRIPTION MUSIC LIBRARIES |
|---|---|---|
| Audionautix Bensound dig.ccMixter Free Music Archive Free Stock Music Incompetech Josh Woodward Moby Gratis Musopen Purple Planet Music TeknoAXE YouTube Audio Library | Premium Beat Audio Jungle | Audio Network Audio Blocks Epidemic Sound |
Sound Effects
Free Sound Effect Sites
PART 4: TRAVEL VLOGGING TIPS
Vlog/Life Balance
- Give yourself more time at each location if you want to have a good balance between getting the shots you need and enjoying your present moment.
Theft Prevention
- Carry a backpack that doesn’t have zippers on the outside that thieves can easily get to.
- If you’re shooting with a flashy smartphone, make it look less appealing to thieves with a grotesque smartphone case, like an Otterbox.
- In locations with high crime, pre-plan the shots you want to capture and take your SLR camera out of your bag only to take those shots. Otherwise, keep your SLR camera concealed.
- Never leave your equipment unattended in a visible area, not even in a locked car.
Pre-Production and Planning
- Before shooting, make a shot list of all the footage you need.
- Have all your filming equipment that needs to be calibrated all calibrated and ready to use.
Onscreen Performance
- Look into your lens, not the projected image of yourself on your camera’s flip screen.
- Show a lot of energy as you film yourself.
- If you’re nervous about talking to the camera in public, keep your talking head clips short and gradually build your way up to longer clips. You can break up longer sentences by saying a few words from one scene, saying a few more in another, and finishing off your last words, again, in another scene. Later, in editing, you can stitch all of those clips together to make one fluid sentence.
- If you’re nervous about talking to the camera in public, you can capture your talking headshots later when you find a more secluded space.
Audio Recording
- Silence everything you don’t want your mic to record.
- Put your mobile phone in airplane mode.
- Block wind from reaching your mic with windscreens and dead cats.
- Upgrade your mic.
- Adjust your levels.
- Get close to the sound you are wanting to record.
Check out 10 Recording Tips to Get The Best Sound From Your Microphone for more audio recording tips.
Filming
- To avoid crowds, wake up early and grab your footage early while everyone else is still sleeping or getting ready.
- Capture wide shots, medium shots, and close-up shots for better coverage.
- Use the Sun Seeker app to set up your sunrise/sunset shots better.
- If your camera can record 4K footage, record in 4K all the scenes that you want to zoom in closer later in editing without losing quality (your video project in editing has to be at 1920p x 1080p for this to work).
Stabilization
- If you’re trying to get shots with movement by walking, rather than walking as you normally would walk with your knees bent for steadier shots.
- If you’re shooting something in front of your handheld, lean your arm against your own body for steadier shots.
- Use a stabilizing gimbal with your camera.
Timelapse/Hyperlapse
- Select scenes where you can see a lot of change over time (not a still building in front of a cloudless smoggy sky).
- Set longer intervals for scenes that change very slowly over time.
- Pre-set your focus. Turn autofocus off.
- Shoot time-lapses/hyper-lapses in manual mode to prevent the flickering that occurs with changing light conditions in automatic settings.
- If your camera is set on a tripod in a fixed position, turn your optical image stabilization off.
- If you aren’t holding onto your camera as it’s in the middle of making a timelapse video, at least keep your camera and tripod attached by some kind of leash mechanism.
- For moving time-lapses or hyper-lapses, try to keep one point of reference in the same position within your camera frame.
Slow Motion
- Shoot slow-motion videos when there is plenty of light.
- For actions that are as slow as walking, slowing down your footage to 50% of the original speed looks good enough. If your video editing project is in 30 fps, shooting your video in 60 fps will give you a 50% slow-motion video. If your video editing project is in 60 fps, shooting your video in 120 fps will give you a 50% slow-motion video. Any slower is overkill for slowing down the speed of walking.
- For actions that are as fast as water splashing, slowing down your footage as little as 15% of the original speed can look good. For a video editing project in 30 fps, you would need a camera that can shoot at up to 240 fps to slow your footage down this much.
Storage and Back-Up
- If you’re using a phone that can store images and videos on a separate SD card, take advantage of that and record your travel footage onto your SD card. Later, you can easily get to your travel media as it will all be in one place.
- If you have your laptop on you, regularly transfer your media files from your cameras to your external hard drives.
- If you don’t want to bring your laptop on your trip and plan to video edit once you’re back home, use a USB memory card reader that connects with an app on your phone to transfer your files into your external hard drive.
- If you have access to a reliable internet connection and you leave your laptop at your place of accommodation, have your computer upload your files onto cloud storage while you are out to travel vlogging.
- Take advantage of Google Photos’ free, unlimited cloud storage for video files up to 1080p.
Video Editing
- If you’re editing a video project with videos from multiple different cameras, make sure to set the correct time and date on all of them before you start filming. Later, in editing, you can import all your image and video files and sort them in the exact order that they were taken.
- If your video editing software can work with proxies, transcode all your video files into proxy files for much faster editing.
Posting On YouTube
- Choose a title that people will search for. Keep your target keywords at the beginning of your title. “S01E01: My Summer Backpacking Trip” is not an effective title. Instead, a title like “Going Up The Eiffel Tower… Beautiful View of Paris!” would be better.
Ready to Become a Travel Vlogger?
Here in this article, I shared travel vlogging cameras &accessories, travel video ideas& resources, and travel vlogging tips. Did you get more hints to become a travel vlogger? Stay tuned and start your own travel vlog! Leave your comments below if you have any suggestions about this travel vlogger guide.
This past year has been a challenge, so if you want to make a #travelanywhere video without traveling, you can try Wondershare Filmora X video editor.
Richard Bennett
Richard Bennett is a writer and a lover of all things video.
Follow @Richard Bennett
Richard Bennett
Oct 26, 2023• Proven solutions
Want to become a travel vlogger?
Traveling around the world is one of life’s most exciting experiences – just ask anyone who has caught the travel bug. It is no wonder that travel videos are a big hit on YouTube. Any viewer can be instantly transported to another part of the world, all from the comfort of their seat.
With all the high-quality cameras and video editing software that are much more accessible to the general public now than even a few years ago, it has never been a better time to make a travel vlog.
Below, I have prepared a comprehensive guide on how to become a travel vlogger.
Create Your Travel Vlog with Wondershare FilmoraX
Wondershare FilmoraX is a video editing application that offers a lot of editing features that can be used both by a beginner and professionals alike. You can easily cut, split and trim your video, and apply transitions, filters, and texts, etc. to your travel vlog. What’s more, its advanced color grading settings and audio keyframing will add a unique flavor to your travel vlog. Just get started and make your video go viral!
PART 1: TRAVEL VLOGGING EQUIPMENT
In order to make travel videos, you’re going to need camera equipment. Below, I’ve prepared a comprehensive list of cameras and accessories that would be good for travel vlogging.
Filmstock Stock Media Library ](https://filmstock.wondershare.com/creative-theme-tourism?spm=rs.filmora%5Fweb&source%5Fchannel=seo%5Farticle )
1.1 Travel Vlogging Cameras
How To Choose A Vlogging Camera
When it comes to travel vlogging, you should look for a camera that ideally has the following eleven qualities:
- It has a fully articulated screen (flip screen)
- It has good continual autofocus while recording video
- It has good focus priority through face recognition
- It has touched to focus
- It has good low-light performance
- It has an external mic jack and a hot/cold shoe bracket
- It has optical image stabilization
- It is lightweight and portable
- It has a good battery life
- It is durable and weather-sealed
- It has hyper-lapse/timelapse/slow-motion shooting modes
For more information on why a lot of these features are ideal to have in a vlogging camera, check out my post on the Top 15 Best Cameras for Vlogging 2020 .
Cameras That Are Good For Travel Vlogging
Considering my list on what to look for in a travel vlogging camera, I’ve prepared a table below of thirteen cameras I’d recommend for travel vlogging:
| Camera | Release Date | Camera Type | Flip Screen | Mic Port | Price | |
|---|---|---|---|---|---|---|
| CanonEOSM50 | |
February2018 | Mirrorless | Fully Articulated | Yes | $- |
| PanasonicLumixDC-GH5S | |
January2018 | Mirrorless | Fully Articulated | Yes | $$$ |
| GoProHero6 Black | |
September2017 | Action Camera | No | Yes | $- |
| CanonEOSM100 | |
August2017 | Mirrorless | Flip-Up | No | $ |
| CanonEOS6D Mark II | |
June2017 | Mid-size SLR | Fully Articulated | Yes | $$ |
| CanonEOS RebelSL2 | |
June2017 | Compact SLR | Fully Articulated | Yes | $ |
| CanonEOS RebelT7i | |
February2017 | Mid-size SLR | Fully Articulated | Yes | $- |
| CanonEOSM6 | |
February2017 | Mirrorless | Flip-Up | Yes | $ |
| SonyCyber-Shot DSCRX 100 V | |
October2016 | Compact | Flip-Up | No | $- |
| PanasonicLumix DMCG85 | |
September2016 | Mirrorless | Fully Articulated | Yes | $- |
| PanasonicLumix DMCLX10 | |
September2016 | Compact | Flip-Up | No | $ |
| CanonEOS80D | |
February2016 | Mid-size SLR | Fully Articulated | Yes | $$ |
| CanonPowerShotG7 X Mark II | |
February2016 | Compact | Flip-Up | No | $ |
Lenses That Are Good For Travel Vlogging
Every travel vlogger should have a wide-angle lens. Wide-angle lenses fit much more of a scene into your camera frame, making it ideal for capturing establishing shots. You’ll also need a wide-angle lens if you plan on holding your camera out in front of yourself with an extended arm to get selfie footage.
As a travel vlogger, you’ll also want to show some close-up shots of the various subjects in your scene. If you don’t mind walking up to these subjects, the lens I recommend for this is a standard lens.
If, however, you want to be able to shoot these close-up shots from a farther distance, you’ll need a telephoto lens.
But you probably don’t want to carry and switch so many lenses as you travel, right? A convenient solution is to get a zoom lens that covers a wide range of focal lengths. For example, travel vlogger Sam Kolder shoots with a Canon EF 24-105mm f/4 lens – that’s a wide-angle lens, standard lens, and telephoto lens all in one lens!
If most of your travel video shooting will be done handheld, you should also definitely look for a lens equipped with optical image stabilization.
Check out my Best Camera Lens for YouTube to gain a more in-depth understanding of lenses and how they work.
1.2 Travel Vlogging Accessories
Camera Accessories That Are Good For Travel Vlogging
|
1. Tripod Record stabilized shots and timelapse footage with a tripod. |
|---|---|
|
2. GorillaPod SLR-Zoom with Ballhead Wrap your camera around structures that your regular tripod can’t stay on. You can also hold out your camera further away from you using the GorillaPod as a selfie stick to fit in more of your background into your selfie shot. |
|
3. Stabilizing Gimbal Get super-smooth shots with a stabilizing gimbal. |
|
4. On-Camera LED Light Is there not enough light? Add an LED light to your camera’s hot/cold shoe. |
|
5. Neutral Density (ND) Filters Is it too bright outside to have your aperture wide open but you still want to get that cinematic look ? You can add ND filters to your lenses so that you can do just that in very bright conditions. |
|
6. Camera Cleaning Kit While traveling, you can get all kinds of unwanted substances on your lens and in your camera like dust, dirt, fingerprints, raindrops, snow, and sand, to name a few. If you bring along a portable camera cleaning kit with you on your travels, you can remove those things immediately so that your shots won’t be affected. |
|
7. Drone When it comes to travel vlogging, wide shots that establish the scene and setting are important. Drones are great for taking these kinds of wide shots from high places that you would not be able to get to by foot. |
Smartphone Accessories That Are Good For Travel Vlogging
Using your smartphone as a travel vlogging device is a great idea! Your smartphone is a light and portable piece of equipment that you likely have with you at all times. Upgrade your smartphone travel vlogging setup with any of these 9 Best Smartphone Camera Accessories For Vloggers:
- RAVPower Portable Charger
- Arkon Tripod Mount
- Mega Tiny Anti-Gravity Case
- FLII Selfie Ring Light
- Rode VideoMic Me
- Aukey Optic 3-in-1 Smartphone Lens Set
- iOgrapher Go for Android and iPhone
- Manfrotto TwistGrip System
- Zhiyun Smooth-Q 3-Axis Handheld Gimbal Stabilizer for Smartphones
Read more about each one of these items in my post The 9 Best Smartphone Camera Accessories For Vloggers .
Camera Mounted Shotgun Microphones for Travel Vlogging
|
|
|
|
|---|
These four shotgun microphones can mount directly onto your camera’s hot/cold shoe:
- Rode VideoMic Go
- Shure VP83
- Rode VideoMic Pro+
- Sennheiser MKE 440
Read more about each one of them in our post about The 19 Best YouTube Microphones 2020 – Options for Music, Voiceovers, Vlogging, and more!
Other Useful Travel Vlogging Accessories
- Camera backpack
- Extra batteries
- Memory cards
- External hard drive
- Power plugs and cables
- USB card reader
- Universal plug
- D-ring clips (to prevent your equipment from slipping out of your grasp)
- Smartphone SD card tray key (if you’re storing your recorded footage in your SD card)
PART 2: TRAVEL VLOGGING IDEAS
If you’re needing some travel video ideas either to get you started or to bring some fresh content into your channel, here are ten travel video ideas that you can try.
1. Travel Vlog
Travel vlogging, the kind where you film yourself just going about your day in a different part of the world, is a great way to not only document your travel moments and memories for yourself, but also a great way to share your experience with others.
Rather than being too picky with your video shots and possibly ending up with a lack of footage to work with, shoot as much as you can.
Try to capture your thoughts and feelings around the things you taste, smell, see and hear. Sharing these details can help your viewers feel more like they’re with you on your travels.
2. Tips or Tricks for Traveling
Although learning from mistakes during your travels can be a rewarding experience, most people want to avoid them and, rather, enjoy their trip as much as they possibly can. After all, travel, for most people, happens in intervals that seem too short. You can help this sizable group by offering travel tips and tricks.
Prepare a list of tips and tricks, a shot list of all the footage you’ll need to go along with those tips, and then capture all your footage. As you go through your list, you can then cut away to your associated travel shots.
3. Video Tour of a Location
Many people are curious about different parts of the world and would love to join a tour without the high cost of flights, hotels, meals, and admission tickets. Give them that experience by making a video tour.
4. Review An Attraction or Experience
A lot of travelers having a limited amount of time and money to enjoy their chosen travel destinations want to know which attractions and experiences to prioritize and which ones to skip. Help them make their decision by making a video review.
5. Timelapse Videos
All you need in addition to your camera is a tripod to get started with making timelapse videos. Your tripod stabilizes your shot as your camera captures all the changes that take place in a given location.
When your footage is sped up, your viewers can appreciate all the changes that take place that they may not have had the patience to sit through in real-time. It’s also interesting to observe the passage of time in a different way.
6. Average Daily Cost
Before going on a trip, many people try to make a budget and figure out how much money to exchange into foreign currency. Making a good budget and getting just enough foreign cash, though, requires you to know how much, on average, things cost.
Make a helpful video on the average cost of daily expenses including meals and transportation like Paolo did in the above video “Average Daily Cost in Tokyo Japan | Is it Expensive?.” His video actually helped me a lot when I was trying to come up with a budget for my recent trip to Japan.
7. Interview Locals
People don’t travel only to see popular attractions. A lot of people travel to connect with and understand people from different parts of the world.
Interviewing locals and sharing their thoughts can help to provide that kind of connection.
8. What’s in My Backpack?
Packing for a trip can say a lot about who you are as a person because it involves prioritizing items based on your personal values.
For your next trip, share a little part of yourself with your audience through a video about the things you’ve packed in your bag.
9. Talk About Your Own Home City
When you’ve lived in your own home city for so long, you might forget that people all over the world may marvel at the things you take for granted because all those things just happen to be at your doorstep.
Take advantage of the expert that you already are in your own home city and make an informative video for others who are taking a trip there.
10. How To Become a Travel Vlogger
After you’ve done a lot of travel vlogging and learned so much along the way, you can make a video about how to be a travel vlogger.
In the above video, Andrew Santos teaches how to make a travel video, all while hilariously poking fun at many of the cliché trends in the travel genre.
PART 3: TRAVEL VIDEO EDITING
Video Editing Software
When it comes to editing your travel video together, there are different kinds of software you can do that with.
| FREE VIDEO EDITING SOFTWARE | PAID VIDEO EDITING SOFTWARE |
|---|---|
| OpenShot Video Editor (Windows, Mac, Linux) ShotCut (Windows, Mac, Linux) Hitfilm Express (Windows, Mac) VideoPad Video Editor (Windows) Lightworks (Windows, Mac, Linux) VSDC Video Editor (Windows) Machete Video Editor Lite (Windows) Avidemux (Windows, Mac, Linux, BSD) Read more about each software in our post about The Best Free Video Editing Software for YouTube – Top 8 Reviews . | Wondershare Filmora X (Windows, Mac) - start at $49.99 for one year license and Free trial Final Cut Pro (Mac) - $299.99, Free trial Vegas Movie Studio (Windows) - $49.99 |
Travel-Themed Video Effects
If you use Filmora Video Editor, you can also take advantage of a variety of travel-themed video effects packs, like the one shown in the above video, filled with titles, transitions, filters, overlays, and other visual elements.
For my recent trip to Japan, I actually used Filmora Effects’ Japanese set.
At the 2:10 mark of the above video, I used an overlay of falling cherry blossom leaves. At the 3:03 mark of the same video, I used an anime-themed overlay.
At the 2:48 mark of the above video, I used a shoji door transition.
Music Libraries
Music is an important component of a lot of travel videos. Here’s where you can get them:
| ROYALTY-FREE MUSIC LIBRARIES | PAID MUSIC LIBRARIES | PAID SUBSCRIPTION MUSIC LIBRARIES |
|---|---|---|
| Audionautix Bensound dig.ccMixter Free Music Archive Free Stock Music Incompetech Josh Woodward Moby Gratis Musopen Purple Planet Music TeknoAXE YouTube Audio Library | Premium Beat Audio Jungle | Audio Network Audio Blocks Epidemic Sound |
Sound Effects
Free Sound Effect Sites
PART 4: TRAVEL VLOGGING TIPS
Vlog/Life Balance
- Give yourself more time at each location if you want to have a good balance between getting the shots you need and enjoying your present moment.
Theft Prevention
- Carry a backpack that doesn’t have zippers on the outside that thieves can easily get to.
- If you’re shooting with a flashy smartphone, make it look less appealing to thieves with a grotesque smartphone case, like an Otterbox.
- In locations with high crime, pre-plan the shots you want to capture and take your SLR camera out of your bag only to take those shots. Otherwise, keep your SLR camera concealed.
- Never leave your equipment unattended in a visible area, not even in a locked car.
Pre-Production and Planning
- Before shooting, make a shot list of all the footage you need.
- Have all your filming equipment that needs to be calibrated all calibrated and ready to use.
Onscreen Performance
- Look into your lens, not the projected image of yourself on your camera’s flip screen.
- Show a lot of energy as you film yourself.
- If you’re nervous about talking to the camera in public, keep your talking head clips short and gradually build your way up to longer clips. You can break up longer sentences by saying a few words from one scene, saying a few more in another, and finishing off your last words, again, in another scene. Later, in editing, you can stitch all of those clips together to make one fluid sentence.
- If you’re nervous about talking to the camera in public, you can capture your talking headshots later when you find a more secluded space.
Audio Recording
- Silence everything you don’t want your mic to record.
- Put your mobile phone in airplane mode.
- Block wind from reaching your mic with windscreens and dead cats.
- Upgrade your mic.
- Adjust your levels.
- Get close to the sound you are wanting to record.
Check out 10 Recording Tips to Get The Best Sound From Your Microphone for more audio recording tips.
Filming
- To avoid crowds, wake up early and grab your footage early while everyone else is still sleeping or getting ready.
- Capture wide shots, medium shots, and close-up shots for better coverage.
- Use the Sun Seeker app to set up your sunrise/sunset shots better.
- If your camera can record 4K footage, record in 4K all the scenes that you want to zoom in closer later in editing without losing quality (your video project in editing has to be at 1920p x 1080p for this to work).
Stabilization
- If you’re trying to get shots with movement by walking, rather than walking as you normally would walk with your knees bent for steadier shots.
- If you’re shooting something in front of your handheld, lean your arm against your own body for steadier shots.
- Use a stabilizing gimbal with your camera.
Timelapse/Hyperlapse
- Select scenes where you can see a lot of change over time (not a still building in front of a cloudless smoggy sky).
- Set longer intervals for scenes that change very slowly over time.
- Pre-set your focus. Turn autofocus off.
- Shoot time-lapses/hyper-lapses in manual mode to prevent the flickering that occurs with changing light conditions in automatic settings.
- If your camera is set on a tripod in a fixed position, turn your optical image stabilization off.
- If you aren’t holding onto your camera as it’s in the middle of making a timelapse video, at least keep your camera and tripod attached by some kind of leash mechanism.
- For moving time-lapses or hyper-lapses, try to keep one point of reference in the same position within your camera frame.
Slow Motion
- Shoot slow-motion videos when there is plenty of light.
- For actions that are as slow as walking, slowing down your footage to 50% of the original speed looks good enough. If your video editing project is in 30 fps, shooting your video in 60 fps will give you a 50% slow-motion video. If your video editing project is in 60 fps, shooting your video in 120 fps will give you a 50% slow-motion video. Any slower is overkill for slowing down the speed of walking.
- For actions that are as fast as water splashing, slowing down your footage as little as 15% of the original speed can look good. For a video editing project in 30 fps, you would need a camera that can shoot at up to 240 fps to slow your footage down this much.
Storage and Back-Up
- If you’re using a phone that can store images and videos on a separate SD card, take advantage of that and record your travel footage onto your SD card. Later, you can easily get to your travel media as it will all be in one place.
- If you have your laptop on you, regularly transfer your media files from your cameras to your external hard drives.
- If you don’t want to bring your laptop on your trip and plan to video edit once you’re back home, use a USB memory card reader that connects with an app on your phone to transfer your files into your external hard drive.
- If you have access to a reliable internet connection and you leave your laptop at your place of accommodation, have your computer upload your files onto cloud storage while you are out to travel vlogging.
- Take advantage of Google Photos’ free, unlimited cloud storage for video files up to 1080p.
Video Editing
- If you’re editing a video project with videos from multiple different cameras, make sure to set the correct time and date on all of them before you start filming. Later, in editing, you can import all your image and video files and sort them in the exact order that they were taken.
- If your video editing software can work with proxies, transcode all your video files into proxy files for much faster editing.
Posting On YouTube
- Choose a title that people will search for. Keep your target keywords at the beginning of your title. “S01E01: My Summer Backpacking Trip” is not an effective title. Instead, a title like “Going Up The Eiffel Tower… Beautiful View of Paris!” would be better.
Ready to Become a Travel Vlogger?
Here in this article, I shared travel vlogging cameras &accessories, travel video ideas& resources, and travel vlogging tips. Did you get more hints to become a travel vlogger? Stay tuned and start your own travel vlog! Leave your comments below if you have any suggestions about this travel vlogger guide.
This past year has been a challenge, so if you want to make a #travelanywhere video without traveling, you can try Wondershare Filmora X video editor.
Richard Bennett
Richard Bennett is a writer and a lover of all things video.
Follow @Richard Bennett
Mastering the Location of YouTube’s Creator Dashboard
Where Is Youtube Video Manager? [All You Need to Know]
Richard Bennett
Mar 27, 2024• Proven solutions
If you are a YouTuber and uploads video to your channel then you must need to see the statistics and analytics of your uploads. Sometimes you might want to alter some of the settings in the video that you already have uploaded.
So if you are looking for ways how to manage your videos and your YouTube overall then look no further. The solution lies in the YouTube studio. This is where all your video and their settings can be managed whether using a desktop PC or any smartphone.
So if you are wondering the sole purpose of YouTube studio and how to manage your productions using video manager then stay with us!
You will Learn :
- How YouTube Studio Can Manage Your Uploads?
- What Does A Video Manager Do?
- How to Find Video Manager on YouTube?
- How To Access Video Manager On YouTube Using A Desktop PC?
- How To Access YouTube Manager In YouTube Using Mobile Phones?
- How to Access YouTube Manager on YouTube Using An iPad?
Best Video Editing Software for YouTubers
Making a video with Filmora is simple, as this movie maker enables its users to import virtually any type of footage in just a couple of clicks.
There are one hundred tracks available so you can combine audio and video files effortlessly or add visual effects to them.
Filmora also offers full support for 4K videos,fgxcsd which means that you can use it to edit footage captured with GoPro and other action cameras.
In addition to huge effects and transitions libraries, the Filmora also features a rich selection of royalty-free music and audio effects that you can use to create soundtracks for all of your videos.
Filmora is free to download now. And due to its small Installation package, it’s easy and quick to install.
How YouTube Studio Can Manage Your Uploads?
The primary purpose of the YouTube studio is to manage your YouTube channel overall.
Accessing YouTube studio will let you see the statistics regarding how many people have viewed your videos, replies of any of the comment you made on your videos, and much more. This is where you can access one of the most significant options of Video Manger where you can completely customize the video setting accordingly any time after the uploading of your YouTube video.
What Does A Video Manager Do?
In the YouTube studio option, you will find another great tab of a video manager which will let you edit your productions, add, edit or delete annotation or even caption and perform zillions of similar related options to personalize and manage your video accordingly even after your video has been uploaded.
This gives one a huge margin to change the initial settings of the uploaded video if they came across any error or lacking in the video.
But you may wonder how to actually access the video manager in your YouTube channel to avail such a vast variety of options to customize your video setting and making it into a masterpiece to gain views to a greater extent by viewing, analyzing and improvising the analytics of your productions.
How to Find Video Manager on YouTube?
You can go access video manager on your desktop application of YouTube. Although you might need to download YouTube studio if you are looking for a video manager YouTube app. YouTube studio has abundant options in it, including a video manager. So once you download this application in your smartphone, be it iPhone or Android, you can have complete access to all the management features under the video manager option.
Read More to Get : How to Reverse Search a Video >>
How To Access Video Manager On YouTube Using A Desktop PC?
If you need to modify and organize your productions from a single place or just need customization in a particular video to adjust its setting then you can do it with a single click.
Video manager gives you full liberty to tweak the settings of your uploads, making use of tools for video optimization or making bulk update alterations.
So, without further ado, let’s dig into the step by step guide to how to get to YouTube video manager using desktop PC.
Step 1: Sign in to your YouTube account by entering your correct credentials.
Step 2: You will be redirected to the homepage of your YouTube channel.
Step 3: At the top right corner of your YouTube main page, there will be your channel profile icon having a circular shape.

Step 4: Click on that icon.
Step 5: You will be served with abundant options in the dropdown, but you need to click on the YouTube studio (beta) option.
Step 6: This will redirect you to your channel’s dashboard where you will be facilitated with multiple options related to your video uploads, a complete and wholesome package to organize, monitor, improvise and manage your videos in general.
Step 7: At the left pane of the dashboard, you will see Creator Studio Classic at the bottom.
Step 8: Click on Creator Studio Classic.
Step 9: This will redirect you to creator studio. At the left on the window will be a bar full of multiple options where you will see the video manager option right there.
Step 10: Click on the video manager to manage.
Step 11: This will open a drop-down which gives you two options. One of managing your videos and others to organize your playlist or make any modifications as per your likeliness.
Voila! You are here in video manager, having full liberty to make any alteration to the metadata of your YouTube uploads. You are now a single click away to change the video title, its stale or non-captivating caption, adjust comment setting and literally everything right according to your choice.
How To Access YouTube Manager In YouTube Using Mobile Phones?
If you are used to operating your YouTube channel through smartphones like iPhone or any android phone or manage your account activities using a tablet then the process to manage your account remains quite the same.
You don’t need to stress out is you are using a mobile application of YouTube. You can still have complete authority to manage your videos using YouTube video manager mobile, YouTube studio applications.
YouTube studio application is an official tool dedicated to content creator introduced by Google for YouTube. This gives immense ease for the mobile users, either android or iPhone, to manage their videos and update the metadata of their upload by merely using this one application.
All thanks to Google to launch such an amazing and wholesome product, considering the ample number of content creators who use mobile phones to create and manage their productions.
YouTube Studio Application Link for iOS
You can download this video manager YouTube application, named as YouTube studio, on your iPhone by clicking the link given here . You can download this YouTube video manager iPhone application on apple store which is absolutely free of cost.
Downloading this tool will make the managing process of your YouTube channel quite easier and faster. Numerous list of options ranging from monitoring latest stats, create or update your productions’ thumbnail images to changing profile picture, reply to your comments, get notifications or organize your playlist on the go and stay connected from literally anywhere.
Features:
- Organize playlist
- Respond to the comments and also moderate them
- Get notified about important events and activities on your channel
- Update video settings like personalizing thumbnail pictures, adding a description, updating titles and monetization.
- Create and modify your profile images.
- Seek for help content using voice
How To Access YouTube Manager In YouTube Using Android?
Similar to the approach we used in for iPhone users, you can download YouTube studio application on google store by clicking on the link given here .
This application is available free on the internet.
If you are an android user and looking for an application that can manage your YouTube channel with an abundance of options, then The official application developed by Google, YouTube Studio is the answer to your question “how to get to YouTube video manager”. It is a powerful tool to give you all the controls to manage and efficiently organize your YouTube channel with great ease and speed.
Features:
- Filter and get an update with the response on the comments
- Monitor video performance and channel activity using user-friendly analytics
- Manage and organize playlist
- Update video settings like schedule dates, personalizing thumbnail pictures, adding description, updating titles and monetization settings.
How to Access YouTube Manager on YouTube Using An iPad?
You can enjoy all the same features as facilitated in the YouTube Studio app for iOS and Android users. All you need is to download this application by clicking on the link given here .
You may find this tool a little overwhelming at the fresh start. There are multiple options given to the users and given full control and independence to manage the video settings as per your requirement for improvisation purposes.
This may take some time to get yourself familiar with this tool. The more you explore deep into it, the more quickly you will get hold onto it.
Worry not! These experiments won’t do any harm to productions, but only make you expertise in a while.
To learn the fundamentals of YouTube Studio application and video manager, you can refer to this site .
Conclusion
The use of YouTube had outgrown to an extent that it has now become a professional career for many which once used to a merely an entertainment platform and get nothing in return for creating content.
But now with the shift of trend, YouTube is taken seriously as a professional domain to earn through the productions or spread awareness and joy to others through one’s creative content. For your content to make an impact, your channel needs thorough management and organization to view your content’s quality by seeing the stats and manage accordingly.
This is now possible to achieve all this within the snap of fingers with great ease offered by this great tool, Video Manager. With this, you can edit and customize your video’s metadata and improvise your video settings to elevate your channel to the next level.
Richard Bennett
Richard Bennett is a writer and a lover of all things video.
Follow @Richard Bennett
Richard Bennett
Mar 27, 2024• Proven solutions
If you are a YouTuber and uploads video to your channel then you must need to see the statistics and analytics of your uploads. Sometimes you might want to alter some of the settings in the video that you already have uploaded.
So if you are looking for ways how to manage your videos and your YouTube overall then look no further. The solution lies in the YouTube studio. This is where all your video and their settings can be managed whether using a desktop PC or any smartphone.
So if you are wondering the sole purpose of YouTube studio and how to manage your productions using video manager then stay with us!
You will Learn :
- How YouTube Studio Can Manage Your Uploads?
- What Does A Video Manager Do?
- How to Find Video Manager on YouTube?
- How To Access Video Manager On YouTube Using A Desktop PC?
- How To Access YouTube Manager In YouTube Using Mobile Phones?
- How to Access YouTube Manager on YouTube Using An iPad?
Best Video Editing Software for YouTubers
Making a video with Filmora is simple, as this movie maker enables its users to import virtually any type of footage in just a couple of clicks.
There are one hundred tracks available so you can combine audio and video files effortlessly or add visual effects to them.
Filmora also offers full support for 4K videos,fgxcsd which means that you can use it to edit footage captured with GoPro and other action cameras.
In addition to huge effects and transitions libraries, the Filmora also features a rich selection of royalty-free music and audio effects that you can use to create soundtracks for all of your videos.
Filmora is free to download now. And due to its small Installation package, it’s easy and quick to install.
How YouTube Studio Can Manage Your Uploads?
The primary purpose of the YouTube studio is to manage your YouTube channel overall.
Accessing YouTube studio will let you see the statistics regarding how many people have viewed your videos, replies of any of the comment you made on your videos, and much more. This is where you can access one of the most significant options of Video Manger where you can completely customize the video setting accordingly any time after the uploading of your YouTube video.
What Does A Video Manager Do?
In the YouTube studio option, you will find another great tab of a video manager which will let you edit your productions, add, edit or delete annotation or even caption and perform zillions of similar related options to personalize and manage your video accordingly even after your video has been uploaded.
This gives one a huge margin to change the initial settings of the uploaded video if they came across any error or lacking in the video.
But you may wonder how to actually access the video manager in your YouTube channel to avail such a vast variety of options to customize your video setting and making it into a masterpiece to gain views to a greater extent by viewing, analyzing and improvising the analytics of your productions.
How to Find Video Manager on YouTube?
You can go access video manager on your desktop application of YouTube. Although you might need to download YouTube studio if you are looking for a video manager YouTube app. YouTube studio has abundant options in it, including a video manager. So once you download this application in your smartphone, be it iPhone or Android, you can have complete access to all the management features under the video manager option.
Read More to Get : How to Reverse Search a Video >>
How To Access Video Manager On YouTube Using A Desktop PC?
If you need to modify and organize your productions from a single place or just need customization in a particular video to adjust its setting then you can do it with a single click.
Video manager gives you full liberty to tweak the settings of your uploads, making use of tools for video optimization or making bulk update alterations.
So, without further ado, let’s dig into the step by step guide to how to get to YouTube video manager using desktop PC.
Step 1: Sign in to your YouTube account by entering your correct credentials.
Step 2: You will be redirected to the homepage of your YouTube channel.
Step 3: At the top right corner of your YouTube main page, there will be your channel profile icon having a circular shape.
Step 4: Click on that icon.
Step 5: You will be served with abundant options in the dropdown, but you need to click on the YouTube studio (beta) option.
Step 6: This will redirect you to your channel’s dashboard where you will be facilitated with multiple options related to your video uploads, a complete and wholesome package to organize, monitor, improvise and manage your videos in general.
Step 7: At the left pane of the dashboard, you will see Creator Studio Classic at the bottom.
Step 8: Click on Creator Studio Classic.
Step 9: This will redirect you to creator studio. At the left on the window will be a bar full of multiple options where you will see the video manager option right there.
Step 10: Click on the video manager to manage.
Step 11: This will open a drop-down which gives you two options. One of managing your videos and others to organize your playlist or make any modifications as per your likeliness.
Voila! You are here in video manager, having full liberty to make any alteration to the metadata of your YouTube uploads. You are now a single click away to change the video title, its stale or non-captivating caption, adjust comment setting and literally everything right according to your choice.
How To Access YouTube Manager In YouTube Using Mobile Phones?
If you are used to operating your YouTube channel through smartphones like iPhone or any android phone or manage your account activities using a tablet then the process to manage your account remains quite the same.
You don’t need to stress out is you are using a mobile application of YouTube. You can still have complete authority to manage your videos using YouTube video manager mobile, YouTube studio applications.
YouTube studio application is an official tool dedicated to content creator introduced by Google for YouTube. This gives immense ease for the mobile users, either android or iPhone, to manage their videos and update the metadata of their upload by merely using this one application.
All thanks to Google to launch such an amazing and wholesome product, considering the ample number of content creators who use mobile phones to create and manage their productions.
YouTube Studio Application Link for iOS
You can download this video manager YouTube application, named as YouTube studio, on your iPhone by clicking the link given here . You can download this YouTube video manager iPhone application on apple store which is absolutely free of cost.
Downloading this tool will make the managing process of your YouTube channel quite easier and faster. Numerous list of options ranging from monitoring latest stats, create or update your productions’ thumbnail images to changing profile picture, reply to your comments, get notifications or organize your playlist on the go and stay connected from literally anywhere.
Features:
- Organize playlist
- Respond to the comments and also moderate them
- Get notified about important events and activities on your channel
- Update video settings like personalizing thumbnail pictures, adding a description, updating titles and monetization.
- Create and modify your profile images.
- Seek for help content using voice
How To Access YouTube Manager In YouTube Using Android?
Similar to the approach we used in for iPhone users, you can download YouTube studio application on google store by clicking on the link given here .
This application is available free on the internet.
If you are an android user and looking for an application that can manage your YouTube channel with an abundance of options, then The official application developed by Google, YouTube Studio is the answer to your question “how to get to YouTube video manager”. It is a powerful tool to give you all the controls to manage and efficiently organize your YouTube channel with great ease and speed.
Features:
- Filter and get an update with the response on the comments
- Monitor video performance and channel activity using user-friendly analytics
- Manage and organize playlist
- Update video settings like schedule dates, personalizing thumbnail pictures, adding description, updating titles and monetization settings.
How to Access YouTube Manager on YouTube Using An iPad?
You can enjoy all the same features as facilitated in the YouTube Studio app for iOS and Android users. All you need is to download this application by clicking on the link given here .
You may find this tool a little overwhelming at the fresh start. There are multiple options given to the users and given full control and independence to manage the video settings as per your requirement for improvisation purposes.
This may take some time to get yourself familiar with this tool. The more you explore deep into it, the more quickly you will get hold onto it.
Worry not! These experiments won’t do any harm to productions, but only make you expertise in a while.
To learn the fundamentals of YouTube Studio application and video manager, you can refer to this site .
Conclusion
The use of YouTube had outgrown to an extent that it has now become a professional career for many which once used to a merely an entertainment platform and get nothing in return for creating content.
But now with the shift of trend, YouTube is taken seriously as a professional domain to earn through the productions or spread awareness and joy to others through one’s creative content. For your content to make an impact, your channel needs thorough management and organization to view your content’s quality by seeing the stats and manage accordingly.
This is now possible to achieve all this within the snap of fingers with great ease offered by this great tool, Video Manager. With this, you can edit and customize your video’s metadata and improvise your video settings to elevate your channel to the next level.
Richard Bennett
Richard Bennett is a writer and a lover of all things video.
Follow @Richard Bennett
- Title: How To Become A Travel Vlogger | Guide of Travel Vlogging for 2024
- Author: Thomas
- Created at : 2024-05-31 12:48:21
- Updated at : 2024-06-01 12:48:21
- Link: https://youtube-help.techidaily.com/how-to-become-a-travel-vlogger-guide-of-travel-vlogging-for-2024/
- License: This work is licensed under CC BY-NC-SA 4.0.
