
:max_bytes(150000):strip_icc()/Maplocation_-5a492a4e482c52003601ea25.jpg)
In 2024, Expand Audiences Quickly Using Short Form Content
Expand Audiences Quickly Using Short Form Content
YouTube Shorts are short, 60-second videos that can be shared across all social media platforms. They’re a great way to quickly and easily share your message with your audience. As a result, many creators are turning to YouTube Shorts Templates to help them create professional-looking videos that stand out.
YouTube Shorts Templates can create a wide variety of videos, from product demos and how-tos to vlogs and comedy skits. They can help you create polished and engaging videos without the need for expensive equipment or a lot of editing experience.

This article will explore everything you need to know about YouTube Shorts Templates, including how to use them, tips for creating great videos, and examples of how other creators use them to boost their views and reach.
Overview of YouTube Shorts
YouTube Shorts is a new feature launched by YouTube in September 2020, which allows users to create short, 15-second videos that can be shared across all social media platforms. According to the statistics of EarthWeb , YouTube Shorts has seen tremendous growth in popularity since its launch, with billions of views every day.
According to YouTube, in the U.S. alone, the watch time for Shorts has grown over 4x since November 2020, and by December 2021, daily active users of Shorts exceeded 200M. As per YouTube’s official blog, In India, Shorts watch time has grown by over 20x since its launch, and by the end of 2021, India had over 150M daily active users.
In addition to the strong growth in views and engagement, YouTube Shorts has also become a powerful tool for creators to reach new audiences and grow their channels.
According to a study by Influencer Marketing Hub, YouTube Shorts have a higher engagement rate than traditional YouTube videos, with Shorts receiving an average of 3x more comments and likes than regular videos. The study also shows that Shorts videos have a higher completion rate of 60% compared to traditional videos with 40%.
As a result of the popularity of YouTube Shorts, many creators are now turning to YouTube Shorts Templates to help them create professional-looking videos that stand out. YouTube Shorts Templates can create a wide variety of videos, from product demos and how-tos to vlogs and comedy skits. They can help you create polished and engaging videos without the need for expensive equipment or a lot of editing experience.
How To Get Profit from Short Videos
There are a few ways to monetize your YouTube Shorts videos and turn them into a source of profit. One way is through YouTube’s built-in monetization options, such as displaying ads on your videos, sponsorships, and affiliate marketing. Another way is to use your Shorts videos’ popularity to promote your products or services.
You can also use YouTube Shorts to drive traffic to your website, where you can sell products or services. Collaborating with brands and promoting their products in your videos can also be a great way to monetize your content. It’s important to remember that building a sizable audience and creating high-quality content is key to monetizing your YouTube Shorts.
Benefits of Using Templates to Create YouTube Shorts
There are several benefits to using templates to create YouTube Shorts, including:

- Time-saving: Templates provide a pre-designed structure for your video, which saves you time and effort in creating a polished and professional-looking video.
- Consistency: Templates can help you maintain a consistent look and feel for your videos, which helps to build your brand and make your videos easily recognizable.
- Cost-effective: Templates can be cost-effective, eliminating the need for expensive equipment or editing software.
- Increased engagement: Templates can help you create engaging videos that capture your audience’s attention and increase the likelihood of them watching and engaging with your content.
- Access to a wider audience: Templates can help increase your views and reach, which can help you grow your channel and reach a wider audience.
- Easy to use: Templates are easy to use, even if you have yet to gain any prior video editing experience.
Using templates allows you to quickly create high-quality, professional-looking videos while also saving money and reaching a wider audience.
How to Make YouTube Shorts Using a Video Editor With Templates
Creating YouTube Shorts using a video editor with templates is a great way to save time and effort while still producing polished, professional-looking videos. One great video editor that can be used for this purpose is Filmora. Filmora has desktop and mobile versions, so you can create YouTube Shorts using any device.
Video Templates Feature of Filmora
With Wondershare Filmora , users can access a variety of templates for YouTube Shorts, which can be easily customized to fit the style and theme of their videos. These templates include various themes such as travel, vlogs, product demos, and more.
Wondershare Filmora also provides a wide range of editing tools, such as text, music, and effects, to help users create engaging and visually appealing videos. Filmora’s templates are an easy and efficient way to create visually appealing and engaging YouTube Shorts that stand out from the rest.
Free Download For Win 7 or later(64-bit)
Free Download For macOS 10.14 or later
Step-by-Step Guide to Create YouTube Shorts With Templates Using Filmora for Desktop
Creating professional-looking YouTube Shorts can be time-consuming and daunting, especially if you have limited experience with video editing. However, using a video editor like Filmora, you can easily create high-quality YouTube Shorts using templates. This step-by-step guide will show you how to use Filmora’s video templates feature to create visually appealing YouTube Shorts on your desktop.
Step 1. Start Wondershare Filmora on your computer. On the “Templates” tab, you will find a variety of component templates to choose from.

Step 2. Select the template you want to use and place it on the timeline point.

Step 3. Add your videos, pictures, and audio files to the designated placeholders in the template to replace the sample ones.

Step 4. Trim, edit the clip or add other effects, texts and stickers as you like.

Step 5. Click the “Export“ button on the upper part to save your clip.
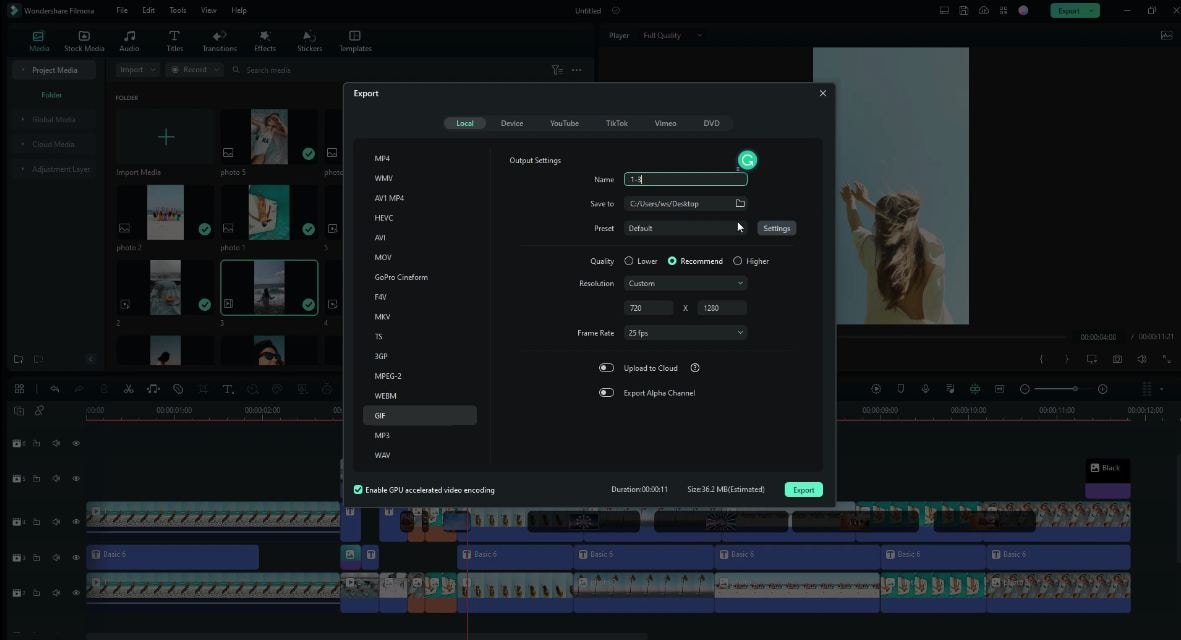
When creating YouTube Shorts, it is important to remember that these videos are vertical. You can easily find vertical video templates in Filmora’s template library. So select the one that best fits your needs and style.
Step-by-Step Guide to Use YouTube Shorts Video Templates With Filmora for Mobile
Creating professional-looking YouTube Shorts on mobile devices is now more accessible than ever. This step-by-step guide will show you how to use Filmora’s video templates feature to create visually appealing YouTube Shorts on your mobile device.
Step 1. Install the Filmora app on your device, then open it.

Step 2. Tap the “Template“ button on the screen’s bottom right.

Step 3. Select the template you wish to use.
Step 4. Press the “Make Video“ button to download the chosen template.

Step 5. Add the necessary footage to edit the template, then tap “Next.”

Step 6. You can preview the video and make any necessary changes.

Step 7. Tap the “Export“ button to save the completed video.

If you want to learn more about using Filmora’s video templates feature to create YouTube Shorts on your mobile device, we recommend watching this video tutorial:
YouTube Shorts Video Template Resources in Filmora
Filmora offers a wide variety of video templates that can be used to create YouTube Shorts. These templates include various themes such as an event, sports, fashion, lifestyle, and more. These templates can be found in Filmora’s library, making it easy for users to find the perfect template for their YouTube Short.
1. Event YouTube Shorts Template

Event YouTube Shorts Templates are an interactive way for creators to showcase their events dynamically and engagingly. These templates come with pre-designed elements such as animations, backgrounds, and text styles that are perfect for highlighting the key moments and creating excitement among the audience. It’s an effective way to make the event more engaging and interactive for the audience.
2. Sports YouTube Shorts Video Template
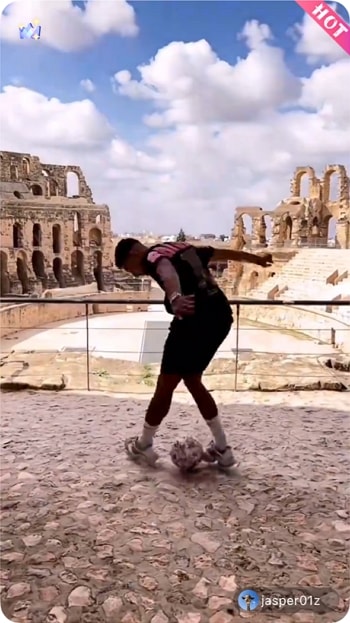
Sports YouTube Shorts video templates are pre-designed, customizable video templates for creating short, engaging sports-related content for YouTube’s Shorts feature. These templates often include scoreboards, team logos, and highlights footage and can be easily customized with your text, images, and videos. They are ideal for sports teams, athletes, and content creators looking to quickly and easily create professional-looking videos.
3. Fashion YouTube Shorts Template

Fashion YouTube Shorts templates are pre-designed video templates that can be used to create visually appealing and engaging content for fashion-related YouTube Shorts. These templates often include elements such as fashion models, clothing and accessory displays, and trendy backgrounds and can be easily customized to suit the creator’s specific needs and aesthetic. They can be used to create various types of videos, including fashion lookbooks, product reviews, and styling tutorials.
4. Life Style Shorts Template

Lifestyle YouTube Shorts templates often include elements such as different lifestyle scenes, like traveling, cooking, home decor, and DIY projects, and can be easily customized to suit the creator’s specific needs and aesthetic. They can create various videos, including travel vlogs, recipe videos, and DIY tutorials.
Conclusion
YouTube Shorts are a great way to connect with your audience and promote your brand. Using a video editor like Filmora, you can easily create high-quality YouTube Shorts using templates. Filmora offers various video templates that can be used to create YouTube Shorts, including templates for events, sports, fashion, and lifestyle.
Filmora templates are fully customizable, meaning you can change the text, images, and colors to match your brand. These templates can be found in Filmora’s library, making it easy for users to find the perfect template for their YouTube Short. With the help of Filmora, you can easily create professional-looking YouTube Shorts that stand out and capture your audience’s attention.
Free Download For macOS 10.14 or later
Step-by-Step Guide to Create YouTube Shorts With Templates Using Filmora for Desktop
Creating professional-looking YouTube Shorts can be time-consuming and daunting, especially if you have limited experience with video editing. However, using a video editor like Filmora, you can easily create high-quality YouTube Shorts using templates. This step-by-step guide will show you how to use Filmora’s video templates feature to create visually appealing YouTube Shorts on your desktop.
Step 1. Start Wondershare Filmora on your computer. On the “Templates” tab, you will find a variety of component templates to choose from.
Step 2. Select the template you want to use and place it on the timeline point.
Step 3. Add your videos, pictures, and audio files to the designated placeholders in the template to replace the sample ones.
Step 4. Trim, edit the clip or add other effects, texts and stickers as you like.
Step 5. Click the “Export“ button on the upper part to save your clip.
When creating YouTube Shorts, it is important to remember that these videos are vertical. You can easily find vertical video templates in Filmora’s template library. So select the one that best fits your needs and style.
Step-by-Step Guide to Use YouTube Shorts Video Templates With Filmora for Mobile
Creating professional-looking YouTube Shorts on mobile devices is now more accessible than ever. This step-by-step guide will show you how to use Filmora’s video templates feature to create visually appealing YouTube Shorts on your mobile device.
Step 1. Install the Filmora app on your device, then open it.
Step 2. Tap the “Template“ button on the screen’s bottom right.
Step 3. Select the template you wish to use.
Step 4. Press the “Make Video“ button to download the chosen template.
Step 5. Add the necessary footage to edit the template, then tap “Next.”
Step 6. You can preview the video and make any necessary changes.
Step 7. Tap the “Export“ button to save the completed video.
If you want to learn more about using Filmora’s video templates feature to create YouTube Shorts on your mobile device, we recommend watching this video tutorial:
YouTube Shorts Video Template Resources in Filmora
Filmora offers a wide variety of video templates that can be used to create YouTube Shorts. These templates include various themes such as an event, sports, fashion, lifestyle, and more. These templates can be found in Filmora’s library, making it easy for users to find the perfect template for their YouTube Short.
1. Event YouTube Shorts Template
Event YouTube Shorts Templates are an interactive way for creators to showcase their events dynamically and engagingly. These templates come with pre-designed elements such as animations, backgrounds, and text styles that are perfect for highlighting the key moments and creating excitement among the audience. It’s an effective way to make the event more engaging and interactive for the audience.
2. Sports YouTube Shorts Video Template
Sports YouTube Shorts video templates are pre-designed, customizable video templates for creating short, engaging sports-related content for YouTube’s Shorts feature. These templates often include scoreboards, team logos, and highlights footage and can be easily customized with your text, images, and videos. They are ideal for sports teams, athletes, and content creators looking to quickly and easily create professional-looking videos.
3. Fashion YouTube Shorts Template
Fashion YouTube Shorts templates are pre-designed video templates that can be used to create visually appealing and engaging content for fashion-related YouTube Shorts. These templates often include elements such as fashion models, clothing and accessory displays, and trendy backgrounds and can be easily customized to suit the creator’s specific needs and aesthetic. They can be used to create various types of videos, including fashion lookbooks, product reviews, and styling tutorials.
4. Life Style Shorts Template
Lifestyle YouTube Shorts templates often include elements such as different lifestyle scenes, like traveling, cooking, home decor, and DIY projects, and can be easily customized to suit the creator’s specific needs and aesthetic. They can create various videos, including travel vlogs, recipe videos, and DIY tutorials.
Conclusion
YouTube Shorts are a great way to connect with your audience and promote your brand. Using a video editor like Filmora, you can easily create high-quality YouTube Shorts using templates. Filmora offers various video templates that can be used to create YouTube Shorts, including templates for events, sports, fashion, and lifestyle.
Filmora templates are fully customizable, meaning you can change the text, images, and colors to match your brand. These templates can be found in Filmora’s library, making it easy for users to find the perfect template for their YouTube Short. With the help of Filmora, you can easily create professional-looking YouTube Shorts that stand out and capture your audience’s attention.
Step-by-Step Guide to Unmicrophonic Audio Recording
How to Record Good Audio Without a Microphone?

Richard Bennett
Oct 26, 2023• Proven solutions
Audio quality is more important than video quality on YouTube. You’ve probably heard that before – viewers might forgive sub-par video quality if they’re interested in what you’re saying, but if it’s hard to understand what you’re saying they’ll click away.
Getting an external mic (even a $10 one-off Amazon ) is one of the best ways to improve your videos. That said, maybe your budget is $0. Or, maybe you just don’t happen to have a mic now and don’t want to wait to make videos. It could even be that you just don’t want to bother with an external mic.
Luckily, there are a lot of easy, free, things you can do to protect the quality of your audio recording even if you’re not using an external mic. Here are a few tips:
- 1. Keep Your Camera Close
- 2. Shoot Somewhere Quiet
- 3. Pick a Good Room
- 4. Protect your Built-In Mic from Wind
- 5. Use a Free Audio App
- 6. Do a Sound Check
1. Keep Your Camera Close (like, really close)
The biggest problem with the mic built into any camera or phone is just that, since it’s with the camera, it’s usually too far away from you. Built-in mics can record decent audio up close, but usually, your camera will be set up farther away from you than an external mic would be.
For example, your camera’s mic might be just as good as a clip-on LAV, but that LAV is right by your mouth and the camera is a couple of big steps away.
Moving your camera/smartphone physically closer to you will make it hard to include anything besides your head and shoulders in your shot, but it will get you significantly better audio.
2.Shoot Somewhere Quiet
The best way to limit the amount of background noise you pick up in your sound recording is to shoot somewhere where there’s no background noise. That probably seems really basic, but it’s something a lot of people just don’t do. It’s easy to default to recording in your home office, even though it’s right next to the kitchen where your family is bustling around, or in your bedroom even though there’s a busy street right outside your window.
Sometimes the best thing you can do for your audio is simply to scout out a quiet room in your house where the sound recording conditions are better. Speaking of recording conditions…
3. Pick a Good Room
There’s more that goes into picking a good room than how quiet it is. If you try to record in a room that’s too big your voice might sound to distant, and if you try to record in a room that’s too small your audio will be too echo-y. You need a room that’s just right.
You should also pay attention to what’s in the room you’re recording in. Avoid hard, reflective, surfaces like appliances and mirrors which your voice will bounce off of. The same conditions that make you sound great when you sing in the shower will – like recording in a small space -make your voiceover unpleasantly echo-y.
Look for a room that has a lot of soft things in it, like beds and sofas.
4. Protect your Built-In Mic from Wind
If you shoot outside, then the wind passing over your built-in mic will do terrible things to your audio. You can do a lot to counter-act this problem by physically blocking the wind.
There are a few ways to do this. If you’re doing hand-held shots you can partially cover your camera or phone’s mic with your finger. You don’t want to completely cover it/press down or your audio will be muffled. What you’re trying to do is create a barrier blocking out the wind.
On movie sets, they block out wind by covering the microphones with big fuzzy things called ‘dead cats’. You can also block out wind noise by attaching something fuzzy to your microphone. If your camera’s built-in mic is on front of it then you just need something big and fluffy you can loop around the lens. You can use a piece of a boa, a fuzzy novelty scrunchie – you can even murder a fuzzy stuffed animal! Do you have an old coat with a fuzz around the hood? That fuzz would do nicely.
The pompom used in this video cost $2, but you might already have something that would work!
If your built-in mic is on top of your camera you can get something called a ‘micromuff’. A micromuff is essentially a circular or rectangular piece of velcro with long strands of fluff on top. It’s open in the middle so it doesn’t actually cover your mic, but the surrounding fuzz blocks out the wind.

You use the adhesive backing to attach the base velcro to your camera. The other side of the velcro has your fluff attached to the back.
The only thing about a micromuff is that it costs about $30, and if you’re going to spend $30 on audio equipment then you could just buy yourself an inexpensive LAV mic. I only bring up the micromuff because it’s a very simple design you can probably DIY – you just need velcro with adhesive backing and any of the fluff-sources we just discussed.
5. Use a Free Audio App
If you’re recording on a smartphone, you can download a free app that will let you make adjustments to your audio as you record it. With the right app, you can adjust your gain (volume is how you control ‘output’ audio, and gain is for ‘input’ audio. By turning up your gain, you can make your mic more sensitive), tempo, and more. A lot of the time, your audio recording app will also let you edit your audio afterward.
Even if you’re not recording video from your smartphone, it might be a good idea to use your phone as your mic and record a separate audio file. You’ll be able to use an app to fine-tune your recording, and you can set your phone up closer to you the way you would an external mic while keeping your camera back a bit farther.
Free audio apps: Hi-Q MP3 Voice Recorder (Android), RecForge II (Android), Smart Voice Recorder (Android), Audio Memos (iOS), and Recorder Plus (iOS).
6. Do a Sound Check
Once you think you’ve got good audio set up – test it! You don’t want to do a whole video and find out when you play it back that your audio doesn’t sound good.
Do you have any of your own audio tips to pass on? Leave them in the comments!
This topic was suggested by RS Beauty over in the forums. Thanks for the idea!
Polish Your YouTube Videos with Filmora
As one of the most widely used video editing software in YouTube video editing, Filmora allows you to record voiceover and edit the recorded audio with mixer, equalizer and provides lots of templates and effects with an intuitive interface, which saves much time. Download the free trial version and get started now.


Richard Bennett
Richard Bennett is a writer and a lover of all things video.
Follow @Richard Bennett
Richard Bennett
Oct 26, 2023• Proven solutions
Audio quality is more important than video quality on YouTube. You’ve probably heard that before – viewers might forgive sub-par video quality if they’re interested in what you’re saying, but if it’s hard to understand what you’re saying they’ll click away.
Getting an external mic (even a $10 one-off Amazon ) is one of the best ways to improve your videos. That said, maybe your budget is $0. Or, maybe you just don’t happen to have a mic now and don’t want to wait to make videos. It could even be that you just don’t want to bother with an external mic.
Luckily, there are a lot of easy, free, things you can do to protect the quality of your audio recording even if you’re not using an external mic. Here are a few tips:
- 1. Keep Your Camera Close
- 2. Shoot Somewhere Quiet
- 3. Pick a Good Room
- 4. Protect your Built-In Mic from Wind
- 5. Use a Free Audio App
- 6. Do a Sound Check
1. Keep Your Camera Close (like, really close)
The biggest problem with the mic built into any camera or phone is just that, since it’s with the camera, it’s usually too far away from you. Built-in mics can record decent audio up close, but usually, your camera will be set up farther away from you than an external mic would be.
For example, your camera’s mic might be just as good as a clip-on LAV, but that LAV is right by your mouth and the camera is a couple of big steps away.
Moving your camera/smartphone physically closer to you will make it hard to include anything besides your head and shoulders in your shot, but it will get you significantly better audio.
2.Shoot Somewhere Quiet
The best way to limit the amount of background noise you pick up in your sound recording is to shoot somewhere where there’s no background noise. That probably seems really basic, but it’s something a lot of people just don’t do. It’s easy to default to recording in your home office, even though it’s right next to the kitchen where your family is bustling around, or in your bedroom even though there’s a busy street right outside your window.
Sometimes the best thing you can do for your audio is simply to scout out a quiet room in your house where the sound recording conditions are better. Speaking of recording conditions…
3. Pick a Good Room
There’s more that goes into picking a good room than how quiet it is. If you try to record in a room that’s too big your voice might sound to distant, and if you try to record in a room that’s too small your audio will be too echo-y. You need a room that’s just right.
You should also pay attention to what’s in the room you’re recording in. Avoid hard, reflective, surfaces like appliances and mirrors which your voice will bounce off of. The same conditions that make you sound great when you sing in the shower will – like recording in a small space -make your voiceover unpleasantly echo-y.
Look for a room that has a lot of soft things in it, like beds and sofas.
4. Protect your Built-In Mic from Wind
If you shoot outside, then the wind passing over your built-in mic will do terrible things to your audio. You can do a lot to counter-act this problem by physically blocking the wind.
There are a few ways to do this. If you’re doing hand-held shots you can partially cover your camera or phone’s mic with your finger. You don’t want to completely cover it/press down or your audio will be muffled. What you’re trying to do is create a barrier blocking out the wind.
On movie sets, they block out wind by covering the microphones with big fuzzy things called ‘dead cats’. You can also block out wind noise by attaching something fuzzy to your microphone. If your camera’s built-in mic is on front of it then you just need something big and fluffy you can loop around the lens. You can use a piece of a boa, a fuzzy novelty scrunchie – you can even murder a fuzzy stuffed animal! Do you have an old coat with a fuzz around the hood? That fuzz would do nicely.
The pompom used in this video cost $2, but you might already have something that would work!
If your built-in mic is on top of your camera you can get something called a ‘micromuff’. A micromuff is essentially a circular or rectangular piece of velcro with long strands of fluff on top. It’s open in the middle so it doesn’t actually cover your mic, but the surrounding fuzz blocks out the wind.
You use the adhesive backing to attach the base velcro to your camera. The other side of the velcro has your fluff attached to the back.
The only thing about a micromuff is that it costs about $30, and if you’re going to spend $30 on audio equipment then you could just buy yourself an inexpensive LAV mic. I only bring up the micromuff because it’s a very simple design you can probably DIY – you just need velcro with adhesive backing and any of the fluff-sources we just discussed.
5. Use a Free Audio App
If you’re recording on a smartphone, you can download a free app that will let you make adjustments to your audio as you record it. With the right app, you can adjust your gain (volume is how you control ‘output’ audio, and gain is for ‘input’ audio. By turning up your gain, you can make your mic more sensitive), tempo, and more. A lot of the time, your audio recording app will also let you edit your audio afterward.
Even if you’re not recording video from your smartphone, it might be a good idea to use your phone as your mic and record a separate audio file. You’ll be able to use an app to fine-tune your recording, and you can set your phone up closer to you the way you would an external mic while keeping your camera back a bit farther.
Free audio apps: Hi-Q MP3 Voice Recorder (Android), RecForge II (Android), Smart Voice Recorder (Android), Audio Memos (iOS), and Recorder Plus (iOS).
6. Do a Sound Check
Once you think you’ve got good audio set up – test it! You don’t want to do a whole video and find out when you play it back that your audio doesn’t sound good.
Do you have any of your own audio tips to pass on? Leave them in the comments!
This topic was suggested by RS Beauty over in the forums. Thanks for the idea!
Polish Your YouTube Videos with Filmora
As one of the most widely used video editing software in YouTube video editing, Filmora allows you to record voiceover and edit the recorded audio with mixer, equalizer and provides lots of templates and effects with an intuitive interface, which saves much time. Download the free trial version and get started now.
Richard Bennett
Richard Bennett is a writer and a lover of all things video.
Follow @Richard Bennett
- Title: In 2024, Expand Audiences Quickly Using Short Form Content
- Author: Thomas
- Created at : 2024-05-31 12:43:13
- Updated at : 2024-06-01 12:43:13
- Link: https://youtube-help.techidaily.com/in-2024-expand-audiences-quickly-using-short-form-content/
- License: This work is licensed under CC BY-NC-SA 4.0.
