
"In 2024, From Dull to Delightful Text that Tumbles and Twirls"
From Dull to Delightful: Text that Tumbles and Twirls
How to Create Animated Bouncing Text

Liza Brown
Mar 27, 2024• Proven solutions
Earlier, you learned how to have a bounce text effect in Adobe After Effects . However, because AE is a complex application and has a steep learning curve, this section explains the two alternative ways to get the same effect on your existing video footage.
Method 1: How to Create Bouncing Text in Filmora Video Editor?
When talking about Wondershare Filmora , the application is populated with several presets for texts and titles, animations, effects, filters, and much more.
These pre-built templates not only make your task easier, they also save your decent amount of time that you would spend while working with After Effects or any other similar app that requires you to build things from scratch.
You can follow the instructions given below to add animated bounce text to any of your video footages with Filmora:
Step 1: Add a Footage to Timeline
Launch Wondershare Filmora on your Windows or Mac PC. By default, the aspect ratio of the project is set to 16:9. Click anywhere inside the Media window at the upper-left section, and select and import footage you want to add bounce text to.
Step 2: Insert Text and Add Bounce Effect
Click Titles from the standard toolbar at the top, and click and drag your preferred title template from the Library to the timeline. In case you don’t want any specific animation or style on the title, you can use the default title.
In the timeline, double-click the title you just added, use the upper-left section to edit the text, go to the Animation tab from the left pane, scroll down the list, and double-click the Up Down 1 or Up Down 2 preset to apply the bounce effect to the credits. Click OK to save the changes and to get back to the main window.

Step 3: Add Shake Filters
Go to Effects from the standard toolbar, expand the Filters category from the left pane, and click Shake. From the Library window, click and drag your preferred shake filter to the timeline. Here, I will choose Mild.

You can customize the default effect by double-clicking the shake filter in the timeline, using the sliders in the upper-left area of the interface to make necessary adjustments, and then clicking OK to save the changes and to get back to the previous interface.

Step 4: Export the Final Output
Click EXPORT from the top of the interface, go to the Local tab in the Export box, choose your preferred output format from the list in the left, make required customizations from the right pane, and click EXPORT from the bottom-right corner to export the video.

Now, you can add the bouncing text video and the background video to the timeline, and then place the bouncing text video above the background video track.
Double click the text track, go to the Chroma Key effect, select the Color Picker tool, and click anywhere in the Preview window to get things right. Finally, export the entire project to your preferred output format as explained in Step 4.
As explained before, Wondeshare Filmora makes the entire process of creating and adding bounce text effect pretty simple. With all the pre-build templates, and the versatility of the options that can be used to customize those presets, you can come up with the effects that are usually obtained when you start generating them from the scratch.


Method 2: Generate Animated Bouncing Texts Online
If you don’t want any heavy and resource-intensive app on your PC merely for some special text effects, you can try any of the online solutions instead. The benefit of using any such web app is that all the processing is done on site’s server, and it is only a web browser and an Internet connection that you need to have at your side.
Some most trusted websites to generate bounce text are listed below:
1. ENGFTO
Website: https://engfto.com/index/create%5Fanimated%5Fbouncing%5Ftext/0-26

You can follow the instructions given below to use Engfto to generate bouncing text for your footages:
Step 1: Get to the Animated Bouncing Text Page
Launch your favorite web browser, and go to the link given above to get to the Engfto’s animated bouncing text page.
Step 2: Customize Text and Preferences
Modify the values in the fields under the SIZE AREA and TEXT sections to customize the text area, the text itself, its size, and font. Next, adjust the values in the fields under the EFFECT PARAMETERS section to get the required bounce effect. Also, use the fields under the BACKGROUND section to either change the background color, or pick a background image from your PC.
Step 3: Obtain the Animated Text
Click the SAVE GIF ANIMATION button from the lower section of the page to download the animated text to your PC.
2. Loading.io
The instructions given below explain how to use Loading.io to get animated bounce text effect for your footages:
Step 1: Get to the Loading.io Webpage
Launch your favorite web browser and go to https://loading.io/animation/text/ .
Step 2: Customize the Text and Choose Animation Effect

Use the options available on the webpage to type your text, and change its font, color, background, transparency level etc. Select Bounce (or any of its variants) from the Animation drop-down list, and adjust the speed using the Speed slider.
Step 3: Obtain the Text
Click your preferred option from next to the Download As section to download the animated text to your PC.
Note: Regardless of the web solution you choose to generate and obtain animated bounce text, you will still need a post-production tool to add the downloaded text to your footage.
Conclusion
Generating bounce text effect is much simpler when you use Wondershare Filmora or any of the online solutions as explained in Method 2. While the former gives you more flexibility when it comes to customizations, the latter doesn’t require any app to be installed on your PC. In addition, many times the web apps offer their services for free, and therefore they are preferred by the novice users who are not much into post-production processes.
Liza Brown
Liza Brown is a writer and a lover of all things video.
Follow @Liza Brown
Liza Brown
Mar 27, 2024• Proven solutions
Earlier, you learned how to have a bounce text effect in Adobe After Effects . However, because AE is a complex application and has a steep learning curve, this section explains the two alternative ways to get the same effect on your existing video footage.
Method 1: How to Create Bouncing Text in Filmora Video Editor?
When talking about Wondershare Filmora , the application is populated with several presets for texts and titles, animations, effects, filters, and much more.
These pre-built templates not only make your task easier, they also save your decent amount of time that you would spend while working with After Effects or any other similar app that requires you to build things from scratch.
You can follow the instructions given below to add animated bounce text to any of your video footages with Filmora:
Step 1: Add a Footage to Timeline
Launch Wondershare Filmora on your Windows or Mac PC. By default, the aspect ratio of the project is set to 16:9. Click anywhere inside the Media window at the upper-left section, and select and import footage you want to add bounce text to.
Step 2: Insert Text and Add Bounce Effect
Click Titles from the standard toolbar at the top, and click and drag your preferred title template from the Library to the timeline. In case you don’t want any specific animation or style on the title, you can use the default title.
In the timeline, double-click the title you just added, use the upper-left section to edit the text, go to the Animation tab from the left pane, scroll down the list, and double-click the Up Down 1 or Up Down 2 preset to apply the bounce effect to the credits. Click OK to save the changes and to get back to the main window.
Step 3: Add Shake Filters
Go to Effects from the standard toolbar, expand the Filters category from the left pane, and click Shake. From the Library window, click and drag your preferred shake filter to the timeline. Here, I will choose Mild.
You can customize the default effect by double-clicking the shake filter in the timeline, using the sliders in the upper-left area of the interface to make necessary adjustments, and then clicking OK to save the changes and to get back to the previous interface.
Step 4: Export the Final Output
Click EXPORT from the top of the interface, go to the Local tab in the Export box, choose your preferred output format from the list in the left, make required customizations from the right pane, and click EXPORT from the bottom-right corner to export the video.
Now, you can add the bouncing text video and the background video to the timeline, and then place the bouncing text video above the background video track.
Double click the text track, go to the Chroma Key effect, select the Color Picker tool, and click anywhere in the Preview window to get things right. Finally, export the entire project to your preferred output format as explained in Step 4.
As explained before, Wondeshare Filmora makes the entire process of creating and adding bounce text effect pretty simple. With all the pre-build templates, and the versatility of the options that can be used to customize those presets, you can come up with the effects that are usually obtained when you start generating them from the scratch.
Method 2: Generate Animated Bouncing Texts Online
If you don’t want any heavy and resource-intensive app on your PC merely for some special text effects, you can try any of the online solutions instead. The benefit of using any such web app is that all the processing is done on site’s server, and it is only a web browser and an Internet connection that you need to have at your side.
Some most trusted websites to generate bounce text are listed below:
1. ENGFTO
Website: https://engfto.com/index/create%5Fanimated%5Fbouncing%5Ftext/0-26
You can follow the instructions given below to use Engfto to generate bouncing text for your footages:
Step 1: Get to the Animated Bouncing Text Page
Launch your favorite web browser, and go to the link given above to get to the Engfto’s animated bouncing text page.
Step 2: Customize Text and Preferences
Modify the values in the fields under the SIZE AREA and TEXT sections to customize the text area, the text itself, its size, and font. Next, adjust the values in the fields under the EFFECT PARAMETERS section to get the required bounce effect. Also, use the fields under the BACKGROUND section to either change the background color, or pick a background image from your PC.
Step 3: Obtain the Animated Text
Click the SAVE GIF ANIMATION button from the lower section of the page to download the animated text to your PC.
2. Loading.io
The instructions given below explain how to use Loading.io to get animated bounce text effect for your footages:
Step 1: Get to the Loading.io Webpage
Launch your favorite web browser and go to https://loading.io/animation/text/ .
Step 2: Customize the Text and Choose Animation Effect
Use the options available on the webpage to type your text, and change its font, color, background, transparency level etc. Select Bounce (or any of its variants) from the Animation drop-down list, and adjust the speed using the Speed slider.
Step 3: Obtain the Text
Click your preferred option from next to the Download As section to download the animated text to your PC.
Note: Regardless of the web solution you choose to generate and obtain animated bounce text, you will still need a post-production tool to add the downloaded text to your footage.
Conclusion
Generating bounce text effect is much simpler when you use Wondershare Filmora or any of the online solutions as explained in Method 2. While the former gives you more flexibility when it comes to customizations, the latter doesn’t require any app to be installed on your PC. In addition, many times the web apps offer their services for free, and therefore they are preferred by the novice users who are not much into post-production processes.
Liza Brown
Liza Brown is a writer and a lover of all things video.
Follow @Liza Brown
Mastering Income via YouTube Channel
YouTube Affiliate Marketing: How to Make Money with It

Richard Bennett
Mar 27, 2024• Proven solutions
Many people are finding it harder to make money online today. However, there are always avenues to explore that can help you increase your revenue. If you’ve never considered YouTube affiliate marketing before, or you are considering to step into it, now could be the perfect time to find out more about this valuable opportunity.
In this article, we will explain how you can make money via YouTube affiliate marketing, so read on to find out more.
- Part1: What is YouTube affiliate marketing
- Part2: Steps to start your YouTube affiliate marketing project
- Part2: 3 Tips before you begin
Want to join the Filmora affiliate program but don’t have the media kit? Visit the Filmora Marketing Kit to download banners, logos and demo videos from Filmora.
Part 1: What is YouTube affiliate marketing?
In YouTube affiliate marketing, videos are made to encourage customers to purchase products from third-party sites including Amazon.
When users buy products via your links, you can receive commission, which can be up to 10% depending on the category of the product and how much you are selling.
Examples of YouTube affiliate marketing videos include reviews, how-to guides, un-boxing videos and more. Videos are designed to show off what products can do and explain why customers should go on to make a purchase.
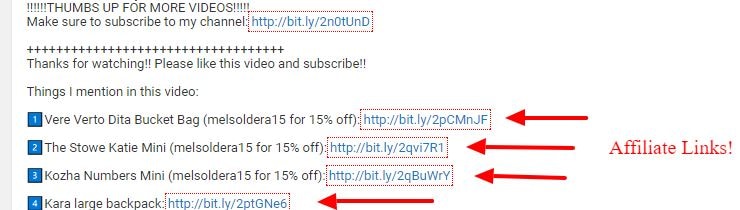
When you have completed your video, you can register for an affiliate marketing program and then add links to your video. The links can be placed either in the video description or as annotations in the clip itself.
Amazon affiliate marketers don’t always just produce videos – they can also promote products via articles, written reviews and more. To make your marketing program successful, you must ensure people know about your video and encourage them to click on the links and buy the products.
Though this can seem daunting at first, the more experience you gain, the more revenue you can generate.
Part 2: Steps to start your YouTube affiliate marketing project
Step 1: build affiliate relationship
One of the first steps you should take when getting your project off the ground is to establish relationships with brands that you love. If you do have a genuine love for the product, this should be reflected in the content and encourage others to make purchases.
Viewers can often tell when your enthusiasm is not genuine, which is why it’s so important to identify products that really do appeal to you. Make a list of the products or programs you use in your daily life and search online to see if there is an affiliate program for it.
If this is the case, you simply need to apply to join it. You may find that the product, program or service that you love does not have a program. Should this be the situation, contact partners to tell them about your love for the product or service and see if they can set something up. Chances are they will be more than happy to do so, as it could be very beneficial for them.

Step 2: Create your product video
The next step is to actually produce your video. Viewers love honesty, so don’t be afraid to say so if there is a way you feel the product or service could be improved.
Remember to include calls to action. Un-boxing videos are very popular and show viewers everything inside a package, whilst review videos can also provide valuable insights.
Top 10 lists also generate high views. You must also remember to include a disclosure that informs viewers that you are being paid via an affiliate marketing scheme. This is a legal obligation.
Step 3: Promote your content
There are many things you can do to ensure your product is seen. Share your video on all your social media channels, respond to as many questions from viewers as possible and add links to online environments where the product is already being discussed.
Set up a channel that can be found when relevant search terms are used and make sure your titles are optimized for search too.

Part 3: 3 Tips before you begin
1. Commission Rate
All brands have different commission rates, with some offering up to 50% and others providing around 5%. Make sure you know what the rates are before you proceed and read the terms and conditions carefully. You may well wish to create a dedicated channel or channels to bring everything together. If you’re passionate about other people’s products, it makes perfect sense to get paid to talk about them.

2. Where affiliate links appear
Affiliate links are placed below the YouTube video in the description. One issue for YouTube affiliate marketers is that buyers tend to exit YouTube once they have clicked on your link, whether they go on to buy the product or not.
It is important to try and get as many views as possible to boost exposure for your video, whilst achieving as many sales as you can. Try to strike the ideal balance between encouraging viewers to make a purchase and to watch as much of your content as possible. The more views you receive, the more favorably your content will be treated by YouTube.
3. Know your product well
It is really essential to know your product inside out when you are marketing it to viewers. YouTube viewers expect you to be an expert when it comes to the products you are showcasing, so take as much time as you need to gain an in-depth understanding of how it works and what its features are.
You must also be able to explain why it makes so much sense to choose the specific product or service over its competitors. Try not to be repetitive, use HD footage and a quality mic, avoid link spamming, choose the best kind of video for the product and plan out the video before you start creating it. Again, engage with your audience as much as you can.

Conclusion
There are various great reasons for getting involved in YouTube affiliate marketing. You may be amazed to see just how much cash you can generate when you follow the above steps and create inspiring videos that showcase products in the best possible light. Just remember to be honest and talk about the cons as well as the pros if they are any. Doing this will help you become a trusted, authentic YouTube affiliate marketer. Why wait any longer to get started?
Richard Bennett
Richard Bennett is a writer and a lover of all things video.
Follow @Richard Bennett
Richard Bennett
Mar 27, 2024• Proven solutions
Many people are finding it harder to make money online today. However, there are always avenues to explore that can help you increase your revenue. If you’ve never considered YouTube affiliate marketing before, or you are considering to step into it, now could be the perfect time to find out more about this valuable opportunity.
In this article, we will explain how you can make money via YouTube affiliate marketing, so read on to find out more.
- Part1: What is YouTube affiliate marketing
- Part2: Steps to start your YouTube affiliate marketing project
- Part2: 3 Tips before you begin
Want to join the Filmora affiliate program but don’t have the media kit? Visit the Filmora Marketing Kit to download banners, logos and demo videos from Filmora.
Part 1: What is YouTube affiliate marketing?
In YouTube affiliate marketing, videos are made to encourage customers to purchase products from third-party sites including Amazon.
When users buy products via your links, you can receive commission, which can be up to 10% depending on the category of the product and how much you are selling.
Examples of YouTube affiliate marketing videos include reviews, how-to guides, un-boxing videos and more. Videos are designed to show off what products can do and explain why customers should go on to make a purchase.
When you have completed your video, you can register for an affiliate marketing program and then add links to your video. The links can be placed either in the video description or as annotations in the clip itself.
Amazon affiliate marketers don’t always just produce videos – they can also promote products via articles, written reviews and more. To make your marketing program successful, you must ensure people know about your video and encourage them to click on the links and buy the products.
Though this can seem daunting at first, the more experience you gain, the more revenue you can generate.
Part 2: Steps to start your YouTube affiliate marketing project
Step 1: build affiliate relationship
One of the first steps you should take when getting your project off the ground is to establish relationships with brands that you love. If you do have a genuine love for the product, this should be reflected in the content and encourage others to make purchases.
Viewers can often tell when your enthusiasm is not genuine, which is why it’s so important to identify products that really do appeal to you. Make a list of the products or programs you use in your daily life and search online to see if there is an affiliate program for it.
If this is the case, you simply need to apply to join it. You may find that the product, program or service that you love does not have a program. Should this be the situation, contact partners to tell them about your love for the product or service and see if they can set something up. Chances are they will be more than happy to do so, as it could be very beneficial for them.
Step 2: Create your product video
The next step is to actually produce your video. Viewers love honesty, so don’t be afraid to say so if there is a way you feel the product or service could be improved.
Remember to include calls to action. Un-boxing videos are very popular and show viewers everything inside a package, whilst review videos can also provide valuable insights.
Top 10 lists also generate high views. You must also remember to include a disclosure that informs viewers that you are being paid via an affiliate marketing scheme. This is a legal obligation.
Step 3: Promote your content
There are many things you can do to ensure your product is seen. Share your video on all your social media channels, respond to as many questions from viewers as possible and add links to online environments where the product is already being discussed.
Set up a channel that can be found when relevant search terms are used and make sure your titles are optimized for search too.
Part 3: 3 Tips before you begin
1. Commission Rate
All brands have different commission rates, with some offering up to 50% and others providing around 5%. Make sure you know what the rates are before you proceed and read the terms and conditions carefully. You may well wish to create a dedicated channel or channels to bring everything together. If you’re passionate about other people’s products, it makes perfect sense to get paid to talk about them.
2. Where affiliate links appear
Affiliate links are placed below the YouTube video in the description. One issue for YouTube affiliate marketers is that buyers tend to exit YouTube once they have clicked on your link, whether they go on to buy the product or not.
It is important to try and get as many views as possible to boost exposure for your video, whilst achieving as many sales as you can. Try to strike the ideal balance between encouraging viewers to make a purchase and to watch as much of your content as possible. The more views you receive, the more favorably your content will be treated by YouTube.
3. Know your product well
It is really essential to know your product inside out when you are marketing it to viewers. YouTube viewers expect you to be an expert when it comes to the products you are showcasing, so take as much time as you need to gain an in-depth understanding of how it works and what its features are.
You must also be able to explain why it makes so much sense to choose the specific product or service over its competitors. Try not to be repetitive, use HD footage and a quality mic, avoid link spamming, choose the best kind of video for the product and plan out the video before you start creating it. Again, engage with your audience as much as you can.
Conclusion
There are various great reasons for getting involved in YouTube affiliate marketing. You may be amazed to see just how much cash you can generate when you follow the above steps and create inspiring videos that showcase products in the best possible light. Just remember to be honest and talk about the cons as well as the pros if they are any. Doing this will help you become a trusted, authentic YouTube affiliate marketer. Why wait any longer to get started?
Richard Bennett
Richard Bennett is a writer and a lover of all things video.
Follow @Richard Bennett
- Title: "In 2024, From Dull to Delightful Text that Tumbles and Twirls"
- Author: Thomas
- Created at : 2024-05-31 12:46:24
- Updated at : 2024-06-01 12:46:24
- Link: https://youtube-help.techidaily.com/in-2024-from-dull-to-delightful-text-that-tumbles-and-twirls/
- License: This work is licensed under CC BY-NC-SA 4.0.
