
:max_bytes(150000):strip_icc()/ledephoto-820c7f6e8d3747c396c4fae1032ac4b4.jpg)
"In 2024, From Virality to Value Gauge Your Content Against Competing Craftsmen"
From Virality to Value: Gauge Your Content Against Competing Craftsmen
YouTube Analytics – How to analyze your and Competitor’s YouTube Video

Richard Bennett
Mar 27, 2024• Proven solutions
Tracking your brand’s YouTube metrics is not enough to ensure success in YouTube. Unless you garner deep insights of your competitors. You must be thinking how can you gauge their company insights using YouTube and track the data movement as well. There is nothing to worry about, we have got you covered. We will show you how to analyze your own channel as well as that of your competitors’ YouTube analytics. Let’s now explore about it!
How to analyze your own YouTube channel/video?
It is important to have reliable YouTube analytics tools for your brand, as videos on YouTube are searchable through Google. They contribute to generate organic traffic for you using both Google and YouTube as a medium. YouTube has a default dedicated analytics mechanism to measure how the video fares in YouTube to gain the most out of it.
Here we have collated the broadly used YouTube insights to ensure that your highly equipped, SEO compatible video engages more audience and performs well. The matrix sums up the most essential parts of YouTube analytics. Let’s go through them.
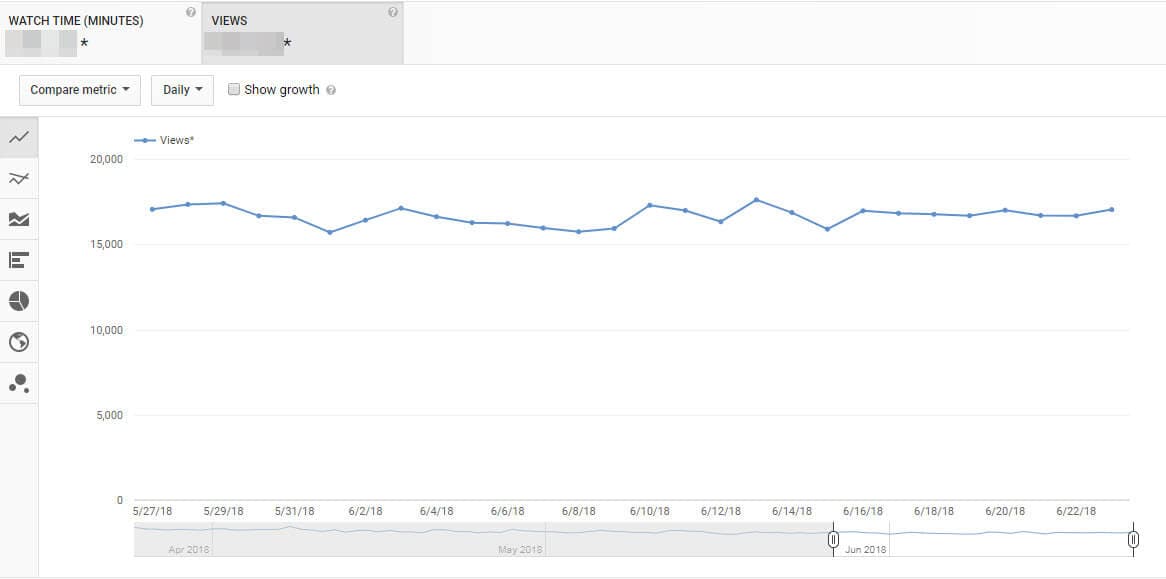
1. Views
Though, views determine the number of people clicked on a certain video on YouTube, it’s impossible to figure out whether the video has been watched till the end or not. Moreover, they can be altered through clickbait tricks and hence YouTube doesn’t solely put much value on them.
Views along with watch time turn out to be the best bet. Watch time sums up the total amount of time spent (in terms of minutes) on your brand’ videos. With the updated dashboard it becomes easy to get the YouTube analytics and gauge the video’s performance. Using the average view duration, you can know whether your video is being watched till the end or not.
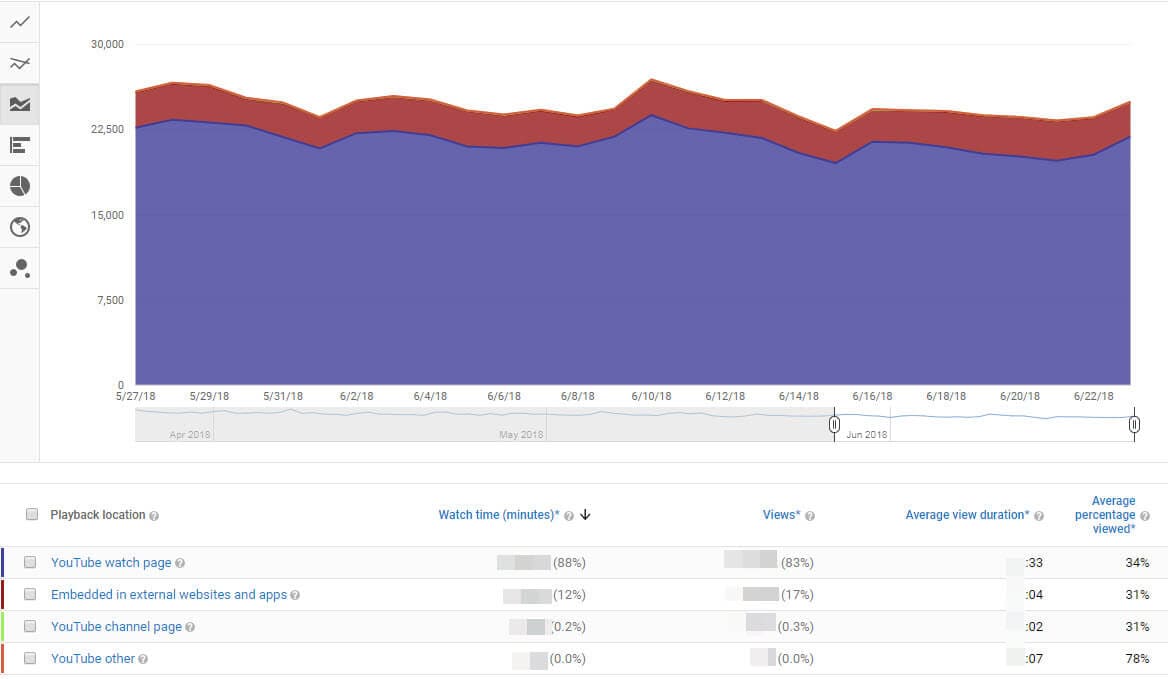
2. Playback Location
As ‘Playback locations’ of YouTube videos can reveal where does all the traffic come from, it would help your channel figure out for which location the video has fared well. It will guide you to reach the backlinks locations/sites. Knowing the popular locations for your YouTube video being played, you can know whether YouTube is the search engine or they have been diverted from somewhere else. Depending on the video playing locations, the views will be segregated in to embedded video, YouTube watch page, mobile devices, and YouTube channel page. Understanding location specific views would help you decide where should you focus to enhance the performance of your video.
3. Demographics
The demographics page helps you get YouTube insights, using them you can know the audience in a gender and location specific manner. For local businesses targeting a certain region, YouTube analytics would prove to be a boon. You can also know the geography and device used by the viewers with this feature. Understanding the gender and location of people will help you create dedicated product videos that would be helpful to them.

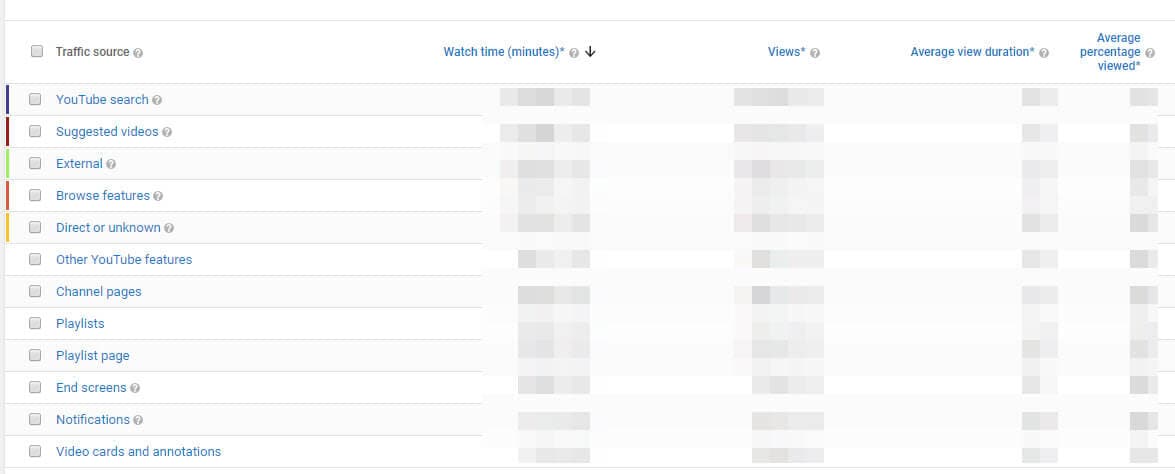
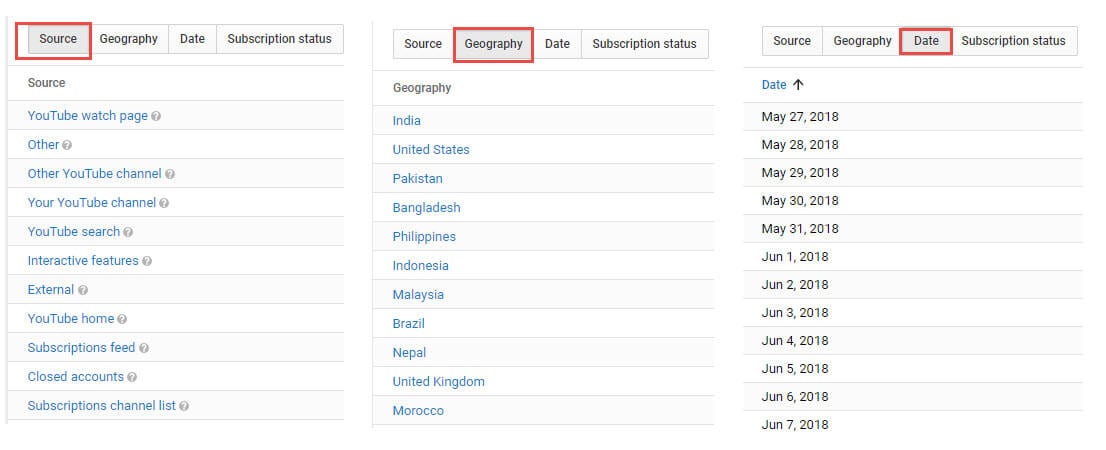
4. Traffic sources
Understanding the source of your YouTube video’s traffic would help you track the prominent keywords that viewers use for landing at your YouTube video. You can figure out their choice and their search patterns this way. The YouTube insights will show you whether the viewers found your video by searching YouTube, a channel on YouTube, through suggested videos, or an external link. The YouTube Analytics tool’s panel would assist you in finalizing the most beneficial traffic source for your brand. You can optimize your video and keyword strategy with this.
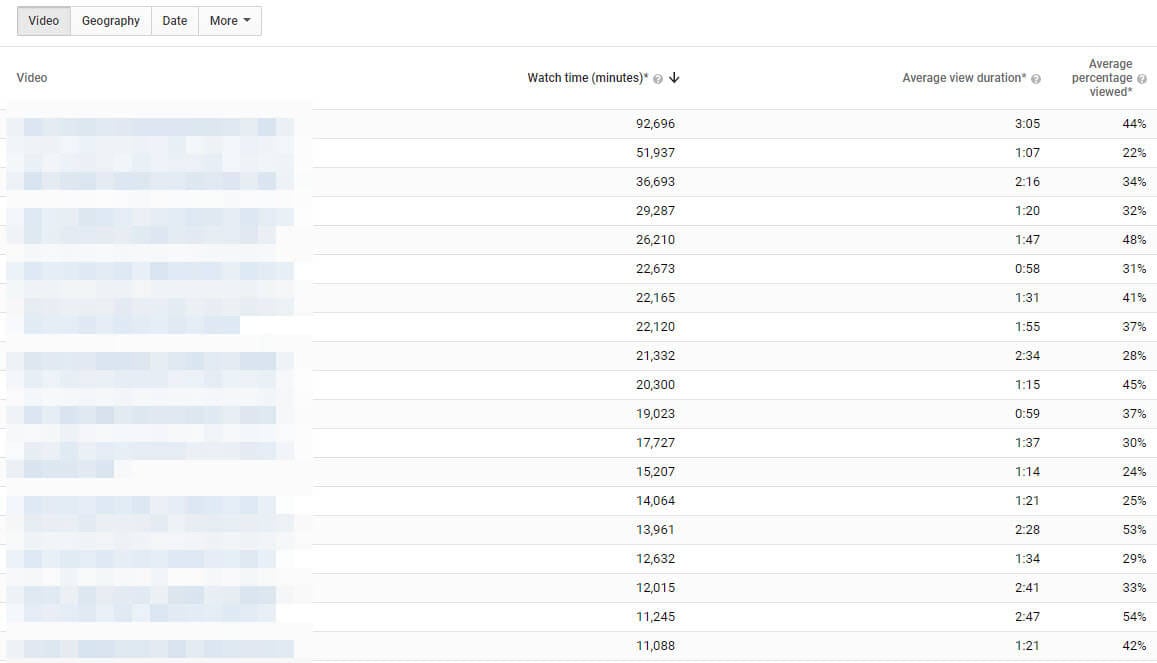
5. Audience Retention
This data explains how far your video has engaged your audience. Along with views, the duration that a viewer is on your video weighs too. From the audience retention page, you can find out the specific time that a viewer has exited your video and see what made them do so. There are 2 types of audience retention features – absolute audience retention and relative audience retention.
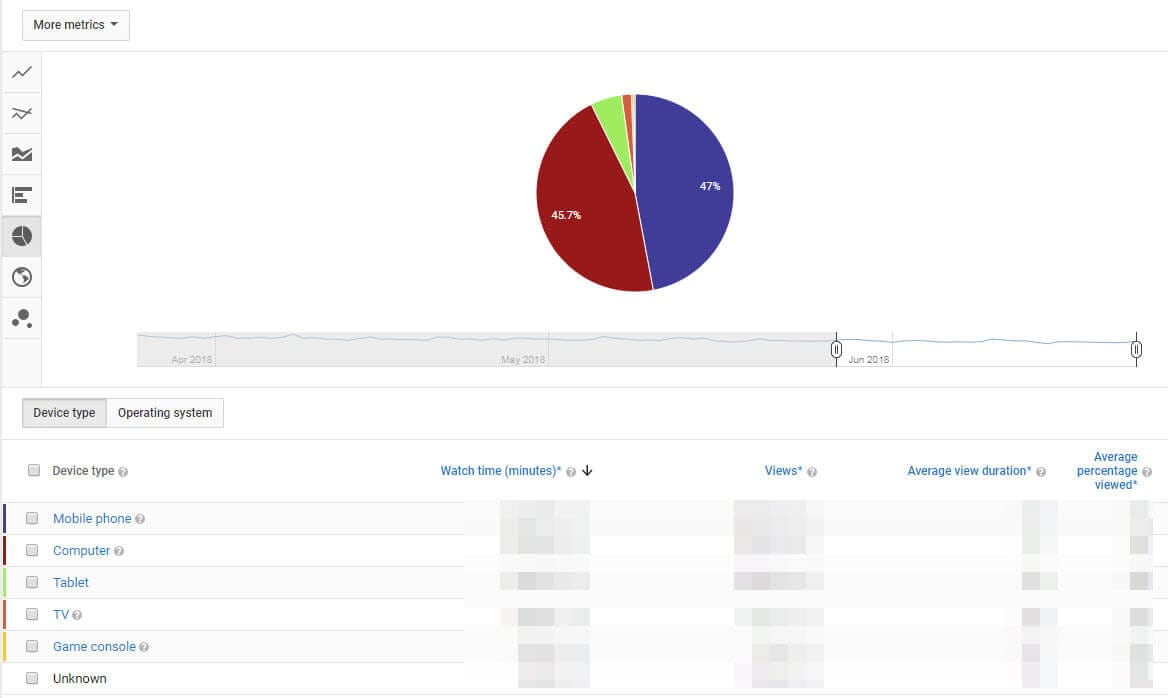
6. Devices
It is important to know which device is being used to watch the video. The metrics is distributed among mobile phones, computer, TV, tablet etc. you will be able to understand whether your video needs to be optimized for a certain video or not.
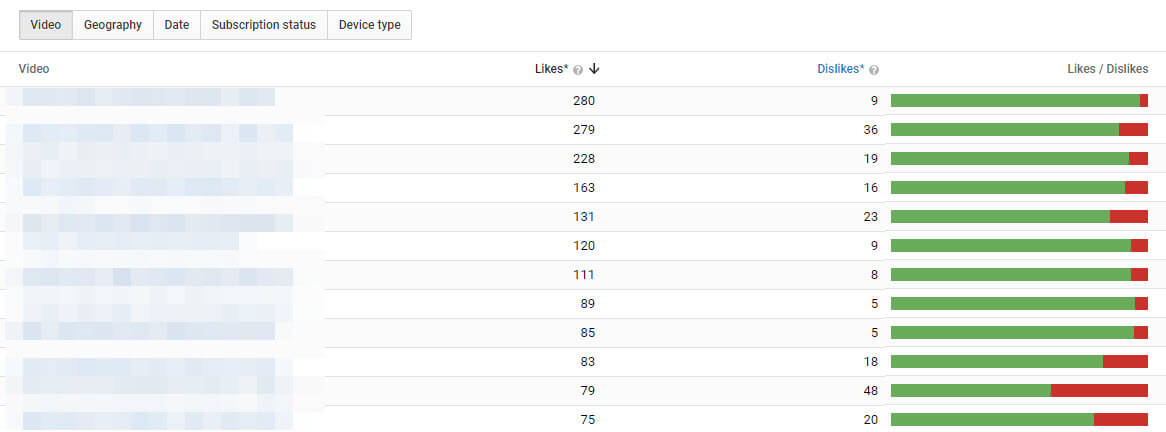
7. Likes and dislikes
YouTube insights gauge the audience acceptance for your video by the number of likes and dislikes. Videos with a huge number of like implies that it is loved by people, though, the quality of video can’t exactly be defined by the number of likes or dislikes. Even the best quality video created for asking opinions about a certain situation/issue might be good enough but still get dislikes.
8. Subscribers
YouTube analytics help you determine the engagement metrics to explain the origin of your subscribers. It includes both their geo-location, the date of subscription, and the source/medium they used to land with your video on YouTube. You can observe the number of people subscribing and unsubscribing from your YouTube channel.
The subscription stream enables your audience to get suggestions for new videos from your channel and offer better exposure to the service and products you offer.
You May Also Like : How to Get More Subscribers
9. Annotations
While considering YouTube Analytics, it is essential to understand that there are annotations to guide viewers to your business site for more content. It is not necessary that the content is video only, it might include a blog post as well. This will let you understand the click through rate and ‘close’ rates for every annotation. This in turn will assist you in optimizing how to reach your audience and where to place the annotations.

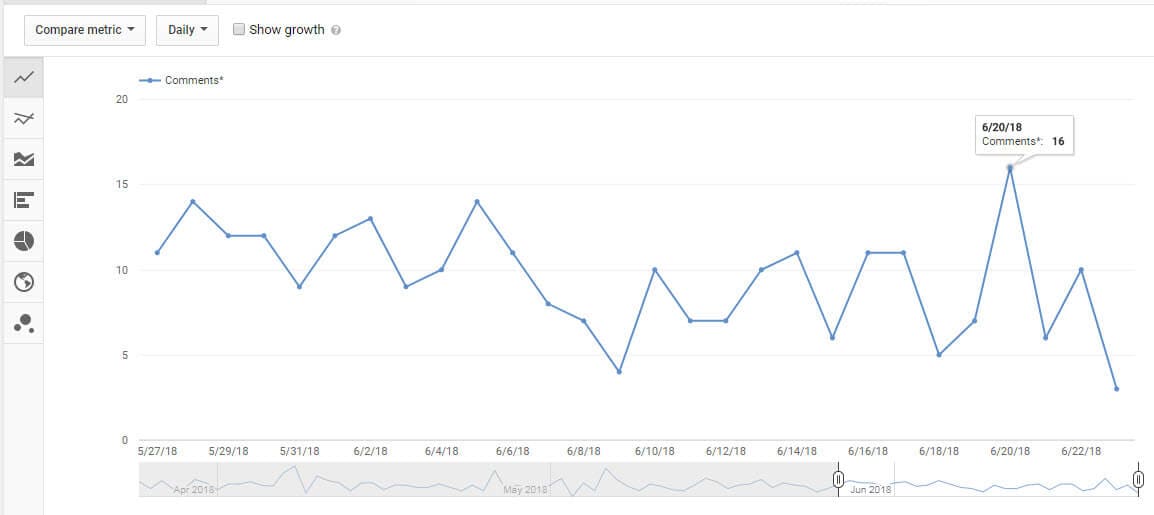
10. Comments
Audience engagement on any YouTube video can easily be gauged by using the vital aspect known as comments. Either it touched a chord in their heart, inspired or motivated them, or simply made them smile, the comments will say it all. Sometimes the audience simply taps ‘Like’ in place of commenting at their convenient.
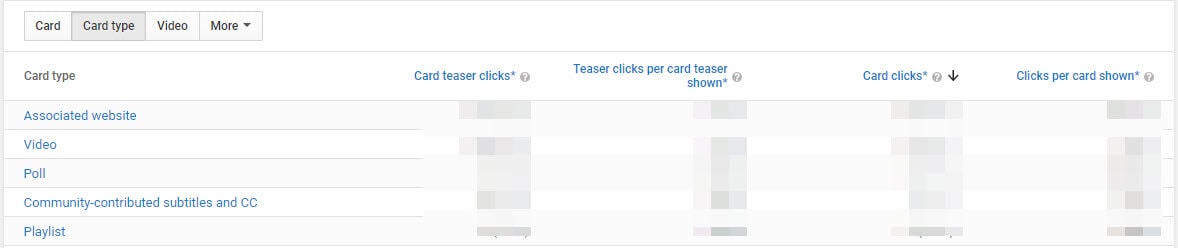
11. Cards
Cards is a new feature in YouTube analytics and aimed at replacing annotations. This will improve user interactivity of any video and accelerate the engagement. They will act as call to action for informing visitors regarding playlists, videos, merchandising, fan funding, and associated website etc.
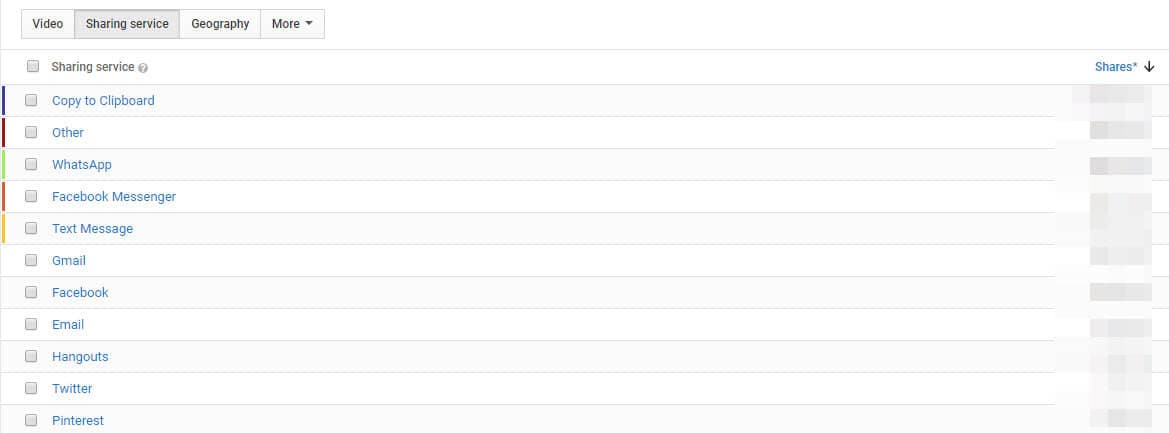
12. Sharing
This aspect sums up the amount of shares of the YouTube video across different social networks along with the share date. Google ranking is influenced with the share numbers, as higher the number more the chances of unique backlinks for your videos.
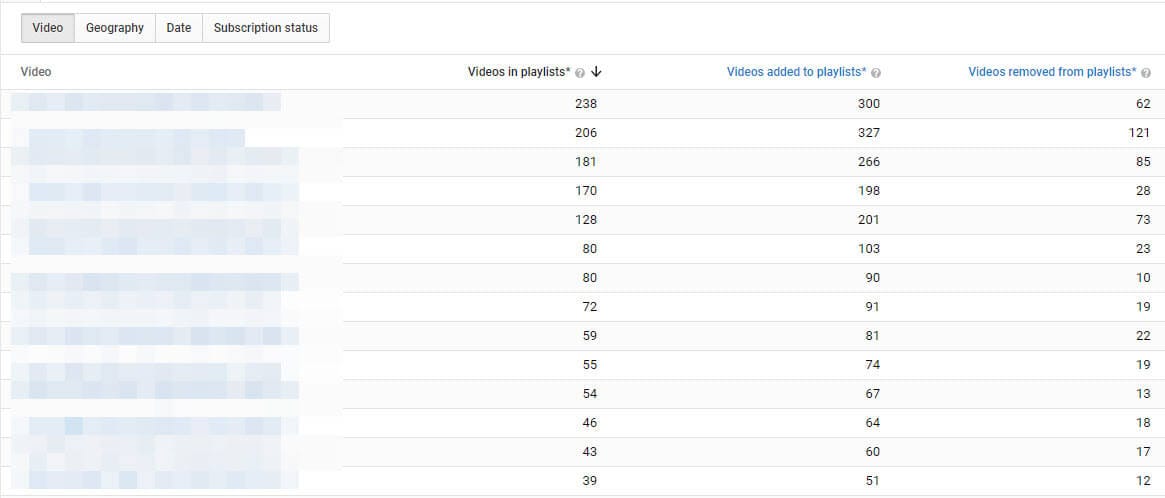
13. Videos in playlists
Favorites has been renamed to ‘Videos in playlists’. Your reach broadens as people keep marking your videos as favorites on their playlist. This is visible to the public on the YouTube channel itself.
How to analyze your competitors
Although, you can’t see the dashboard data of your competitor, there are still some ways to observe and study your competitors’ successful videos and from their views, favorites, ratings, and comments find out the driving force behind it.
For example, reading the comments and see what they are saying. Notice both the positive and negative ones so that you can incorporate the ideas in your videos. You can also make a better video by understanding what a specific demographic region is fond of watching in the said niche.
Or you can use those analyzing tools below to discover the more stats of your competitors.
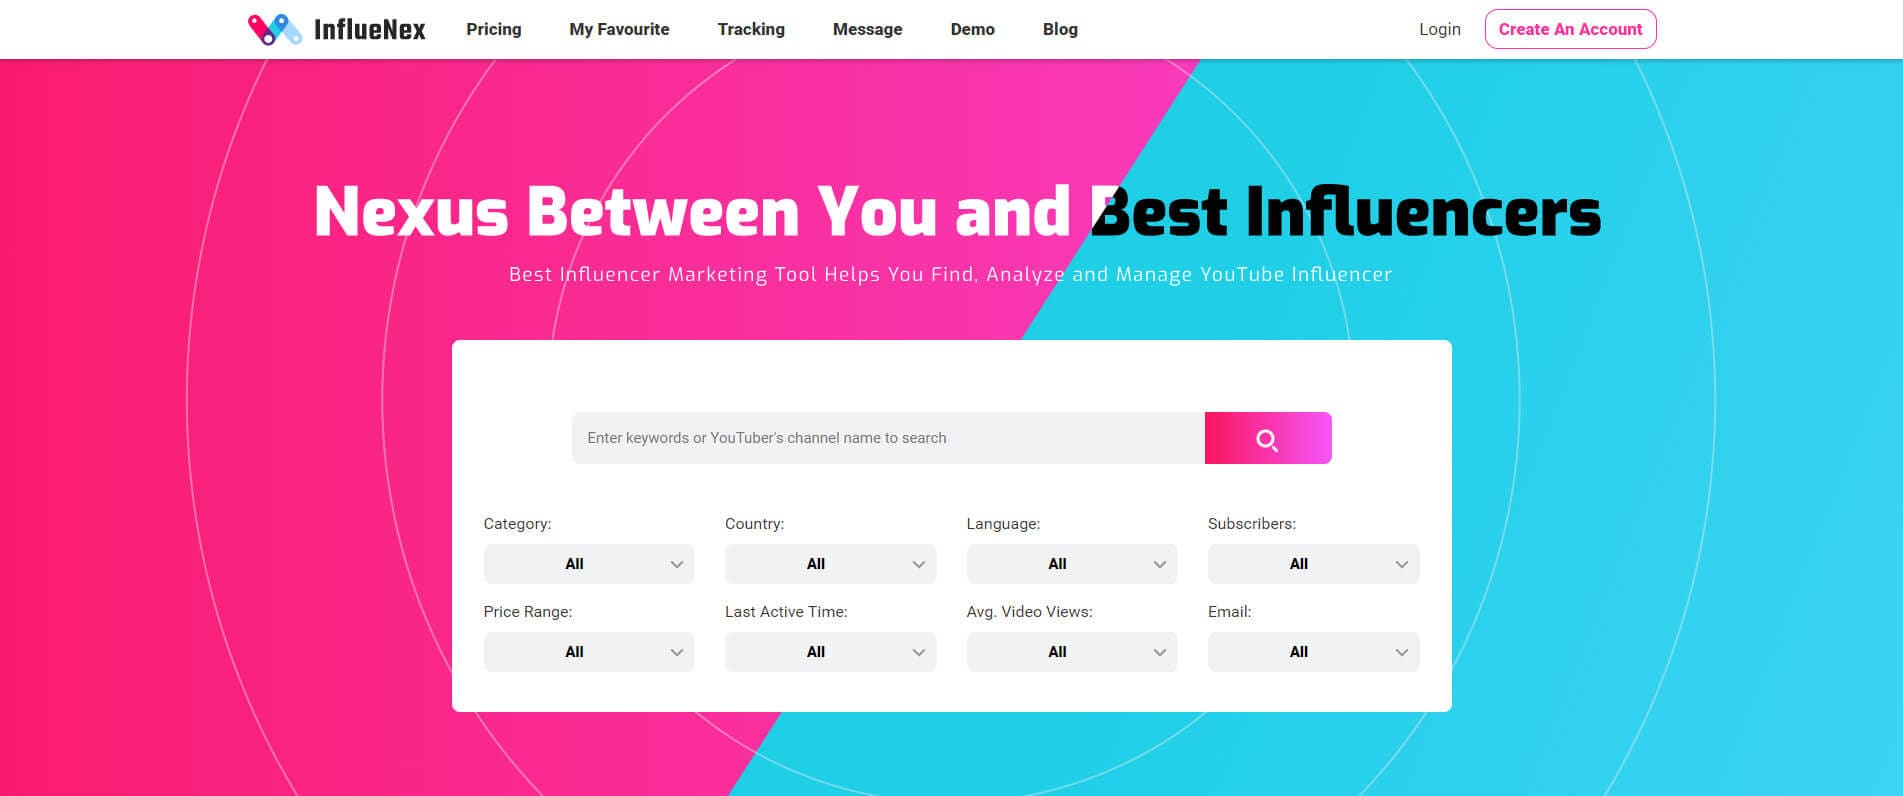
1. InflueNex
InflueNex is a helpful influencer marketing tool for Analyzing, searching, and managing YouTubers. With the help of this YouTube analytics tool, you’re able to learn your competitors’ channels and videos with detailed information.
2. Rival IQ
This YouTube analytics tool helps you increase social media engagement, conduct competitive analysis to track competition, discovers new content ideas for your target audience. You can use it to leverage your foothold in YouTube.
3. SocialBlade
SocialBlade helps you gain YouTube insights and enables you to understand how your rival brands fare. You can learn from them and enhance your own strategy to beat them.
Read More to Get: 5 Methods to Go Frame by Frame on YouTube Video >>
Richard Bennett
Richard Bennett is a writer and a lover of all things video.
Follow @Richard Bennett
Richard Bennett
Mar 27, 2024• Proven solutions
Tracking your brand’s YouTube metrics is not enough to ensure success in YouTube. Unless you garner deep insights of your competitors. You must be thinking how can you gauge their company insights using YouTube and track the data movement as well. There is nothing to worry about, we have got you covered. We will show you how to analyze your own channel as well as that of your competitors’ YouTube analytics. Let’s now explore about it!
How to analyze your own YouTube channel/video?
It is important to have reliable YouTube analytics tools for your brand, as videos on YouTube are searchable through Google. They contribute to generate organic traffic for you using both Google and YouTube as a medium. YouTube has a default dedicated analytics mechanism to measure how the video fares in YouTube to gain the most out of it.
Here we have collated the broadly used YouTube insights to ensure that your highly equipped, SEO compatible video engages more audience and performs well. The matrix sums up the most essential parts of YouTube analytics. Let’s go through them.
1. Views
Though, views determine the number of people clicked on a certain video on YouTube, it’s impossible to figure out whether the video has been watched till the end or not. Moreover, they can be altered through clickbait tricks and hence YouTube doesn’t solely put much value on them.
Views along with watch time turn out to be the best bet. Watch time sums up the total amount of time spent (in terms of minutes) on your brand’ videos. With the updated dashboard it becomes easy to get the YouTube analytics and gauge the video’s performance. Using the average view duration, you can know whether your video is being watched till the end or not.
2. Playback Location
As ‘Playback locations’ of YouTube videos can reveal where does all the traffic come from, it would help your channel figure out for which location the video has fared well. It will guide you to reach the backlinks locations/sites. Knowing the popular locations for your YouTube video being played, you can know whether YouTube is the search engine or they have been diverted from somewhere else. Depending on the video playing locations, the views will be segregated in to embedded video, YouTube watch page, mobile devices, and YouTube channel page. Understanding location specific views would help you decide where should you focus to enhance the performance of your video.
3. Demographics
The demographics page helps you get YouTube insights, using them you can know the audience in a gender and location specific manner. For local businesses targeting a certain region, YouTube analytics would prove to be a boon. You can also know the geography and device used by the viewers with this feature. Understanding the gender and location of people will help you create dedicated product videos that would be helpful to them.
4. Traffic sources
Understanding the source of your YouTube video’s traffic would help you track the prominent keywords that viewers use for landing at your YouTube video. You can figure out their choice and their search patterns this way. The YouTube insights will show you whether the viewers found your video by searching YouTube, a channel on YouTube, through suggested videos, or an external link. The YouTube Analytics tool’s panel would assist you in finalizing the most beneficial traffic source for your brand. You can optimize your video and keyword strategy with this.
5. Audience Retention
This data explains how far your video has engaged your audience. Along with views, the duration that a viewer is on your video weighs too. From the audience retention page, you can find out the specific time that a viewer has exited your video and see what made them do so. There are 2 types of audience retention features – absolute audience retention and relative audience retention.
6. Devices
It is important to know which device is being used to watch the video. The metrics is distributed among mobile phones, computer, TV, tablet etc. you will be able to understand whether your video needs to be optimized for a certain video or not.
7. Likes and dislikes
YouTube insights gauge the audience acceptance for your video by the number of likes and dislikes. Videos with a huge number of like implies that it is loved by people, though, the quality of video can’t exactly be defined by the number of likes or dislikes. Even the best quality video created for asking opinions about a certain situation/issue might be good enough but still get dislikes.
8. Subscribers
YouTube analytics help you determine the engagement metrics to explain the origin of your subscribers. It includes both their geo-location, the date of subscription, and the source/medium they used to land with your video on YouTube. You can observe the number of people subscribing and unsubscribing from your YouTube channel.
The subscription stream enables your audience to get suggestions for new videos from your channel and offer better exposure to the service and products you offer.
You May Also Like : How to Get More Subscribers
9. Annotations
While considering YouTube Analytics, it is essential to understand that there are annotations to guide viewers to your business site for more content. It is not necessary that the content is video only, it might include a blog post as well. This will let you understand the click through rate and ‘close’ rates for every annotation. This in turn will assist you in optimizing how to reach your audience and where to place the annotations.
10. Comments
Audience engagement on any YouTube video can easily be gauged by using the vital aspect known as comments. Either it touched a chord in their heart, inspired or motivated them, or simply made them smile, the comments will say it all. Sometimes the audience simply taps ‘Like’ in place of commenting at their convenient.
11. Cards
Cards is a new feature in YouTube analytics and aimed at replacing annotations. This will improve user interactivity of any video and accelerate the engagement. They will act as call to action for informing visitors regarding playlists, videos, merchandising, fan funding, and associated website etc.
12. Sharing
This aspect sums up the amount of shares of the YouTube video across different social networks along with the share date. Google ranking is influenced with the share numbers, as higher the number more the chances of unique backlinks for your videos.
13. Videos in playlists
Favorites has been renamed to ‘Videos in playlists’. Your reach broadens as people keep marking your videos as favorites on their playlist. This is visible to the public on the YouTube channel itself.
How to analyze your competitors
Although, you can’t see the dashboard data of your competitor, there are still some ways to observe and study your competitors’ successful videos and from their views, favorites, ratings, and comments find out the driving force behind it.
For example, reading the comments and see what they are saying. Notice both the positive and negative ones so that you can incorporate the ideas in your videos. You can also make a better video by understanding what a specific demographic region is fond of watching in the said niche.
Or you can use those analyzing tools below to discover the more stats of your competitors.
1. InflueNex
InflueNex is a helpful influencer marketing tool for Analyzing, searching, and managing YouTubers. With the help of this YouTube analytics tool, you’re able to learn your competitors’ channels and videos with detailed information.
2. Rival IQ
This YouTube analytics tool helps you increase social media engagement, conduct competitive analysis to track competition, discovers new content ideas for your target audience. You can use it to leverage your foothold in YouTube.
3. SocialBlade
SocialBlade helps you gain YouTube insights and enables you to understand how your rival brands fare. You can learn from them and enhance your own strategy to beat them.
Read More to Get: 5 Methods to Go Frame by Frame on YouTube Video >>
Richard Bennett
Richard Bennett is a writer and a lover of all things video.
Follow @Richard Bennett
Instantaneous Timestamping for Your YouTube URLs
How to Add Timestamps on YouTube Video Link?
Richard Bennett
Mar 27, 2024• Proven solutions
It is a well-known fact that internet users have a short interest span, about just eight seconds. This attention span applies to all internet platforms including YouTube. YouTube is the second largest and most visited search engine after Google. It provides users with information through engaging and eye-catchy videos. However, certain videos are longer where only a particular section of the video holds the important information. Viewers tend to skip the long videos and if you do not want this to happen to you, you can link to that specific part on your video adding value for your channel viewers with a link known as the YouTube Timestamp link.
When you have a Timestamp link on your video, you can help your viewers directly reach the specific time in the video. This helps avoid the viewers from losing interest or to search for the key part in your video themselves.
Here in this article, we will explain Timestamp links, how to add Timestamp to YouTube video links, and what are the benefits of Timestamp.
- Part 1: YouTube Timestamp Links Introduction
- Part 2: Adding a Timestamp to YouTube Video Link on Desktop
- Part 3: How to Share Specific Parts of YouTube Video
- part 4: Getting YouTube Timestamp Link on Mobile
- Part 5: FAQ About YouTube Timestamps
Part 1: What is YouTube Timestamp Links
In this fast-paced world where viewers have limited time at hand, YouTube Timestamp links are extremely helpful. These links are anchor text or video hyperlinks found either in the description beneath the video or at the video link end.

The Timestamps links allow you to put a link to a key moment in your YouTube video allowing the viewers and subscribers to view the video at the precise time specified. Your YouTube video maybe half an hour long or maybe your users do not have the time now or forget to later watch your video, but when you add Timestamp to the YouTube link, you provide them ways to get to the content quickly enhancing the user experience.
In addition to this, you can even provide a reference in minutes and hours where necessary. The YouTube Timestamp link acts as a guide that directs viewers to the part of the video, which is most relevant to them without having to watch the entire video.
Part 2: How to Add a Timestamp to YouTube Video Link on Desktop?
In the following section, I will show you how to add timestamp to YouTube video link in several ways.
Use YouTube’s Share Feature
Using YouTube’s share feature is the simplest way to add Timestamp to YouTube videos. Here are easy steps to follow to do this.
- Open the YouTube video on your desktop that you want to share.
- Play the video or navigate the timeline and stop at the key moment you wish to apply the timestamp to.
- Now click on the Share button, a pop-up will appear. Under the URL, you will see a small box indicating Start at. The Timestamp is generated automatically, but you can adjust it.

- Copy the updated URL with Timestamp to share the video or click on the social sharing icons to do so.
- When your viewers click on this URL, the video will begin at the specified Timestamp.
Use the Browser URL to add Timestamp manually
You can add Timestamp manually as well. Follow the step-by-step guide below to add a Timestamp manually.
- Open your YouTube video in a browser on your desktop and then find the URL in the browser’s address bar.
- Enter the specific time you want the viewers to watch the video from at the end of the video URL.
You can add time manually in two ways depending on the URL.
?t=As or
&t=As
“youtu.be/” Format
If your YouTube video link is a youtu.be format, then just add ?t=As at the end of the video link. The A denotes the seconds at which you want the viewer to watch your video. The time can also be specified in minutes and seconds and when you want to do that just add ?t=AmBs. For instance, ?t=2m40s.
“youtube.com/” Format
When your YouTube video link has a youtube.com format, the adjustment starts with an ampersand. &t=As or &t=AmBs is what you can use. If you are looking to add the Timestamp at 2m40s, just add “&t=2m40s at the end of the video URL.
Whenever anybody uses the URL with Timestamp, the video will start from the specified time.
However, when adding a Timestamp manually, always leave include whole numbers. For example, if the time starts at 4m, use 4 and not 04.
Copy video URL at current time
You can use YouTube’s built-in feature to share the key parts of your YouTube video. Follow the steps here.
- Visit YouTube and open the video you want to add Timestamp link to.
- Play the video or navigate the timeline to reach the specific part you like to use in Timestamp.
- Now either press Ctrl + click or right-click anywhere on the video. A pop-up opens where you can see various texts, click on the Copy video URL at current time and share the link.

- Anyone who clicks on this link will be instantly transported to the exact segment of your YouTube video.
Part 3: How to Share Specific Parts of Videos with Vibby and Get YouTube Link with Timestamp
The above-mentioned methods to add and send YouTube link with timestamp are quick and easy, but they have a few limitations. If you need more control and share highlighted parts of YouTube video without cutting the video, you need to use a third-party tool known as Vibby.
Vibby allows you to not only share specific parts of videos from YouTube but other platforms as well like Vimeo and Twitch. With the tool, you can clip multiple sections of the video and share them with others.
- To get started, signup either with mail, Google, Twitter, Facebook, or Twitch account.
- Once signed in, go to Create vib at the top left corner and then paste the URL of the YouTube video you would like to share and then click on the Start button.

- Your video will load in the Vibby editor, now click on Highlight the parts to share.
- Here you will see the Start highlight button, jump 5-sec option, option to switch between HD and SD video quality, and volume control button. Navigate to the part you want to share and click on Start highlight.

- When you reach the end of the part, click on Finish highlight. Repeat the process to highlight multiple parts of the video. All the highlighted parts will appear in a list on the right side of the screen.
- Add a description to each part and format it, you have the option to preview before hitting the Save vib button.
- Name the vib and assign a category and then publish it to Vibby or make it a private vib.
- You get a dedicated link to your vib with the ability to embed it on your website or blog.
In this way, you can share the highlights of the YouTube video or Vimeo video easily.
Part 4: How to Get YouTube Timestamp Link on iPhone and Android?
Linking to specific YouTube Timestamp Link is straightforward on both iPhone and Android.
- Go to YouTube and select the video you want to share.
- Move through the progress bar of the video to reach the key part and click on the Share button.
- A pop-up menu appears, highlight the URL and click on the Copy button.
- Paste the URL and manually add the Timestamp using the steps mentioned in add a Timestamp manually.
Part 5: Is Timestamp Beneficial for your Video?
Timestamping your YouTube videos may decrease the watch time, but it enhances the user experience, and they want to see more of your videos. Apart from this, adding Timestamps to your videos make your videos discoverable through Google search. YouTube and Google will reward you for the videos in form of a high search engine ranking.
Bonus: How to Add YouTube Timestamp Link in YouTube Video Description
Adding a YouTube Timestamp link in your video description is easy. Here are the steps to do so.
- Go to your YouTube channel and select the video you want to add Timestamp to and then navigate to the description below it.
- Edit the description by clicking on the Edit Video button.
- You are redirected to the Video Details page. Here write 0:00 at the first part of the timecode, and then continue with the time of the key part of the video you want to add the Timestamp to in 2:40 format. You can add more Timestamp as well and then click on the Save button.

- Reload the video page and you will see auto-generated Timestamp Links at the specific time you provided in the description.
Note: You need to add at least three timestamps which are 10 seconds or longer in order to add timestamps successfully.
Conclusion
As much as possible YouTubers want to make videos short and to the point. However, if a video needs to be longer, you can still help users navigate through to find what is important to them by adding Timestamp to YouTube link or Timestamp the YouTube descriptions. This can help your viewers jump straight to the interesting part in the video, rather than viewing the entire video saving their time and boost user experience.
Richard Bennett
Richard Bennett is a writer and a lover of all things video.
Follow @Richard Bennett
Richard Bennett
Mar 27, 2024• Proven solutions
It is a well-known fact that internet users have a short interest span, about just eight seconds. This attention span applies to all internet platforms including YouTube. YouTube is the second largest and most visited search engine after Google. It provides users with information through engaging and eye-catchy videos. However, certain videos are longer where only a particular section of the video holds the important information. Viewers tend to skip the long videos and if you do not want this to happen to you, you can link to that specific part on your video adding value for your channel viewers with a link known as the YouTube Timestamp link.
When you have a Timestamp link on your video, you can help your viewers directly reach the specific time in the video. This helps avoid the viewers from losing interest or to search for the key part in your video themselves.
Here in this article, we will explain Timestamp links, how to add Timestamp to YouTube video links, and what are the benefits of Timestamp.
- Part 1: YouTube Timestamp Links Introduction
- Part 2: Adding a Timestamp to YouTube Video Link on Desktop
- Part 3: How to Share Specific Parts of YouTube Video
- part 4: Getting YouTube Timestamp Link on Mobile
- Part 5: FAQ About YouTube Timestamps
Part 1: What is YouTube Timestamp Links
In this fast-paced world where viewers have limited time at hand, YouTube Timestamp links are extremely helpful. These links are anchor text or video hyperlinks found either in the description beneath the video or at the video link end.
The Timestamps links allow you to put a link to a key moment in your YouTube video allowing the viewers and subscribers to view the video at the precise time specified. Your YouTube video maybe half an hour long or maybe your users do not have the time now or forget to later watch your video, but when you add Timestamp to the YouTube link, you provide them ways to get to the content quickly enhancing the user experience.
In addition to this, you can even provide a reference in minutes and hours where necessary. The YouTube Timestamp link acts as a guide that directs viewers to the part of the video, which is most relevant to them without having to watch the entire video.
Part 2: How to Add a Timestamp to YouTube Video Link on Desktop?
In the following section, I will show you how to add timestamp to YouTube video link in several ways.
Use YouTube’s Share Feature
Using YouTube’s share feature is the simplest way to add Timestamp to YouTube videos. Here are easy steps to follow to do this.
- Open the YouTube video on your desktop that you want to share.
- Play the video or navigate the timeline and stop at the key moment you wish to apply the timestamp to.
- Now click on the Share button, a pop-up will appear. Under the URL, you will see a small box indicating Start at. The Timestamp is generated automatically, but you can adjust it.
- Copy the updated URL with Timestamp to share the video or click on the social sharing icons to do so.
- When your viewers click on this URL, the video will begin at the specified Timestamp.
Use the Browser URL to add Timestamp manually
You can add Timestamp manually as well. Follow the step-by-step guide below to add a Timestamp manually.
- Open your YouTube video in a browser on your desktop and then find the URL in the browser’s address bar.
- Enter the specific time you want the viewers to watch the video from at the end of the video URL.
You can add time manually in two ways depending on the URL.
?t=As or
&t=As
“youtu.be/” Format
If your YouTube video link is a youtu.be format, then just add ?t=As at the end of the video link. The A denotes the seconds at which you want the viewer to watch your video. The time can also be specified in minutes and seconds and when you want to do that just add ?t=AmBs. For instance, ?t=2m40s.
“youtube.com/” Format
When your YouTube video link has a youtube.com format, the adjustment starts with an ampersand. &t=As or &t=AmBs is what you can use. If you are looking to add the Timestamp at 2m40s, just add “&t=2m40s at the end of the video URL.
Whenever anybody uses the URL with Timestamp, the video will start from the specified time.
However, when adding a Timestamp manually, always leave include whole numbers. For example, if the time starts at 4m, use 4 and not 04.
Copy video URL at current time
You can use YouTube’s built-in feature to share the key parts of your YouTube video. Follow the steps here.
- Visit YouTube and open the video you want to add Timestamp link to.
- Play the video or navigate the timeline to reach the specific part you like to use in Timestamp.
- Now either press Ctrl + click or right-click anywhere on the video. A pop-up opens where you can see various texts, click on the Copy video URL at current time and share the link.
- Anyone who clicks on this link will be instantly transported to the exact segment of your YouTube video.
Part 3: How to Share Specific Parts of Videos with Vibby and Get YouTube Link with Timestamp
The above-mentioned methods to add and send YouTube link with timestamp are quick and easy, but they have a few limitations. If you need more control and share highlighted parts of YouTube video without cutting the video, you need to use a third-party tool known as Vibby.
Vibby allows you to not only share specific parts of videos from YouTube but other platforms as well like Vimeo and Twitch. With the tool, you can clip multiple sections of the video and share them with others.
- To get started, signup either with mail, Google, Twitter, Facebook, or Twitch account.
- Once signed in, go to Create vib at the top left corner and then paste the URL of the YouTube video you would like to share and then click on the Start button.
- Your video will load in the Vibby editor, now click on Highlight the parts to share.
- Here you will see the Start highlight button, jump 5-sec option, option to switch between HD and SD video quality, and volume control button. Navigate to the part you want to share and click on Start highlight.
- When you reach the end of the part, click on Finish highlight. Repeat the process to highlight multiple parts of the video. All the highlighted parts will appear in a list on the right side of the screen.
- Add a description to each part and format it, you have the option to preview before hitting the Save vib button.
- Name the vib and assign a category and then publish it to Vibby or make it a private vib.
- You get a dedicated link to your vib with the ability to embed it on your website or blog.
In this way, you can share the highlights of the YouTube video or Vimeo video easily.
Part 4: How to Get YouTube Timestamp Link on iPhone and Android?
Linking to specific YouTube Timestamp Link is straightforward on both iPhone and Android.
- Go to YouTube and select the video you want to share.
- Move through the progress bar of the video to reach the key part and click on the Share button.
- A pop-up menu appears, highlight the URL and click on the Copy button.
- Paste the URL and manually add the Timestamp using the steps mentioned in add a Timestamp manually.
Part 5: Is Timestamp Beneficial for your Video?
Timestamping your YouTube videos may decrease the watch time, but it enhances the user experience, and they want to see more of your videos. Apart from this, adding Timestamps to your videos make your videos discoverable through Google search. YouTube and Google will reward you for the videos in form of a high search engine ranking.
Bonus: How to Add YouTube Timestamp Link in YouTube Video Description
Adding a YouTube Timestamp link in your video description is easy. Here are the steps to do so.
- Go to your YouTube channel and select the video you want to add Timestamp to and then navigate to the description below it.
- Edit the description by clicking on the Edit Video button.
- You are redirected to the Video Details page. Here write 0:00 at the first part of the timecode, and then continue with the time of the key part of the video you want to add the Timestamp to in 2:40 format. You can add more Timestamp as well and then click on the Save button.
- Reload the video page and you will see auto-generated Timestamp Links at the specific time you provided in the description.
Note: You need to add at least three timestamps which are 10 seconds or longer in order to add timestamps successfully.
Conclusion
As much as possible YouTubers want to make videos short and to the point. However, if a video needs to be longer, you can still help users navigate through to find what is important to them by adding Timestamp to YouTube link or Timestamp the YouTube descriptions. This can help your viewers jump straight to the interesting part in the video, rather than viewing the entire video saving their time and boost user experience.
Richard Bennett
Richard Bennett is a writer and a lover of all things video.
Follow @Richard Bennett
- Title: "In 2024, From Virality to Value Gauge Your Content Against Competing Craftsmen"
- Author: Thomas
- Created at : 2024-05-31 12:39:52
- Updated at : 2024-06-01 12:39:52
- Link: https://youtube-help.techidaily.com/in-2024-from-virality-to-value-gauge-your-content-against-competing-craftsmen/
- License: This work is licensed under CC BY-NC-SA 4.0.
