
:max_bytes(150000):strip_icc():format(webp)/bestfirestickapps-5bcba08546e0fb005177a983-0591296fac8241ccb8497f9f29901acd.jpg)
"In 2024, Going Against Gravity Reversing Your Vids"
Going Against Gravity: Reversing Your Vids
Best YouTube Video Reverser Online

Richard Bennett
Mar 27, 2024• Proven solutions
While working on the movies in a professional post-production environment, there might be instances where you want to reverse YouTube video to show flashback effect, or to replay a sequence so the audience can experience more thrills while watching.
With that said, not every media player or video editing application is capable enough to reverse a movie clip, not at least with merely a few mouse clicks. Therefore, the following sections suggest some such programs that can help you play YouTube video backward.
Part 1: Best Free YouTube Video Reversers Online
There are a few online web programs that are capable of reversing YouTube videos with efficiency. However, some of them may have certain restrictions like file size limit, number of supported formats, fewer or absolutely no editing options, etc.
Nevertheless, the best five online solutions to reverse YouTube video along with the process of using them are discussed below:
1. Clideo
Clideo is not merely a video reverser, but can also convert media files to your preferred format. You can paste the URL of a YouTube video to upload or import the videos from your computer, Dropbox or Google Drive storage. At the time of this writing, Clideo allows only up to 500MB videos to be uploaded to reverse or convert. As for the acceptability, the portal supports almost all the commonly used formats.

To play YouTube video backward with Clideo:
- Visit Clideo’s online reverse tool page: https://clideo.com/reverse-video ;
- Hover mouse over the down arrow icon next to the Choose file button and paste the URL of the YouTube video that you want to reverse;
- After Clideo fetches the video and opens the next page, choose your preferred speed from the right section
- Leave the Mute video box checked, or uncheck it if required and then click Reverse button to reverse YouTube video. The maximum reverse speed that you can apply is 2X.
2. Kapwing
This web solution also supports almost all types of video formats including 3GPP, AVI, MP4, etc. When talking about the limitations of a free user, you can only upload the videos that are up to 7 minutes long. At the time of this writing, Kapwing can accept the source files from your computer, and from the YouTube URL.

To reverse YouTube video with Kapwing:
- Go to Kapwing’s online video reverser page: https://www.kapwing.com/tools/reverse-video ;
- Paste the URL of the YouTube video in the Paste a URL field;
- Select your preferred playback speed of the reversed video from the Reverse speed section in the left pane;
- Choose whether or not Kapwing should mute the output video;
- Optionally, click Trim video from the upper-left corner of the right window to edit the footage if needed;
- Click CREATE from the bottom-left corner to play YouTube video backward. The maximum reverse speed that you can apply on Kapwing is also 2X.
3. EZGIF
With the ability to support almost all major video formats, and the capability to accept the media files of up to 100MB, Ezgif allows you to upload the footages from your PC, or paste their URL if they are published on YouTube. Even though the landing page has a few distracting adverts, the overall process to play YouTube video backward and save it to your PC is simple.

To reverse YouTube video with Ezgif:
- Go to the reverser tool page: https://ezgif.com/reverse-video and then paste the URL of the YouTube video in the available field;
- Click Upload video and optionally click the speed icon from the toolbar at the top;
- Use the checkboxes and input fields to mute the audio and adjust the playback speed as needed;
- Choose your preferred encoding method from the Output format and encoding drop-down list and then click Reverse video to reverse the video.
Note: It seems that you can’t customize the reverse speed on EZGif but you can choose to mute the reversed audio or not.
4. VideoReverser
Although this web solution has an extremely simple interface, the files that you can upload must not exceed 10MB in size. The portal supports formats like MPG, MPEG, MP4, AVI, M4V, 3GP, etc. for reversing. In addition to uploading the clips from your PC, VideoReverser also allows you to paste the URL of the footages if they are published on YouTube.

To play YouTube video backward with VideoReverser:
- Launch your favorite Internet browser, and then visit https://www.videoreverser.com/ ;
- Paste the URL of the YouTube video in the available text field;
- Choose your preferred output format from the Select output format drop-down list;
- Use the Remove audio track checkbox to get rid of the acoustics or leave the sound enabled;
- Click Start to reverse YouTube video.
5. Pixiko
With almost all formats’ support, Pixiko is yet another web-based media editor that can also reverse YouTube video with a few mouse clicks. At the time of this writing, Pixiko only accepts the source files from your PC, which means you can’t paste the YouTube link to it directly. At first, you need to download or save the YouTube video on computer and then either drag those clips from your local hard drive to the portal.

To play YouTube video backward with Pixiko:
- On the page https://pixiko.com/editor/video-reverse , click anywhere inside the Blue rectangle;
- Locate, select, and upload the downloaded YouTube source video from your PC;
- Click Reverse from the lower-right section of the video player window;
- Follow the on-screen instructions from there to manage and reverse YouTube video as needed;
Bonus: Reversing YouTube Video with Wondershare Filmora
With easily reachable editing options and self-explanatory buttons, Wondershare Filmora has gained a decent amount of popularity in the recent years. The program is available for both Windows and Mac platforms, and gives tough competition to other leading tools of the industry such as Adobe Premiere Pro, Final Cut Pro X, etc.
 Download Mac Version ](https://tools.techidaily.com/wondershare/filmora/download/ )
When talking about the playback speed, with the help of available presets, it can be increased or decreased by 100x or 0.01x respectively. One of the presets also enables you to reverse the direction of the playback quite easily, i.e. while keeping the speed intact. In addition, the ‘Custom Speed’ option lets you control the preferences more granularly.
You can follow the simple instructions given below to reverse YouTube video with Wondershare Filmora:
Note: To remain compliant with the terms and conditions, and to respect the copyright policies, Wondershare Filmora doesn’t allow you to download other people’s videos from YouTube. However, once you have a footage on your PC, you can jump to the following step-by-step process to reverse its playback.
1. Import the Source Video to the Timeline
Launch Wondershare Filmora on your Windows or Mac computer (Windows 10 here), making sure that the Media button in the standard toolbar at the top is selected, click inside the Media window, and select and import the YouTube source video to the program. Next, drag the YouTube video clip to the Timeline, and when the confirmation box appears, click the Match to Media or Keep Project Settings button as needed to get the footage to the Timeline.

2. Reverse the Video (Using the Preset)
Click and select the media clip in the Timeline, click the Speed icon present above the Timeline itself, and click the Reverse option from the menu that appears to reverse the video playback.
![]()
3. Reverse the Video (Manual Control)

Select the media clip in the Timeline and click the Speed icon as explained in the previous step. From the menu that appears, click Custom Speed this time. When the Custom Speed box appears, use the Speed slider to adjust the playback speed of the media clip, and check the Reverse box to reverse YouTube video. Optionally, you can also modify the Duration and Ripple options to customize the preferences. Finally, click OK to save the changes.
4. Export the Video or Upload to YouTube Directly
Back on the main window, click EXPORT from the top. Filmora provides several ways to saving and sharing the video.

You can select the Local tab, choose your preferred output format from the list in the left, in the right window, define a name and location for the file that you are about to export, and click EXPORT from the bottom-right corner to export the video with the reverse playback.

Or, go to the YouTube tab and sign in your YouTube account to upload the reversed video to YouTube directly. In the YouTube upload interface, you can optimize the YouTube SEO elements and revise the video title, description, category and tags.
Download Mac Version ](https://tools.techidaily.com/wondershare/filmora/download/ )
Conclusion
Even though the online video reversers are free and offer simple process to get the job done, the desktop programs like Wondershare Filmora offer more flexibility when it comes to making changes to the media clips, controlling the playback speed, adding effects, applying the modifications only to certain sections of the footage, selecting output preferences, etc. before you can reverse YouTube video.
Richard Bennett
Richard Bennett is a writer and a lover of all things video.
Follow @Richard Bennett
Richard Bennett
Mar 27, 2024• Proven solutions
While working on the movies in a professional post-production environment, there might be instances where you want to reverse YouTube video to show flashback effect, or to replay a sequence so the audience can experience more thrills while watching.
With that said, not every media player or video editing application is capable enough to reverse a movie clip, not at least with merely a few mouse clicks. Therefore, the following sections suggest some such programs that can help you play YouTube video backward.
Part 1: Best Free YouTube Video Reversers Online
There are a few online web programs that are capable of reversing YouTube videos with efficiency. However, some of them may have certain restrictions like file size limit, number of supported formats, fewer or absolutely no editing options, etc.
Nevertheless, the best five online solutions to reverse YouTube video along with the process of using them are discussed below:
1. Clideo
Clideo is not merely a video reverser, but can also convert media files to your preferred format. You can paste the URL of a YouTube video to upload or import the videos from your computer, Dropbox or Google Drive storage. At the time of this writing, Clideo allows only up to 500MB videos to be uploaded to reverse or convert. As for the acceptability, the portal supports almost all the commonly used formats.
To play YouTube video backward with Clideo:
- Visit Clideo’s online reverse tool page: https://clideo.com/reverse-video ;
- Hover mouse over the down arrow icon next to the Choose file button and paste the URL of the YouTube video that you want to reverse;
- After Clideo fetches the video and opens the next page, choose your preferred speed from the right section
- Leave the Mute video box checked, or uncheck it if required and then click Reverse button to reverse YouTube video. The maximum reverse speed that you can apply is 2X.
2. Kapwing
This web solution also supports almost all types of video formats including 3GPP, AVI, MP4, etc. When talking about the limitations of a free user, you can only upload the videos that are up to 7 minutes long. At the time of this writing, Kapwing can accept the source files from your computer, and from the YouTube URL.
To reverse YouTube video with Kapwing:
- Go to Kapwing’s online video reverser page: https://www.kapwing.com/tools/reverse-video ;
- Paste the URL of the YouTube video in the Paste a URL field;
- Select your preferred playback speed of the reversed video from the Reverse speed section in the left pane;
- Choose whether or not Kapwing should mute the output video;
- Optionally, click Trim video from the upper-left corner of the right window to edit the footage if needed;
- Click CREATE from the bottom-left corner to play YouTube video backward. The maximum reverse speed that you can apply on Kapwing is also 2X.
3. EZGIF
With the ability to support almost all major video formats, and the capability to accept the media files of up to 100MB, Ezgif allows you to upload the footages from your PC, or paste their URL if they are published on YouTube. Even though the landing page has a few distracting adverts, the overall process to play YouTube video backward and save it to your PC is simple.
To reverse YouTube video with Ezgif:
- Go to the reverser tool page: https://ezgif.com/reverse-video and then paste the URL of the YouTube video in the available field;
- Click Upload video and optionally click the speed icon from the toolbar at the top;
- Use the checkboxes and input fields to mute the audio and adjust the playback speed as needed;
- Choose your preferred encoding method from the Output format and encoding drop-down list and then click Reverse video to reverse the video.
Note: It seems that you can’t customize the reverse speed on EZGif but you can choose to mute the reversed audio or not.
4. VideoReverser
Although this web solution has an extremely simple interface, the files that you can upload must not exceed 10MB in size. The portal supports formats like MPG, MPEG, MP4, AVI, M4V, 3GP, etc. for reversing. In addition to uploading the clips from your PC, VideoReverser also allows you to paste the URL of the footages if they are published on YouTube.
To play YouTube video backward with VideoReverser:
- Launch your favorite Internet browser, and then visit https://www.videoreverser.com/ ;
- Paste the URL of the YouTube video in the available text field;
- Choose your preferred output format from the Select output format drop-down list;
- Use the Remove audio track checkbox to get rid of the acoustics or leave the sound enabled;
- Click Start to reverse YouTube video.
5. Pixiko
With almost all formats’ support, Pixiko is yet another web-based media editor that can also reverse YouTube video with a few mouse clicks. At the time of this writing, Pixiko only accepts the source files from your PC, which means you can’t paste the YouTube link to it directly. At first, you need to download or save the YouTube video on computer and then either drag those clips from your local hard drive to the portal.
To play YouTube video backward with Pixiko:
- On the page https://pixiko.com/editor/video-reverse , click anywhere inside the Blue rectangle;
- Locate, select, and upload the downloaded YouTube source video from your PC;
- Click Reverse from the lower-right section of the video player window;
- Follow the on-screen instructions from there to manage and reverse YouTube video as needed;
Bonus: Reversing YouTube Video with Wondershare Filmora
With easily reachable editing options and self-explanatory buttons, Wondershare Filmora has gained a decent amount of popularity in the recent years. The program is available for both Windows and Mac platforms, and gives tough competition to other leading tools of the industry such as Adobe Premiere Pro, Final Cut Pro X, etc.
Download Mac Version ](https://tools.techidaily.com/wondershare/filmora/download/ )
When talking about the playback speed, with the help of available presets, it can be increased or decreased by 100x or 0.01x respectively. One of the presets also enables you to reverse the direction of the playback quite easily, i.e. while keeping the speed intact. In addition, the ‘Custom Speed’ option lets you control the preferences more granularly.
You can follow the simple instructions given below to reverse YouTube video with Wondershare Filmora:
Note: To remain compliant with the terms and conditions, and to respect the copyright policies, Wondershare Filmora doesn’t allow you to download other people’s videos from YouTube. However, once you have a footage on your PC, you can jump to the following step-by-step process to reverse its playback.
1. Import the Source Video to the Timeline
Launch Wondershare Filmora on your Windows or Mac computer (Windows 10 here), making sure that the Media button in the standard toolbar at the top is selected, click inside the Media window, and select and import the YouTube source video to the program. Next, drag the YouTube video clip to the Timeline, and when the confirmation box appears, click the Match to Media or Keep Project Settings button as needed to get the footage to the Timeline.
2. Reverse the Video (Using the Preset)
Click and select the media clip in the Timeline, click the Speed icon present above the Timeline itself, and click the Reverse option from the menu that appears to reverse the video playback.
![]()
3. Reverse the Video (Manual Control)
Select the media clip in the Timeline and click the Speed icon as explained in the previous step. From the menu that appears, click Custom Speed this time. When the Custom Speed box appears, use the Speed slider to adjust the playback speed of the media clip, and check the Reverse box to reverse YouTube video. Optionally, you can also modify the Duration and Ripple options to customize the preferences. Finally, click OK to save the changes.
4. Export the Video or Upload to YouTube Directly
Back on the main window, click EXPORT from the top. Filmora provides several ways to saving and sharing the video.
You can select the Local tab, choose your preferred output format from the list in the left, in the right window, define a name and location for the file that you are about to export, and click EXPORT from the bottom-right corner to export the video with the reverse playback.
Or, go to the YouTube tab and sign in your YouTube account to upload the reversed video to YouTube directly. In the YouTube upload interface, you can optimize the YouTube SEO elements and revise the video title, description, category and tags.
Download Mac Version ](https://tools.techidaily.com/wondershare/filmora/download/ )
Conclusion
Even though the online video reversers are free and offer simple process to get the job done, the desktop programs like Wondershare Filmora offer more flexibility when it comes to making changes to the media clips, controlling the playback speed, adding effects, applying the modifications only to certain sections of the footage, selecting output preferences, etc. before you can reverse YouTube video.
Richard Bennett
Richard Bennett is a writer and a lover of all things video.
Follow @Richard Bennett
Acquire High-Quality Sounds for Media Creators
Download Free Sound Effects for YouTubers
Richard Bennett
Oct 26, 2023• Proven solutions
Whether you’re making a short film and need sounds to go with your action sequences, or just want some fun noises for your vlog or challenge video, it’s easy to find great sound effects you can use for free online.
Here are 7 places to download free sound effects! Or, if you’re interested in making your own, click here to jump to ‘Make Your Own Sound Effects’.

Part 1: YouTube Free Sound Effects Download
1. Filmora Sound Effects
Filmora Video Editor provides you with a huge library of free sound effects without download from anywhere else. There are 25 pieces of sound effect available in Filmora, such as transition swoosh, cinematic horn, beep sound and phone ring.

If you do not see the sound effect you want in Filmora, you can also go to the online effect store to find out more sound effects. The sounds are in.wav or mp3 files, so you do not have to use them inside Filmora only. They’re free to use for everyone after downloading, no matter what video editor you use.
The Filmstock audio effect library covers sound effects in different categories: nature sounds, animal sounds, movie sounds, gun sounds, fireworks, bird sounds, cricket sounds, wet sounds, dog barking, water sounds, guitar sounds, city sounds, monster sounds, laughing sounds, dinosaur sounds, fart sounds, pet sounds, dog sounds, car sounds, video game, and thunderstorm.
2. Freesound
Sounds on Freesound are uploaded by users under various Creative Commons licenses (some may require attribution, some may not allow commercial use).
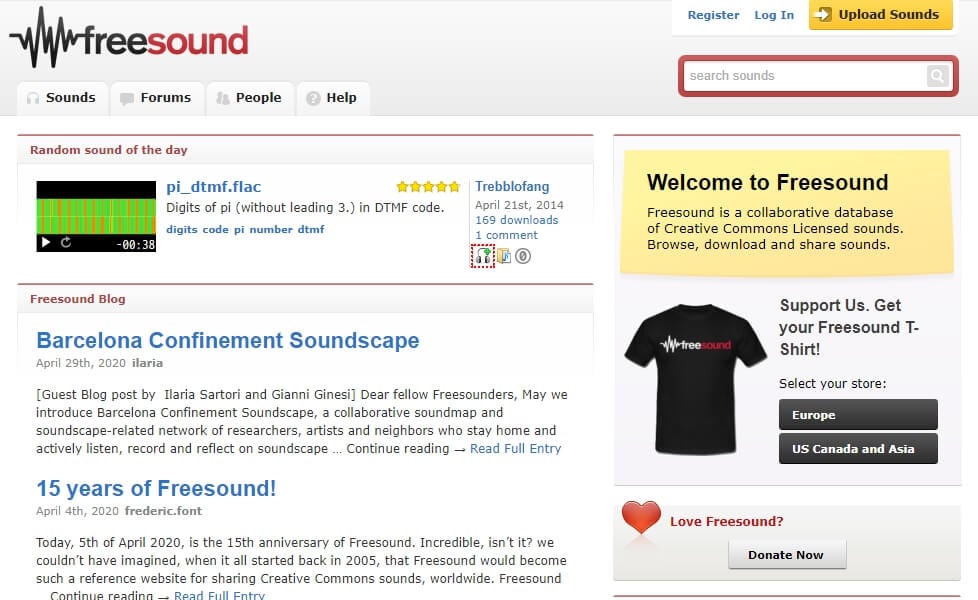
The easiest way to browse the sounds on Freesound is probably to click into Sounds in the top menu, and then ‘Browse tags’ in the menu on the right of your screen. All of the tags on the site will be displayed, and the most commonly used ones will be biggest. The tags include what the sounds are meant to be (i.e. percussion or thunder) and what type of sounds they are (i.e. field-recording or synth).
3. PacDV
PacDV has been producing sound effects since 2001. You can browse and download sounds individually from their site, or download all at once in a huge bundle. You can use all the sounds for free (you just can’t sell them or provide direct download links to other people).
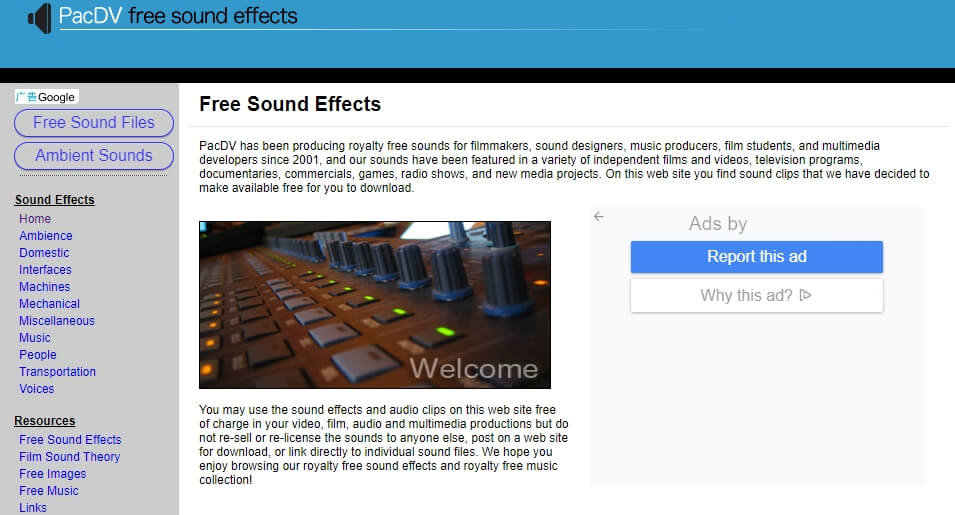
On the left of the website there’s a menu where you can choose what kinds of sound effects you’re interested in. The categories are:
Ambience: this is where you’ll find general background sounds, like ‘car interior’ or ‘grocery store’. Even when nothing in particular is happening, locations have sounds. This is also where you’ll find things like crowd noises.
Domestic: these are sounds you hear around the home, like sounds related to doors and appliances.
Interfaces: a lot of tech sounds live here, like beeps and clicks. Beeps are all titled ‘Beep’, but nothing else is really labeled beyond being called ‘Interface Sound’. You just have to listen and find out.
Machines: a variety of different machine sounds can be found here, from power tools like chainsaws and drills to things like typewriters or paper shredders.
Mechanical: this is where you’ll find sounds associated with cameras, coin slots, zippers, and more.
People: laughing, clapping, footsteps and even farts – this is where you’ll find human sounds.
Transportation: these sounds are all related to vehicles, be they cars or airplanes.
Voices: here you’ll find voices saying common things like ‘hi’, ‘aaah’, or ‘come on’.
Music: PacDV also has a selection of royalty free music. If you use it in your video, you need to give them credit by including Music by <www.pacdv.com/sounds/> in your video description.
Miscellaneous: sounds that don’t quite fit into other categories.
4. Sound Bible
The sounds on Sound Bible are either in the public domain, which means anyone can use them for anything without restriction, or licensed under the Creative Commons Attribution 3.0 License, which means you just need to provide a credit for the person who created the effect you use. When you click on sound effects on Sound Bible you’ll be able to see whether the effect is Public Domain or Attribution 3.0, and it will tell you who the sound was recorded by. Both public domain and Attribution 3.0 sounds are available for commercial use.
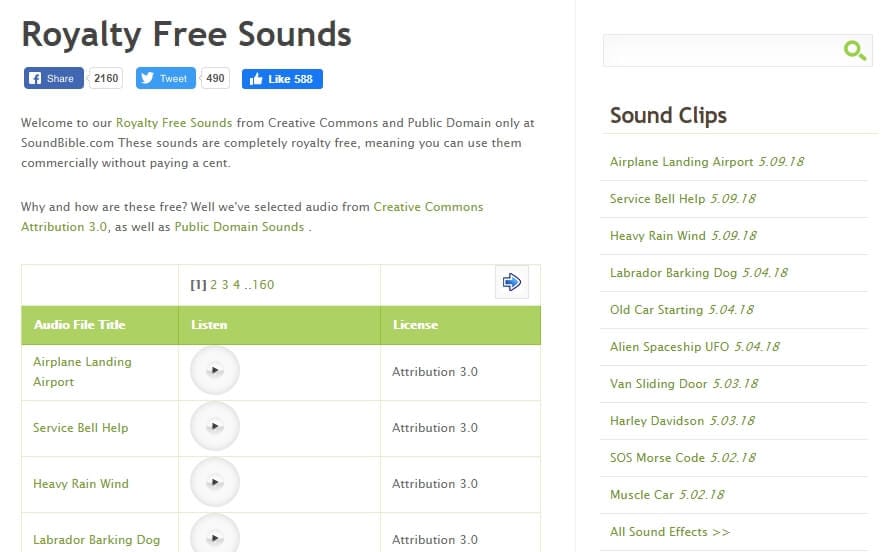
This site has a search function, so if you want dog sounds you can search for ‘dog’. This might be easier than trying to pick the category closest to what you’re looking for and just scrolling through, like you do on some sites.
Sound Bible is updated about 3 times a week, so you can always check back for fresh sounds.
5. Sound Gator
Sound Gator has a huge number of sound effects divided into too many categories to list (24). The categories tend to be very specific, like ‘drink sound effects’ or ‘phone sound effects. If you don’t see a category that sounds like what you’re looking for, make sure to check under Misc Sound Effects because there are 68 Mp3#s in there for everything from tools to static.
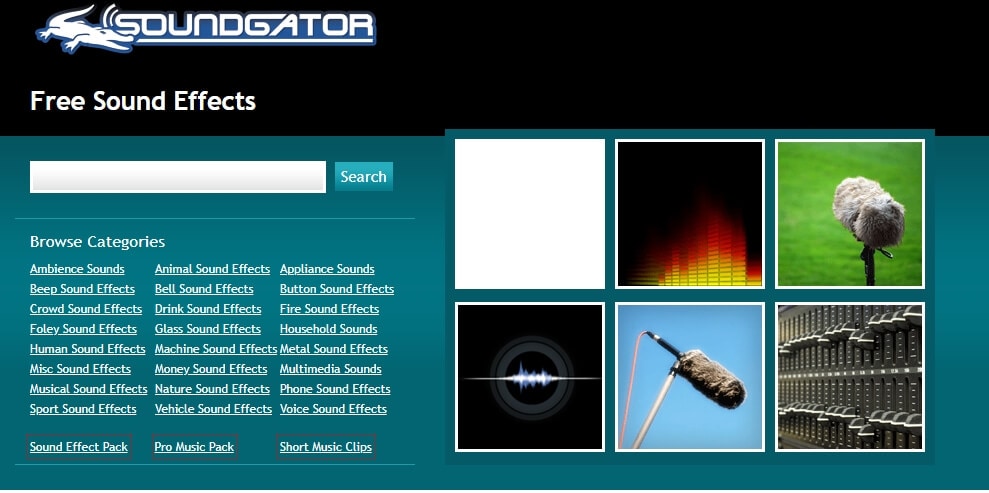
You can sort the sound effects on Sound Gator by date added, popularity, top rated, runtime, top favorites, or most discussed.
6. Sounds Crate
Sounds Crate is part of the larger Production Crate which provides all kinds of resources to creators for free (you can upgrade to a paid account to access exclusive content, but there’s a lot of great content available for free). The categories available on Sounds Crate are:

Ambient: room tones and general background noises from nature or cities.
Animal: includes things like puppy barks and angry cats.
Blades and Metal: you’ll find sounds from swords, chains, and other metal implements here.
Crashes and Debris: perfect for action, this is where you’ll find sounds associated with destruction.
Electricity: things like electrical blasts and charges can be found here.
Electronics: any sound made by anything electrical, like beeps and appliance sounds.
Explosions and Bangs: if you have a visual explosion effect, you’ll probably need to combine it with something from here.
Fight: find sounds associated with action sequences, like whooshes and punches.
Gun Related: everything from reloads to gunshots.
Impact: any kind of thud or shattering sound.
Lock n’ Load: although there are some ‘gun checking’ sounds in here, it’s mostly clothing related sounds like zippers and Velcro.
Movement: wind sounds and whooshes.
People: sounds humans make, from voices to footsteps.
Sci-Fi SFX: zaps, beeps, and sci-fi ambience.
Vehicle: includes both common vehicles like cars and less-common vehicles like tanks.
Weapons: both modern weapons like missiles and old-timey things like arrows.
7. Zapsplat
Zapsplat claims to be the fastest growing free sound effects library on the internet. With more than 23,999 professional sounds, and more being added every week, they might just be right. The owner of the site, Alan McKinney, adds 500 sound effects every week by himself and the site also accepts sounds from contributors. All of their sounds were recorded using professional equipment and then edited to make them perfect.
You can even send Alan a message and request specific sound effects if you can’t already find what you want on the site.
On Zapsplat you can browse 26 categories including fantasy, warfare, and animals for individual sounds. Or, you can visit the Free SFX Packs section and download a set of related sounds together. Packs include ‘Magic Wand’, ‘Science Fiction Alarms’, and ‘Cartoon Boings’.
Part 2: Make Your Own Sound Effects for YouTube Videos
Here are some easy ways you can make your own sound effects at home.
1. Making Natural Sounds
Fire using cellophane. Just crinkle the cellophane wrap to create a sound like a crackling fire. Chip bags work too.
Rain using rice. Sprinkle rice (or birdseed) onto a thin metal sheet.
Alternatively for rain, you could record the sound of bacon frying.
Wind using a Ziploc. Fill a large ziplock with air and then open the bag a bit and force the air out.
Thunder with aluminum. Just shake a sheet of aluminum to make a thunder sound.
2. Making Action or Sci-Fi Sounds
Ticking Bomb with a clock. Any clock that ticks will do.
Hits/Blows with a pillow. Hit a pillow to make a sound like a body blow. For really hard hits, you might want to whack a sofa cushion with a broomstick.
Bones breaking with celery. Just snap the celery stalks in half.
Richard Bennett
Richard Bennett is a writer and a lover of all things video.
Follow @Richard Bennett
Richard Bennett
Oct 26, 2023• Proven solutions
Whether you’re making a short film and need sounds to go with your action sequences, or just want some fun noises for your vlog or challenge video, it’s easy to find great sound effects you can use for free online.
Here are 7 places to download free sound effects! Or, if you’re interested in making your own, click here to jump to ‘Make Your Own Sound Effects’.
Part 1: YouTube Free Sound Effects Download
1. Filmora Sound Effects
Filmora Video Editor provides you with a huge library of free sound effects without download from anywhere else. There are 25 pieces of sound effect available in Filmora, such as transition swoosh, cinematic horn, beep sound and phone ring.
If you do not see the sound effect you want in Filmora, you can also go to the online effect store to find out more sound effects. The sounds are in.wav or mp3 files, so you do not have to use them inside Filmora only. They’re free to use for everyone after downloading, no matter what video editor you use.
The Filmstock audio effect library covers sound effects in different categories: nature sounds, animal sounds, movie sounds, gun sounds, fireworks, bird sounds, cricket sounds, wet sounds, dog barking, water sounds, guitar sounds, city sounds, monster sounds, laughing sounds, dinosaur sounds, fart sounds, pet sounds, dog sounds, car sounds, video game, and thunderstorm.
2. Freesound
Sounds on Freesound are uploaded by users under various Creative Commons licenses (some may require attribution, some may not allow commercial use).
The easiest way to browse the sounds on Freesound is probably to click into Sounds in the top menu, and then ‘Browse tags’ in the menu on the right of your screen. All of the tags on the site will be displayed, and the most commonly used ones will be biggest. The tags include what the sounds are meant to be (i.e. percussion or thunder) and what type of sounds they are (i.e. field-recording or synth).
3. PacDV
PacDV has been producing sound effects since 2001. You can browse and download sounds individually from their site, or download all at once in a huge bundle. You can use all the sounds for free (you just can’t sell them or provide direct download links to other people).
On the left of the website there’s a menu where you can choose what kinds of sound effects you’re interested in. The categories are:
Ambience: this is where you’ll find general background sounds, like ‘car interior’ or ‘grocery store’. Even when nothing in particular is happening, locations have sounds. This is also where you’ll find things like crowd noises.
Domestic: these are sounds you hear around the home, like sounds related to doors and appliances.
Interfaces: a lot of tech sounds live here, like beeps and clicks. Beeps are all titled ‘Beep’, but nothing else is really labeled beyond being called ‘Interface Sound’. You just have to listen and find out.
Machines: a variety of different machine sounds can be found here, from power tools like chainsaws and drills to things like typewriters or paper shredders.
Mechanical: this is where you’ll find sounds associated with cameras, coin slots, zippers, and more.
People: laughing, clapping, footsteps and even farts – this is where you’ll find human sounds.
Transportation: these sounds are all related to vehicles, be they cars or airplanes.
Voices: here you’ll find voices saying common things like ‘hi’, ‘aaah’, or ‘come on’.
Music: PacDV also has a selection of royalty free music. If you use it in your video, you need to give them credit by including Music by <www.pacdv.com/sounds/> in your video description.
Miscellaneous: sounds that don’t quite fit into other categories.
4. Sound Bible
The sounds on Sound Bible are either in the public domain, which means anyone can use them for anything without restriction, or licensed under the Creative Commons Attribution 3.0 License, which means you just need to provide a credit for the person who created the effect you use. When you click on sound effects on Sound Bible you’ll be able to see whether the effect is Public Domain or Attribution 3.0, and it will tell you who the sound was recorded by. Both public domain and Attribution 3.0 sounds are available for commercial use.
This site has a search function, so if you want dog sounds you can search for ‘dog’. This might be easier than trying to pick the category closest to what you’re looking for and just scrolling through, like you do on some sites.
Sound Bible is updated about 3 times a week, so you can always check back for fresh sounds.
5. Sound Gator
Sound Gator has a huge number of sound effects divided into too many categories to list (24). The categories tend to be very specific, like ‘drink sound effects’ or ‘phone sound effects. If you don’t see a category that sounds like what you’re looking for, make sure to check under Misc Sound Effects because there are 68 Mp3#s in there for everything from tools to static.
You can sort the sound effects on Sound Gator by date added, popularity, top rated, runtime, top favorites, or most discussed.
6. Sounds Crate
Sounds Crate is part of the larger Production Crate which provides all kinds of resources to creators for free (you can upgrade to a paid account to access exclusive content, but there’s a lot of great content available for free). The categories available on Sounds Crate are:
Ambient: room tones and general background noises from nature or cities.
Animal: includes things like puppy barks and angry cats.
Blades and Metal: you’ll find sounds from swords, chains, and other metal implements here.
Crashes and Debris: perfect for action, this is where you’ll find sounds associated with destruction.
Electricity: things like electrical blasts and charges can be found here.
Electronics: any sound made by anything electrical, like beeps and appliance sounds.
Explosions and Bangs: if you have a visual explosion effect, you’ll probably need to combine it with something from here.
Fight: find sounds associated with action sequences, like whooshes and punches.
Gun Related: everything from reloads to gunshots.
Impact: any kind of thud or shattering sound.
Lock n’ Load: although there are some ‘gun checking’ sounds in here, it’s mostly clothing related sounds like zippers and Velcro.
Movement: wind sounds and whooshes.
People: sounds humans make, from voices to footsteps.
Sci-Fi SFX: zaps, beeps, and sci-fi ambience.
Vehicle: includes both common vehicles like cars and less-common vehicles like tanks.
Weapons: both modern weapons like missiles and old-timey things like arrows.
7. Zapsplat
Zapsplat claims to be the fastest growing free sound effects library on the internet. With more than 23,999 professional sounds, and more being added every week, they might just be right. The owner of the site, Alan McKinney, adds 500 sound effects every week by himself and the site also accepts sounds from contributors. All of their sounds were recorded using professional equipment and then edited to make them perfect.
You can even send Alan a message and request specific sound effects if you can’t already find what you want on the site.
On Zapsplat you can browse 26 categories including fantasy, warfare, and animals for individual sounds. Or, you can visit the Free SFX Packs section and download a set of related sounds together. Packs include ‘Magic Wand’, ‘Science Fiction Alarms’, and ‘Cartoon Boings’.
Part 2: Make Your Own Sound Effects for YouTube Videos
Here are some easy ways you can make your own sound effects at home.
1. Making Natural Sounds
Fire using cellophane. Just crinkle the cellophane wrap to create a sound like a crackling fire. Chip bags work too.
Rain using rice. Sprinkle rice (or birdseed) onto a thin metal sheet.
Alternatively for rain, you could record the sound of bacon frying.
Wind using a Ziploc. Fill a large ziplock with air and then open the bag a bit and force the air out.
Thunder with aluminum. Just shake a sheet of aluminum to make a thunder sound.
2. Making Action or Sci-Fi Sounds
Ticking Bomb with a clock. Any clock that ticks will do.
Hits/Blows with a pillow. Hit a pillow to make a sound like a body blow. For really hard hits, you might want to whack a sofa cushion with a broomstick.
Bones breaking with celery. Just snap the celery stalks in half.
Richard Bennett
Richard Bennett is a writer and a lover of all things video.
Follow @Richard Bennett
- Title: "In 2024, Going Against Gravity Reversing Your Vids"
- Author: Thomas
- Created at : 2024-05-31 12:45:54
- Updated at : 2024-06-01 12:45:54
- Link: https://youtube-help.techidaily.com/in-2024-going-against-gravity-reversing-your-vids/
- License: This work is licensed under CC BY-NC-SA 4.0.
