
:max_bytes(150000):strip_icc()/chromebooktouchscreennotworking-25f01d4ce9b84c92ac52410a2673919e.jpg)
In 2024, Masterful Guide to Gaming Banners on YouTube
Masterful Guide to Gaming Banners on YouTube
Gaming videos have become increasingly popular on YouTube, especially among young people. It is not uncommon for older folk to enjoy this type of content, especially if they want to unwind after a long day. However, the industry is becoming pretty crowded, making it harder for content creators to stand out from the crowd.
An excellent way to get your target audience to notice you would be to design a killer YouTube banner that will immediately cause anyone scrolling past to click on your video. Stick around to learn how to create a great gaming YouTube banner with templates.
Importance of a Banner for Your YouTube Gaming Channel
Imagine a scenario where you want to open a brick-and-mortar store. One of the most important things you need to get out of the way is the business name. Once you have settled on a fitting name, you will then move on to create a sign to place outside your shop.
For example, a banner for your YouTube gaming channel plays a similar role to signage for a brick-and-mortar shop.
- An excellent banner helps you make a solid first impression on your viewers, some of who is viewing your content for the first time.
- Secondly, a well-designed banner reflects positively on your brand and helps you grow your audience at a steady rate.
- Thirdly, you can use your banner to give your viewers a rough idea of what your video is about without them clicking to watch. A suitable banner can cause anticipation to build within your viewers. Once the video is over, they won’t resist visiting your channel to see what else you offer.
Guide to YouTube Gaming Banner Size
We can liken a banner for your YouTube video to a book cover to a novel you have been dying to read. Therefore, it would be wise to get the size right if you want to create an excellent first impression for yourself. Ideally, the best size for a YouTube banner is 2560*1440 pixels or an aspect ratio of 16:9.
We urge you not to upload a banner smaller than 2048*1152 pixels, or else the image will appear cropped. Keep your banner within 1235*338 pixels and centered on the screen to be on the safe side.
This YouTube banner dimension is ideal for viewing on any device since your audience might use their smartphones or laptop to watch your videos on YouTube. Lastly, ensure you keep the file to a maximum of 6MB. We believe this file size is pretty generous.
Tips for Designing an Attractive Gaming YouTube Banner
Below are some tips that will help you create beautiful YouTube banners.
Simplicity is key: Contrary to popular belief, a simple banner looks more polished than a complex one. If your YouTube banner has too many elements, your viewers using their mobile phones might have a challenge viewing the image.
Ensure the graphics are high-quality : Nothing is as frustrating to your viewers as seeing a blurry or pixelated YouTube banner. However, high-quality graphics with a resolution of at least 1920*1080 pixels make your work look polished and attract more viewers to your channel.
Leverage the grid system: Some of your viewers might watch your videos from their smartphones, and others on their laptops or tablets. The grid system allows you to ensure the full banner will be visible no matter what device your audience will use to watch your gaming videos.
Add a CTA: At the end of the day, you are trying to grow your audience on your YouTube channel. You might also have other social media platforms where you post content. Since your banner is one of the first things your audience will see, you could include a short, easy-to-read, and understandable call to action. For instance, you could encourage them to “Subscribe Now!”
Incorporate your unique color scheme: By now, you already have a theme for your YouTube channel that your existing subscribers associate with you. As you design your YouTube banner, ensure you incorporate your theme colors, so new visitors know what colors to look out for as they scroll on the platform.
Why Use Templates To Create Gaming YouTube Banners?
First and foremost, a gaming youtube banner template takes the tedium out of creating a design from scratch. They are also systematized, meaning you can download a template specifically for YouTube that comes in the correct dimensions. Most importantly, templates designed for gaming YouTube banners are optimized to help you generate more organic traffic to your channel.
You probably have other expenses breathing down your neck. No need to add your YouTube banner to the list. A youtube gaming channel banner template a budget-friendly way to create stunning designs for your banner that actually look good. If you are lucky, you might find free programs to help you create gorgeous YouTube banners for your gaming channel.
Make YouTube Gaming Banners With Templates in Filmora
Now that you understand why a gaming channel banner template is essential for your YouTube channel, you might wonder where you can find some good ones to incorporate into your videos. Don’t worry because Filmora is precisely what you need.
Wondershare Filmora has a fantastic template feature that helps you make creative videos effortlessly. You can use the preset templates in the platform, saving you lots of time you would have spent designing your template from scratch. We guarantee you cannot exhaust the 1000+ templates this platform offers, meaning you are spoilt for choice!
If you want to customize your video, you can replace the stock videos that come with the preset templates with footage from your internal storage. In addition, Wondershare Filmora lets you share your favorite templates with other content creators who would also like to try making their own cool videos.
Free Download For Win 7 or later(64-bit)
Free Download For macOS 10.14 or later
Below is a detailed step-by-step guide on how to make a gaming YouTuber banner template with Wondershare Filmora.
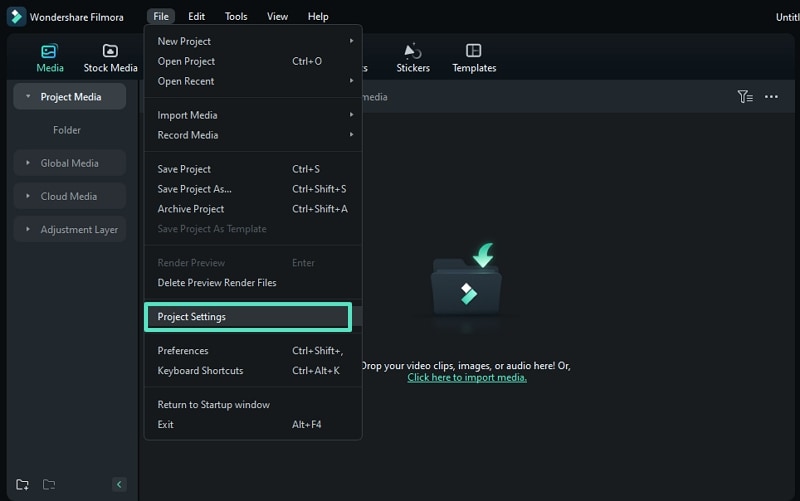
Step 1. After creating a project with Filmora, click on the “File” tab, wait for a drop-down menu to appear, and select “Project Settings.”
Step 2. Once a dialogue box appears, go to the “Resolution” tab and adjust the resolution to 2560*1140.
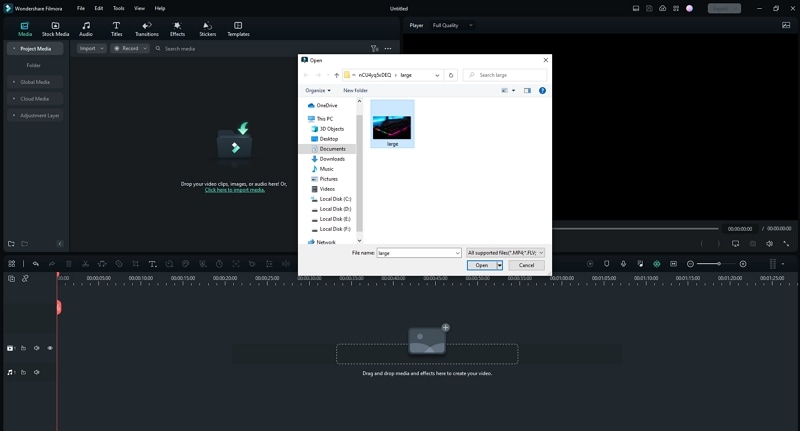
Step 3. Upload your footage or photo from your internal storage by clicking on the logo below.
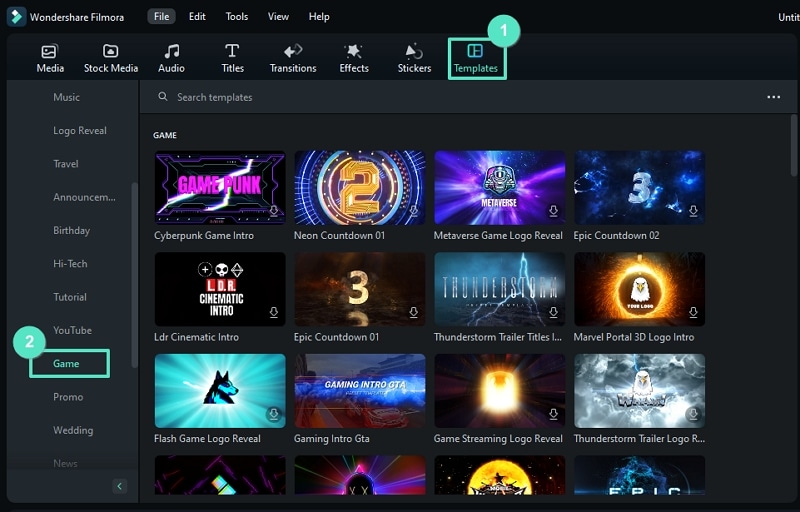
Step 4. Click on the “Template” tab at the top of the page and click “Game.” Browse the available templates till you see one you like.
Step 5. Drag and drop the template you have chosen to the timeline as shown below.
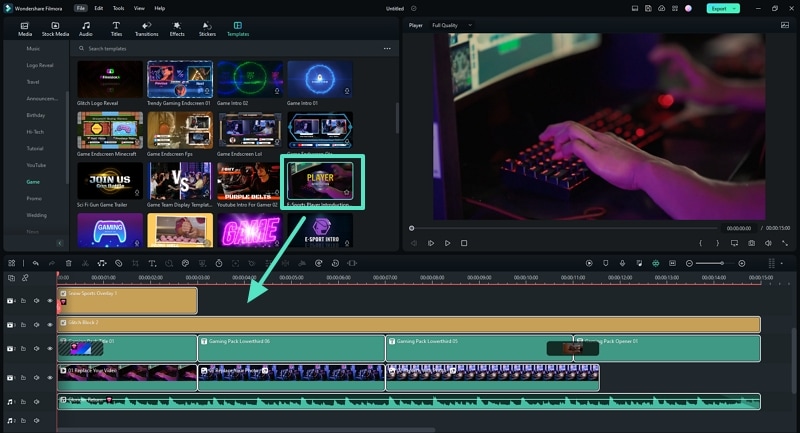
Step 6. Replace the sample footage in the template by dragging and dropping your own footage into the timeline.

Step 7. Customize the footage and change the settings until you are happy with the outcome. Edit the text using the tools provided in the platform.
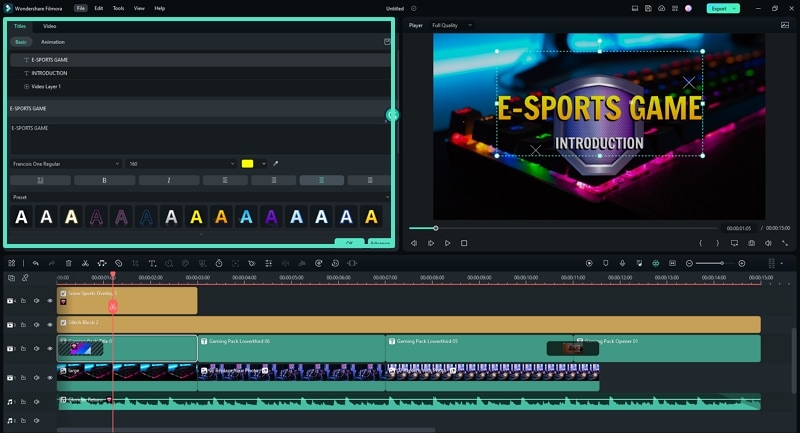
Step 8. Take a screenshot of the final result.

Step 9. Specify the snapshot format and choose the storage location before saving a copy to your device.

Step 10. Once the snapshot appears in the Media Panel, right-click on it to open. Select “Reveal in Explorer” to locate the picture in your internal storage. You can now use the photo as your YouTube gaming banner.

5 Websites for Gaming Banner Templates Your YouTube
Wondershare Filmora is not the only platform you can use to create banner templates for your YouTube channel. Here is a list of 5 more websites you can try and a detailed breakdown of the remarkable features you are bound to enjoy.
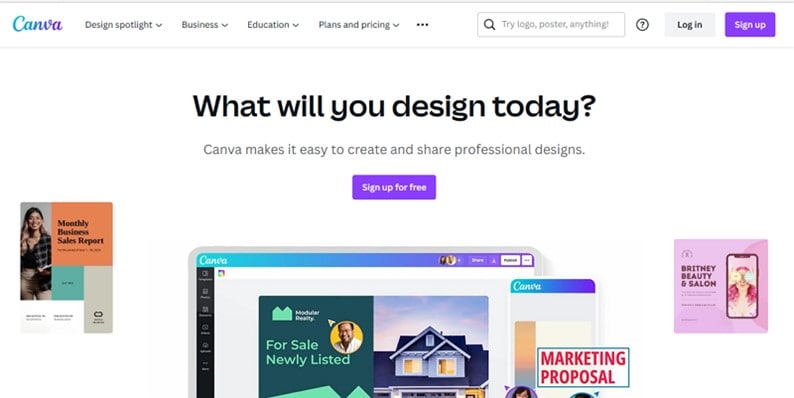
1. Canva
The first alternative to Filmora on our list is Canva, which has thousands of professional, ready-made designs to wow your audience. You can work alone or with a dedicated team to ensure you design only the best banner for your channel to attract the masses to the kind of content you create.
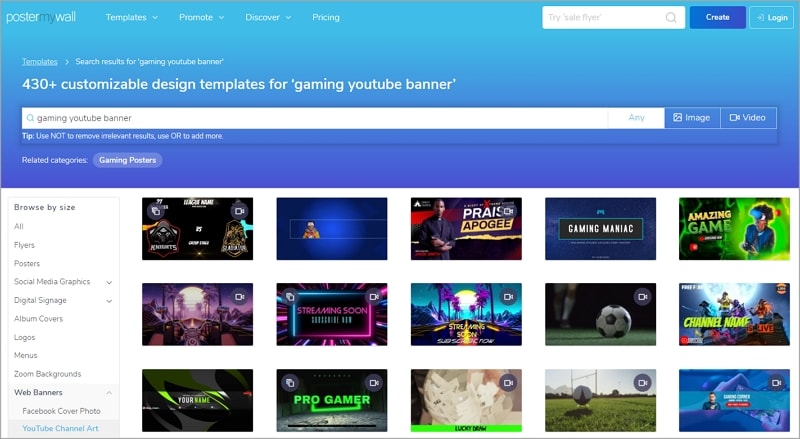
2. PosterMyWall
We couldn’t forget to include PosterMyWall to our list, which has pre-made templates you can customize to suit your needs. With PosterMyWall, you can save the time you could have used to design a banner from scratch to think of more content for your channel. The developers suggest various templates you might like, not to mention that you can sign up for free!
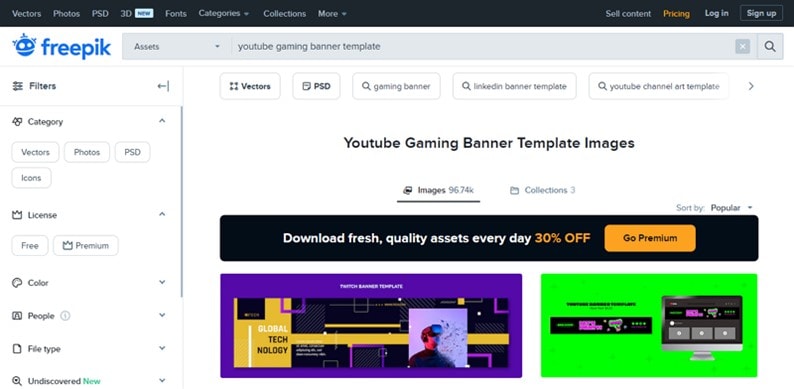
3. Freepik
Another suitable alternative to Filmora is Freepik. We guarantee you cannot exhaust all the numerous templates this platform offers. Each template is unique, with different color combinations and fonts to cater to the theme colors on your YouTube channel. You could opt for the free version or sign up for a Premium account and get 30% off.
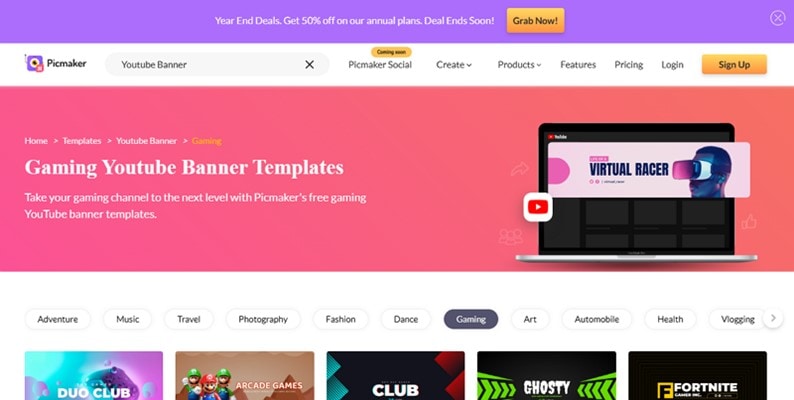
4. Pickmaker
The fourth alternative on our list is Pickmaker, a sure way to take your gaming channel to the next level. The templates are arranged in broad categories to help you pick the best one based on the type of content you post. In addition, you don’t have to part with your precious monies to start designing YouTube banners with Pickmaker.
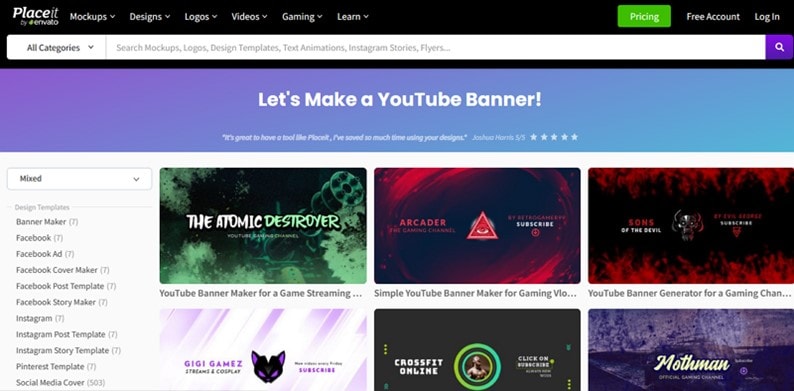
5. Placeit
Last but definitely not least is Placeit, which contains picturesque templates fitting for a gaming YouTube channel. We guarantee your audience won’t resist clicking on your videos once you use any of the templates within this platform. All you need to do is create a free account to enjoy the perks. Placeit makes your work easier by allowing you to indicate your favorite templates for use later.
Conclusion
Gaming content is far from boring, and neither should your banner. Remember, your audience will judge you based on your banner, the first content they interact with before they click to watch your video.
The better you can design your banner, the higher your chances of growing an audience that supports you by watching your content regularly. Once you have created an enticing banner, all that’s left is to ensure you have the content to match.
Free Download For macOS 10.14 or later
Below is a detailed step-by-step guide on how to make a gaming YouTuber banner template with Wondershare Filmora.
Step 1. After creating a project with Filmora, click on the “File” tab, wait for a drop-down menu to appear, and select “Project Settings.”
Step 2. Once a dialogue box appears, go to the “Resolution” tab and adjust the resolution to 2560*1140.
Step 3. Upload your footage or photo from your internal storage by clicking on the logo below.
Step 4. Click on the “Template” tab at the top of the page and click “Game.” Browse the available templates till you see one you like.
Step 5. Drag and drop the template you have chosen to the timeline as shown below.
Step 6. Replace the sample footage in the template by dragging and dropping your own footage into the timeline.
Step 7. Customize the footage and change the settings until you are happy with the outcome. Edit the text using the tools provided in the platform.
Step 8. Take a screenshot of the final result.
Step 9. Specify the snapshot format and choose the storage location before saving a copy to your device.
Step 10. Once the snapshot appears in the Media Panel, right-click on it to open. Select “Reveal in Explorer” to locate the picture in your internal storage. You can now use the photo as your YouTube gaming banner.
5 Websites for Gaming Banner Templates Your YouTube
Wondershare Filmora is not the only platform you can use to create banner templates for your YouTube channel. Here is a list of 5 more websites you can try and a detailed breakdown of the remarkable features you are bound to enjoy.
1. Canva
The first alternative to Filmora on our list is Canva, which has thousands of professional, ready-made designs to wow your audience. You can work alone or with a dedicated team to ensure you design only the best banner for your channel to attract the masses to the kind of content you create.
2. PosterMyWall
We couldn’t forget to include PosterMyWall to our list, which has pre-made templates you can customize to suit your needs. With PosterMyWall, you can save the time you could have used to design a banner from scratch to think of more content for your channel. The developers suggest various templates you might like, not to mention that you can sign up for free!
3. Freepik
Another suitable alternative to Filmora is Freepik. We guarantee you cannot exhaust all the numerous templates this platform offers. Each template is unique, with different color combinations and fonts to cater to the theme colors on your YouTube channel. You could opt for the free version or sign up for a Premium account and get 30% off.
4. Pickmaker
The fourth alternative on our list is Pickmaker, a sure way to take your gaming channel to the next level. The templates are arranged in broad categories to help you pick the best one based on the type of content you post. In addition, you don’t have to part with your precious monies to start designing YouTube banners with Pickmaker.
5. Placeit
Last but definitely not least is Placeit, which contains picturesque templates fitting for a gaming YouTube channel. We guarantee your audience won’t resist clicking on your videos once you use any of the templates within this platform. All you need to do is create a free account to enjoy the perks. Placeit makes your work easier by allowing you to indicate your favorite templates for use later.
Conclusion
Gaming content is far from boring, and neither should your banner. Remember, your audience will judge you based on your banner, the first content they interact with before they click to watch your video.
The better you can design your banner, the higher your chances of growing an audience that supports you by watching your content regularly. Once you have created an enticing banner, all that’s left is to ensure you have the content to match.
Streaming Excellence: Selecting the Best Webcams for YouTube
Best Webcams for YouTube Livestreaming

Max Wales
Mar 27, 2024• Proven solutions
Broadcasting videos in real time on social media can be a great way to share some of the best moments of your life with your friends or to reach new customers for the products your company offers. YouTube is the world’s biggest video sharing platform that already allows its users to stream live videos through third-party applications such as Wirecast Play or OBS. Less than a month ago, YouTube has finally made possible live streaming directly from a computer’s webcam. The option is currently only available on Chrome browsers, but the company claims that more browsers will start offering this feature soon.
In this article, we are going to provide you with all the information you’ll need to create seamless live streams using a webcam and introduce you to some of the best webcam models in 2021.
Best webcams for YouTube Livestreaming in 2021
The quality of the video recording you intend to broadcast live is essential for the success of your live streams. Most built-in laptop webcams produce low-quality videos, and for that reason using an external webcam that captures high-resolution videos can help you create live streams that attract a lot of attention from YouTube’s community.
How to choose the right webcam for live streaming on YouTube?
Compatability: Even the best webcams on the market are completely useless if they are not compatible with your computer. Finding a webcam that works with a PC or a Mac shouldn’t be too difficult because both Windows and iOS platforms offer support for a wide range of models.
Video Resolution: YouTubers that just want to produce simple live streams don’t have to pay a lot of attention to the video resolution, because their videos don’t show too many details. Vloggers and gamers, on the other hand, should consider using webcams that produce 4K or HD footage since lower-priced options have a hard time realistically depicting colors. The quality of the video output a webcam produces can increase its price significantly, so there’s no reason investing in it if you don’t have the intention of utilizing its features to the fullest.
Sound Quality: Besides the video features, you should also look into the webcam’s audio options, because no one wants to watch a video with a terrible sound. Buying an external microphone is probably the best solution to this issue, but if you can’t afford one, then purchasing a webcam with decent audio recording features is the second best option.
Adjustable Location: Although the angle from which you are recording a stream may not seem important, poorly framed live streams are more likely to go unnoticed. A webcam that is easily adjustable can grant you the freedom of choosing your shots on every live stream you share online and it will enable you to control each and every detail in the video.
![]()

The All-in-One Screen Recorder & Video Editor
- Record desktop screen, voiceover, and webcam simultaneously
- Edit recorded clips quickly with a wide range of professional tools
- Built-in plentiful templates and effects
- Export to MP4, MOV, MKV, GIF and multiple formats
For Win 7 or later (64-bit)
For macOS 10.12 or later
 Secure Download
4 Best Webcams for YouTube Live streaming in 2021
There are thousands of different webcams you can use to record a live stream, but the models featured below are some of the very best currently available on the market.
1. Logitech 4K Pro webcam
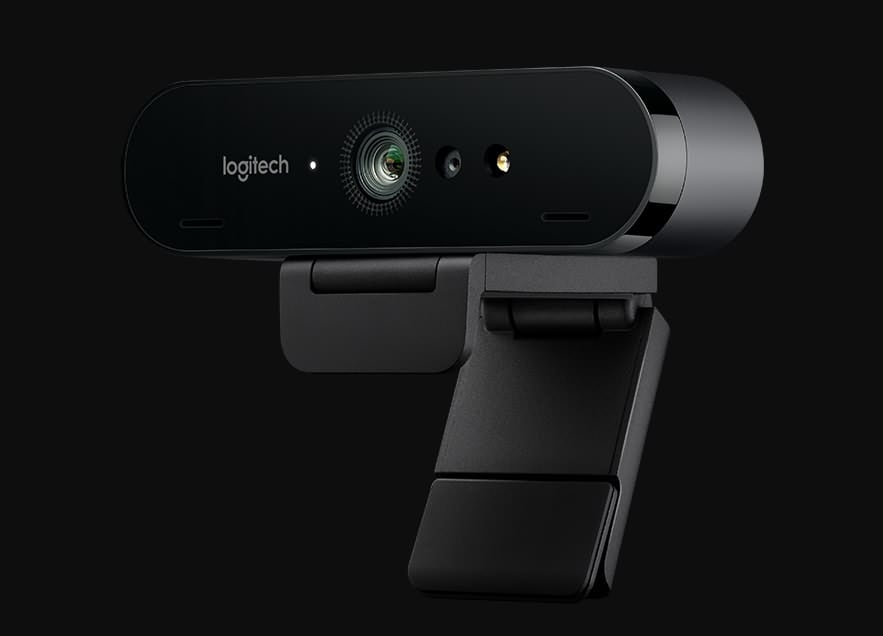
OS: Windows, macOS, Chrome OS
Price: $199
This is currently the only webcam on the market that supports 4K video recording, which makes it a forerunner of innovation and change. Besides the 4K option, the webcam’s features include a 5X digital zoom, infrared facial recognition and the amazing Right Light with HDR option that helps users record videos even under difficult light conditions.
The webcam can perform basic functions, like Skype calls, without the aid of third-party apps, which means that you can use it to create live streams on YouTube even if you don’t have a broadcasting software. The webcam’s stand is designed to fit almost any surface, so mounting the Logitech 4K Pro webcam to a laptop or monitor is quick and simple. The background replacement feature this Logitech’s webcam model offers can be quite useful if you want to use a different background in your YouTube live stream.
Pros:
- Produces incredibly clear and sharp images
- Superb background replacement options
- Expansive field of view
Cons:
- Poor audio recording options
- Internal software is basic
- A limited number of programs can capture 4K footage
2. Logitech HD Pro C920
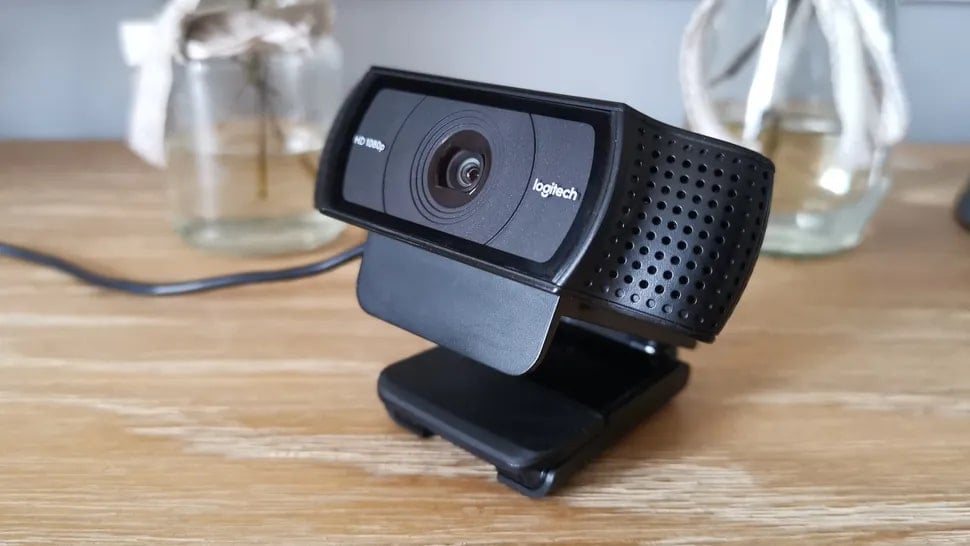
OS: macOS, Windows
Price: $99,99
Vloggers and all other YouTubers who care about video resolution will love using this webcam. Besides being capable of producing crystal clear videos in 1080p or HD 720 resolution at 30 or 60 fps, Logitech HD Pro C922 is also optimized for live streaming, which makes it a perfect webcam for live streaming on YouTube and all other video sharing platforms.
The webcam is equipped with two omnidirectional microphones that can record clear audio, but they pick up background noises easily, so using an external microphone for your live stream is still a much better option. The automatic low-light correction feature is designed to detect flickering lights in a video or increase visibility when streaming from a dimmed location. A foldable stand makes mounting the webcam easy, and you can also use a tripod if you want to record a live stream from an unusual perspective.
Pros:
- Produces 1080p and 720p resolution videos at 30 and 60 fps
- Allows users to integrate live images into their live streams
- Very easy to use
Cons
- Below average audio recording features
- Pricey
- Works only with OBS and XSplit broadcasting software
3. Logitech C922 Pro Stream webcam
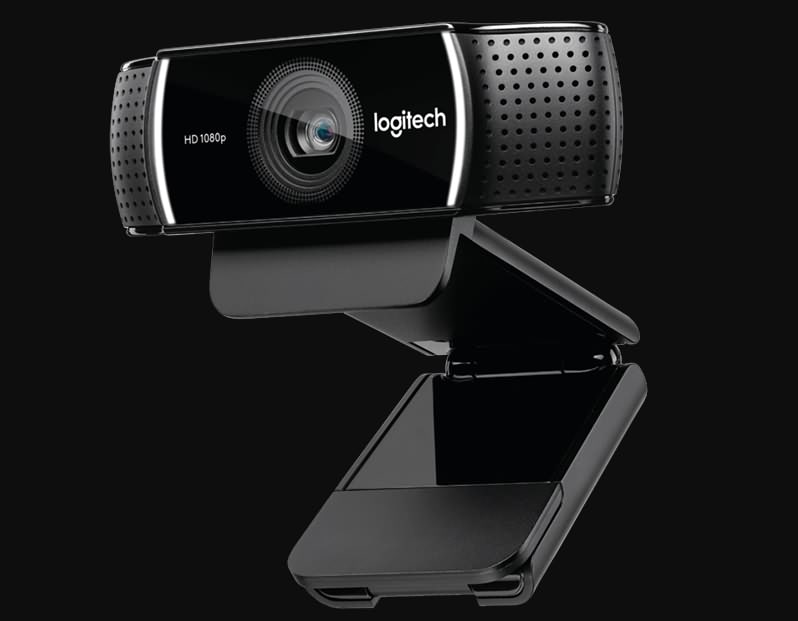
OS: Windows, macOS, Xbox, Chrome OS, Android 5.0 or above
Price: $99,99
Professional streamers, who want to capture impeccable live streams, should look no further. Logitech C922 Pro Stream webcam is the premier option for anyone who wants to be regarded as a professional streamer. This Logitech’s webcam lets you capture live streams in 1080p at 30 fps or 720p at 60 fps, while also providing the background removal feature for live streams on Twitch and YouTube. The video compression ensures that your live streams don’t take up too much of your network’s resources.
The webcam’s microphones enable users to record clear audio and reduce the need to use an external mic on every live stream you make. The Logitech C922 Pro Stream webcam delivers stunning performances in low light conditions, and it also has a 78-degree field of view lens. The webcam’s mounting options are somewhat limited, which can have a negative effect on the visual appeal of your YouTube live streams.
Pros:
- Offers a solid support for audio recording
- Delivers stunning picture quality
- Compatible with a wide range of operating systems
Cons:
- Limited mounting options
- Not plug-and-play friendly on Mac devices
- More expensive than webcams with similar capabilities
4. Microsoft LifeCam Studio
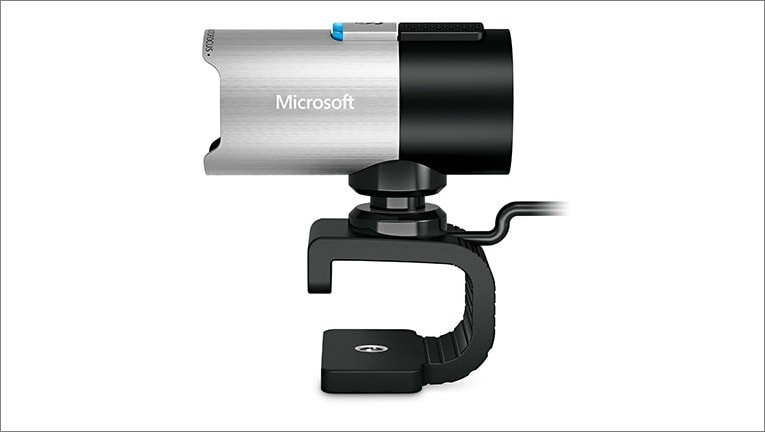
OS: Windows
Price: $99,95
The high-precision glass element lens this webcam features produces clear and sharp images. The Microsoft LifeCam Studio webcam has a 1080p HD sensor and it offers 720p HD video chat option. In addition to these remarkable features, the webcam is also equipped with TrueColor technology with face tracking that automatically adjusts the camera’s exposure to the environment and ensures that your live streams are always bright and colorful.
The Microsoft LifeCam Studio has a wide angle lens and an autofocus feature that guarantees that all live streams are always in focus. The webcam is Skype certified which means that it performs best when used with this software. Audio recording features exceed all expectations since the webcam can record natural audio recordings with no background noises. However, the limited compatibility narrows down the spectrum of its potential users.
Pros:
- Excellent video recording features.
- Crystal clear audio
- Great mounting options
Cons:
- Available only on Windows OS
- Demanding system requirements
- Not optimized for live streaming.
How to live stream from a webcam on YouTube in 2020
Although producing your own live stream on YouTube is easy, there are still a few steps you will have to take before you can start streaming from the webcam on your computer. If you don’t have a YouTube channel, you must make one, in order to be able to create your first live steam.
Step 1
Go to youtube.com/webcam , then complete the channel verification process and make sure that your channel doesn’t have any live streaming restrictions in the last 90 days. Head over to your channel, click on the Create a Video or Post icon in the upper right corner of the web page and select the GoLive option.
Afterward, you should give Chrome permission to access your webcam and the microphone you intend on using to record audio.
Step 2
Immediately after, the platform will ask you to give a title to your stream and it will let you choose whether or not you want the stream to be public or unlisted. It may be a good idea to create a few unlisted streams before you go public if you are still trying to figure out how this feature works.
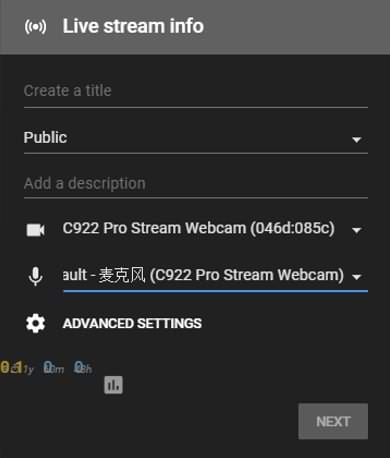
Proceed to select the camera and the microphone you intend to use to record the live stream, and you can also click on the Advanced Settings icon if you want to disable chat during the session or to specify that the live stream includes paid promotions.
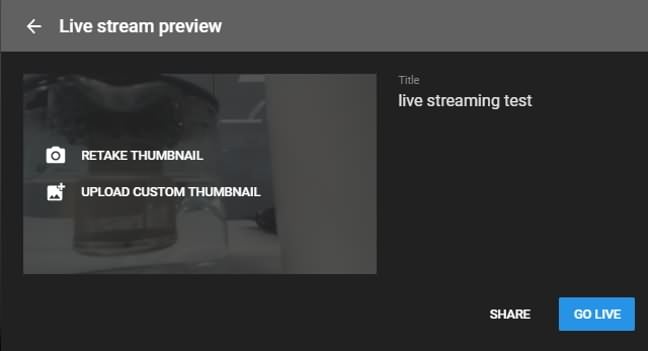
Step 3
Once you’ve finished fine-tuning the advanced settings, you should click on the Next button. The platform will offer you to take or upload a thumbnail for your live stream.
Clicking on the Share icon will enable you to share a live stream on social media, copy the link or access the embed code. Using the Share option is a great way to check if your live stream is functioning properly and to make sure that you are all set to begin the streaming session.
Step 4
Start your live stream by hitting the Go Live button. During the stream, you’ll be able to see and reply to comments people posted, the duration of the stream as well as the number of people following your live stream. If you haven’t shared your live stream before you started a new session you can do so while you are live. Click on the End Stream button to finish your webcam live stream on YouTube.
Step 5
After each live streaming session, YouTube will display some important statistics like the total and average watch time for the particular stream, the number of new subscribers or the number of playbacks of your live stream. The stream will be available for review in YouTube’s Creator Studio in the Events menu.
Max Wales
Max Wales is a writer and a lover of all things video.
Follow @Max Wales
Max Wales
Mar 27, 2024• Proven solutions
Broadcasting videos in real time on social media can be a great way to share some of the best moments of your life with your friends or to reach new customers for the products your company offers. YouTube is the world’s biggest video sharing platform that already allows its users to stream live videos through third-party applications such as Wirecast Play or OBS. Less than a month ago, YouTube has finally made possible live streaming directly from a computer’s webcam. The option is currently only available on Chrome browsers, but the company claims that more browsers will start offering this feature soon.
In this article, we are going to provide you with all the information you’ll need to create seamless live streams using a webcam and introduce you to some of the best webcam models in 2021.
Best webcams for YouTube Livestreaming in 2021
The quality of the video recording you intend to broadcast live is essential for the success of your live streams. Most built-in laptop webcams produce low-quality videos, and for that reason using an external webcam that captures high-resolution videos can help you create live streams that attract a lot of attention from YouTube’s community.
How to choose the right webcam for live streaming on YouTube?
Compatability: Even the best webcams on the market are completely useless if they are not compatible with your computer. Finding a webcam that works with a PC or a Mac shouldn’t be too difficult because both Windows and iOS platforms offer support for a wide range of models.
Video Resolution: YouTubers that just want to produce simple live streams don’t have to pay a lot of attention to the video resolution, because their videos don’t show too many details. Vloggers and gamers, on the other hand, should consider using webcams that produce 4K or HD footage since lower-priced options have a hard time realistically depicting colors. The quality of the video output a webcam produces can increase its price significantly, so there’s no reason investing in it if you don’t have the intention of utilizing its features to the fullest.
Sound Quality: Besides the video features, you should also look into the webcam’s audio options, because no one wants to watch a video with a terrible sound. Buying an external microphone is probably the best solution to this issue, but if you can’t afford one, then purchasing a webcam with decent audio recording features is the second best option.
Adjustable Location: Although the angle from which you are recording a stream may not seem important, poorly framed live streams are more likely to go unnoticed. A webcam that is easily adjustable can grant you the freedom of choosing your shots on every live stream you share online and it will enable you to control each and every detail in the video.
![]()
The All-in-One Screen Recorder & Video Editor
- Record desktop screen, voiceover, and webcam simultaneously
- Edit recorded clips quickly with a wide range of professional tools
- Built-in plentiful templates and effects
- Export to MP4, MOV, MKV, GIF and multiple formats
For Win 7 or later (64-bit)
For macOS 10.12 or later
Secure Download
4 Best Webcams for YouTube Live streaming in 2021
There are thousands of different webcams you can use to record a live stream, but the models featured below are some of the very best currently available on the market.
1. Logitech 4K Pro webcam
OS: Windows, macOS, Chrome OS
Price: $199
This is currently the only webcam on the market that supports 4K video recording, which makes it a forerunner of innovation and change. Besides the 4K option, the webcam’s features include a 5X digital zoom, infrared facial recognition and the amazing Right Light with HDR option that helps users record videos even under difficult light conditions.
The webcam can perform basic functions, like Skype calls, without the aid of third-party apps, which means that you can use it to create live streams on YouTube even if you don’t have a broadcasting software. The webcam’s stand is designed to fit almost any surface, so mounting the Logitech 4K Pro webcam to a laptop or monitor is quick and simple. The background replacement feature this Logitech’s webcam model offers can be quite useful if you want to use a different background in your YouTube live stream.
Pros:
- Produces incredibly clear and sharp images
- Superb background replacement options
- Expansive field of view
Cons:
- Poor audio recording options
- Internal software is basic
- A limited number of programs can capture 4K footage
2. Logitech HD Pro C920
OS: macOS, Windows
Price: $99,99
Vloggers and all other YouTubers who care about video resolution will love using this webcam. Besides being capable of producing crystal clear videos in 1080p or HD 720 resolution at 30 or 60 fps, Logitech HD Pro C922 is also optimized for live streaming, which makes it a perfect webcam for live streaming on YouTube and all other video sharing platforms.
The webcam is equipped with two omnidirectional microphones that can record clear audio, but they pick up background noises easily, so using an external microphone for your live stream is still a much better option. The automatic low-light correction feature is designed to detect flickering lights in a video or increase visibility when streaming from a dimmed location. A foldable stand makes mounting the webcam easy, and you can also use a tripod if you want to record a live stream from an unusual perspective.
Pros:
- Produces 1080p and 720p resolution videos at 30 and 60 fps
- Allows users to integrate live images into their live streams
- Very easy to use
Cons
- Below average audio recording features
- Pricey
- Works only with OBS and XSplit broadcasting software
3. Logitech C922 Pro Stream webcam
OS: Windows, macOS, Xbox, Chrome OS, Android 5.0 or above
Price: $99,99
Professional streamers, who want to capture impeccable live streams, should look no further. Logitech C922 Pro Stream webcam is the premier option for anyone who wants to be regarded as a professional streamer. This Logitech’s webcam lets you capture live streams in 1080p at 30 fps or 720p at 60 fps, while also providing the background removal feature for live streams on Twitch and YouTube. The video compression ensures that your live streams don’t take up too much of your network’s resources.
The webcam’s microphones enable users to record clear audio and reduce the need to use an external mic on every live stream you make. The Logitech C922 Pro Stream webcam delivers stunning performances in low light conditions, and it also has a 78-degree field of view lens. The webcam’s mounting options are somewhat limited, which can have a negative effect on the visual appeal of your YouTube live streams.
Pros:
- Offers a solid support for audio recording
- Delivers stunning picture quality
- Compatible with a wide range of operating systems
Cons:
- Limited mounting options
- Not plug-and-play friendly on Mac devices
- More expensive than webcams with similar capabilities
4. Microsoft LifeCam Studio
OS: Windows
Price: $99,95
The high-precision glass element lens this webcam features produces clear and sharp images. The Microsoft LifeCam Studio webcam has a 1080p HD sensor and it offers 720p HD video chat option. In addition to these remarkable features, the webcam is also equipped with TrueColor technology with face tracking that automatically adjusts the camera’s exposure to the environment and ensures that your live streams are always bright and colorful.
The Microsoft LifeCam Studio has a wide angle lens and an autofocus feature that guarantees that all live streams are always in focus. The webcam is Skype certified which means that it performs best when used with this software. Audio recording features exceed all expectations since the webcam can record natural audio recordings with no background noises. However, the limited compatibility narrows down the spectrum of its potential users.
Pros:
- Excellent video recording features.
- Crystal clear audio
- Great mounting options
Cons:
- Available only on Windows OS
- Demanding system requirements
- Not optimized for live streaming.
How to live stream from a webcam on YouTube in 2020
Although producing your own live stream on YouTube is easy, there are still a few steps you will have to take before you can start streaming from the webcam on your computer. If you don’t have a YouTube channel, you must make one, in order to be able to create your first live steam.
Step 1
Go to youtube.com/webcam , then complete the channel verification process and make sure that your channel doesn’t have any live streaming restrictions in the last 90 days. Head over to your channel, click on the Create a Video or Post icon in the upper right corner of the web page and select the GoLive option.
Afterward, you should give Chrome permission to access your webcam and the microphone you intend on using to record audio.
Step 2
Immediately after, the platform will ask you to give a title to your stream and it will let you choose whether or not you want the stream to be public or unlisted. It may be a good idea to create a few unlisted streams before you go public if you are still trying to figure out how this feature works.
Proceed to select the camera and the microphone you intend to use to record the live stream, and you can also click on the Advanced Settings icon if you want to disable chat during the session or to specify that the live stream includes paid promotions.
Step 3
Once you’ve finished fine-tuning the advanced settings, you should click on the Next button. The platform will offer you to take or upload a thumbnail for your live stream.
Clicking on the Share icon will enable you to share a live stream on social media, copy the link or access the embed code. Using the Share option is a great way to check if your live stream is functioning properly and to make sure that you are all set to begin the streaming session.
Step 4
Start your live stream by hitting the Go Live button. During the stream, you’ll be able to see and reply to comments people posted, the duration of the stream as well as the number of people following your live stream. If you haven’t shared your live stream before you started a new session you can do so while you are live. Click on the End Stream button to finish your webcam live stream on YouTube.
Step 5
After each live streaming session, YouTube will display some important statistics like the total and average watch time for the particular stream, the number of new subscribers or the number of playbacks of your live stream. The stream will be available for review in YouTube’s Creator Studio in the Events menu.
Max Wales
Max Wales is a writer and a lover of all things video.
Follow @Max Wales
Also read:
- 2024 Approved Premiere Pro Know-How Optimizing YouTube Video Uploads
- 2024 Approved The Investor's Guide to Choosing YT Channels
- [New] Illuminating the Path to YouTube Success Keyword Research
- In 2024, Starting YouTube Essential SEO Tips
- [New] Stream Your Spotify Hits on YouTube with These Select Tools
- [New] Expert Strategies to Maximize Income with Video Ads on Youtube
- [New] Explore the Best Apps for Effortless YouTube to WebM Conversion
- 2024 Approved Unleashing Fun Crafting Amazing YouTube Reaction Videos in 3 Ways
- In 2024, WeVideo The Fast and Easy Way to Create Online Videos
- [New] Chortle Creator Suite
- [Updated] Explore Popular YouTube Comment Sections for 2024
- In 2024, Efficient Time Markers in YouTube Videos (Desktop/Mobile Edition)
- In 2024, Digital Divas Top Ten Gamers on YouTube
- [Updated] Master Screen Recording on Windows, macOS, and Android Devices for 2024
- [Updated] Tailoring Your Footage A Comprehensive Guide to GoPro's Color Adjustment
- Unlocking Full Potential ZDSoft Screen Recorder
- Change Location on Yik Yak For your ZTE Axon 40 Lite to Enjoy More Fun | Dr.fone
- Title: In 2024, Masterful Guide to Gaming Banners on YouTube
- Author: Thomas
- Created at : 2024-06-28 04:41:00
- Updated at : 2024-06-29 04:41:00
- Link: https://youtube-help.techidaily.com/in-2024-masterful-guide-to-gaming-banners-on-youtube/
- License: This work is licensed under CC BY-NC-SA 4.0.
