"In 2024, Optimizing Self-Filmed Content on YouTube"

Optimizing Self-Filmed Content on YouTube
4 Ways To Set Up Your Talking-Head Shots For YouTube

Richard Bennett
Oct 26, 2023• Proven solutions
A big part of being a YouTuber involves talking to the camera. How you set up your talking-head shot depends on many factors, including how much space you have, what kind of look you’re going for, and how many people you want to fit in one frame. Here are four ways to set up your talking-head shots for YouTube.
| Table of Contents 1. Close Quarters Wide-Angle Vlog Set-Up2. Medium Vlog Set-Up3. Two Person Vlog Set-Up4. Long Teleprompter Vlog Set-Up |
|---|
How to Set Up Your Talking Heads Shots for YouTube Video [Infographic]
We’ve summarized the key points about setting up talking head style video shots with the Infographic below. It is welcomed to share on social media.

How to Set Up Your Talking-Head Shots for YouTube [4 Ways]
1. Close Quarters Wide-Angle Vlog Set-Up
Don’t have a lot of space to set up your camera and lighting equipment? No problem! You can be within an arm’s length away from your camera with a close quarters wide-angle vlog set-up.
With this set-up, you’re going to need a camera with a wide-angle lens, a tripod, a camera-mounted shotgun mic for sound, and a ring light for light.
Set your camera on the tripod and mount the shotgun mic directly on the camera shoe (the electronic bracket on the top of the camera). Inside the circular space of your ring light, position your camera right in the middle of it so that you can shoot your video through it without getting any part of the lighting equipment in your shot.
In the video above, Sean Cannell demonstrates this set-up. As you can see from this example, the wide-angle lens is able to squeeze in a lot of what’s in front of the camera into the shot.
Objects and people that just make it into the sides of the frame will appear more stretched out as the wide-angle causes distortion and enhances perspectives.
If you look closely into Sean’s eyes, you can also see a specular highlight in the shape of a circle. Many people like the way eyes look against a ring light.
2. Medium Vlog Set-Up
If you have more space and want to shoot a more professional-looking talking-head shot with more realistic perspectives, a medium vlog set-up may be a better alternative for you.
For this set-up, you’ll be using a slightly longer standard/normal lens (like a 35mm or a 50mm lens) attached to your camera which would be set on a tripod. Since this longer lens will show less of the surrounding areas as it “zooms” closer into whatever is in front, you will need to sit further back, away from your camera.
Now that you’re further away from your camera, a camera-mounted shotgun mic may not be the best mic for you. For better sound recording, you’ll need a shotgun mic fixed on a mic stand that is set up like a boom mic, positioned just outside of your camera frame.
At the 39 second mark of the above video, electronic music producer deadmau5 is positioned right in the center of this particular set-up.
You can see from how even the background and couch looks across the entire camera frame that there is no distortion or enhanced perspective.
It appears that, to the right of deadmau5 (camera left), there is a key light and to his left (camera right) there may be a fill light for additional lighting. Behind the couch, there’s also a background uplight to create depth between the subject and the background. At the 1:30 mark of this trailer video, you can briefly see how the Masterclass camera crew set up their shot.
3. Two Person Vlog Set-Up
If your talking-head shot has got to include two people, you can use a similar set-up as the medium vlog set-up detailed above.
If you look back at the 39-second mark of deadmau5’s Masterclass trailer, you can see that there’s a lot of space to the left and right of deadmau5. Now imagine the same shot but with two people.
With two people, though, you’ll want to set up your mic slightly differently. Rather than using a directional shotgun mic with a narrow area of sensitivity, you’ll want to use a directional mic with a wider area of sensitivity.
4. Long Teleprompter Vlog Set-Up
If you want to read over a script but still make it appear like you’re looking straight into the camera, you’ll need to use a long teleprompter vlog set-up.
For this set-up, you’ll need all the same equipment as the medium vlog set-up, but you’ll additionally need a teleprompter placed in front of your camera equipped with a long telephoto lens.
You will have to sit much further back away from your camera for two main reasons. Firstly, you want to be able to fit yourself in your much more zoomed-in camera frame (effect of the long telephoto lens). Secondly, you want to be far enough that the camera cannot detect your eyes reading from left to right. You’ll want to be around six meters away from a 17” teleprompter monitor or around four meters away from a 10” teleprompter monitor.
In the above video, Jared Polin uses a long teleprompter vlog set-up.
In the video, he says there’s about 8 feet (2.4 meters) between himself and his lens. At the 1:15 mark of his video, Jared demonstrates how this set-up works.
It is difficult to know whether the movement in his eyes is caused by not being far enough from the lens or from his horizontal nystagmus condition in his eyes.
Looking to find the right lights for your video recording set? Check out our Top 17 Video Lighting Equipment For YouTubers .
Tips for Making a Talking Head Video Better
To make a talking-head video more interesting, you can add some background music to the video, apply some interesting texts or elements. Filmora has built-in royalty-free music tracks and sound effects as well as text templates , filters and motivating elements. Download the free trial version below and release your creativity.

Richard Bennett
Richard Bennett is a writer and a lover of all things video.
Follow @Richard Bennett
Richard Bennett
Oct 26, 2023• Proven solutions
A big part of being a YouTuber involves talking to the camera. How you set up your talking-head shot depends on many factors, including how much space you have, what kind of look you’re going for, and how many people you want to fit in one frame. Here are four ways to set up your talking-head shots for YouTube.
| Table of Contents 1. Close Quarters Wide-Angle Vlog Set-Up2. Medium Vlog Set-Up3. Two Person Vlog Set-Up4. Long Teleprompter Vlog Set-Up |
|---|
How to Set Up Your Talking Heads Shots for YouTube Video [Infographic]
We’ve summarized the key points about setting up talking head style video shots with the Infographic below. It is welcomed to share on social media.

How to Set Up Your Talking-Head Shots for YouTube [4 Ways]
1. Close Quarters Wide-Angle Vlog Set-Up
Don’t have a lot of space to set up your camera and lighting equipment? No problem! You can be within an arm’s length away from your camera with a close quarters wide-angle vlog set-up.
With this set-up, you’re going to need a camera with a wide-angle lens, a tripod, a camera-mounted shotgun mic for sound, and a ring light for light.
Set your camera on the tripod and mount the shotgun mic directly on the camera shoe (the electronic bracket on the top of the camera). Inside the circular space of your ring light, position your camera right in the middle of it so that you can shoot your video through it without getting any part of the lighting equipment in your shot.
In the video above, Sean Cannell demonstrates this set-up. As you can see from this example, the wide-angle lens is able to squeeze in a lot of what’s in front of the camera into the shot.
Objects and people that just make it into the sides of the frame will appear more stretched out as the wide-angle causes distortion and enhances perspectives.
If you look closely into Sean’s eyes, you can also see a specular highlight in the shape of a circle. Many people like the way eyes look against a ring light.
2. Medium Vlog Set-Up
If you have more space and want to shoot a more professional-looking talking-head shot with more realistic perspectives, a medium vlog set-up may be a better alternative for you.
For this set-up, you’ll be using a slightly longer standard/normal lens (like a 35mm or a 50mm lens) attached to your camera which would be set on a tripod. Since this longer lens will show less of the surrounding areas as it “zooms” closer into whatever is in front, you will need to sit further back, away from your camera.
Now that you’re further away from your camera, a camera-mounted shotgun mic may not be the best mic for you. For better sound recording, you’ll need a shotgun mic fixed on a mic stand that is set up like a boom mic, positioned just outside of your camera frame.
At the 39 second mark of the above video, electronic music producer deadmau5 is positioned right in the center of this particular set-up.
You can see from how even the background and couch looks across the entire camera frame that there is no distortion or enhanced perspective.
It appears that, to the right of deadmau5 (camera left), there is a key light and to his left (camera right) there may be a fill light for additional lighting. Behind the couch, there’s also a background uplight to create depth between the subject and the background. At the 1:30 mark of this trailer video, you can briefly see how the Masterclass camera crew set up their shot.
3. Two Person Vlog Set-Up
If your talking-head shot has got to include two people, you can use a similar set-up as the medium vlog set-up detailed above.
If you look back at the 39-second mark of deadmau5’s Masterclass trailer, you can see that there’s a lot of space to the left and right of deadmau5. Now imagine the same shot but with two people.
With two people, though, you’ll want to set up your mic slightly differently. Rather than using a directional shotgun mic with a narrow area of sensitivity, you’ll want to use a directional mic with a wider area of sensitivity.
4. Long Teleprompter Vlog Set-Up
If you want to read over a script but still make it appear like you’re looking straight into the camera, you’ll need to use a long teleprompter vlog set-up.
For this set-up, you’ll need all the same equipment as the medium vlog set-up, but you’ll additionally need a teleprompter placed in front of your camera equipped with a long telephoto lens.
You will have to sit much further back away from your camera for two main reasons. Firstly, you want to be able to fit yourself in your much more zoomed-in camera frame (effect of the long telephoto lens). Secondly, you want to be far enough that the camera cannot detect your eyes reading from left to right. You’ll want to be around six meters away from a 17” teleprompter monitor or around four meters away from a 10” teleprompter monitor.
In the above video, Jared Polin uses a long teleprompter vlog set-up.
In the video, he says there’s about 8 feet (2.4 meters) between himself and his lens. At the 1:15 mark of his video, Jared demonstrates how this set-up works.
It is difficult to know whether the movement in his eyes is caused by not being far enough from the lens or from his horizontal nystagmus condition in his eyes.
Looking to find the right lights for your video recording set? Check out our Top 17 Video Lighting Equipment For YouTubers .
Tips for Making a Talking Head Video Better
To make a talking-head video more interesting, you can add some background music to the video, apply some interesting texts or elements. Filmora has built-in royalty-free music tracks and sound effects as well as text templates , filters and motivating elements. Download the free trial version below and release your creativity.

Richard Bennett
Richard Bennett is a writer and a lover of all things video.
Follow @Richard Bennett
Richard Bennett
Oct 26, 2023• Proven solutions
A big part of being a YouTuber involves talking to the camera. How you set up your talking-head shot depends on many factors, including how much space you have, what kind of look you’re going for, and how many people you want to fit in one frame. Here are four ways to set up your talking-head shots for YouTube.
| Table of Contents 1. Close Quarters Wide-Angle Vlog Set-Up2. Medium Vlog Set-Up3. Two Person Vlog Set-Up4. Long Teleprompter Vlog Set-Up |
|---|
How to Set Up Your Talking Heads Shots for YouTube Video [Infographic]
We’ve summarized the key points about setting up talking head style video shots with the Infographic below. It is welcomed to share on social media.

How to Set Up Your Talking-Head Shots for YouTube [4 Ways]
1. Close Quarters Wide-Angle Vlog Set-Up
Don’t have a lot of space to set up your camera and lighting equipment? No problem! You can be within an arm’s length away from your camera with a close quarters wide-angle vlog set-up.
With this set-up, you’re going to need a camera with a wide-angle lens, a tripod, a camera-mounted shotgun mic for sound, and a ring light for light.
Set your camera on the tripod and mount the shotgun mic directly on the camera shoe (the electronic bracket on the top of the camera). Inside the circular space of your ring light, position your camera right in the middle of it so that you can shoot your video through it without getting any part of the lighting equipment in your shot.
In the video above, Sean Cannell demonstrates this set-up. As you can see from this example, the wide-angle lens is able to squeeze in a lot of what’s in front of the camera into the shot.
Objects and people that just make it into the sides of the frame will appear more stretched out as the wide-angle causes distortion and enhances perspectives.
If you look closely into Sean’s eyes, you can also see a specular highlight in the shape of a circle. Many people like the way eyes look against a ring light.
2. Medium Vlog Set-Up
If you have more space and want to shoot a more professional-looking talking-head shot with more realistic perspectives, a medium vlog set-up may be a better alternative for you.
For this set-up, you’ll be using a slightly longer standard/normal lens (like a 35mm or a 50mm lens) attached to your camera which would be set on a tripod. Since this longer lens will show less of the surrounding areas as it “zooms” closer into whatever is in front, you will need to sit further back, away from your camera.
Now that you’re further away from your camera, a camera-mounted shotgun mic may not be the best mic for you. For better sound recording, you’ll need a shotgun mic fixed on a mic stand that is set up like a boom mic, positioned just outside of your camera frame.
At the 39 second mark of the above video, electronic music producer deadmau5 is positioned right in the center of this particular set-up.
You can see from how even the background and couch looks across the entire camera frame that there is no distortion or enhanced perspective.
It appears that, to the right of deadmau5 (camera left), there is a key light and to his left (camera right) there may be a fill light for additional lighting. Behind the couch, there’s also a background uplight to create depth between the subject and the background. At the 1:30 mark of this trailer video, you can briefly see how the Masterclass camera crew set up their shot.
3. Two Person Vlog Set-Up
If your talking-head shot has got to include two people, you can use a similar set-up as the medium vlog set-up detailed above.
If you look back at the 39-second mark of deadmau5’s Masterclass trailer, you can see that there’s a lot of space to the left and right of deadmau5. Now imagine the same shot but with two people.
With two people, though, you’ll want to set up your mic slightly differently. Rather than using a directional shotgun mic with a narrow area of sensitivity, you’ll want to use a directional mic with a wider area of sensitivity.
4. Long Teleprompter Vlog Set-Up
If you want to read over a script but still make it appear like you’re looking straight into the camera, you’ll need to use a long teleprompter vlog set-up.
For this set-up, you’ll need all the same equipment as the medium vlog set-up, but you’ll additionally need a teleprompter placed in front of your camera equipped with a long telephoto lens.
You will have to sit much further back away from your camera for two main reasons. Firstly, you want to be able to fit yourself in your much more zoomed-in camera frame (effect of the long telephoto lens). Secondly, you want to be far enough that the camera cannot detect your eyes reading from left to right. You’ll want to be around six meters away from a 17” teleprompter monitor or around four meters away from a 10” teleprompter monitor.
In the above video, Jared Polin uses a long teleprompter vlog set-up.
In the video, he says there’s about 8 feet (2.4 meters) between himself and his lens. At the 1:15 mark of his video, Jared demonstrates how this set-up works.
It is difficult to know whether the movement in his eyes is caused by not being far enough from the lens or from his horizontal nystagmus condition in his eyes.
Looking to find the right lights for your video recording set? Check out our Top 17 Video Lighting Equipment For YouTubers .
Tips for Making a Talking Head Video Better
To make a talking-head video more interesting, you can add some background music to the video, apply some interesting texts or elements. Filmora has built-in royalty-free music tracks and sound effects as well as text templates , filters and motivating elements. Download the free trial version below and release your creativity.

Richard Bennett
Richard Bennett is a writer and a lover of all things video.
Follow @Richard Bennett
Richard Bennett
Oct 26, 2023• Proven solutions
A big part of being a YouTuber involves talking to the camera. How you set up your talking-head shot depends on many factors, including how much space you have, what kind of look you’re going for, and how many people you want to fit in one frame. Here are four ways to set up your talking-head shots for YouTube.
| Table of Contents 1. Close Quarters Wide-Angle Vlog Set-Up2. Medium Vlog Set-Up3. Two Person Vlog Set-Up4. Long Teleprompter Vlog Set-Up |
|---|
How to Set Up Your Talking Heads Shots for YouTube Video [Infographic]
We’ve summarized the key points about setting up talking head style video shots with the Infographic below. It is welcomed to share on social media.

How to Set Up Your Talking-Head Shots for YouTube [4 Ways]
1. Close Quarters Wide-Angle Vlog Set-Up
Don’t have a lot of space to set up your camera and lighting equipment? No problem! You can be within an arm’s length away from your camera with a close quarters wide-angle vlog set-up.
With this set-up, you’re going to need a camera with a wide-angle lens, a tripod, a camera-mounted shotgun mic for sound, and a ring light for light.
Set your camera on the tripod and mount the shotgun mic directly on the camera shoe (the electronic bracket on the top of the camera). Inside the circular space of your ring light, position your camera right in the middle of it so that you can shoot your video through it without getting any part of the lighting equipment in your shot.
In the video above, Sean Cannell demonstrates this set-up. As you can see from this example, the wide-angle lens is able to squeeze in a lot of what’s in front of the camera into the shot.
Objects and people that just make it into the sides of the frame will appear more stretched out as the wide-angle causes distortion and enhances perspectives.
If you look closely into Sean’s eyes, you can also see a specular highlight in the shape of a circle. Many people like the way eyes look against a ring light.
2. Medium Vlog Set-Up
If you have more space and want to shoot a more professional-looking talking-head shot with more realistic perspectives, a medium vlog set-up may be a better alternative for you.
For this set-up, you’ll be using a slightly longer standard/normal lens (like a 35mm or a 50mm lens) attached to your camera which would be set on a tripod. Since this longer lens will show less of the surrounding areas as it “zooms” closer into whatever is in front, you will need to sit further back, away from your camera.
Now that you’re further away from your camera, a camera-mounted shotgun mic may not be the best mic for you. For better sound recording, you’ll need a shotgun mic fixed on a mic stand that is set up like a boom mic, positioned just outside of your camera frame.
At the 39 second mark of the above video, electronic music producer deadmau5 is positioned right in the center of this particular set-up.
You can see from how even the background and couch looks across the entire camera frame that there is no distortion or enhanced perspective.
It appears that, to the right of deadmau5 (camera left), there is a key light and to his left (camera right) there may be a fill light for additional lighting. Behind the couch, there’s also a background uplight to create depth between the subject and the background. At the 1:30 mark of this trailer video, you can briefly see how the Masterclass camera crew set up their shot.
3. Two Person Vlog Set-Up
If your talking-head shot has got to include two people, you can use a similar set-up as the medium vlog set-up detailed above.
If you look back at the 39-second mark of deadmau5’s Masterclass trailer, you can see that there’s a lot of space to the left and right of deadmau5. Now imagine the same shot but with two people.
With two people, though, you’ll want to set up your mic slightly differently. Rather than using a directional shotgun mic with a narrow area of sensitivity, you’ll want to use a directional mic with a wider area of sensitivity.
4. Long Teleprompter Vlog Set-Up
If you want to read over a script but still make it appear like you’re looking straight into the camera, you’ll need to use a long teleprompter vlog set-up.
For this set-up, you’ll need all the same equipment as the medium vlog set-up, but you’ll additionally need a teleprompter placed in front of your camera equipped with a long telephoto lens.
You will have to sit much further back away from your camera for two main reasons. Firstly, you want to be able to fit yourself in your much more zoomed-in camera frame (effect of the long telephoto lens). Secondly, you want to be far enough that the camera cannot detect your eyes reading from left to right. You’ll want to be around six meters away from a 17” teleprompter monitor or around four meters away from a 10” teleprompter monitor.
In the above video, Jared Polin uses a long teleprompter vlog set-up.
In the video, he says there’s about 8 feet (2.4 meters) between himself and his lens. At the 1:15 mark of his video, Jared demonstrates how this set-up works.
It is difficult to know whether the movement in his eyes is caused by not being far enough from the lens or from his horizontal nystagmus condition in his eyes.
Looking to find the right lights for your video recording set? Check out our Top 17 Video Lighting Equipment For YouTubers .
Tips for Making a Talking Head Video Better
To make a talking-head video more interesting, you can add some background music to the video, apply some interesting texts or elements. Filmora has built-in royalty-free music tracks and sound effects as well as text templates , filters and motivating elements. Download the free trial version below and release your creativity.

Richard Bennett
Richard Bennett is a writer and a lover of all things video.
Follow @Richard Bennett
Behind the Scenes: Choosing Ideal Winter Backdrops
There’s something special about wintertime that makes us all want to get as cozy and as warm as possible. When you’re a YouTube creator, you should definitely take advantage of this desire and use a YouTube background video designed specifically with this in mind.
In this guide, we’ll go over how to get or make such a background and show you five incredible examples you can use now.
YouTube Video Background Creating realistic video scenes at your will is easy to complete with Filmora green screen removal.
Create Video Backgrounds Create Video Backgrounds Learn Green Screen

What Is a YouTube Video Background?
A YouTube video background is a simple image or video that sits in place at the back of your videos. It’s just a simple background that can greatly impact your brand, presence, and style as a creator.
Even something as small as your YouTube video thumbnail background can strongly impact your results.
Obviously, choosing the right custom YouTube background is important. And, now that it’s winter, this requires a special approach.
Why Are Seasonal Backgrounds Effective?
There are several important reasons why a seasonal YouTube video background or photo, and other elements are very effective and engage us more.
The main reasons include:
- Creates a meaningful connection;
- Boosts engagement with fellow winter lovers;
- Builds a better brand;
- Enhances everyone’s mood, especially during the holidays.
So, whenever you can and whenever there is an opportunity, don’t be afraid to use a seasonal YouTube video background download.
Factors to Consider When Choosing a Background for YouTube Videos
Now, before we dive into the examples themselves and the tutorial on how to make the best backgrounds yourself, here are several factors you must consider before proceeding.
Content Relevance
As a video creator, you must ensure to be consistent with your elements. This includes your background tune for YouTube videos. For example, if you’re talking about books in your video, including a bookshelf in the winter background makes all the difference.
Audience Appeal
If you already have an audience, regardless of its size, you should definitely consider what they like and don’t like. You should then leverage this information to create highly appealing content for them and adjust your background scenery accordingly.
Lighting and Visibility
Another thing you must ensure is to keep your background simple and not too distracting. Remember, even though you have the best background for YouTube videos, you still need to realize that it’s not the main focus of the video. It’s just there to make it better.
Personal Branding
If you want to improve your brand identity and get your name known by more people, incorporate your logo, name, or something similar in the background. It will have a small but meaningful impact, and it’s easy to do.
Editing
If you plan to shoot a YouTube live background and not some stock images or videos, then you must make sure it has enough headroom for editing later on. The best option here is to use a green screen background for YouTube videos.
5 Winter YouTube Background Ideas
It’s finally time to have a look at some examples of highly effective and engaging YouTube video backgrounds for the winter season.
Enjoy!
- Snowy Landscape
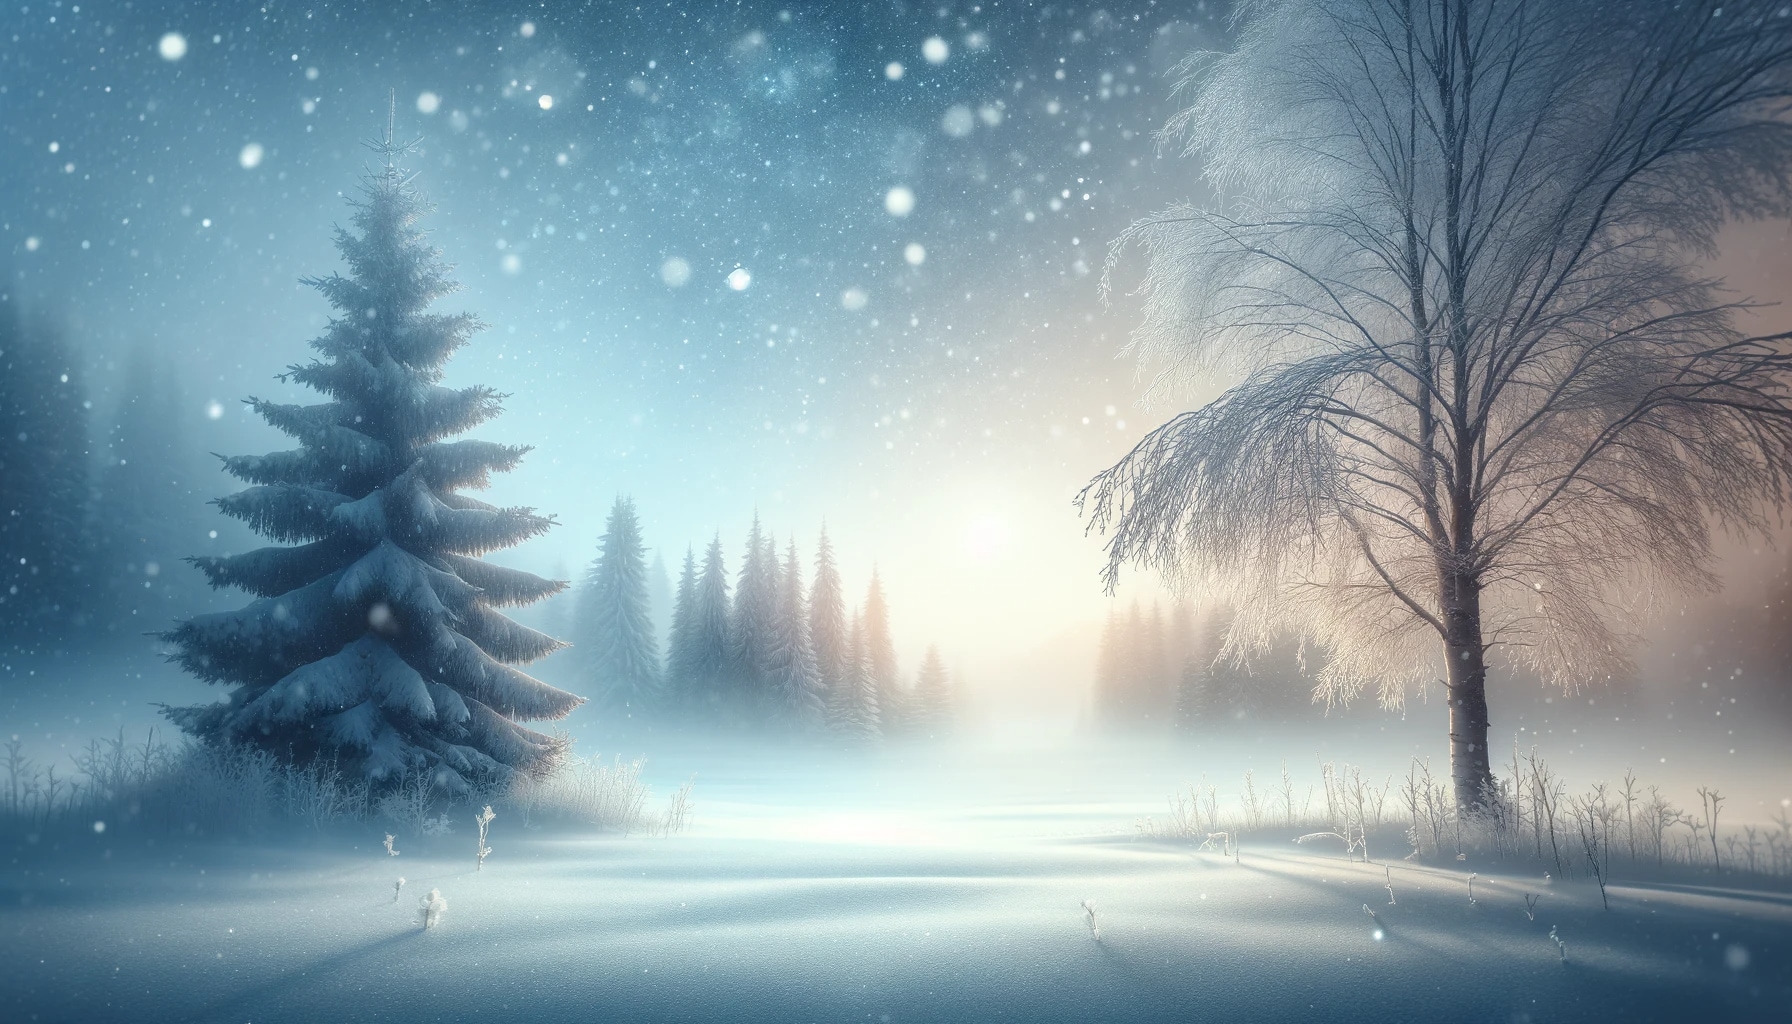
- Festive Holiday Decor
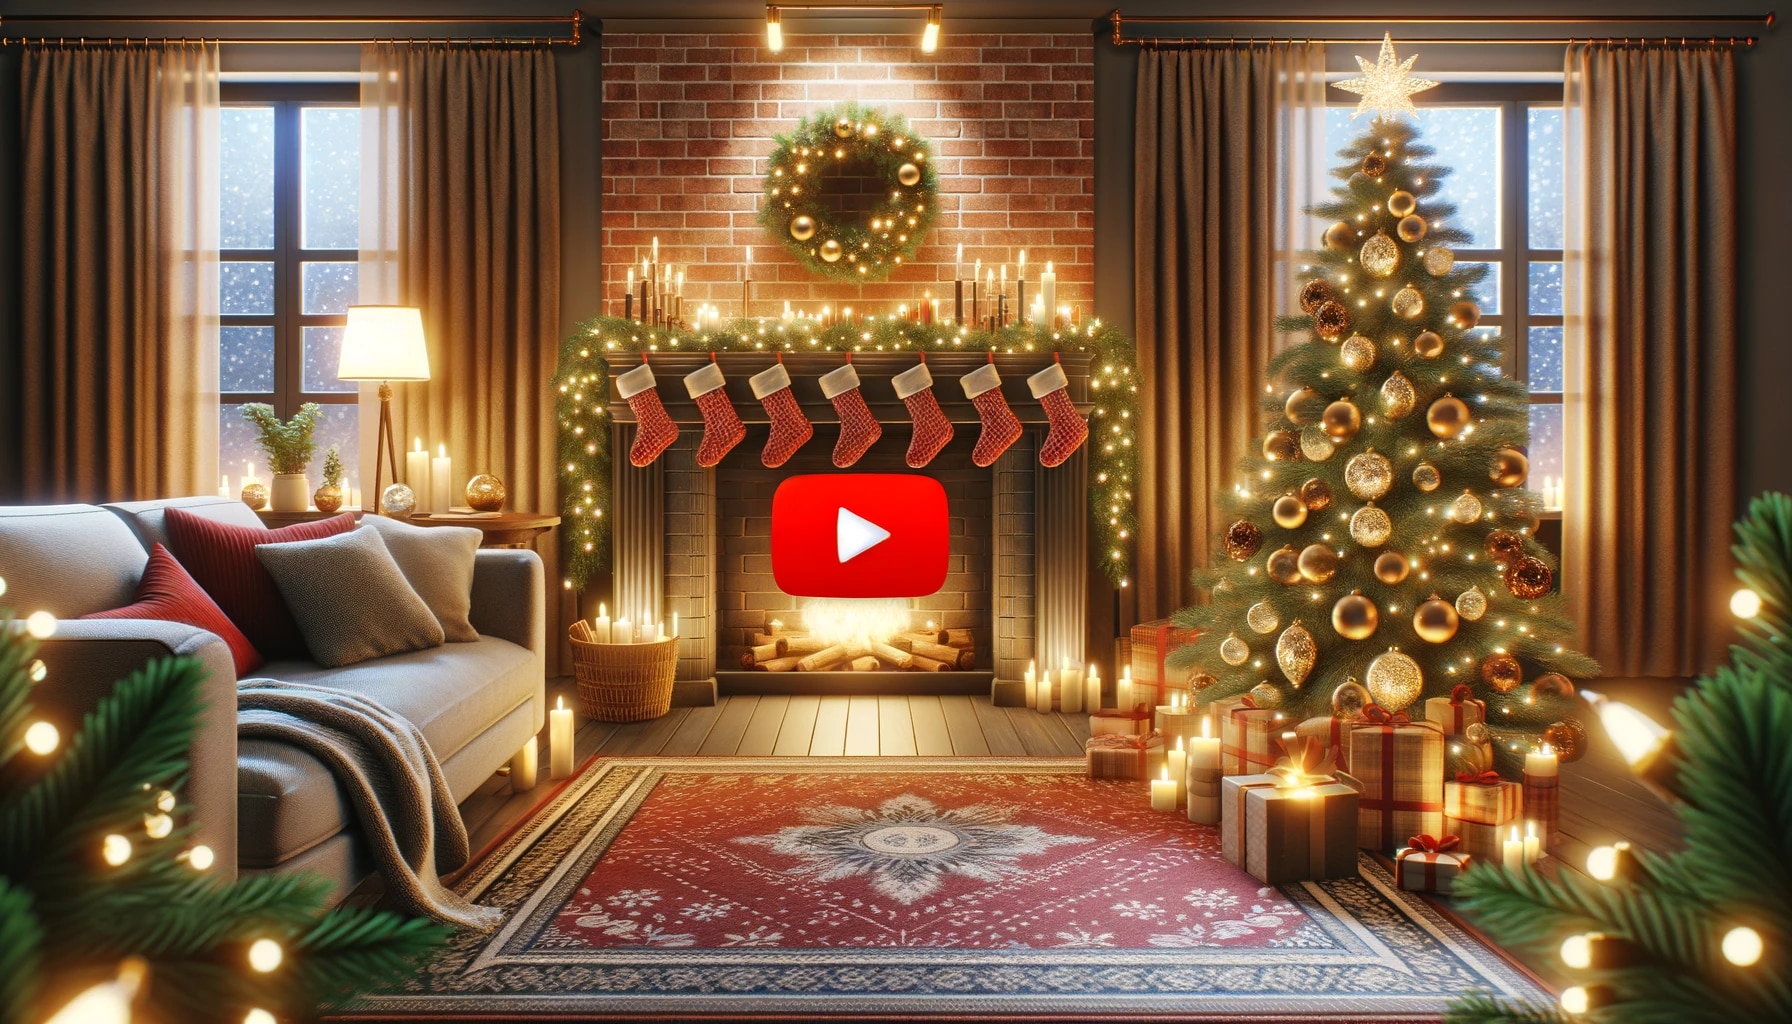
- Cozy Indoor Settings
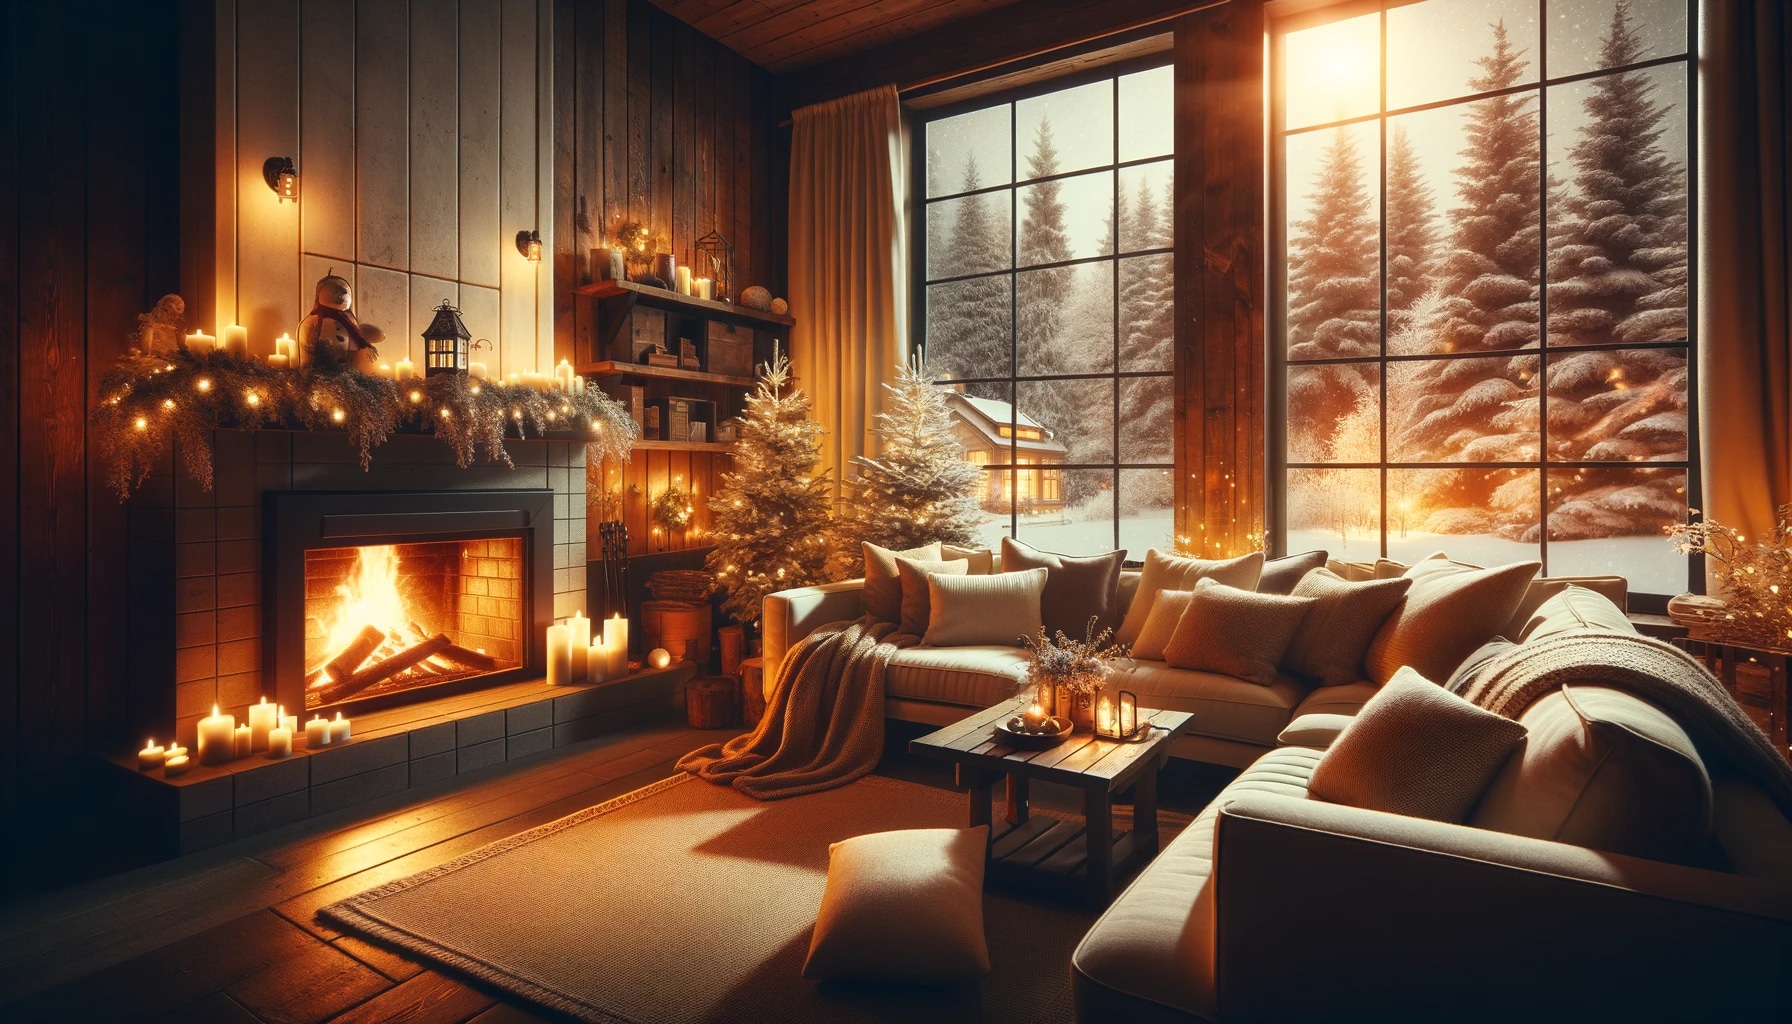
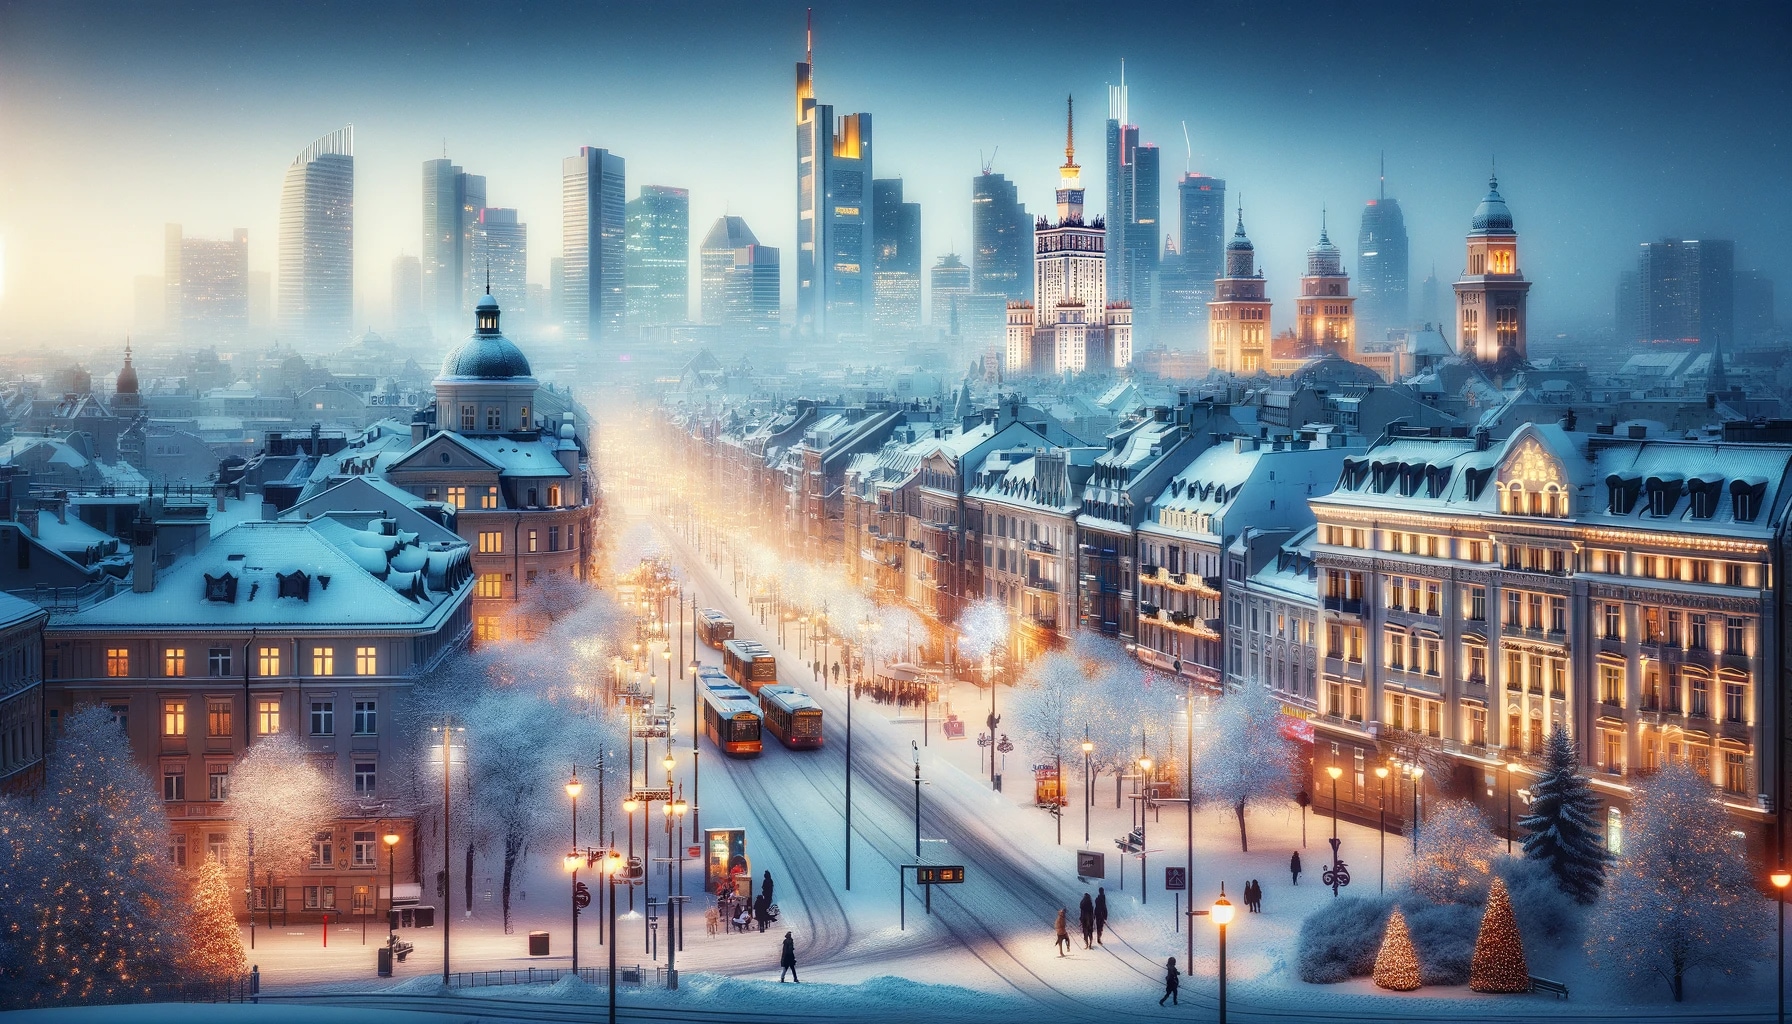
- Winter Cityscapes
- Animated Winter Scenes

How to Create or Source Winter Backgrounds
If you want to make your own winter backgrounds or simply edit the ones you have, the most effective way is to use a beginner-friendly video editing platform, such as Filmora .
Free Download For Win 7 or later(64-bit)
Free Download For macOS 10.14 or later
This type of platform has all the necessary tools, templates, and presets for professionals to use but all of it is packed in a very easy-to-use interface that anyone can get the hang of.
Just follow these steps and you’ll have the perfect winter background for YouTube in no time.
Step 1
Download and install the Filmora video editing tool.
Step 2
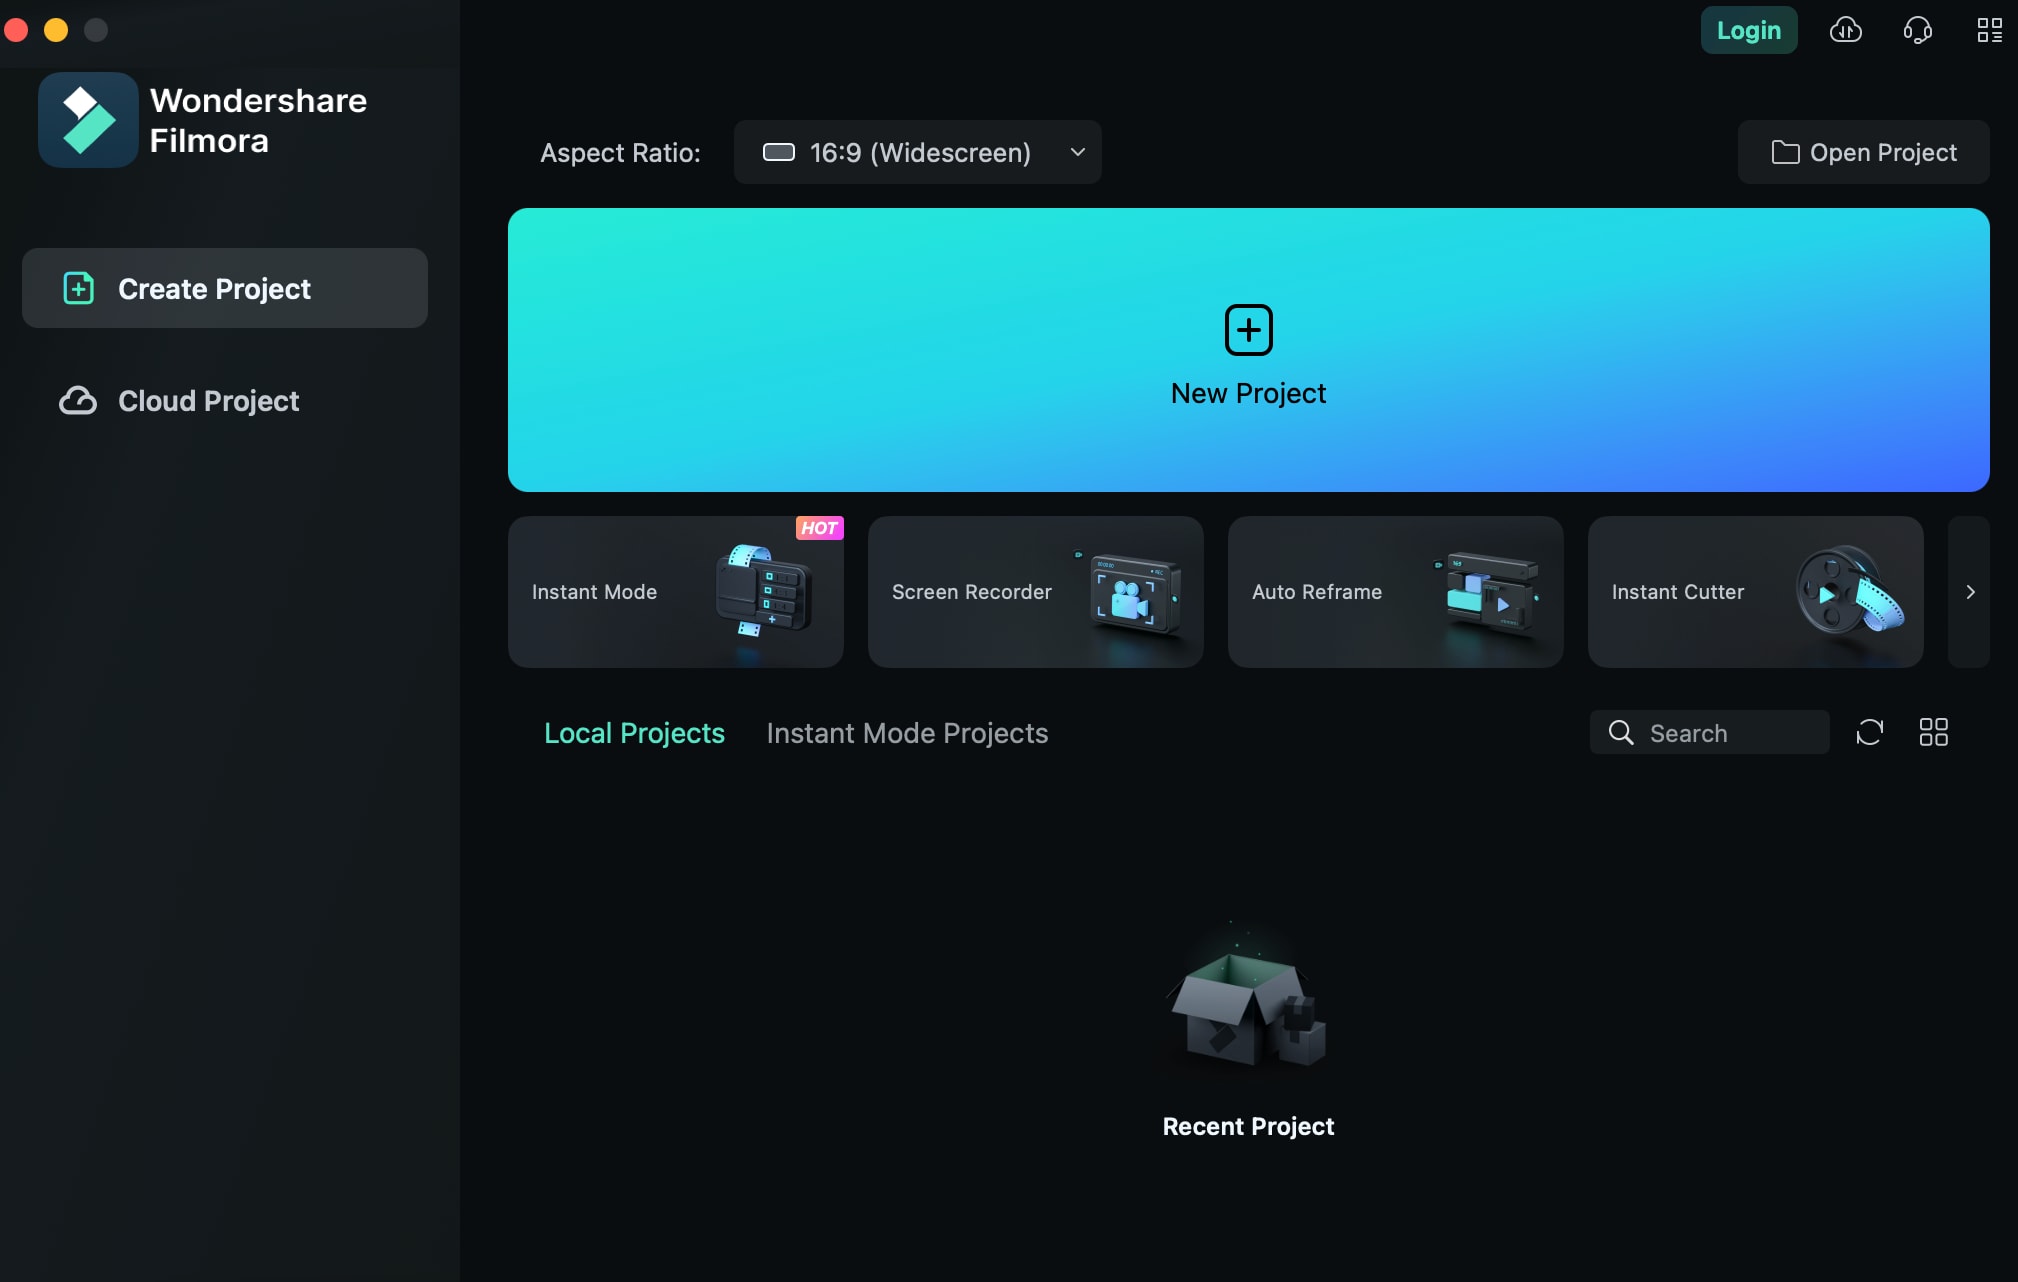
Run the program and click on “New Project”. No need to create an account for this.
Step 3
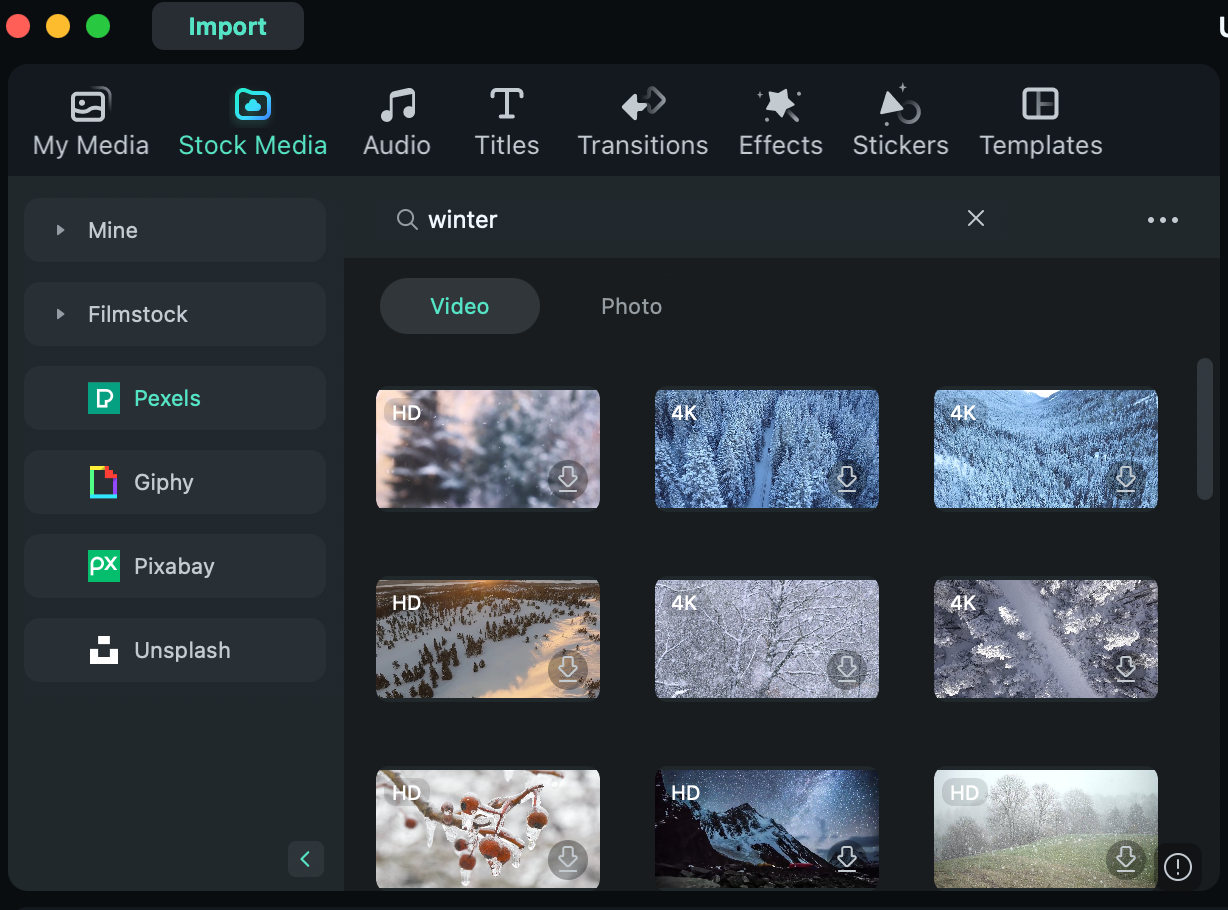
Click on “Stock Media” and then type in “winter” in the Search Bar.
Step 4
Select your favorite background clip and drag it down to the Timeline.
That’s it! You won’t believe how many video clips you can use, all of which are extremely high-quality. As a result, you’ll have a professional video for free.
Now, if you want, you can freely edit these backgrounds as you wish. You can mess around with them as much as you want, use various tools to edit, and make the perfect result.
And don’t worry, if you mess up the background and don’t know how to restore it, just delete it from the timeline and drag it again from the Stock Media tab. It will be as good as new.
Once you’re done, simply export it and you’re done.
Integrating Your Background Into Videos
Finally, once you have the perfect YouTube studio background, it’s time to glue it to your video and upload this masterpiece.
In order to do this, you will need to use a video editing platform once again. This is not optional as there is no other way to merge these clips.
Luckily, you now have Filmora downloaded and can easily make it happen.
So, here’s how to combine everything.
Step 1
Start up a New Project in Filmora.
Step 2
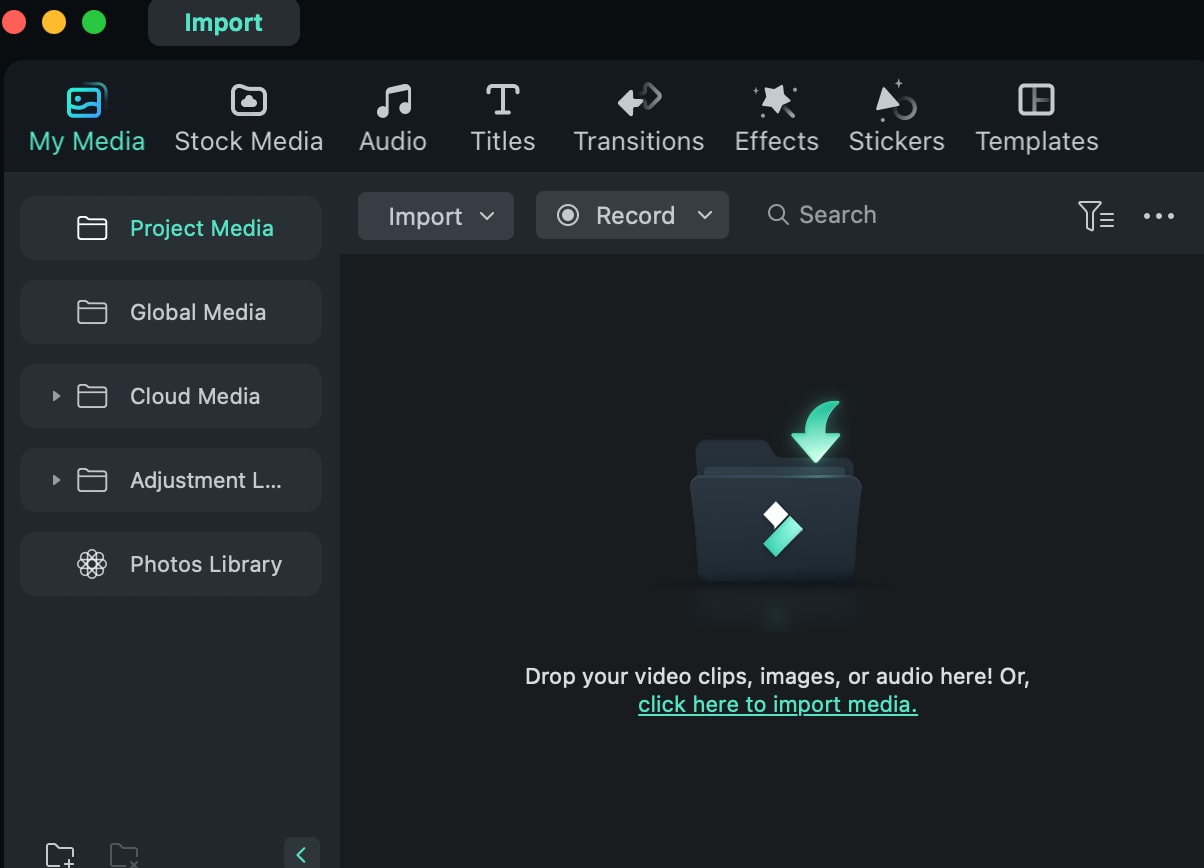
Click on “My Media” and then click in the middle of the small box to upload your background and your video clips.
Step 3
After uploading all the files, simply drag everything in a separate Track down on the Timeline.
Step 4
Export and upload to YouTube. That’s it!
Summary
You’re now ready to make some outstanding Winter YouTube videos and bless everyone with amazing scenery and backgrounds that will make their hearts warm up. Not only do you have infinite backgrounds to choose from, you also know how to perfectly blend them in any of your videos.
Enjoy!
Create Video Backgrounds Create Video Backgrounds Learn Green Screen

What Is a YouTube Video Background?
A YouTube video background is a simple image or video that sits in place at the back of your videos. It’s just a simple background that can greatly impact your brand, presence, and style as a creator.
Even something as small as your YouTube video thumbnail background can strongly impact your results.
Obviously, choosing the right custom YouTube background is important. And, now that it’s winter, this requires a special approach.
Why Are Seasonal Backgrounds Effective?
There are several important reasons why a seasonal YouTube video background or photo, and other elements are very effective and engage us more.
The main reasons include:
- Creates a meaningful connection;
- Boosts engagement with fellow winter lovers;
- Builds a better brand;
- Enhances everyone’s mood, especially during the holidays.
So, whenever you can and whenever there is an opportunity, don’t be afraid to use a seasonal YouTube video background download.
Factors to Consider When Choosing a Background for YouTube Videos
Now, before we dive into the examples themselves and the tutorial on how to make the best backgrounds yourself, here are several factors you must consider before proceeding.
Content Relevance
As a video creator, you must ensure to be consistent with your elements. This includes your background tune for YouTube videos. For example, if you’re talking about books in your video, including a bookshelf in the winter background makes all the difference.
Audience Appeal
If you already have an audience, regardless of its size, you should definitely consider what they like and don’t like. You should then leverage this information to create highly appealing content for them and adjust your background scenery accordingly.
Lighting and Visibility
Another thing you must ensure is to keep your background simple and not too distracting. Remember, even though you have the best background for YouTube videos, you still need to realize that it’s not the main focus of the video. It’s just there to make it better.
Personal Branding
If you want to improve your brand identity and get your name known by more people, incorporate your logo, name, or something similar in the background. It will have a small but meaningful impact, and it’s easy to do.
Editing
If you plan to shoot a YouTube live background and not some stock images or videos, then you must make sure it has enough headroom for editing later on. The best option here is to use a green screen background for YouTube videos.
5 Winter YouTube Background Ideas
It’s finally time to have a look at some examples of highly effective and engaging YouTube video backgrounds for the winter season.
Enjoy!
- Snowy Landscape

- Festive Holiday Decor

- Cozy Indoor Settings

- Winter Cityscapes

- Animated Winter Scenes

How to Create or Source Winter Backgrounds
If you want to make your own winter backgrounds or simply edit the ones you have, the most effective way is to use a beginner-friendly video editing platform, such as Filmora .
Free Download For Win 7 or later(64-bit)
Free Download For macOS 10.14 or later
This type of platform has all the necessary tools, templates, and presets for professionals to use but all of it is packed in a very easy-to-use interface that anyone can get the hang of.
Just follow these steps and you’ll have the perfect winter background for YouTube in no time.
Step 1
Download and install the Filmora video editing tool.
Step 2
Run the program and click on “New Project”. No need to create an account for this.

Step 3
Click on “Stock Media” and then type in “winter” in the Search Bar.

Step 4
Select your favorite background clip and drag it down to the Timeline.
That’s it! You won’t believe how many video clips you can use, all of which are extremely high-quality. As a result, you’ll have a professional video for free.
Now, if you want, you can freely edit these backgrounds as you wish. You can mess around with them as much as you want, use various tools to edit, and make the perfect result.
And don’t worry, if you mess up the background and don’t know how to restore it, just delete it from the timeline and drag it again from the Stock Media tab. It will be as good as new.
Once you’re done, simply export it and you’re done.
Integrating Your Background Into Videos
Finally, once you have the perfect YouTube studio background, it’s time to glue it to your video and upload this masterpiece.
In order to do this, you will need to use a video editing platform once again. This is not optional as there is no other way to merge these clips.
Luckily, you now have Filmora downloaded and can easily make it happen.
So, here’s how to combine everything.
Step 1
Start up a New Project in Filmora.
Step 2
Click on “My Media” and then click in the middle of the small box to upload your background and your video clips.

Step 3
After uploading all the files, simply drag everything in a separate Track down on the Timeline.
Step 4
Export and upload to YouTube. That’s it!
Summary
You’re now ready to make some outstanding Winter YouTube videos and bless everyone with amazing scenery and backgrounds that will make their hearts warm up. Not only do you have infinite backgrounds to choose from, you also know how to perfectly blend them in any of your videos.
Enjoy!
Also read:
- [New] 2024 Approved Favorite Frames Social's #1-#8 Vids
- [New] Charting the Course From Scale to Submillions in Youtube for 2024
- [New] Digital Dynamics Mastering YouTube Video Distribution on Facebook for 2024
- [New] Examining the Potential of 4-Second Subscriptions
- [New] Simplifying iPhone/iPad Screen Captures for Online Sharing
- [New] Step-by-Step Guide for Earning From Every YouTube Short
- [Updated] 2024 Approved Live Watch Tracker Applications
- [Updated] Quantifying IGTV Engagement and Outreach
- 2024 Approved Explore 10 YouTube Creators Accelerating Their Popularity
- 2024 Approved Improve Your Channel's Meta Description Powerfully
- 2024 Approved The Full Laptop ScreenCapture Experience
- 2024 Approved YouTube Income Guide - What's New?
- Augmented Reality Excellence Mastering the Use of Spark AR LUTs
- In 2024, Making Sense of Creative Commons Licensing & Usage
- In 2024, Revolutionize Earning with Youtube Short Tactics
- In 2024, The Economics of YouTube Ad Revenues per 1000 Views
- In 2024, The Essentials of Earning on YouTube Latest Changes
- In 2024, Top Picks in Affordable Home Cinema Setups with 4K
- The Insider's Approach to Maximizing YouTube Video Revenue for 2024
- Title: In 2024, Optimizing Self-Filmed Content on YouTube
- Author: Thomas
- Created at : 2025-01-17 20:59:21
- Updated at : 2025-01-22 09:16:36
- Link: https://youtube-help.techidaily.com/in-2024-optimizing-self-filmed-content-on-youtube/
- License: This work is licensed under CC BY-NC-SA 4.0.

