
"In 2024, Preferred Choices Affordable Channels for Newbie Monetizers"
Preferred Choices: Affordable Channels for Newbie Monetizers
Building a following on a YouTube channel to monetize it can be difficult. It is even more difficult to turn it into a full-time occupation, especially if you are a beginner. So, it makes sense buying monetized YouTube channel. When you buy a monetized YouTube channel, it relieves you of the struggle of churning out high-quality content that connects with an audience. You also get a fully functional stream of generating additional income. In this article, we explore the top sites that offer monetized YouTube channel for sale, giving you an easier start on the platform.
YouTube Monetization Editor A cross-platform for editing any kind of videos and add creative effects to make them more attarctive!
Free Download Free Download Learn More

Part 1. Top 10 Sites to Buy Monetized YouTube Channels
Investing in a pre-existing, monetized YouTube channel is a great idea. It saves you time, allowing you to focus on creating quality content. However, make sure you buy a monetized YouTube channel from a reliable seller. Let’s have a look at the top sites to buy monetized YouTube channels:
1. UseViral
This is one of the best options available to buy monetize YouTube channel. They offer precious monetized YouTube channel packages. Your new channel will be ready for monetization with more than 4,000 watch time hours and a 1,000+ subscriber base.
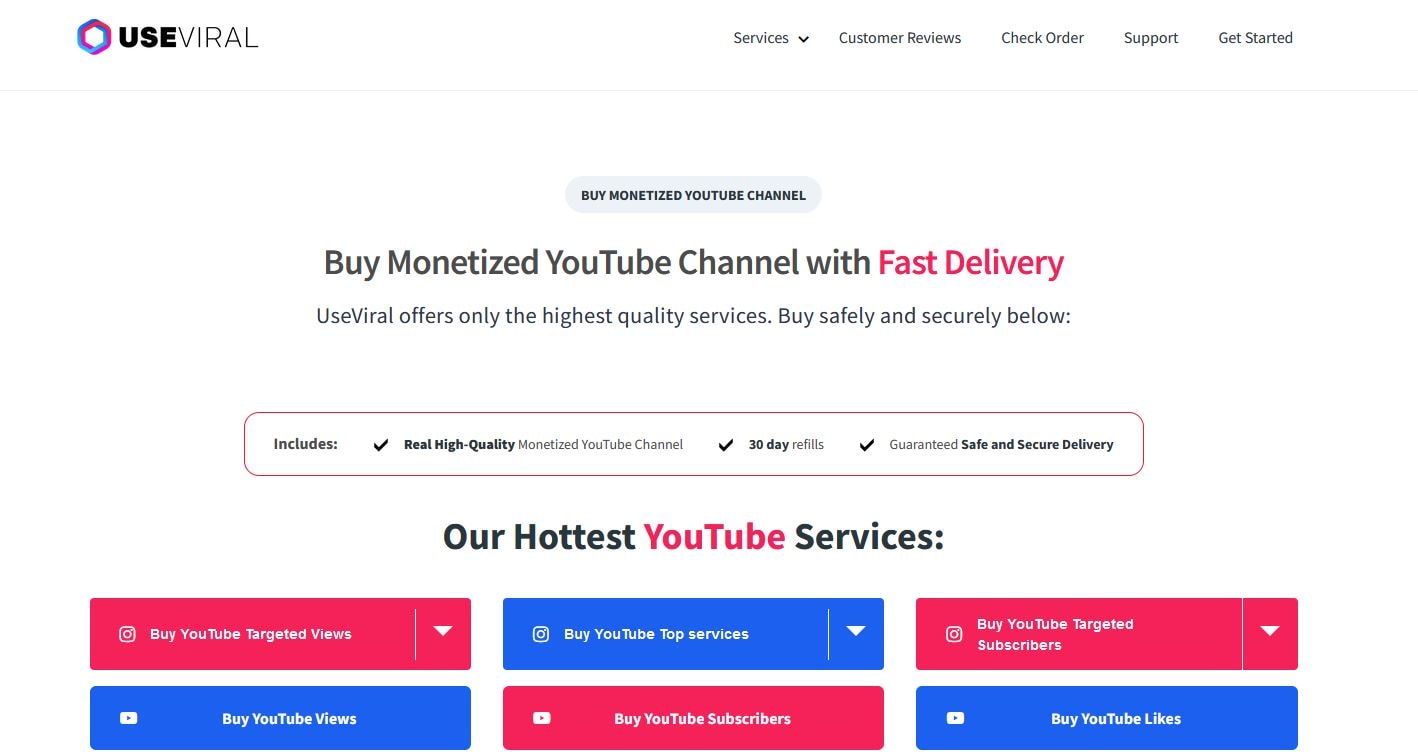
To get your monetized channel, you will be required to fill out a brief questionnaire. Explain your ideal market and video production needs to allow the UseViral team to understand what you are looking for. They let you know what you are paying for any extras.
Price: $599
Customer Rating: 9.5/10
2. SlidesMedia
This is a well-known social media growth strategist that allows you to buy a monetized YouTube channel. The site stands out for offering assistance with growing the YouTube channel and other social media platforms.

SlidesMedia promises to use only human editors on your YouTube channel. They give you a channel with genuine content. You also get the assurance that the content is not bot-generated..
Price: $529 - $2400.
Customer Rating: 9.3/10
3. AudienceGain
AudienceGain is a popular social media marketing platform. They offer a wide range of services, including selling monetized YouTube channels.
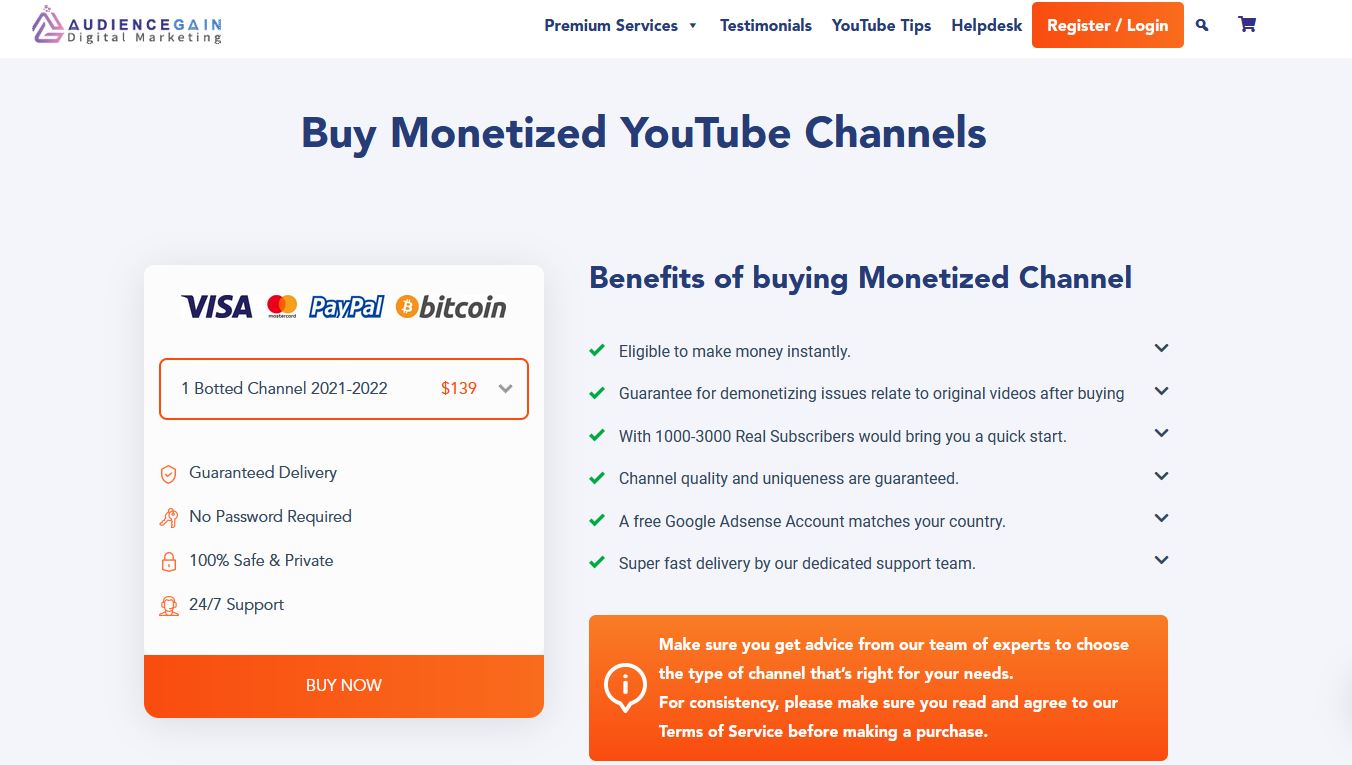
With a proven track record, AudienceGain stands out for offering quality customer service. They support you before, during, and after the purchase. They also provide organically grown channels to make sure you are not demonetized.
Price: $ 129 - $390
Customer Rating: 9.5/10
4. Fameswap
This is a flexible marketplace for selling and buying monetized YouTube channels. The site stands out for being selective in the kind of channels it features.
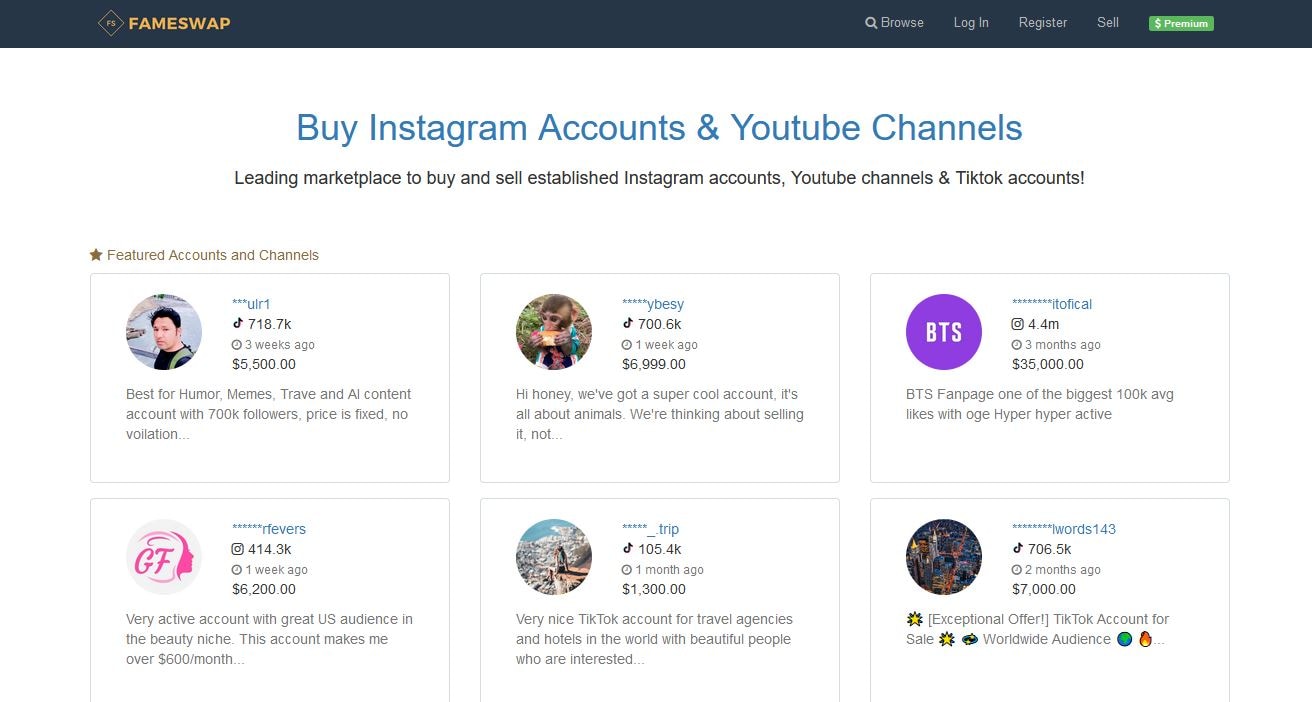
Fameswap offers a safe method of communication between vendors and buyers through an internal messaging system. You can invest in a channel that you are interested in, ranging from topics like fashion and beauty to entertainment and sports.
Price: Customized pricing
Customer Rating: 8.5/10
5. Eazy Viral
Another excellent choice is to buy a monetized YouTube channel. It allows you to choose from numerous channel types. Users also specify the number of subscribers and watch times they want.

Eazy Viral promises quality content that will not infringe on the rights of others. They also make it simple to monetize your videos and safeguard your AdSense account.
Price: $249 - $1100
Customer Rating: 9/10
6. EazySMM
With EazySMM, you get a unique starting point on your YouTube journey. Choose a YouTube monetized channel for sale on a niche you are interested in at a low price to get started.

EazySMM watches over its clients to make sure they are growing organically. They promise genuine channel views and subscriptions. Their services are also quick, delivering monetized channels within 12 to 48 hours of the purchase.
Price: Custom Pricing
Customer Rating: 8/10
7. 123accs
This platform allows you to buy YouTube channels that have not yet made money. You can then monetize the channel since it has already met the YouTube Partner Program eligibility criteria.
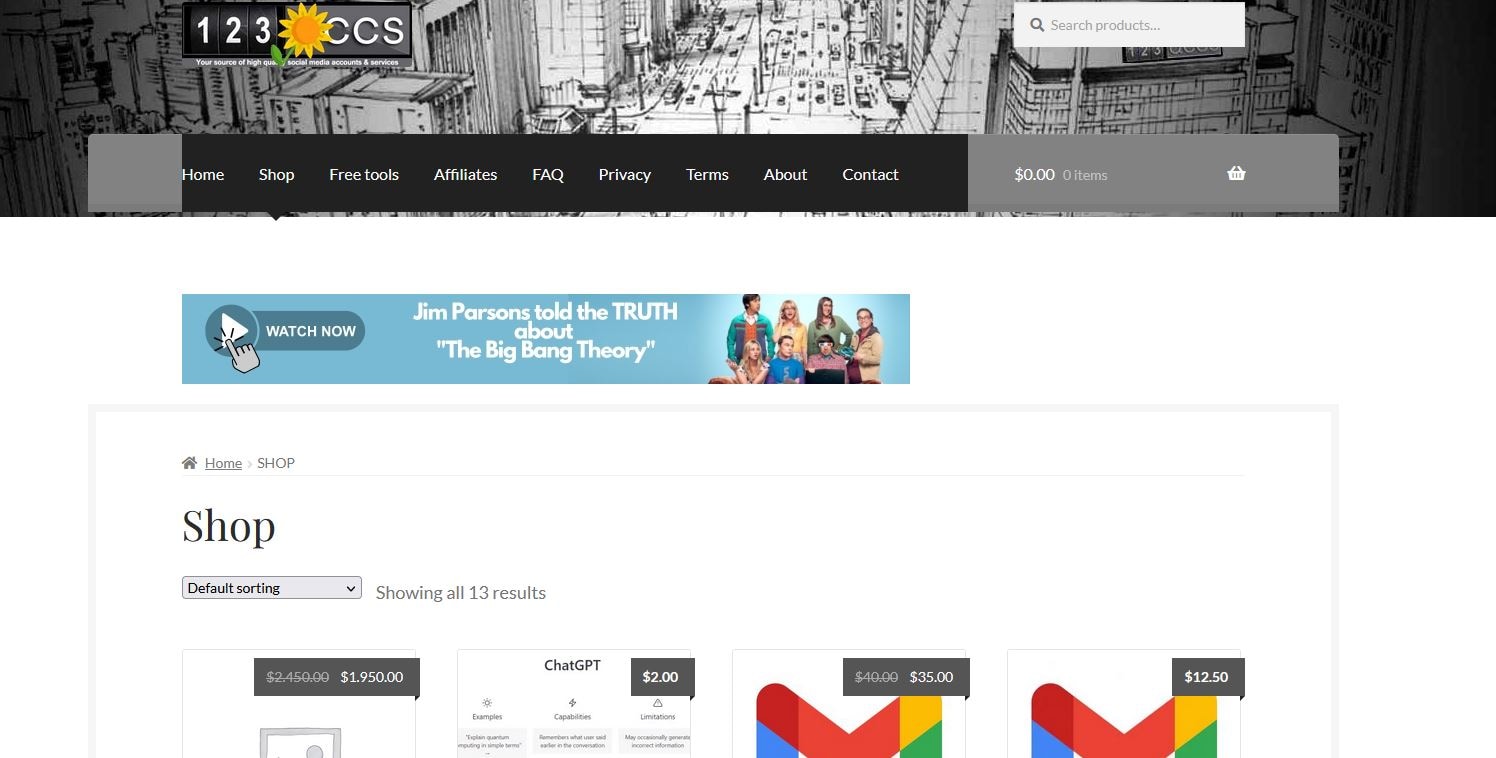
123accs offers new and affordable PVA accounts. Therefore, you can use the service to buy a monetized YouTube channel. Available options include 5 PVA accounts, 25 UK followers, 10 US follower accounts, and more.
Price: Custom Pricing
Customer Rating: 8/10
8. PlayerUp
PlayerUp offers monetized YouTube channels for sale in its marketplace. The platform offers authentic and affordable channels that users can rely on.
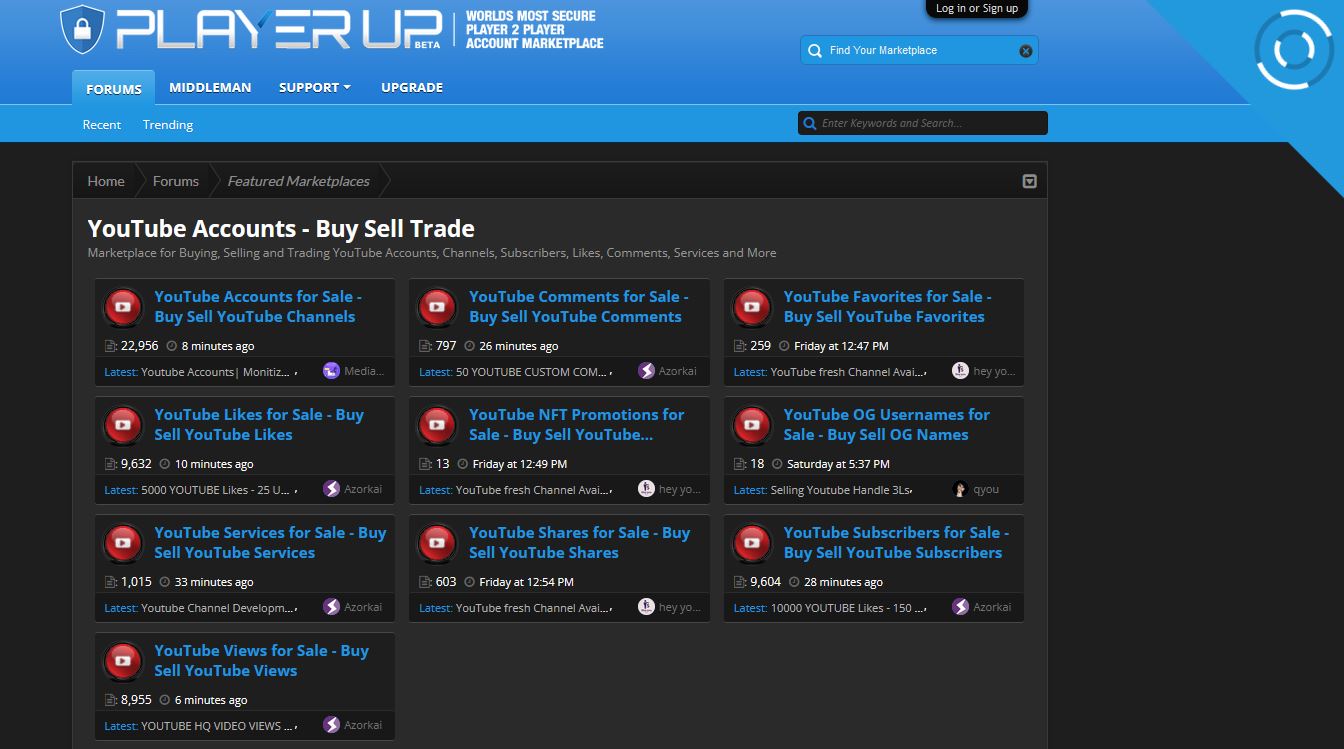
The high quality of the videos posted in the channels under sale will make them stand out in marketing campaigns. This is also a great platform for buying branded content and advanced filters.
Price: Custom Pricing
Customer Rating: 7.5/10
9. Trustiu
This is a great choice for for satisfying shopping experience. The platform makes it easy to purchase YouTube channels almost instantly.

Trustiu stands out for its affordable prices and a wide selection of choices. Users also have the freedom to choose the language they want for their channels.
Price: Custom Pricing
Customer Rating: 7.5/10
10. Accs Market
This social media marketplace allows you to buy monetized YouTube channels in a matter of few steps. Choose channels in entertainment of lifestyle niches.
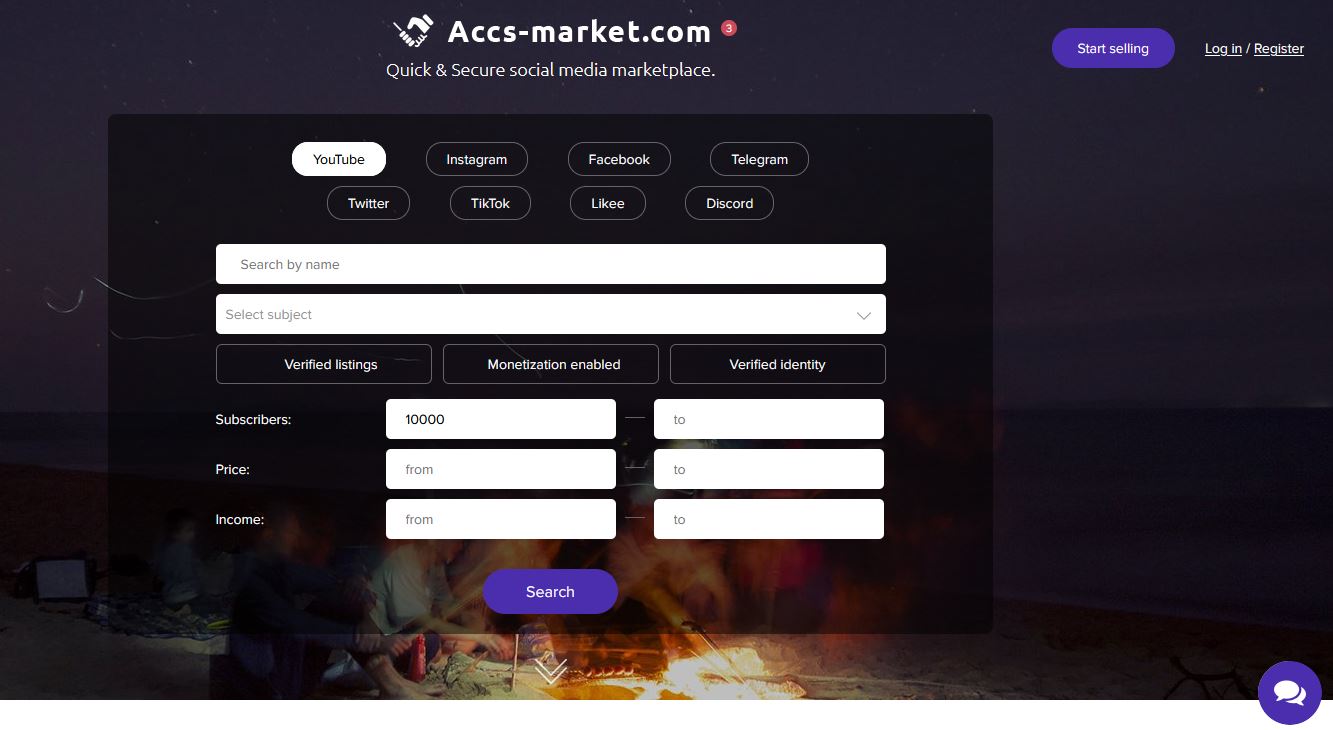
Accs market offers an affordable option for any type of video genre for sellers. From TV shows to movies, Accs Market has something for you.
Part 2. Editing YouTube Videos for Monetization with Wondershare Filmora
In addition to buying a monetized YouTube channel, you will need to create quality videos to remain relevant. This requires good video editing software. With Wondershare Filmora, you can edit any kind of video and add creative effects to make it more interesting. With the option to edit on your desktop or phone on the go, the software gives you more versatility.
Free Download For Win 7 or later(64-bit)
Free Download For macOS 10.14 or later
Wondershare offers a wide range of features that make video editing fun and easy. From automation tools to video enhancement, you can do a lot to your video on the same platform. The most useful features for YouTube monetization include:
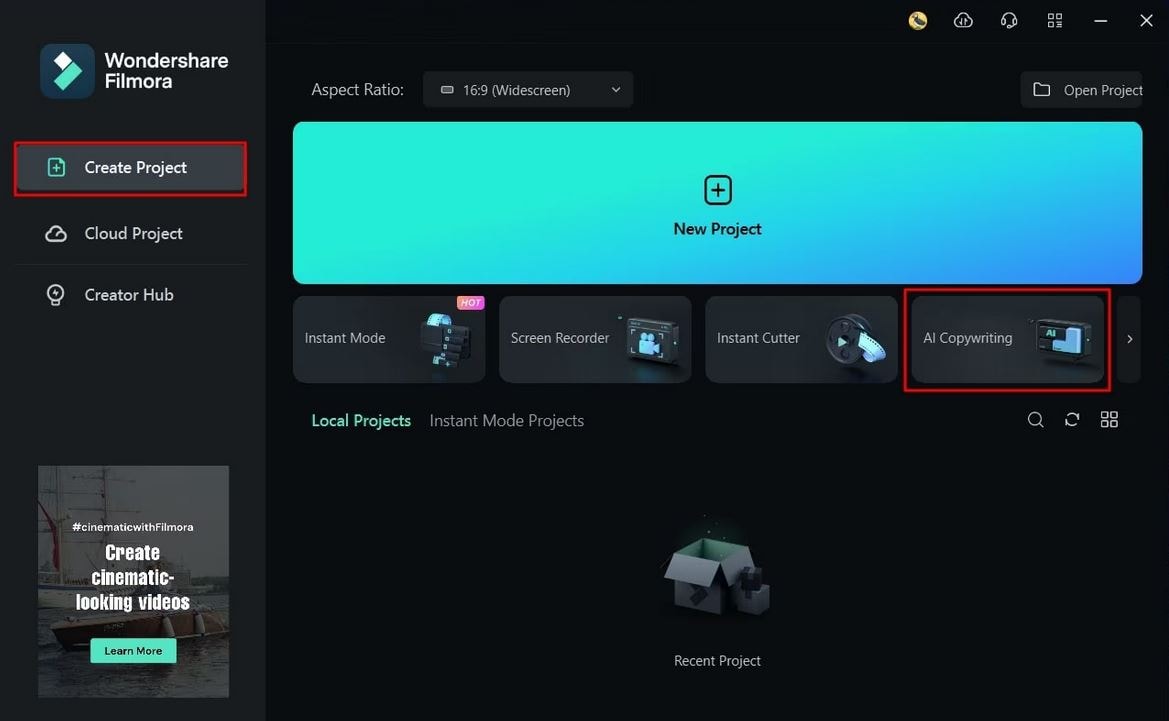
1. AI Copywriting
This feature integrates the ChatGPT API, allowing you to get inspiration through AI-generating scripts. You can also generate text during video editing, as well as YouTube Titles and Descriptions.
2. Auto Synchronization
The auto-synchronization feature allows you to effortlessly match your audio with the video. This makes it sound more clear and gives your audience a better watching experience.

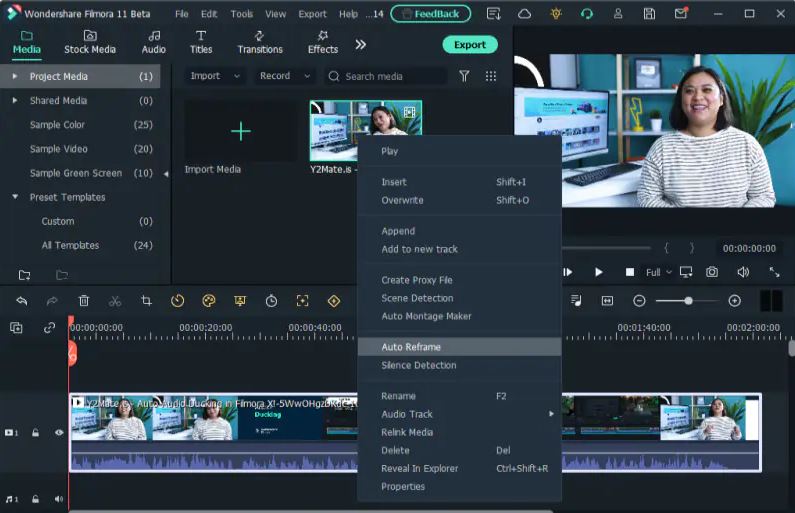
3. Auto Reframe
With the rise of YouTube Shorts, reframing your videos is now more of a necessity than an option. You need to appeal to both YouTube viewers and those who consume content in the vertical orientation. The Filmora Auto Reframe feature allows you to automatically resize your videos with no editing skills needed. To use this feature:
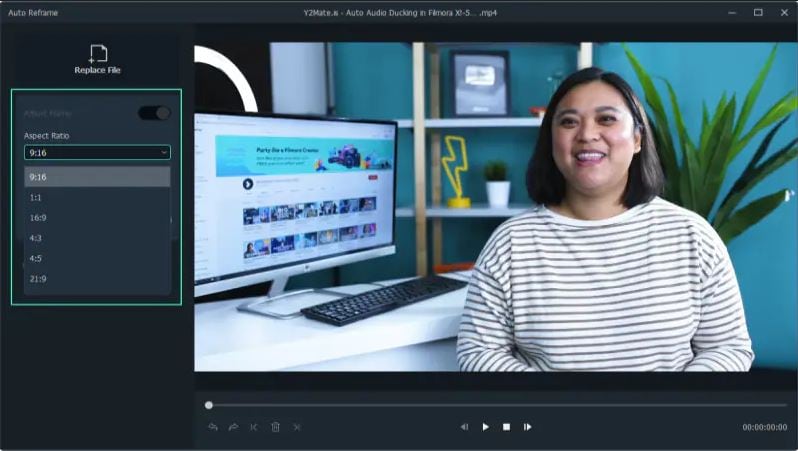
Step 1Start the Auto Reframe Feature
One of the ways is by clicking on the Auto Reframe option when you launch Filmora. The other option is to import the media and right-click on it to find the Auto Reframe feature.
Step 2Adjust the Aspect Ratio and Motion Speed
Define the aspect ratio in the dialogue box that opens. A widescreen has an aspect ratio of 16:9 while a vertical one is 9:16.
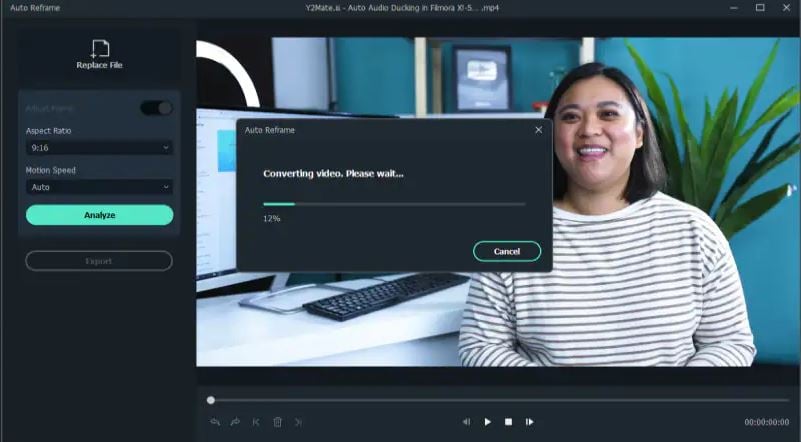
Step 3Analyze and Auto Reframe the Video
After adjusting the settings, tap on the Analysis option. This will prompt Filmora to analyze your video for completion. The video will be automatically reframed to your specified aspect ratio and speed.
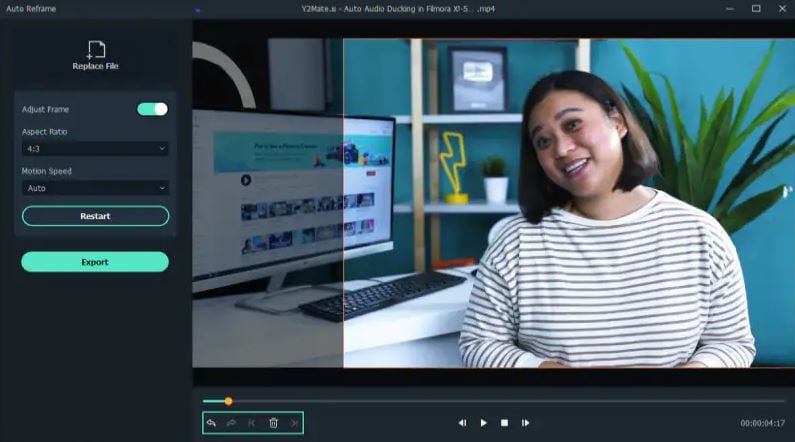
Step 4Preview and Export the Reframed Video
You can now preview the final video to make sure it runs as desired. Make any changes if necessary, and export the reframed video in MP4 format, ready for uploading to YouTube.
Conclusion
The first step to running a successful channel is to be accepted into the YouTube Partner Program. However, building a YouTube Channel from 0 views to meet the eligibility status can be difficult. That’s why buying a monetized YouTube channel is a great place to start. You will only need to focus on creating highly engaging content to continue earning and growing your channel. To ensure that the content you create is of high quality, we recommend using Wondershare Filmora. The video editing software comes with fantastic features that help you create great videos for your channel.
Free Download Free Download Learn More
Part 1. Top 10 Sites to Buy Monetized YouTube Channels
Investing in a pre-existing, monetized YouTube channel is a great idea. It saves you time, allowing you to focus on creating quality content. However, make sure you buy a monetized YouTube channel from a reliable seller. Let’s have a look at the top sites to buy monetized YouTube channels:
1. UseViral
This is one of the best options available to buy monetize YouTube channel. They offer precious monetized YouTube channel packages. Your new channel will be ready for monetization with more than 4,000 watch time hours and a 1,000+ subscriber base.
To get your monetized channel, you will be required to fill out a brief questionnaire. Explain your ideal market and video production needs to allow the UseViral team to understand what you are looking for. They let you know what you are paying for any extras.
Price: $599
Customer Rating: 9.5/10
2. SlidesMedia
This is a well-known social media growth strategist that allows you to buy a monetized YouTube channel. The site stands out for offering assistance with growing the YouTube channel and other social media platforms.
SlidesMedia promises to use only human editors on your YouTube channel. They give you a channel with genuine content. You also get the assurance that the content is not bot-generated..
Price: $529 - $2400.
Customer Rating: 9.3/10
3. AudienceGain
AudienceGain is a popular social media marketing platform. They offer a wide range of services, including selling monetized YouTube channels.
With a proven track record, AudienceGain stands out for offering quality customer service. They support you before, during, and after the purchase. They also provide organically grown channels to make sure you are not demonetized.
Price: $ 129 - $390
Customer Rating: 9.5/10
4. Fameswap
This is a flexible marketplace for selling and buying monetized YouTube channels. The site stands out for being selective in the kind of channels it features.
Fameswap offers a safe method of communication between vendors and buyers through an internal messaging system. You can invest in a channel that you are interested in, ranging from topics like fashion and beauty to entertainment and sports.
Price: Customized pricing
Customer Rating: 8.5/10
5. Eazy Viral
Another excellent choice is to buy a monetized YouTube channel. It allows you to choose from numerous channel types. Users also specify the number of subscribers and watch times they want.
Eazy Viral promises quality content that will not infringe on the rights of others. They also make it simple to monetize your videos and safeguard your AdSense account.
Price: $249 - $1100
Customer Rating: 9/10
6. EazySMM
With EazySMM, you get a unique starting point on your YouTube journey. Choose a YouTube monetized channel for sale on a niche you are interested in at a low price to get started.
EazySMM watches over its clients to make sure they are growing organically. They promise genuine channel views and subscriptions. Their services are also quick, delivering monetized channels within 12 to 48 hours of the purchase.
Price: Custom Pricing
Customer Rating: 8/10
7. 123accs
This platform allows you to buy YouTube channels that have not yet made money. You can then monetize the channel since it has already met the YouTube Partner Program eligibility criteria.
123accs offers new and affordable PVA accounts. Therefore, you can use the service to buy a monetized YouTube channel. Available options include 5 PVA accounts, 25 UK followers, 10 US follower accounts, and more.
Price: Custom Pricing
Customer Rating: 8/10
8. PlayerUp
PlayerUp offers monetized YouTube channels for sale in its marketplace. The platform offers authentic and affordable channels that users can rely on.
The high quality of the videos posted in the channels under sale will make them stand out in marketing campaigns. This is also a great platform for buying branded content and advanced filters.
Price: Custom Pricing
Customer Rating: 7.5/10
9. Trustiu
This is a great choice for for satisfying shopping experience. The platform makes it easy to purchase YouTube channels almost instantly.
Trustiu stands out for its affordable prices and a wide selection of choices. Users also have the freedom to choose the language they want for their channels.
Price: Custom Pricing
Customer Rating: 7.5/10
10. Accs Market
This social media marketplace allows you to buy monetized YouTube channels in a matter of few steps. Choose channels in entertainment of lifestyle niches.
Accs market offers an affordable option for any type of video genre for sellers. From TV shows to movies, Accs Market has something for you.
Part 2. Editing YouTube Videos for Monetization with Wondershare Filmora
In addition to buying a monetized YouTube channel, you will need to create quality videos to remain relevant. This requires good video editing software. With Wondershare Filmora, you can edit any kind of video and add creative effects to make it more interesting. With the option to edit on your desktop or phone on the go, the software gives you more versatility.
Free Download For Win 7 or later(64-bit)
Free Download For macOS 10.14 or later
Wondershare offers a wide range of features that make video editing fun and easy. From automation tools to video enhancement, you can do a lot to your video on the same platform. The most useful features for YouTube monetization include:
1. AI Copywriting
This feature integrates the ChatGPT API, allowing you to get inspiration through AI-generating scripts. You can also generate text during video editing, as well as YouTube Titles and Descriptions.
2. Auto Synchronization
The auto-synchronization feature allows you to effortlessly match your audio with the video. This makes it sound more clear and gives your audience a better watching experience.
3. Auto Reframe
With the rise of YouTube Shorts, reframing your videos is now more of a necessity than an option. You need to appeal to both YouTube viewers and those who consume content in the vertical orientation. The Filmora Auto Reframe feature allows you to automatically resize your videos with no editing skills needed. To use this feature:
Step 1Start the Auto Reframe Feature
One of the ways is by clicking on the Auto Reframe option when you launch Filmora. The other option is to import the media and right-click on it to find the Auto Reframe feature.
Step 2Adjust the Aspect Ratio and Motion Speed
Define the aspect ratio in the dialogue box that opens. A widescreen has an aspect ratio of 16:9 while a vertical one is 9:16.
Step 3Analyze and Auto Reframe the Video
After adjusting the settings, tap on the Analysis option. This will prompt Filmora to analyze your video for completion. The video will be automatically reframed to your specified aspect ratio and speed.
Step 4Preview and Export the Reframed Video
You can now preview the final video to make sure it runs as desired. Make any changes if necessary, and export the reframed video in MP4 format, ready for uploading to YouTube.
Conclusion
The first step to running a successful channel is to be accepted into the YouTube Partner Program. However, building a YouTube Channel from 0 views to meet the eligibility status can be difficult. That’s why buying a monetized YouTube channel is a great place to start. You will only need to focus on creating highly engaging content to continue earning and growing your channel. To ensure that the content you create is of high quality, we recommend using Wondershare Filmora. The video editing software comes with fantastic features that help you create great videos for your channel.
The Filmmaker’s Guide: Producing Engaging YouTube Splits
How to Make a Creative Split-screen Video for YouTube?

Liza Brown
Oct 26, 2023• Proven solutions
If we talk about post-production techniques and visual effects, then Split Screen has to be one of the smartest picks. After all, it lets us narrate our story via two (or more) screens and gives our audience a superior viewing experience. Though, a lot of users find it hard to implement the split-screen effect on YouTube videos. Here, I will let you know how to come up with all kinds of YouTube split-screen videos by using a professional video editor.
Part 1: The Diverse Applications of Split-screen Videos
Before we discuss how to work on YouTube split-screen videos, let’s quickly consider some major applications of this video effect.
One of the most popular applications of split-screen videos is for comparing two or more instances or perspectives in the same frame. For example, you might wish to depict the lifestyle of two people from different parts of the world or simply compare the effect of various seasons in a single video.

Videos are the best visual storytelling tools and just like any story, they can also have different perspectives. Ideally, the split-screen effect would be one of the best ways to show your audience all kinds of perspectives that can take place in your story.
One of the best examples was depicted in the movie “500 Days of Summer” in which we got several Expectations vs. Reality shots. These split-screen shots depicted the two major perspectives of the story in a single frame.

Have you ever wondered how filmmakers create a clone of a person in movies? To do that, we make the protagonist record both the scenes in front of the same background. Later, we implement a split-screen effect in which both the clips are combined in such a way that it makes the audience believe as if the scene has both, the character and their clone placed flawlessly.

Watch Video! Use Split-Screen for Your YouTube Videos
Part 2: How to Make Creative YouTube Split-screen Videos with Wondershare Filmora ?
If you want to come up with professional YouTube split-screen videos, then consider using a resourceful tool like Wondershare Filmora. Recently, the company has launched Wondershare Filmora for Mac V10.2 with an upgraded set of newly-added split-screen templates . Therefore, you can simply use the wide range of split-screen templates in Filmora and drag-and-drop your videos to implement the effect.
- Wondershare Filmora has recently added an extensive range of split-screen templates that you can instantly use and customize to meet your requirements.
- Apart from YouTube split-screen templates, you can also find options for other social platforms such as Instagram, Facebook, TikTok, etc.
- Without undergoing any technical hassle, you can just drag and drop your videos to the split-screen template and further make the needed changes.
- There are also dedicated options to edit the split-screen video, apply color correction, and even implement different stunning animated effects.
- Besides that, you can use Filmora to access numerous other editing options like motion tracking, keyframing, audio ducking, auto reframing, action cam editing, and more.


Creating or editing YouTube split-screen videos in Wondershare Filmora is extremely easy and can be done in the following way:
Step 1: Import the Videos You Want to Edit to Wondershare Filmora
Before you edit your YouTube split-screen video, you need to import clips to the application. To do this, just launch Wondershare Filmora on your system and click on the “Import” button to load your videos. You can also go to its Menu > File > Import Media to do the same.

Step 2: Select the Split-screen Template and Add Your Videos
Great! Once you have loaded the interface of Filmora, you can locate a “Split Screen” section from the top. Just click on it to browse a wide range of split-screen video templates for YouTube to include two, three, or more clips. You can just double-click any template to get its preview and drag-and-drop it to the timeline to start working on it.

If you want, you can take the playhead and drag the pointer to adjust the length of the split-screen template on the timeline. To add your clips, just double-click on the split-screen template and click on the drop icon from the preview window. Now, click on the source clip to add it to the template and adjust its position to get the desired effects.

Step 3: Edit Your YouTube Split-screen Video
Following the same drill, you can include multiple clips to the YouTube split-screen template. You can further go to its editing features and explore the “Video” tab to scale, reposition, or rotate your clips. There are also options to add borders in the split-screen effect to separate the clips distinctively in the video.

Apart from that, you can also go to the “Color” section to access various color correction features. From here, you can adjust the brightness, temperature, saturation, tint, and other effects in the video.

If you want to make your YouTube split-screen video more appealing, then go to the “Motion” feature. Here, you can easily implement any existing animated template for transitions and other effects.

Besides that, you can also click on the edit icon from the bottom panel of the Preview section to edit your videos separately.

Step 4: Export the YouTube Split-screen Video
That’s it! Once you are done editing the split-screen video, you can export it from Filmora and save it on your Mac. Just click on the Export option and select a location to save the YouTube split-screen video. There are also additional features to save the video in different formats, video resolutions, and frame rates here that you can explore.

There you go! After following this guide, you would be able to come up with all kinds of YouTube split-screen videos on your Mac. Ideally, with the help of a resourceful tool like Wondershare Filmora, working on a split-screen video is an effortless task. Since the tool has numerous split-screen templates for YouTube, you can just select any template, and customize it to create a stunning YouTube split-screen video in minutes.
Liza Brown
Liza Brown is a writer and a lover of all things video.
Follow @Liza Brown
Liza Brown
Oct 26, 2023• Proven solutions
If we talk about post-production techniques and visual effects, then Split Screen has to be one of the smartest picks. After all, it lets us narrate our story via two (or more) screens and gives our audience a superior viewing experience. Though, a lot of users find it hard to implement the split-screen effect on YouTube videos. Here, I will let you know how to come up with all kinds of YouTube split-screen videos by using a professional video editor.
Part 1: The Diverse Applications of Split-screen Videos
Before we discuss how to work on YouTube split-screen videos, let’s quickly consider some major applications of this video effect.
One of the most popular applications of split-screen videos is for comparing two or more instances or perspectives in the same frame. For example, you might wish to depict the lifestyle of two people from different parts of the world or simply compare the effect of various seasons in a single video.
Videos are the best visual storytelling tools and just like any story, they can also have different perspectives. Ideally, the split-screen effect would be one of the best ways to show your audience all kinds of perspectives that can take place in your story.
One of the best examples was depicted in the movie “500 Days of Summer” in which we got several Expectations vs. Reality shots. These split-screen shots depicted the two major perspectives of the story in a single frame.
Have you ever wondered how filmmakers create a clone of a person in movies? To do that, we make the protagonist record both the scenes in front of the same background. Later, we implement a split-screen effect in which both the clips are combined in such a way that it makes the audience believe as if the scene has both, the character and their clone placed flawlessly.
Watch Video! Use Split-Screen for Your YouTube Videos
Part 2: How to Make Creative YouTube Split-screen Videos with Wondershare Filmora ?
If you want to come up with professional YouTube split-screen videos, then consider using a resourceful tool like Wondershare Filmora. Recently, the company has launched Wondershare Filmora for Mac V10.2 with an upgraded set of newly-added split-screen templates . Therefore, you can simply use the wide range of split-screen templates in Filmora and drag-and-drop your videos to implement the effect.
- Wondershare Filmora has recently added an extensive range of split-screen templates that you can instantly use and customize to meet your requirements.
- Apart from YouTube split-screen templates, you can also find options for other social platforms such as Instagram, Facebook, TikTok, etc.
- Without undergoing any technical hassle, you can just drag and drop your videos to the split-screen template and further make the needed changes.
- There are also dedicated options to edit the split-screen video, apply color correction, and even implement different stunning animated effects.
- Besides that, you can use Filmora to access numerous other editing options like motion tracking, keyframing, audio ducking, auto reframing, action cam editing, and more.
Creating or editing YouTube split-screen videos in Wondershare Filmora is extremely easy and can be done in the following way:
Step 1: Import the Videos You Want to Edit to Wondershare Filmora
Before you edit your YouTube split-screen video, you need to import clips to the application. To do this, just launch Wondershare Filmora on your system and click on the “Import” button to load your videos. You can also go to its Menu > File > Import Media to do the same.
Step 2: Select the Split-screen Template and Add Your Videos
Great! Once you have loaded the interface of Filmora, you can locate a “Split Screen” section from the top. Just click on it to browse a wide range of split-screen video templates for YouTube to include two, three, or more clips. You can just double-click any template to get its preview and drag-and-drop it to the timeline to start working on it.
If you want, you can take the playhead and drag the pointer to adjust the length of the split-screen template on the timeline. To add your clips, just double-click on the split-screen template and click on the drop icon from the preview window. Now, click on the source clip to add it to the template and adjust its position to get the desired effects.
Step 3: Edit Your YouTube Split-screen Video
Following the same drill, you can include multiple clips to the YouTube split-screen template. You can further go to its editing features and explore the “Video” tab to scale, reposition, or rotate your clips. There are also options to add borders in the split-screen effect to separate the clips distinctively in the video.
Apart from that, you can also go to the “Color” section to access various color correction features. From here, you can adjust the brightness, temperature, saturation, tint, and other effects in the video.
If you want to make your YouTube split-screen video more appealing, then go to the “Motion” feature. Here, you can easily implement any existing animated template for transitions and other effects.
Besides that, you can also click on the edit icon from the bottom panel of the Preview section to edit your videos separately.
Step 4: Export the YouTube Split-screen Video
That’s it! Once you are done editing the split-screen video, you can export it from Filmora and save it on your Mac. Just click on the Export option and select a location to save the YouTube split-screen video. There are also additional features to save the video in different formats, video resolutions, and frame rates here that you can explore.
There you go! After following this guide, you would be able to come up with all kinds of YouTube split-screen videos on your Mac. Ideally, with the help of a resourceful tool like Wondershare Filmora, working on a split-screen video is an effortless task. Since the tool has numerous split-screen templates for YouTube, you can just select any template, and customize it to create a stunning YouTube split-screen video in minutes.
Liza Brown
Liza Brown is a writer and a lover of all things video.
Follow @Liza Brown
Also read:
- [New] Earning Potential in Gaming Videos for 2024
- [New] How To Streamline the Integration of YouTube Playlists Into a Site's Layout
- [Updated] In 2024, A+ PowerPoint to Cinema Suites
- 2024 Approved Masterful Screenshots Made Simple – Top 10 FREE Mac Apps
- 2024 Approved Mastering YouTube Partnership Reaching 10K Views Quickly
- Come Trasferire in Modo Rapido E Protetto Le Informazioni Sulla Tua Unità SSD Di Samsung 850 EVO
- Download the Newest NVIDIA Quadro RTX 8000 Drivers for Windows 11, 10 & 7
- Exclusive Offer: Meta Unveils Top-Notch October Prime Day Bargain with 512GB Quest 3 - Limited Time Only
- In 2024, Android Unlock Code Sim Unlock Your OnePlus 12 Phone and Remove Locked Screen
- In 2024, From Zero to Hero Steps to Construct Your Channel's Backlinks
- In 2024, Hasty Methods for Mixed-Up YouTube Playback Sequence
- In 2024, Navigating Numbers Essential Online Stock Market Guides
- In 2024, Unpacking YouTube's Income Distribution From 1M Viewers
- Navigating the World of YouTube Live Visuals for 2024
- QuickStart Guide: Accelerating Your Windows 11 Booting Process
- Top-Ranking Cybersecurity Protectors - The Ultimate List as Featured
- Title: In 2024, Preferred Choices Affordable Channels for Newbie Monetizers
- Author: Thomas
- Created at : 2025-01-09 16:30:22
- Updated at : 2025-01-10 16:07:31
- Link: https://youtube-help.techidaily.com/in-2024-preferred-choices-affordable-channels-for-newbie-monetizers/
- License: This work is licensed under CC BY-NC-SA 4.0.