
:max_bytes(150000):strip_icc()/GettyImages-643997505-3dcb1b226e104d1da13825b0d9117173.jpg)
In 2024, Professional Filmmaking Made Easy with Right Lenses
Professional Filmmaking Made Easy with Right Lenses
A Vlogger’s Guide To Camera Lenses

Richard Bennett
Nov 01, 2022• Proven solutions
The staple of any vlog is the talking headshot, a shot of the speaker talking directly to the audience. You can compose this shot with different kinds of lenses for your interchangeable lens camera.
But which kind of lens is the right lens for you as a vlogger?
In this article, I’m going to help you figure that out.
- Part 1: Three Focal Length Groups: Wide, Standard, Telephoto
- Part 2: Vlogging With Each Focal Length Group
- Part 3: Crop Factor
- Part 4: Focal Length Equivalency Table
- Part 5: Aperture
- Part 6: Vlogging With a Fast Lens
- Part 7: Optical Image Stabilization
Three Focal Length Groups: Wide, Standard, Telephoto
There are three main ranges in focal lengths that camera lenses can be categorized into wide, standard, and telephoto.
Wide-Angle Lens
Wide-angle lenses can “see more.” They allow more of your scene to fit inside your frame. Objects that are closer to the lens appear much bigger while objects that are further away appear even smaller. Perspectives are also enhanced, making close objects and people that just make it into the sides of the frame appear more stretched out. Out of all the other ranges in focal lengths, wide-angle lenses will appear the least zoomed in.
Standard Lens
With standard lenses or normal lenses, you won’t get the stretched out objects or enhanced perspectives that you get from wide-angle lenses. Instead, standard lenses are meant to see scenes as the natural human eye is meant to see them. If you shoot a scene with both a wide-angle lens and a standard lens from the same position, you’ll notice that less of the scene fits into your frame. Standard lenses will appear more zoomed-in than wide-angle lenses, but less zoomed-in than telephoto lenses.
Telephoto Lens
Out of all the other ranges in focal lengths, telephoto lenses will appear the most zoomed in. This can be beneficial for the shooter who wants to get a closer shot of a scene without having to physically be in close proximity to the scene. Objects that are further away in the background also appear larger and closer than they would appear on wide-angle or standard lenses.
Vlogging With Each Focal Length Group
You can get your talking head footage using lenses from any of the three focal length groups. Depending on how you plan to vlog most of the time, though, one of the three focal lengths might be more suitable for you.
When to vlog with a wide-angle lens
Wide-angle lenses are the most commonly used lenses for vlogging. Wide-angle lenses are great when you need to be close to your camera. This might be the case for you if your recording space is small or if you want to film yourself as you hold your camera up with your own hand.
Being close to your camera not only gives you the option to use your camera’s built-in microphone, but it also gives you the option to make use of camera-mounted shotgun microphones.
When to vlog with a standard lens
Standard lenses are great when you have more space to be further away from your camera. The perspectives in your shot will look more natural through a standard lens, making your talking head footage feel more corporate or professional. You’ll also be able to get blurrier backgrounds using a standard lens versus a wide-angle lens.
Being further away from your camera, however, means that you’ll have to use a separate microphone positioned closer to you.
When to vlog with a telephoto lens
As telephoto lenses are even more zoomed in, you’ll need to be even further away from your camera to fit yourself inside your camera frame. Why would any vlogger ever need to be that far away from their camera? One word… teleprompter. If you want or need to stick to a script, you’ll have to be far away enough from your camera that it doesn’t appear like your eyes are scanning left to right. You then close in the distance with a telephoto lens.
In the above video, Marcos Rocha compares different focal lengths for talking head videos. Which focal length range do you like the look of?
Crop Factor
Focal lengths in camera lenses are measured in millimeters. You can vlog yourself handheld with a 24mm lens on a camera with a full-frame sensor (the sensor is the piece of hardware inside your camera that turns the light it receives into a digital image). But if you use a 24mm lens on a camera with a smaller sensor, like an APS-C sensor or even smaller Micro 4/3 sensor, more of you will get cropped out (see below).

In order to make up for the cropping that occurs, you will need to use a wider lens on cameras with smaller sensors to get the same shot you’d get with a full-frame camera.
Focal Length Equivalency Table
This table shows you the focal lengths needed to achieve the same shot between cameras with different sensor sizes. In order to take a shot as wide as the shot I took of myself with the 24mm lens on my full-frame camera, I would need a 15mm lens on an APS-C sensor camera or a 12mm lens on a micro 4/3 camera.
| Focal Length / Sensor | Full Frame | APS-C | Micro 4/3 |
|---|---|---|---|
| Wide (Handheld Selfie-Safe) | 16mm | 10mm | 8mm |
| Wide (Handheld Selfie-Safe) | 18mm | 11mm | 9mm |
| Wide (Handheld Selfie-Safe) | 24mm | 15mm | 12mm |
| Wide | 35mm | 22mm | 18mm |
| Standard | 50mm | 31mm | 25mm |
| Telephoto | 70mm | 44mm | 35mm |
| Telephoto | 100mm | 63mm | 50mm |
| Telephoto | 200mm | 125mm | 100mm |
Aperture

The next thing to consider when you’re looking for a lens is the aperture, the hole (often adjustable) within the lens that lets light in. Aperture for camera lenses is measured in f-stops (f/1.4, f/1.8, f/2.0) - the smaller the f-stop number, the larger the aperture (bigger hole letting even more light in).

Because larger aperture lenses let more light in, they need a shorter time for cameras to compose an image. This is why larger aperture lenses are also called “fast” lenses.
Fast lenses are more expensive because they cost more to produce. There’s a lot more that goes into them, including larger and higher quality glass elements.
But do you even need a fast lens?
Vlogging With a Fast Lens
Pros of Vlogging With a Fast Lens
- Better low-light performance
- Better autofocus performance
- Better “bokeh” (out-of-focus areas, like your background, having that nice blurry look that you see in a lot of movies)
Cons of Vlogging With a Fast Lens
- More expensive
- Moving subjects more likely to get out of focus when shooting with a large aperture
- Better continuous autofocus performance needed when shooting moving subjects with a large aperture
Optical Image Stabilization
Finally, you’ll have to decide whether or not you want your lens to have built-in optical image stabilization (OIS).
OIS is very beneficial to have on a lens if you’re a vlogger who films mostly handheld footage. Although this technology adds to the price of your lens as well, it can greatly help you to capture smoother footage that may otherwise be shaky. Nikon calls this technology “Vibration Reduction” (VR) for their lenses.
In the above video, you can see how much OIS can help to stabilize your footage. MicBergsma simultaneously compares the footage between two GoPro Hero5 Blacks, one with OIS on and one with OIS off.
If, however, you are shooting most of your vlogs on a tripod, you won’t need a lens with OIS.
Looking for ways to set up your talking-head shot for YouTube with any of these lenses? Check out our post on 4 Ways To Set Up Your Talking-Head Shots For YouTube .
Richard Bennett
Richard Bennett is a writer and a lover of all things video.
Follow @Richard Bennett
Richard Bennett
Nov 01, 2022• Proven solutions
The staple of any vlog is the talking headshot, a shot of the speaker talking directly to the audience. You can compose this shot with different kinds of lenses for your interchangeable lens camera.
But which kind of lens is the right lens for you as a vlogger?
In this article, I’m going to help you figure that out.
- Part 1: Three Focal Length Groups: Wide, Standard, Telephoto
- Part 2: Vlogging With Each Focal Length Group
- Part 3: Crop Factor
- Part 4: Focal Length Equivalency Table
- Part 5: Aperture
- Part 6: Vlogging With a Fast Lens
- Part 7: Optical Image Stabilization
Three Focal Length Groups: Wide, Standard, Telephoto
There are three main ranges in focal lengths that camera lenses can be categorized into wide, standard, and telephoto.
Wide-Angle Lens
Wide-angle lenses can “see more.” They allow more of your scene to fit inside your frame. Objects that are closer to the lens appear much bigger while objects that are further away appear even smaller. Perspectives are also enhanced, making close objects and people that just make it into the sides of the frame appear more stretched out. Out of all the other ranges in focal lengths, wide-angle lenses will appear the least zoomed in.
Standard Lens
With standard lenses or normal lenses, you won’t get the stretched out objects or enhanced perspectives that you get from wide-angle lenses. Instead, standard lenses are meant to see scenes as the natural human eye is meant to see them. If you shoot a scene with both a wide-angle lens and a standard lens from the same position, you’ll notice that less of the scene fits into your frame. Standard lenses will appear more zoomed-in than wide-angle lenses, but less zoomed-in than telephoto lenses.
Telephoto Lens
Out of all the other ranges in focal lengths, telephoto lenses will appear the most zoomed in. This can be beneficial for the shooter who wants to get a closer shot of a scene without having to physically be in close proximity to the scene. Objects that are further away in the background also appear larger and closer than they would appear on wide-angle or standard lenses.
Vlogging With Each Focal Length Group
You can get your talking head footage using lenses from any of the three focal length groups. Depending on how you plan to vlog most of the time, though, one of the three focal lengths might be more suitable for you.
When to vlog with a wide-angle lens
Wide-angle lenses are the most commonly used lenses for vlogging. Wide-angle lenses are great when you need to be close to your camera. This might be the case for you if your recording space is small or if you want to film yourself as you hold your camera up with your own hand.
Being close to your camera not only gives you the option to use your camera’s built-in microphone, but it also gives you the option to make use of camera-mounted shotgun microphones.
When to vlog with a standard lens
Standard lenses are great when you have more space to be further away from your camera. The perspectives in your shot will look more natural through a standard lens, making your talking head footage feel more corporate or professional. You’ll also be able to get blurrier backgrounds using a standard lens versus a wide-angle lens.
Being further away from your camera, however, means that you’ll have to use a separate microphone positioned closer to you.
When to vlog with a telephoto lens
As telephoto lenses are even more zoomed in, you’ll need to be even further away from your camera to fit yourself inside your camera frame. Why would any vlogger ever need to be that far away from their camera? One word… teleprompter. If you want or need to stick to a script, you’ll have to be far away enough from your camera that it doesn’t appear like your eyes are scanning left to right. You then close in the distance with a telephoto lens.
In the above video, Marcos Rocha compares different focal lengths for talking head videos. Which focal length range do you like the look of?
Crop Factor
Focal lengths in camera lenses are measured in millimeters. You can vlog yourself handheld with a 24mm lens on a camera with a full-frame sensor (the sensor is the piece of hardware inside your camera that turns the light it receives into a digital image). But if you use a 24mm lens on a camera with a smaller sensor, like an APS-C sensor or even smaller Micro 4/3 sensor, more of you will get cropped out (see below).
In order to make up for the cropping that occurs, you will need to use a wider lens on cameras with smaller sensors to get the same shot you’d get with a full-frame camera.
Focal Length Equivalency Table
This table shows you the focal lengths needed to achieve the same shot between cameras with different sensor sizes. In order to take a shot as wide as the shot I took of myself with the 24mm lens on my full-frame camera, I would need a 15mm lens on an APS-C sensor camera or a 12mm lens on a micro 4/3 camera.
| Focal Length / Sensor | Full Frame | APS-C | Micro 4/3 |
|---|---|---|---|
| Wide (Handheld Selfie-Safe) | 16mm | 10mm | 8mm |
| Wide (Handheld Selfie-Safe) | 18mm | 11mm | 9mm |
| Wide (Handheld Selfie-Safe) | 24mm | 15mm | 12mm |
| Wide | 35mm | 22mm | 18mm |
| Standard | 50mm | 31mm | 25mm |
| Telephoto | 70mm | 44mm | 35mm |
| Telephoto | 100mm | 63mm | 50mm |
| Telephoto | 200mm | 125mm | 100mm |
Aperture
The next thing to consider when you’re looking for a lens is the aperture, the hole (often adjustable) within the lens that lets light in. Aperture for camera lenses is measured in f-stops (f/1.4, f/1.8, f/2.0) - the smaller the f-stop number, the larger the aperture (bigger hole letting even more light in).
Because larger aperture lenses let more light in, they need a shorter time for cameras to compose an image. This is why larger aperture lenses are also called “fast” lenses.
Fast lenses are more expensive because they cost more to produce. There’s a lot more that goes into them, including larger and higher quality glass elements.
But do you even need a fast lens?
Vlogging With a Fast Lens
Pros of Vlogging With a Fast Lens
- Better low-light performance
- Better autofocus performance
- Better “bokeh” (out-of-focus areas, like your background, having that nice blurry look that you see in a lot of movies)
Cons of Vlogging With a Fast Lens
- More expensive
- Moving subjects more likely to get out of focus when shooting with a large aperture
- Better continuous autofocus performance needed when shooting moving subjects with a large aperture
Optical Image Stabilization
Finally, you’ll have to decide whether or not you want your lens to have built-in optical image stabilization (OIS).
OIS is very beneficial to have on a lens if you’re a vlogger who films mostly handheld footage. Although this technology adds to the price of your lens as well, it can greatly help you to capture smoother footage that may otherwise be shaky. Nikon calls this technology “Vibration Reduction” (VR) for their lenses.
In the above video, you can see how much OIS can help to stabilize your footage. MicBergsma simultaneously compares the footage between two GoPro Hero5 Blacks, one with OIS on and one with OIS off.
If, however, you are shooting most of your vlogs on a tripod, you won’t need a lens with OIS.
Looking for ways to set up your talking-head shot for YouTube with any of these lenses? Check out our post on 4 Ways To Set Up Your Talking-Head Shots For YouTube .
Richard Bennett
Richard Bennett is a writer and a lover of all things video.
Follow @Richard Bennett
Craft Channels with Flair: Unveiling 10 Innovative Design Platforms
Youtube Banners Makers: 10+ Online Tools to Create Channel Art
Richard Bennett
Mar 27, 2024• Proven solutions
If you want to have more fans on your YouTube channel, it becomes really important to make your channel more attractive and fresh. YouTube banner is one of the important factors which represents the style, quality, and taste of your channel. Fortunately, there are many tools on the market that can help you make attractive banners. Therefore, we have brought you 10+ best-known YouTube banner makers that can enhance the beauty of your channel with their exceptionally amazing features. We will also let you know how to make a YouTube banner. Let’s explore.
You may also like: How to add custom thumbnails to YouTube videos >>
- Part 1: YouTube Banner Dimensions You Should Know
- Part 2: How to Make a YouTube Banner with Canva for Free
- Part 3: 10+ Best YouTube Banner Makers
Part 1: YouTube Banner Dimensions You Should Know
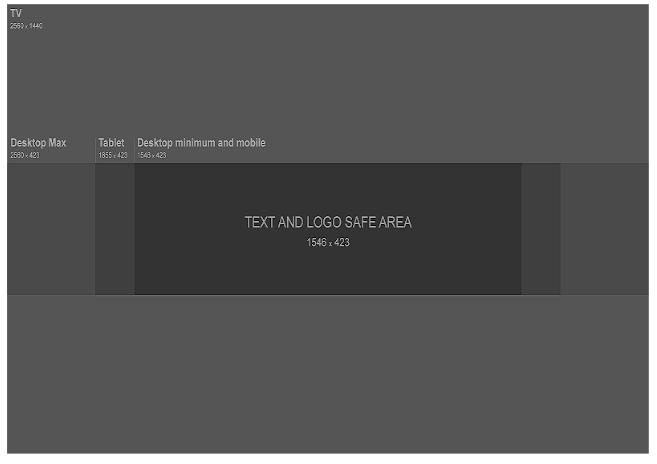
YouTube banner dimensions varied on different platforms, so you need to make the YouTube banner look great on desktop, tablet, and phone. According to Google , the recommended dimension is 2560 x 1440 px as the YouTube banner will be cropped if its size is too large. Minimum dimension is 2048 x 1152 px for uploading. The maximum width is 2560 x 423 px. The largest file size is 6MB. You can also add links to your own social media on YouTube banner, so it is a great place to recommend your other social media.
Part 2: How to Make a YouTube Banner with Canva for Free
There are so many tools that you can make a YouTube banner in the market, but it is not easy to find the right tool to make a banner if you can’t find the right tools. We have listed one way to make a YouTube banner below. You can use Wondershare Filmora to edit YouTube videos as it is designed to be a YouTube editor. Besides the basic editing including cropping/trimming and adding transitions, you can use it to add various text, more than 300 effects/filters, free audio, and more. It is also easy to make a YouTube intro. Download it to have a try!
 Download Mac Version ](https://tools.techidaily.com/wondershare/filmora/download/ )
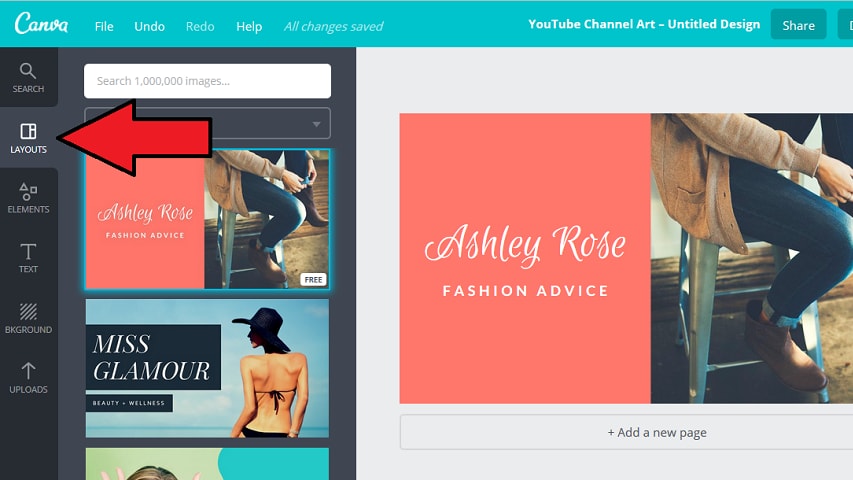
Step 1: Choose your template and layout
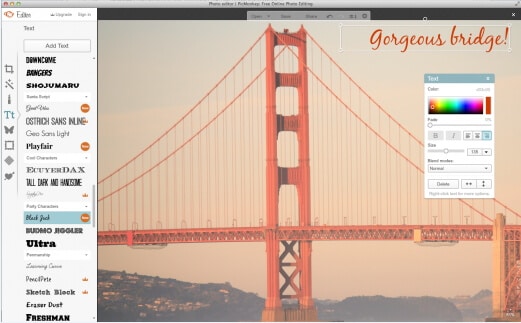
Canva is an online tool to make YouTube banner, so first you need to open it up . You are asked to log in.
After you’ve signed up for Canva you will see a variety of different templates. Scroll through them until you find YouTube Channel Art under Social Media & Email Headers.
This template will be the right size for a YouTube banner, but it will not show you the ‘safe zones’. Your banner will show up differently depending on the screen a viewer is watching on. Click here to download YouTube’s official template, which displays safe zones. You will be able to use it as a reference.
And Canva also provides you with sample layouts that you can build off of. They will include stock photos and text. Most are free, but some might cost a dollar.
If the one you happen to like isn’t free, don’t worry. It’s actually just the specific stock images being used in the example that cost money, and you’re probably planning on replacing those anyways.
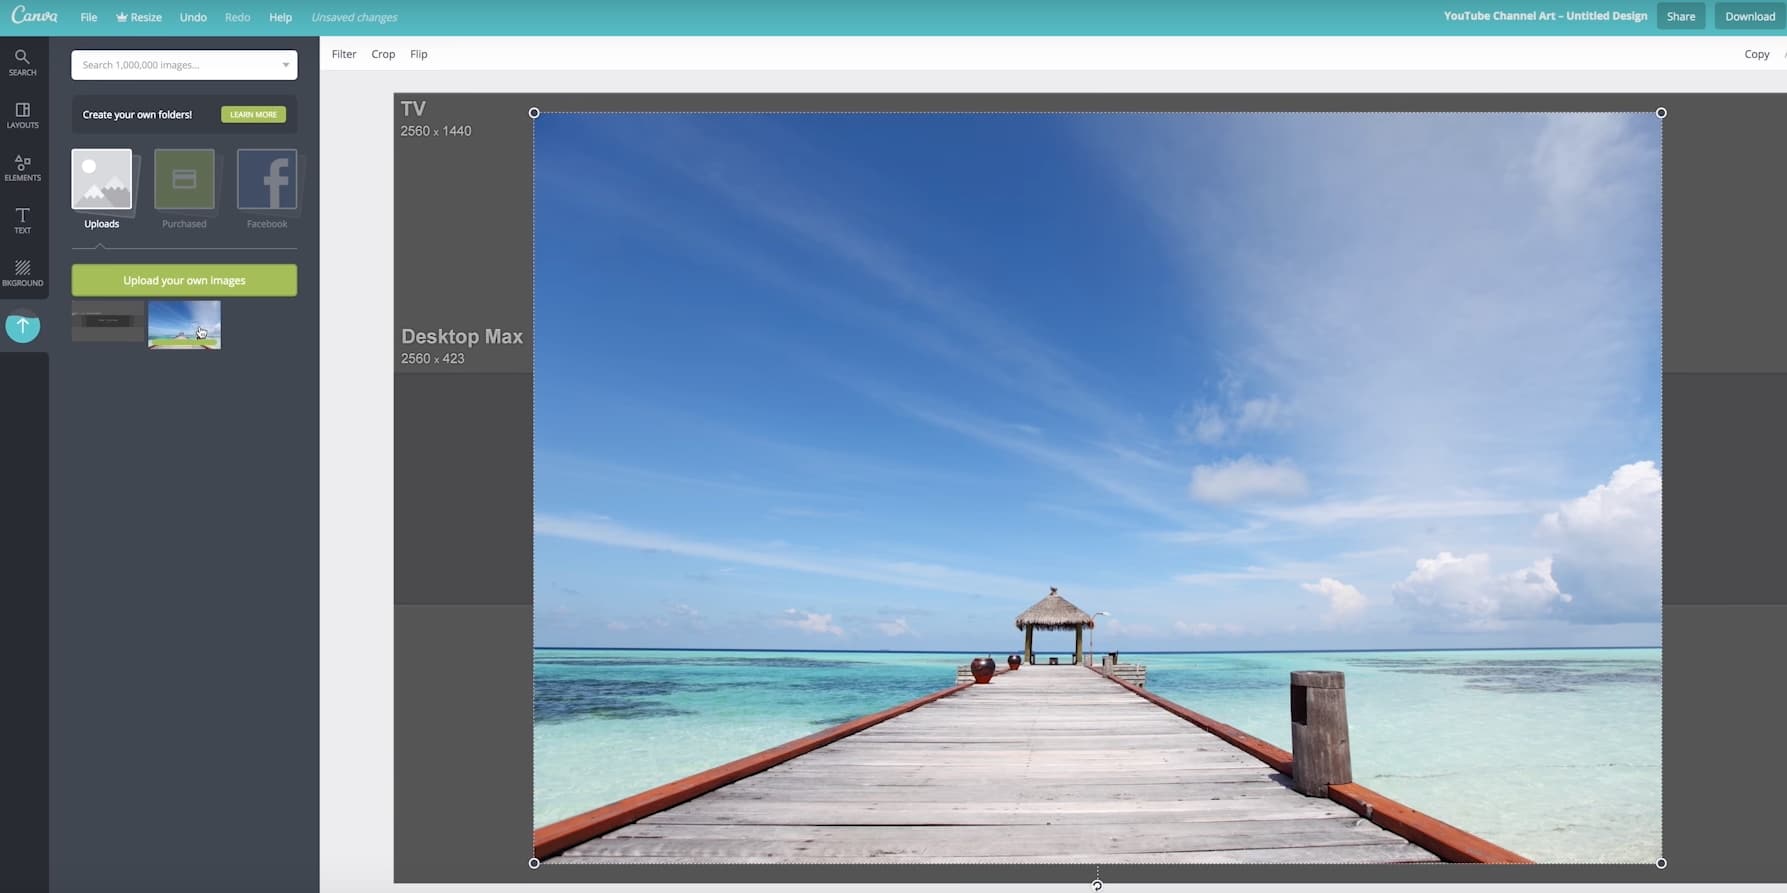
Step 2: Import your image
Canva provides a selection of stock images you can use for free. You can find them by clicking on Elements in the menu on the far left, and then clicking on Free Photos.
If you’d rather use your own images, click on Upload at the bottom of that same menu on the left. You’ll have the option of uploading images from your computer or importing them from Facebook.
After you have found the image you want to use or loaded it into Canva, click on it and it will appear in your layout.
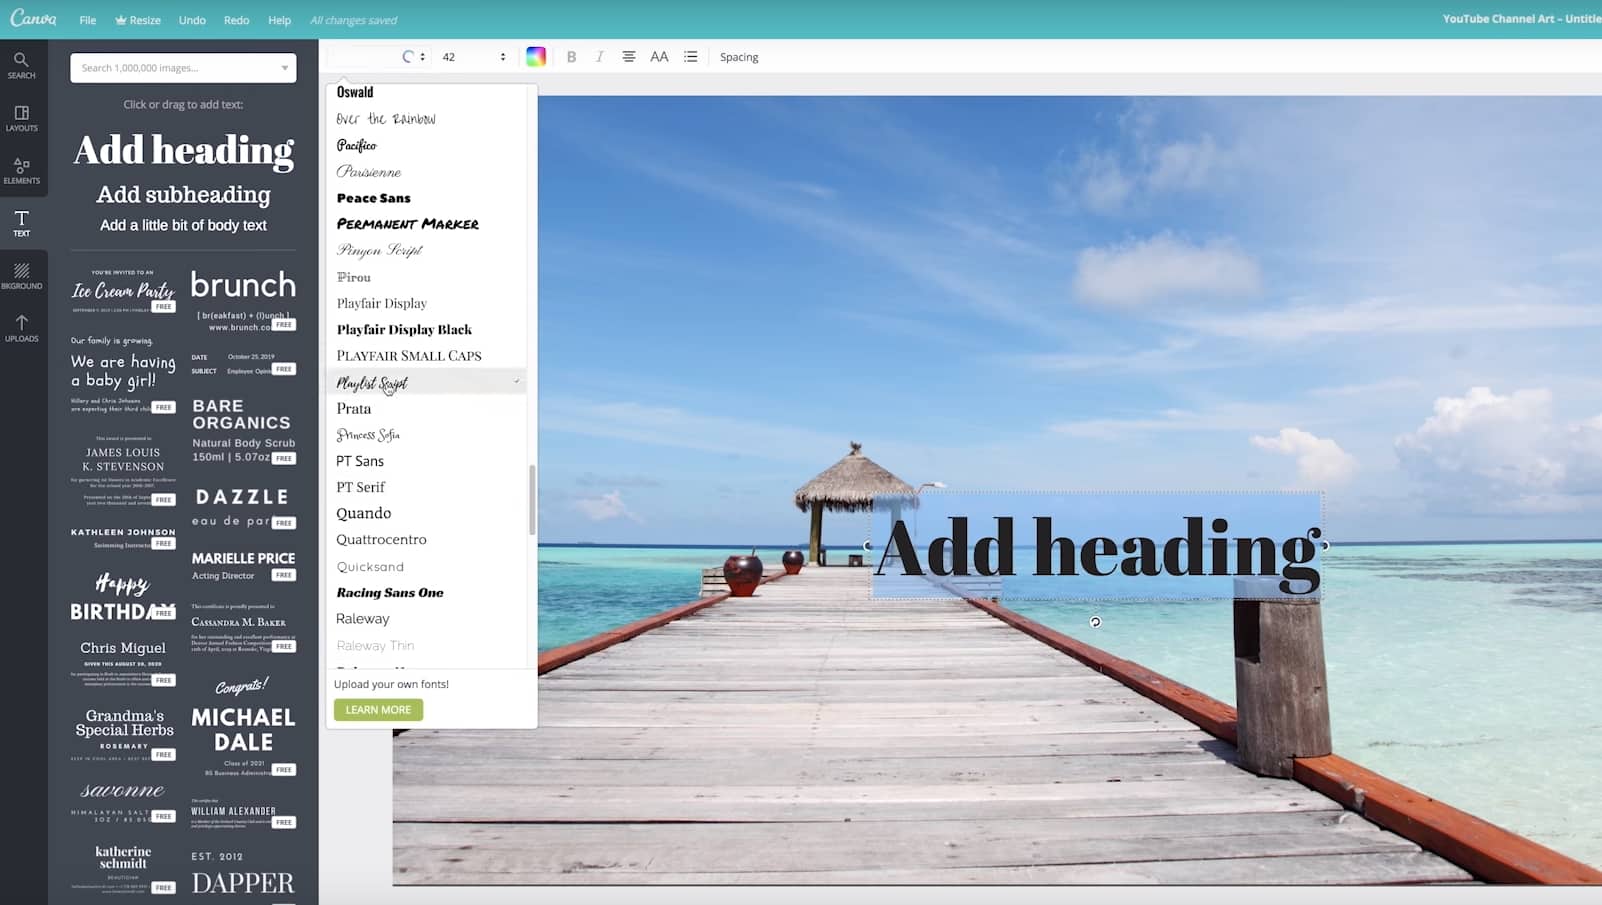
Step 3: Add text to YouTube banner
You can add various text after it is imported. There are lots of text templates in Canva, so just pick the one you like. You can also change text color and transparency to make it look great. Now to place it in the right position.
Step 4: Edit other elements
The layout you chose might include things like borders or backgrounds behind the text. You can change the colors of any of these just by clicking on them, then clicking on the color swatch in the top left corner of your design area.

Step 5: Download YouTube banner
Once you finish the editing, there is a download button in the top right corner of your screen. Click on it when you are finished to save your new channel art to your computer. It supports JPEG, PNG, and PDF. Now upload it to YouTube. So simple. Isn’t it?

Part 3: 10+ Best YouTube Banner Makers
1. Canva:
Canva is probably the most popular site for making channel art, for good reason. It has over 8000 templates for different kinds of graphics, including YouTube channel art, and there’s a huge variety of stock photos available either for free or $1. On Canva, creating your perfect banner is as easy as dragging and dropping images into a pre-built layout. Resizing is automatic, and you can flip/rotate or apply filters in just a few clicks
Pros: It contains millions of stock images, about 100 professional layouts, and lots of stunning filters.
Cons: Some high-quality images can be accessed only after payment of $1.
Price: The best thing to know is that this tool is available for free.
2. Wondershare PixStudio

Wondershare PixStudio is an all-in-one and powerful online graphic design maker for everyone. It has various types of templates for YouTube Thumbnails, Logos, Posters, etc. You can create a beautiful design by simply dragging and dropping the elements and photos. The online platform is free to use all templates, just One-Click to download your creations, and share to your Facebook, Instagram Story, and YouTube Thumbnails, etc. immediately.
Pros:
- Various types of templates
- Simple and Fast Design
- Background remover
Cons: The features of removing background be used after payment of $7.99 per month.
Price: The best thing to know is that this tool is available for free.
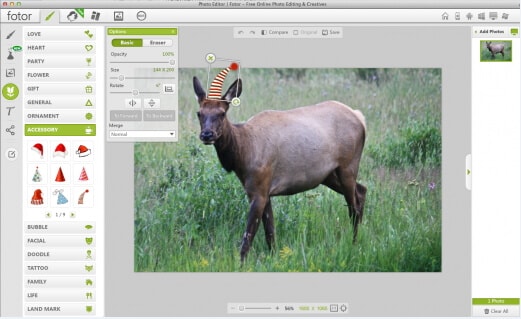
3. Fotor:
The makers of Fotor describe it as a ‘revolutionary photo editor and graphic designer’, and it is certainly a powerful tool. Fotor allows you to do a lot of fine editing on your photos – brightness, saturation, and color temperature are just a few of the things you can adjust – and its design feature is perfect for YouTube channel art.
Fotor has templates for YouTube channel art and a lot of fun sticker-like graphics. The Design interface is very similar to Canva, if slightly more complicated.
Pros: Complete art can be created within a few minutes and contains dozens of templates.
Cons: Little difficult to use for beginners.
Price: Free
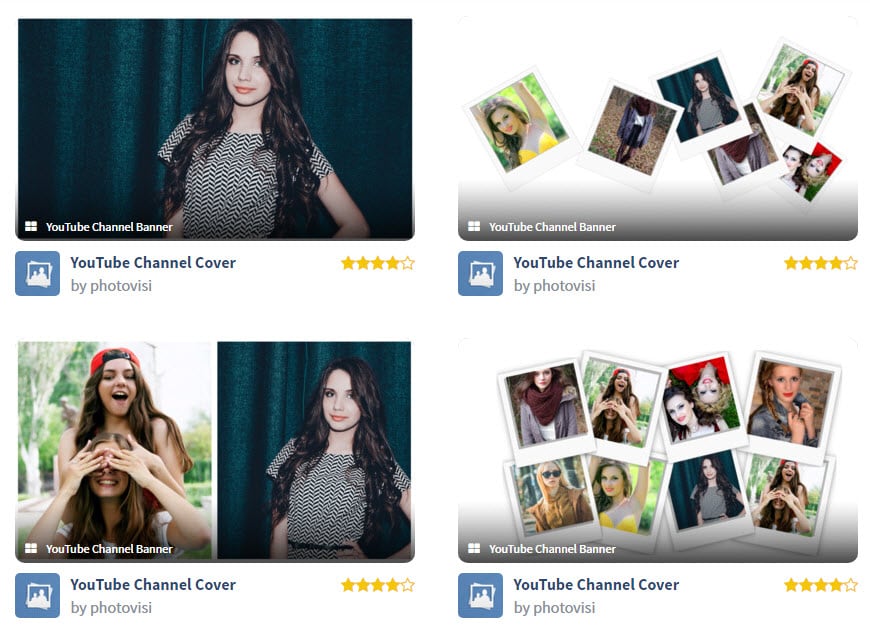
4. Photovisi:
It is a great source of inspiration for your YouTube channel where you can easily design, save and share your customized banner.
Pros: It automatically adjusts the size of the banner to the required format and is loaded with unlimited themes. Works on Android, Windows, Mac, and iOS.
Cons: Demand some special skills for usage.
Price: It is available for free at the official website
5. iKomee:
It is possible to have customized results for your YouTube banner designing using the iKomee platform where few minutes are enough to create wonders. It is one of the most loved tools of all professionals.
Pros: Contains lots of cool templates for channel art.
Cons: Limited themes and layouts.
Price: Available for free.

6. Banners Nack:
Here is one of the most wonderful YouTube banner maker for you that can be accessed online with easy to use interface where one can design animated, static HTML5 with interactive banner ads.
Pros: Professional, easy to use platform with rich quality fonts, stock images, and animated effects.
Cons: Little costly.
Price: Users can go ahead with premium plans where the basic plan is worth $12/month and a professional plan is $18/month with a business plan offer of $24 per month.
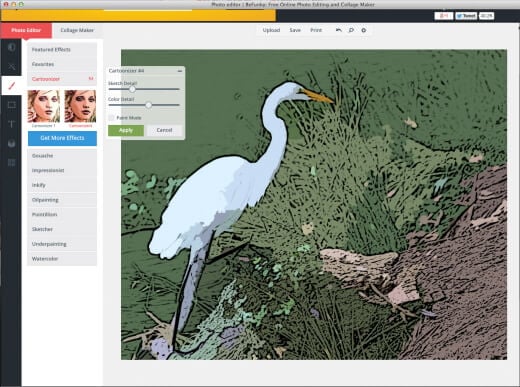
7. BeFunky:
BeFunky allows users to create meaningful banners for YouTube business building. The platform consists of numerous effortless options for banner designs and the drag and drops features make everything much easier. It is possible to boost traffic on your YouTube channel with this highly ranked banner maker.
Pros: Four-step banner-making process that can be followed by beginners too.
Cons: The uploading and downloading process takes more time due to heavy projects.
Price: Get started for free.
8. Picmonkey:
With PicMonkey.com you will be able to get customized, readymade banners with a perfect look. It is much easier to make selections for fonts, colors, and graphics with advanced templates here.
Pros: The best platform to enhance your creativity; users will be able to get perfect sharpness of quality.
Cons: File size is more for output banner and special features can be accessed only after payment.
Price: Free trial.
9. iPiccy:
The number of steps to be followed for designing a YouTube banner here completely depends upon your demand of end banner design type. Generally, four-step method is capable enough to provide you professional output with proper cropping dimensions and small file size for download
Pros: Various additional features are available like adding text etc so that highly customized designs can be created for YouTube Banners.
Cons: Demands more time of the user for making quality banner.
Price: Get started for free within a few seconds.
10. Adobe Spark:
Adobe Spark is one of the amazing online YouTube banner makers that helps you create the desired banner for your YouTube channel with ease. All that you need to do is browse to the site and pick the ‘YouTube channel art’ option to get the YouTube banner of the right size, though there are other options as well. Due to its easily customizable features, you can alter or change the background completely and try different color combinations to match your brand’s logo.
Pros:
- The drag-n-drop feature of Adobe Spark enables you to craft eye-catching and engaging banners effortlessly.
- Adobe Spark offers you the freedom to experiment with unlimited alterations in alignments, text, layouts, and themes like a trusted YouTube banner creator.
Cons: Though Adobe Spark is free, it annoys the users when it automatically adds Adobe Spark’s watermark logo to your creation. To get it removed, you must be an active subscriber of Adobe products.

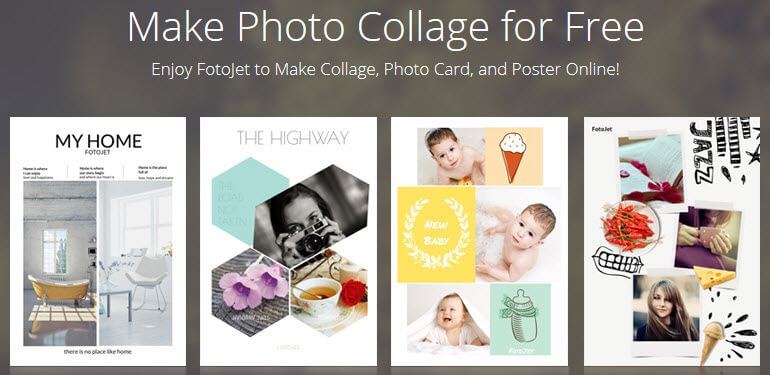
11. Fotojet:
FotoJet being a reliable YouTube banner maker assists you in creating personalized banners using numerous free templates. You get hold of interesting YouTube banner without toiling with the intricacies of graphic designing. Impressing your visitors with your unique and brand new banner from FotoJet YouTube banner creator is class apart.
Pros: It offers you the flexibility to add anything and everything on your channel art and upload it on YouTube right away.
Cons: Similar to Adobe Spark, FotoJet too adds a watermark logo of its name to your creation which is again a bit of nuisance.
Conclusion
Want to make your YouTube video more attractive and beautiful? Wondershare Filmora is such video editing software designed for YouTube creators. It not only allows you to cut, trim, crop, zoom, reverse, rotate the video clips, but also makes the advanced features like green screen, PIP, tilt-shift, and mosaic easy like a piece of cake. With Wondershare Filmora, you can ignite your YouTube videos with over 300 effects like Fashion, Beauty, BlockBuster, Travel, etc.

Richard Bennett
Richard Bennett is a writer and a lover of all things video.
Follow @Richard Bennett
Richard Bennett
Mar 27, 2024• Proven solutions
If you want to have more fans on your YouTube channel, it becomes really important to make your channel more attractive and fresh. YouTube banner is one of the important factors which represents the style, quality, and taste of your channel. Fortunately, there are many tools on the market that can help you make attractive banners. Therefore, we have brought you 10+ best-known YouTube banner makers that can enhance the beauty of your channel with their exceptionally amazing features. We will also let you know how to make a YouTube banner. Let’s explore.
You may also like: How to add custom thumbnails to YouTube videos >>
- Part 1: YouTube Banner Dimensions You Should Know
- Part 2: How to Make a YouTube Banner with Canva for Free
- Part 3: 10+ Best YouTube Banner Makers
Part 1: YouTube Banner Dimensions You Should Know
YouTube banner dimensions varied on different platforms, so you need to make the YouTube banner look great on desktop, tablet, and phone. According to Google , the recommended dimension is 2560 x 1440 px as the YouTube banner will be cropped if its size is too large. Minimum dimension is 2048 x 1152 px for uploading. The maximum width is 2560 x 423 px. The largest file size is 6MB. You can also add links to your own social media on YouTube banner, so it is a great place to recommend your other social media.
Part 2: How to Make a YouTube Banner with Canva for Free
There are so many tools that you can make a YouTube banner in the market, but it is not easy to find the right tool to make a banner if you can’t find the right tools. We have listed one way to make a YouTube banner below. You can use Wondershare Filmora to edit YouTube videos as it is designed to be a YouTube editor. Besides the basic editing including cropping/trimming and adding transitions, you can use it to add various text, more than 300 effects/filters, free audio, and more. It is also easy to make a YouTube intro. Download it to have a try!
Download Mac Version ](https://tools.techidaily.com/wondershare/filmora/download/ )
Step 1: Choose your template and layout
Canva is an online tool to make YouTube banner, so first you need to open it up . You are asked to log in.
After you’ve signed up for Canva you will see a variety of different templates. Scroll through them until you find YouTube Channel Art under Social Media & Email Headers.
This template will be the right size for a YouTube banner, but it will not show you the ‘safe zones’. Your banner will show up differently depending on the screen a viewer is watching on. Click here to download YouTube’s official template, which displays safe zones. You will be able to use it as a reference.
And Canva also provides you with sample layouts that you can build off of. They will include stock photos and text. Most are free, but some might cost a dollar.
If the one you happen to like isn’t free, don’t worry. It’s actually just the specific stock images being used in the example that cost money, and you’re probably planning on replacing those anyways.
Step 2: Import your image
Canva provides a selection of stock images you can use for free. You can find them by clicking on Elements in the menu on the far left, and then clicking on Free Photos.
If you’d rather use your own images, click on Upload at the bottom of that same menu on the left. You’ll have the option of uploading images from your computer or importing them from Facebook.
After you have found the image you want to use or loaded it into Canva, click on it and it will appear in your layout.
Step 3: Add text to YouTube banner
You can add various text after it is imported. There are lots of text templates in Canva, so just pick the one you like. You can also change text color and transparency to make it look great. Now to place it in the right position.
Step 4: Edit other elements
The layout you chose might include things like borders or backgrounds behind the text. You can change the colors of any of these just by clicking on them, then clicking on the color swatch in the top left corner of your design area.
Step 5: Download YouTube banner
Once you finish the editing, there is a download button in the top right corner of your screen. Click on it when you are finished to save your new channel art to your computer. It supports JPEG, PNG, and PDF. Now upload it to YouTube. So simple. Isn’t it?
Part 3: 10+ Best YouTube Banner Makers
1. Canva:
Canva is probably the most popular site for making channel art, for good reason. It has over 8000 templates for different kinds of graphics, including YouTube channel art, and there’s a huge variety of stock photos available either for free or $1. On Canva, creating your perfect banner is as easy as dragging and dropping images into a pre-built layout. Resizing is automatic, and you can flip/rotate or apply filters in just a few clicks
Pros: It contains millions of stock images, about 100 professional layouts, and lots of stunning filters.
Cons: Some high-quality images can be accessed only after payment of $1.
Price: The best thing to know is that this tool is available for free.
2. Wondershare PixStudio
Wondershare PixStudio is an all-in-one and powerful online graphic design maker for everyone. It has various types of templates for YouTube Thumbnails, Logos, Posters, etc. You can create a beautiful design by simply dragging and dropping the elements and photos. The online platform is free to use all templates, just One-Click to download your creations, and share to your Facebook, Instagram Story, and YouTube Thumbnails, etc. immediately.
Pros:
- Various types of templates
- Simple and Fast Design
- Background remover
Cons: The features of removing background be used after payment of $7.99 per month.
Price: The best thing to know is that this tool is available for free.
3. Fotor:
The makers of Fotor describe it as a ‘revolutionary photo editor and graphic designer’, and it is certainly a powerful tool. Fotor allows you to do a lot of fine editing on your photos – brightness, saturation, and color temperature are just a few of the things you can adjust – and its design feature is perfect for YouTube channel art.
Fotor has templates for YouTube channel art and a lot of fun sticker-like graphics. The Design interface is very similar to Canva, if slightly more complicated.
Pros: Complete art can be created within a few minutes and contains dozens of templates.
Cons: Little difficult to use for beginners.
Price: Free
4. Photovisi:
It is a great source of inspiration for your YouTube channel where you can easily design, save and share your customized banner.
Pros: It automatically adjusts the size of the banner to the required format and is loaded with unlimited themes. Works on Android, Windows, Mac, and iOS.
Cons: Demand some special skills for usage.
Price: It is available for free at the official website
5. iKomee:
It is possible to have customized results for your YouTube banner designing using the iKomee platform where few minutes are enough to create wonders. It is one of the most loved tools of all professionals.
Pros: Contains lots of cool templates for channel art.
Cons: Limited themes and layouts.
Price: Available for free.
6. Banners Nack:
Here is one of the most wonderful YouTube banner maker for you that can be accessed online with easy to use interface where one can design animated, static HTML5 with interactive banner ads.
Pros: Professional, easy to use platform with rich quality fonts, stock images, and animated effects.
Cons: Little costly.
Price: Users can go ahead with premium plans where the basic plan is worth $12/month and a professional plan is $18/month with a business plan offer of $24 per month.
7. BeFunky:
BeFunky allows users to create meaningful banners for YouTube business building. The platform consists of numerous effortless options for banner designs and the drag and drops features make everything much easier. It is possible to boost traffic on your YouTube channel with this highly ranked banner maker.
Pros: Four-step banner-making process that can be followed by beginners too.
Cons: The uploading and downloading process takes more time due to heavy projects.
Price: Get started for free.
8. Picmonkey:
With PicMonkey.com you will be able to get customized, readymade banners with a perfect look. It is much easier to make selections for fonts, colors, and graphics with advanced templates here.
Pros: The best platform to enhance your creativity; users will be able to get perfect sharpness of quality.
Cons: File size is more for output banner and special features can be accessed only after payment.
Price: Free trial.
9. iPiccy:
The number of steps to be followed for designing a YouTube banner here completely depends upon your demand of end banner design type. Generally, four-step method is capable enough to provide you professional output with proper cropping dimensions and small file size for download
Pros: Various additional features are available like adding text etc so that highly customized designs can be created for YouTube Banners.
Cons: Demands more time of the user for making quality banner.
Price: Get started for free within a few seconds.
10. Adobe Spark:
Adobe Spark is one of the amazing online YouTube banner makers that helps you create the desired banner for your YouTube channel with ease. All that you need to do is browse to the site and pick the ‘YouTube channel art’ option to get the YouTube banner of the right size, though there are other options as well. Due to its easily customizable features, you can alter or change the background completely and try different color combinations to match your brand’s logo.
Pros:
- The drag-n-drop feature of Adobe Spark enables you to craft eye-catching and engaging banners effortlessly.
- Adobe Spark offers you the freedom to experiment with unlimited alterations in alignments, text, layouts, and themes like a trusted YouTube banner creator.
Cons: Though Adobe Spark is free, it annoys the users when it automatically adds Adobe Spark’s watermark logo to your creation. To get it removed, you must be an active subscriber of Adobe products.
11. Fotojet:
FotoJet being a reliable YouTube banner maker assists you in creating personalized banners using numerous free templates. You get hold of interesting YouTube banner without toiling with the intricacies of graphic designing. Impressing your visitors with your unique and brand new banner from FotoJet YouTube banner creator is class apart.
Pros: It offers you the flexibility to add anything and everything on your channel art and upload it on YouTube right away.
Cons: Similar to Adobe Spark, FotoJet too adds a watermark logo of its name to your creation which is again a bit of nuisance.
Conclusion
Want to make your YouTube video more attractive and beautiful? Wondershare Filmora is such video editing software designed for YouTube creators. It not only allows you to cut, trim, crop, zoom, reverse, rotate the video clips, but also makes the advanced features like green screen, PIP, tilt-shift, and mosaic easy like a piece of cake. With Wondershare Filmora, you can ignite your YouTube videos with over 300 effects like Fashion, Beauty, BlockBuster, Travel, etc.
Richard Bennett
Richard Bennett is a writer and a lover of all things video.
Follow @Richard Bennett
- Title: In 2024, Professional Filmmaking Made Easy with Right Lenses
- Author: Thomas
- Created at : 2024-05-31 12:42:34
- Updated at : 2024-06-01 12:42:34
- Link: https://youtube-help.techidaily.com/in-2024-professional-filmmaking-made-easy-with-right-lenses/
- License: This work is licensed under CC BY-NC-SA 4.0.
