In 2024, Professional Shooters' Guide to Stability
Professional Shooters’ Guide to Stability
Best Camera Stabilizers for YouTube

Richard Bennett
Mar 27, 2024• Proven solutions
When a YouTube video is shaky it’s hard to focus on what is happening in it. Camera shake is a huge distraction and, if it is a persistent problem in your YouTube videos, it will be hard to get subscribers. Shakiness is an easy problem to correct. With a bit of equipment, or a bit of creativity, it is easy to make sure your YouTube videos are nice and smooth.
Best Camera Stabilizers for YouTube
This article will talk about different types of equipment you can use to stabilize your camera. For vloggers on a budget, there is even one tip on stabilizing your camera without camera equipment. Here are some of the best stabilizers for YouTube videos:
Part 1. Tripod
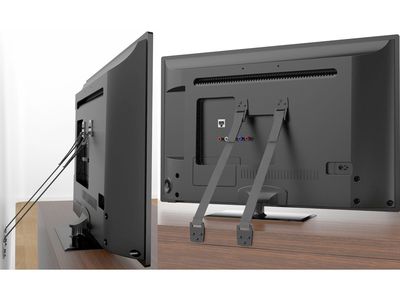
A tripod is a three-legged stand you can mount your camera to. The height of a tripod can be adjusted so you can set your camera up at the level that works best for you. Because tripods can stand alone you can set your camera up to record yourself without needing a helper.
Tripods are the best choice for vlogs that revolve around you standing (or sitting) and delivering information, like opinion or beauty vlogs.
Part 2. Monopod
A monopod is like a tripod in the sense that you can adjust its height, but unlike a tripod a monopod has only one leg and cannot stand by itself. You will need a helper to stay with your camera if you plan to film yourself using a monopod. A monopod is more portable than a tripod, though, and can be used in a wider variety of places. You can even use a monopod to record aerial shots just by picking it up.
Part 3. Pistol Grip
A pistol grip is a handle you mount your camera to the top of. You can carry your camera around on top of the pistol grip, or you can mount the grip itself to your tripod or monopod. Once the grip is mounted you can use it to more easily control your camera movements. This is a great way to get even, steady, camera pans.
Part 4. Selfie Stick
A selfie stick is a long pole you mount your smartphone to one end of in order to take selfies from farther away. Selfie sticks also make great stabilizers if you are shooting video on your smartphone. To stabilize your smartphone place the handle of your selfie stick on the ground as if it were a monopod. When you are shooting using a selfie stick you can also hold it up in the air to get interesting high angle shots.
Some YouTubers even like to shoot selfie-style vlogs where the hold the selfie stick just like they are taking a photo of themselves.
Part 5. OIS – Optical Image Stabilization
‘Optical Image Stabilization’ is fairly new hardware which is built in to a lot of new smartphones, like the iPhone 6S Plus and the Samsung Galaxy S6 Edge Plus. OIS reduces camera shake by a lot, although it is still a good idea to stabilize your smartphone while you record. OIS will also help you take sharper still photos without using any software.
Part 6. Tables, Desks, Trees, ect
If you do not have equipment, or cannot bring it where you want to shoot, then you can still record steady footage. You just have to get creative with where you put your camera. Any stable surface will do. You can set your camera down on a shelf in your house, a picnic bench, or up in a tree.
If you are able to lean your elbows onto a desk or table while you hold your camera then that will also significantly cut down on camera shake. This works best for footage you are not in, or which you can have a helper film for you. If you are open to shooting a selfie-style vlog then you can use anything you can rest your hand on, like a fence or a railing.
Richard Bennett
Richard Bennett is a writer and a lover of all things video.
Follow @Richard Bennett
Richard Bennett
Mar 27, 2024• Proven solutions
When a YouTube video is shaky it’s hard to focus on what is happening in it. Camera shake is a huge distraction and, if it is a persistent problem in your YouTube videos, it will be hard to get subscribers. Shakiness is an easy problem to correct. With a bit of equipment, or a bit of creativity, it is easy to make sure your YouTube videos are nice and smooth.
Best Camera Stabilizers for YouTube
This article will talk about different types of equipment you can use to stabilize your camera. For vloggers on a budget, there is even one tip on stabilizing your camera without camera equipment. Here are some of the best stabilizers for YouTube videos:
Part 1. Tripod
A tripod is a three-legged stand you can mount your camera to. The height of a tripod can be adjusted so you can set your camera up at the level that works best for you. Because tripods can stand alone you can set your camera up to record yourself without needing a helper.
Tripods are the best choice for vlogs that revolve around you standing (or sitting) and delivering information, like opinion or beauty vlogs.
Part 2. Monopod
A monopod is like a tripod in the sense that you can adjust its height, but unlike a tripod a monopod has only one leg and cannot stand by itself. You will need a helper to stay with your camera if you plan to film yourself using a monopod. A monopod is more portable than a tripod, though, and can be used in a wider variety of places. You can even use a monopod to record aerial shots just by picking it up.
Part 3. Pistol Grip
A pistol grip is a handle you mount your camera to the top of. You can carry your camera around on top of the pistol grip, or you can mount the grip itself to your tripod or monopod. Once the grip is mounted you can use it to more easily control your camera movements. This is a great way to get even, steady, camera pans.
Part 4. Selfie Stick
A selfie stick is a long pole you mount your smartphone to one end of in order to take selfies from farther away. Selfie sticks also make great stabilizers if you are shooting video on your smartphone. To stabilize your smartphone place the handle of your selfie stick on the ground as if it were a monopod. When you are shooting using a selfie stick you can also hold it up in the air to get interesting high angle shots.
Some YouTubers even like to shoot selfie-style vlogs where the hold the selfie stick just like they are taking a photo of themselves.
Part 5. OIS – Optical Image Stabilization
‘Optical Image Stabilization’ is fairly new hardware which is built in to a lot of new smartphones, like the iPhone 6S Plus and the Samsung Galaxy S6 Edge Plus. OIS reduces camera shake by a lot, although it is still a good idea to stabilize your smartphone while you record. OIS will also help you take sharper still photos without using any software.
Part 6. Tables, Desks, Trees, ect
If you do not have equipment, or cannot bring it where you want to shoot, then you can still record steady footage. You just have to get creative with where you put your camera. Any stable surface will do. You can set your camera down on a shelf in your house, a picnic bench, or up in a tree.
If you are able to lean your elbows onto a desk or table while you hold your camera then that will also significantly cut down on camera shake. This works best for footage you are not in, or which you can have a helper film for you. If you are open to shooting a selfie-style vlog then you can use anything you can rest your hand on, like a fence or a railing.
Richard Bennett
Richard Bennett is a writer and a lover of all things video.
Follow @Richard Bennett
Apple’s Mobile Posting Playbook for YouTube Success
Create High-Quality Video - Wondershare Filmora
An easy and powerful YouTube video editor
Numerous video and audio effects to choose from
Detailed tutorials provided by the official channel
Initially, iOS users had the option to load videos directly to YouTube via the tap-to-upload feature. However, this option is missing in the recent iOS devices versions. Therefore, many users search for possible ways to post a video on YouTube from iPhone. For this, you have to put some considerations into place before moving on. The video title length should not exceed 100 characters, while the description is maintained at 5,000 characters. Also, ensure the video length doesn’t exceed 15 minutes. Let’s roll out the best ways to upload your videos and make that big catch on subscribers.

In this article
01 [ How to upload a video to YouTube from iPhone or iPad](#Part 1)
02 [Why your phone doesn’t post videos to YouTube](#Part 2)
03 [Make your YouTube video better with Filmora](#Part 3)
How to upload a video to YouTube from iPhone or iPad
Are you ready to start on that big adventure and share your videos on YouTube? Follow these steps to learn how to upload a video to YouTube from your iPhone.
Method 1: Upload using the YouTube iOS app
Using the YouTube app is the simplest way to upload your YouTube videos. The YouTube app should be installed on your iOS device.
Step 1. Launch the YouTube app on your device, then sign in to your account. If you don’t have an account yet, you will need to “Sign up” for a new one before continuing the upload process.
Step 2. Click on the “+” icon found at the bottom of the screen.
Step 3. Then choose the “Upload a video” option from the populated list of options.
Step 4. Check out the pop-up that appears and “Allow access” to it.
Step 5. Edit your video to your preference by trimming or cropping as you desire. Then click on the “Next” option.

Step 6. Add “title and description” to your video. Remember, the title should contain less than 100 characters and the description no more than 500 characters.
Step 7. Then set the visibility mode as “Public” to enable you to share your video over the internet.
Step 8. Click on the “Upload” button to finally upload your video to YouTube.

Method 2: Upload using Photo App
The Photo App has a “Share” option that you can use to upload your videos to YouTube. Here is the guide.
Step 1. Go to your iOS device and tap on the “Photos” app.
Step 2. Then tap on the “Videos Folder” to locate the video you wish to upload to YouTube.

Step 3. Next, tap on the video that you want to upload.
Step 4. Then tap on the “Share” icon located at the bottom left of your iOS device screen.
Step 5. You’ll then access a “Share” menu from where you have various share options for your video.
Step 6. Choose the “YouTube” option to continue to share your video there. At this juncture, ensure you have logged in to your Google Account.

Step 7. You need to provide a “Title” and “Description” of your video. Then go to the “Privacy” Options and make your video “Public.”
Step 8. Finally, tap on the “Publish” tab found at the top-right corner of your screen to make your video viewable by the public.

Method 3: Upload video to YouTube using Safari
Safari is another alternative method to upload a video to YouTube.
Step 1. First, go to “youtube.com” on Safari and sign in.

Step 2. Then tap on the “account” icon at the top right side of the screen.
Step 3. Hit on the “Upload” icon and wait to be redirected to the YouTube Studio desktop site.
Step 4. Click on the “Select Files” option.
Step 5. Choose the video you wish to add to YouTube from the “Photo” library and tap on the “Add” button.

Step 6. Add your video’s “title and description” and hit the “Next” button.
Step 7. Tap on the “Next” button once more to go to the “Visibility” page.
Step 8. Select the “Public” option to upload your video to the public.
Why your phone doesn’t post videos to YouTube
Despite learning how to upload to YouTube from iPhone, you may be perplexed to realize that your phone refuses to post videos to YouTube. What could be the reason?
1) YouTube issues
In most cases, the problem doesn’t arise from your phone but from YouTube. This streaming app may also experience some hitches along the way. Remember that even if your phone sync with your YouTube account to upload videos from the “Camera Roll,” YouTube isn’t managed from the Camera Roll but the YouTube app directly. You can solve the issue by signing out of your YouTube account and signing back in.
2) Connection Strength
Some videos may appear quite large and cause a time-out during the upload process. Check your Wi-Fi or internet connection strength to determine if it needs a boost or wait until the streaming strength is strong for a quick upload. Test your internet speed by searching “internet test speed” on Google. Then click the “Run Speed Test” in the search box. A window will open and give you an estimate of the Mbps that your connection is operating at. If too low, switch to other alternatives.
3) Verify your YouTube account
Verifying your account will help you to enjoy YouTube’s full features. It’s then that you’ll manage to upload videos without any drawbacks. Also, that’s when you’ll manage to upload longer videos that go beyond the 15-minute duration.
4) Pay attention to the video size
There is a limit for videos to post to YouTube. If it is too large or long, the upload will cancel before completion.
5) Be patient
YouTube can save your partial upload for 24 hours. So, you can continue to upload from where you left. Learn to be patient as there could be a surge of user traffic, especially during evenings.
Make your YouTube video better with Filmora
Good video quality will make you go miles ahead of your marketing gig. You can use Filmora mobile application to make your videos look better before uploading them to YouTube. This intuitive video editing app has advanced features and several ways to compose creative videos.
- Stunning video effects that let you add animated text to video
- Easily record your voice-overs with its perfect sound effects
- Split functionality that allows you to slice your video footage into two or more separate video clips
- Playback your clips in reverse and adjust the speed for fast or slow motion
- Select the best aspect ratio for your video
- Advanced camera to create emoji selfies and other video beautification
- Directly share your videos to social media sites like YouTube and Facebook.
Check out the steps to edit your video with Filmora on your iOS device
Step 1. Download and install Filmora
For iOS devices, go to the “Apple Store” to download and install the app. Also, allow it to access your videos, camera, and pictures in the process.
Step 2. Import video
You may already have a video in your library that you wish to upload to YouTube. Nonetheless, you can shoot a video afresh to add. To shoot one, you need to settle on a topic before recording and downloading other images you may need. Ensure you watch what you are filming and use adequate lighting during the shooting process.
Next, begin to import your video file. Just open the application and select the “Create new video” option. Then choose the “Video” icon and select a folder that contains the video to be added. Hit the “Add” button from the bottom right corner.
Step 3. Edit video
Filmora has several editing features to make your video better. Use the “Edit tools” feature to turn your video into an impeccable piece. Easily add filters, adjust the speed, or create subtitles, among other functions. You can also split, trim, or delete the unwanted clip parts.
It is important to add a title and description to your video. Just use the “Titles” button to add the title. Other precepts that you can add include transitions, sound like voice-over,
Step 4. Export and share
You’ve just finished creating and editing your video. Click on the “Save” tab and let the application export your video. Then select the “Save to Camera Roll” option to save the video to your iPhone. Finally, you can upload and share the video directly to your YouTube account.
Conclusion
● However, it appears to be a difficult task; you must have found relief after going through these procedures. You don’t need prior knowledge on how to upload a video to YouTube from your iPhone. Several options are at your disposal. You can use the Safari, YouTube app, or the Photo app to upload your videos. The better part is that you can create top-notch videos with Filmora. This mobile video editing app has a lot to offer, ensuring quality content.
Initially, iOS users had the option to load videos directly to YouTube via the tap-to-upload feature. However, this option is missing in the recent iOS devices versions. Therefore, many users search for possible ways to post a video on YouTube from iPhone. For this, you have to put some considerations into place before moving on. The video title length should not exceed 100 characters, while the description is maintained at 5,000 characters. Also, ensure the video length doesn’t exceed 15 minutes. Let’s roll out the best ways to upload your videos and make that big catch on subscribers.
In this article
01 [ How to upload a video to YouTube from iPhone or iPad](#Part 1)
02 [Why your phone doesn’t post videos to YouTube](#Part 2)
03 [Make your YouTube video better with Filmora](#Part 3)
How to upload a video to YouTube from iPhone or iPad
Are you ready to start on that big adventure and share your videos on YouTube? Follow these steps to learn how to upload a video to YouTube from your iPhone.
Method 1: Upload using the YouTube iOS app
Using the YouTube app is the simplest way to upload your YouTube videos. The YouTube app should be installed on your iOS device.
Step 1. Launch the YouTube app on your device, then sign in to your account. If you don’t have an account yet, you will need to “Sign up” for a new one before continuing the upload process.
Step 2. Click on the “+” icon found at the bottom of the screen.
Step 3. Then choose the “Upload a video” option from the populated list of options.
Step 4. Check out the pop-up that appears and “Allow access” to it.
Step 5. Edit your video to your preference by trimming or cropping as you desire. Then click on the “Next” option.
Step 6. Add “title and description” to your video. Remember, the title should contain less than 100 characters and the description no more than 500 characters.
Step 7. Then set the visibility mode as “Public” to enable you to share your video over the internet.
Step 8. Click on the “Upload” button to finally upload your video to YouTube.
Method 2: Upload using Photo App
The Photo App has a “Share” option that you can use to upload your videos to YouTube. Here is the guide.
Step 1. Go to your iOS device and tap on the “Photos” app.
Step 2. Then tap on the “Videos Folder” to locate the video you wish to upload to YouTube.
Step 3. Next, tap on the video that you want to upload.
Step 4. Then tap on the “Share” icon located at the bottom left of your iOS device screen.
Step 5. You’ll then access a “Share” menu from where you have various share options for your video.
Step 6. Choose the “YouTube” option to continue to share your video there. At this juncture, ensure you have logged in to your Google Account.
Step 7. You need to provide a “Title” and “Description” of your video. Then go to the “Privacy” Options and make your video “Public.”
Step 8. Finally, tap on the “Publish” tab found at the top-right corner of your screen to make your video viewable by the public.
Method 3: Upload video to YouTube using Safari
Safari is another alternative method to upload a video to YouTube.
Step 1. First, go to “youtube.com” on Safari and sign in.
Step 2. Then tap on the “account” icon at the top right side of the screen.
Step 3. Hit on the “Upload” icon and wait to be redirected to the YouTube Studio desktop site.
Step 4. Click on the “Select Files” option.
Step 5. Choose the video you wish to add to YouTube from the “Photo” library and tap on the “Add” button.
Step 6. Add your video’s “title and description” and hit the “Next” button.
Step 7. Tap on the “Next” button once more to go to the “Visibility” page.
Step 8. Select the “Public” option to upload your video to the public.
Why your phone doesn’t post videos to YouTube
Despite learning how to upload to YouTube from iPhone, you may be perplexed to realize that your phone refuses to post videos to YouTube. What could be the reason?
1) YouTube issues
In most cases, the problem doesn’t arise from your phone but from YouTube. This streaming app may also experience some hitches along the way. Remember that even if your phone sync with your YouTube account to upload videos from the “Camera Roll,” YouTube isn’t managed from the Camera Roll but the YouTube app directly. You can solve the issue by signing out of your YouTube account and signing back in.
2) Connection Strength
Some videos may appear quite large and cause a time-out during the upload process. Check your Wi-Fi or internet connection strength to determine if it needs a boost or wait until the streaming strength is strong for a quick upload. Test your internet speed by searching “internet test speed” on Google. Then click the “Run Speed Test” in the search box. A window will open and give you an estimate of the Mbps that your connection is operating at. If too low, switch to other alternatives.
3) Verify your YouTube account
Verifying your account will help you to enjoy YouTube’s full features. It’s then that you’ll manage to upload videos without any drawbacks. Also, that’s when you’ll manage to upload longer videos that go beyond the 15-minute duration.
4) Pay attention to the video size
There is a limit for videos to post to YouTube. If it is too large or long, the upload will cancel before completion.
5) Be patient
YouTube can save your partial upload for 24 hours. So, you can continue to upload from where you left. Learn to be patient as there could be a surge of user traffic, especially during evenings.
Make your YouTube video better with Filmora
Good video quality will make you go miles ahead of your marketing gig. You can use Filmora mobile application to make your videos look better before uploading them to YouTube. This intuitive video editing app has advanced features and several ways to compose creative videos.
- Stunning video effects that let you add animated text to video
- Easily record your voice-overs with its perfect sound effects
- Split functionality that allows you to slice your video footage into two or more separate video clips
- Playback your clips in reverse and adjust the speed for fast or slow motion
- Select the best aspect ratio for your video
- Advanced camera to create emoji selfies and other video beautification
- Directly share your videos to social media sites like YouTube and Facebook.
Check out the steps to edit your video with Filmora on your iOS device
Step 1. Download and install Filmora
For iOS devices, go to the “Apple Store” to download and install the app. Also, allow it to access your videos, camera, and pictures in the process.
Step 2. Import video
You may already have a video in your library that you wish to upload to YouTube. Nonetheless, you can shoot a video afresh to add. To shoot one, you need to settle on a topic before recording and downloading other images you may need. Ensure you watch what you are filming and use adequate lighting during the shooting process.
Next, begin to import your video file. Just open the application and select the “Create new video” option. Then choose the “Video” icon and select a folder that contains the video to be added. Hit the “Add” button from the bottom right corner.
Step 3. Edit video
Filmora has several editing features to make your video better. Use the “Edit tools” feature to turn your video into an impeccable piece. Easily add filters, adjust the speed, or create subtitles, among other functions. You can also split, trim, or delete the unwanted clip parts.
It is important to add a title and description to your video. Just use the “Titles” button to add the title. Other precepts that you can add include transitions, sound like voice-over,
Step 4. Export and share
You’ve just finished creating and editing your video. Click on the “Save” tab and let the application export your video. Then select the “Save to Camera Roll” option to save the video to your iPhone. Finally, you can upload and share the video directly to your YouTube account.
Conclusion
● However, it appears to be a difficult task; you must have found relief after going through these procedures. You don’t need prior knowledge on how to upload a video to YouTube from your iPhone. Several options are at your disposal. You can use the Safari, YouTube app, or the Photo app to upload your videos. The better part is that you can create top-notch videos with Filmora. This mobile video editing app has a lot to offer, ensuring quality content.
Also read:
- [New] 2024 Approved The Ultimate List of Android MOBAs
- [New] In 2024, Key Approaches to Mute Motion Capture
- [New] Integrating Social Video Platforms with HDTV for 2024
- [New] Mix Magic How to Download Top DJ Content
- [New] Steps to Save Your Tweet Videos in a Compressed MP3 File Form
- [Updated] In 2024, Instantaneously Showcasing Archived Video Sessions via Facebook Live
- 2024 Approved Football Video Analysis Top YouTube Infographics
- 2024 Approved Future of Techno-Gaming Revenue
- 2024 Approved Leading Tech Review The Top 10 Screen Recorders
- 2024 Approved Perfect Harmony Strategies for Top-Tier Audio Recording
- In 2024, Navigating the Seas of Success Utilizing Social Blade for YouTube Data
- In 2024, Top FIFA Film Analysis on YouTube Infographics
- In 2024, Top Picks for Virtual Globe Tourists
- Preparing for Your Purchase: A Checklist of 5 Crucial Points About Smartwatches
- Reviewing the SYMA X5C RC Drone: A Great Deal for New Flyers
- Shift Key Failure Solved: Tips for Restoring Functionality
- Troubleshooting Guide: No More Crashes in Updated Version of Classic Diablo 2
- Title: In 2024, Professional Shooters' Guide to Stability
- Author: Thomas
- Created at : 2024-12-10 17:34:56
- Updated at : 2024-12-16 17:41:55
- Link: https://youtube-help.techidaily.com/in-2024-professional-shooters-guide-to-stability/
- License: This work is licensed under CC BY-NC-SA 4.0.