
:max_bytes(150000):strip_icc()/how-to-sync-contacts-from-iphone-to-mac-5714752-2c82289fe1f84868909ac8a60960d240.jpg)
"In 2024, Revamping YouTube Images Adding Electric Neon Frames"
Revamping YouTube Images: Adding Electric Neon Frames
Your YouTube video, or any other clip published on any forum, gets a larger number of hits if it has an attractive thumbnail. And, the fact is, a thumbnail becomes 10x more attractive when the main character that the image has have a neon border around it.
With that said, in the following sections, you will learn a couple of methods on how to add a YouTube thumbnail border around the main characters and/or objects that are significant to the clip.
In this article
01 Add Glowing Neon Border to YouTube Thumbnail with Filmora
02 Add a Glowing Neon Border in YouTube Thumbnail with Canva
03 Outline a Person in a YouTube Thumbnail with Photoshop
Part 1: How to Add Neon Border to YouTube Thumbnail for Free with Filmora
Being one of the most versatile and intuitive post-production tools available in the market today, Wondershare Filmora X allows you to add a neon border to a YouTube thumbnail quite conveniently. You can learn how to get this done on Windows or Mac by following the steps given below.
For Win 7 or later (64-bit)
For macOS 10.12 or later
Step 1: Define Project Settings and Add Image to the Timeline
Launch Wondershare Filmora X on your PC (a MacBook Pro M1 is used here), ensure that the project aspect ratio is set to 16:9 (Widescreen) on the splash screen, and click New Project. On the main interface, click the Preview quality and display settings icon from the upper-right area of the Timeline, click Change Project Aspect Ratio, click to select 1280 x 720 (HD) from the Resolution menu of the Project Settings box, and click OK to save the custom project settings.

Then select My Media from the menu bar if not already selected, click Project Media from the navigation pane, and click Import from the Media box to select and import the image of the main character or object that you want to use in the thumbnail.

Now, drag the image from the Media box to the Timeline at the bottom.

Step 2: Clear Image Background, Add Border, and Add Custom Background
Go to Effects from the menu bar, click to select the Default tab and then AI Portrait from the navigation pane, and click and drag the Human Segmentation preset from the right box, and place it over the image track in the Timeline.

Double-click the image layer, scroll down the upper-left box to the Video Effects section, and use the Edge Thickness and Edge Feather sliders to adjust the character’s edges to make them as realistic as possible. Click OK when done.

Next, click and drag the Human Border preset over the image track in the Timeline, and follow the same procedure to customize the border. This will give the character a neon border effect.

Now, use the method explained earlier to import a custom image for the background, and drag and place it under the previous track in the Timeline.

If you are running the latest version of Filmora, you will find there are some neon light effects available under AI Portrait as well.

Step 3: Add Titles to Thumbnail
Go to Titles from the menu bar, click to select the Default tab and then Lower 3rds from the navigation pane, and click and drag your preferred lower-third preset from the right window to a separate layer in the Timeline. Double-click the lower-third layer, and use the available options in the upper-left window to change the text, its color, etc., and drag the textbox to place it to your preferred position on the image as well. Click OK to save the changes.
Next, click to select Titles from the navigation pane, and drag your preferred title from the right window to the upper-most track in the Timeline. Now use the method explained earlier to edit the text, its color, position, etc. to make it look professional.

For more tips and tricks for creating YouTube thumbnail, you can check this You Tube thumbnail creating guide.
Step 4: Get the Neon Border Thumbnail
Click the Snapshot (Camera) icon from the upper-right area of the Timeline, go to My Media from the menu bar, right-click the thumbnail of the screenshot you captured, and click Reveal in Finder (on Mac) or Reveal in Explorer (on Windows) to get to the folder the YouTube thumbnail border is saved in.

Part 2: How to Add a Glowing Neon Border in Your YouTube Thumbnail with Canva
Canva is another intuitive editing program that works on the web interface rather than having you download and install an app on your PC. You can add a neon border for YouTube thumbnails using Canva by following the instructions given below:
Step 1: Define Project Settings and Add a Background
After signing in to your Canva account, click Create a design from the top-right corner of the page, click Custom size from the bottom, define 1280 and 720 in the Width and Height fields on the box that appears respectively, and click Create new design.

Now, click to select Background from the navigation bar on the left (if the Background tool is not visible, click More and then choose Background from the expanded list), and click to select a background from the images available in the center pane.

Step 2: Upload an Image and Add Effects
Click Uploads from the navigation bar, click the More icon from the right of the Upload media button present at the top of the center pane, choose your preferred method to upload the image (with the transparent background) that you want to use, upload the image, and drag it from the center pane to the Canvas.
Note: You can use any of the tools available online to remove the background from your image for free.

To add a YouTube thumbnail border, make sure that the image that you added to the Canvas is selected, click the Duplicate icon from the upper-right area, and use the scaling handles of the copy of the image to increase its size a bit. Reposition the image back to its original location as well.
Then, click Edit image from the upper-left corner of the Canvas, click Duotone from the Edit image pane at the center, if need be, click See all, choose your preferred duotone effect to apply on the image, choose your preferred highlight and shadow colors from the box that appears next, and click Back from the top of the pane.

Next, click See all next to the Adjust section from the center pane, and drag the Blur slider to the right to increase the blur effect on the image.

Step 3: Position the Layers
While keeping the duplicate image selected, click the Position button from the upper-right area of the Canvas, and click Background to send the second image behind the first one to get the neon border effect for the photo.

Part 3: How to Outline a Person in a YouTube Thumbnail with Photoshop
Because YouTube thumbnails are nothing but static images, creating YouTube thumbnail border with Adobe Photoshop is comparatively easier. The process of doing this is given below:
Step 1: Define Document Preferences and Import an Image
Launch Adobe Photoshop on your PC, click Create new, and on the New Document customization box, define the width and height values to 1280 and 720 pixels respectively. Select Transparent from the Background Contents menu as well if not already selected. Click Create from the bottom to create a new Photoshop document with the specified document settings. Next, open the folder that contains the source image, drag the photo to Photoshop, and press Enter to place the photo.

Step 2: Remove Background from the Image
Make sure that the image layer is selected in the Layers panel on the right, go to Select from the menu bar at the top, and click Subject. From the bottom of the Layers panel, click the Add a mask icon to get rid of the background, leaving only the human on the Canvas.

Step 3: Add a Custom Background and an Outline Around the Subject
Use the method explained earlier to import a background image of your choice to Photoshop. Drag the background image layer to the bottom in the Layers panel. Double-click the masked layer, click to select Stroke from the left pane of the Layer Style box, and use the options available on the right to manage the size, color, position, etc. of the stroke that has been added around the human subject. Click OK when done, and then export the image normally to use it as a YouTube thumbnail border.

Summary
It is important to know that the default resolution of a YouTube thumbnail is 1280 x 720 pixels that is usually written and referred to as 720p. While adding a YouTube thumbnail border, it is also imperative to have a good sense of color combination and fonts. Furthermore, a decent tool like Wondershare Filmora X must be used to add an appealing neon border around the main subject in the thumbnail image easily and quickly.
02 Add a Glowing Neon Border in YouTube Thumbnail with Canva
03 Outline a Person in a YouTube Thumbnail with Photoshop
Part 1: How to Add Neon Border to YouTube Thumbnail for Free with Filmora
Being one of the most versatile and intuitive post-production tools available in the market today, Wondershare Filmora X allows you to add a neon border to a YouTube thumbnail quite conveniently. You can learn how to get this done on Windows or Mac by following the steps given below.
For Win 7 or later (64-bit)
For macOS 10.12 or later
Step 1: Define Project Settings and Add Image to the Timeline
Launch Wondershare Filmora X on your PC (a MacBook Pro M1 is used here), ensure that the project aspect ratio is set to 16:9 (Widescreen) on the splash screen, and click New Project. On the main interface, click the Preview quality and display settings icon from the upper-right area of the Timeline, click Change Project Aspect Ratio, click to select 1280 x 720 (HD) from the Resolution menu of the Project Settings box, and click OK to save the custom project settings.
Then select My Media from the menu bar if not already selected, click Project Media from the navigation pane, and click Import from the Media box to select and import the image of the main character or object that you want to use in the thumbnail.
Now, drag the image from the Media box to the Timeline at the bottom.
Step 2: Clear Image Background, Add Border, and Add Custom Background
Go to Effects from the menu bar, click to select the Default tab and then AI Portrait from the navigation pane, and click and drag the Human Segmentation preset from the right box, and place it over the image track in the Timeline.
Double-click the image layer, scroll down the upper-left box to the Video Effects section, and use the Edge Thickness and Edge Feather sliders to adjust the character’s edges to make them as realistic as possible. Click OK when done.
Next, click and drag the Human Border preset over the image track in the Timeline, and follow the same procedure to customize the border. This will give the character a neon border effect.
Now, use the method explained earlier to import a custom image for the background, and drag and place it under the previous track in the Timeline.
If you are running the latest version of Filmora, you will find there are some neon light effects available under AI Portrait as well.
Step 3: Add Titles to Thumbnail
Go to Titles from the menu bar, click to select the Default tab and then Lower 3rds from the navigation pane, and click and drag your preferred lower-third preset from the right window to a separate layer in the Timeline. Double-click the lower-third layer, and use the available options in the upper-left window to change the text, its color, etc., and drag the textbox to place it to your preferred position on the image as well. Click OK to save the changes.
Next, click to select Titles from the navigation pane, and drag your preferred title from the right window to the upper-most track in the Timeline. Now use the method explained earlier to edit the text, its color, position, etc. to make it look professional.
For more tips and tricks for creating YouTube thumbnail, you can check this You Tube thumbnail creating guide.
Step 4: Get the Neon Border Thumbnail
Click the Snapshot (Camera) icon from the upper-right area of the Timeline, go to My Media from the menu bar, right-click the thumbnail of the screenshot you captured, and click Reveal in Finder (on Mac) or Reveal in Explorer (on Windows) to get to the folder the YouTube thumbnail border is saved in.
Part 2: How to Add a Glowing Neon Border in Your YouTube Thumbnail with Canva
Canva is another intuitive editing program that works on the web interface rather than having you download and install an app on your PC. You can add a neon border for YouTube thumbnails using Canva by following the instructions given below:
Step 1: Define Project Settings and Add a Background
After signing in to your Canva account, click Create a design from the top-right corner of the page, click Custom size from the bottom, define 1280 and 720 in the Width and Height fields on the box that appears respectively, and click Create new design.
Now, click to select Background from the navigation bar on the left (if the Background tool is not visible, click More and then choose Background from the expanded list), and click to select a background from the images available in the center pane.
Step 2: Upload an Image and Add Effects
Click Uploads from the navigation bar, click the More icon from the right of the Upload media button present at the top of the center pane, choose your preferred method to upload the image (with the transparent background) that you want to use, upload the image, and drag it from the center pane to the Canvas.
Note: You can use any of the tools available online to remove the background from your image for free.
To add a YouTube thumbnail border, make sure that the image that you added to the Canvas is selected, click the Duplicate icon from the upper-right area, and use the scaling handles of the copy of the image to increase its size a bit. Reposition the image back to its original location as well.
Then, click Edit image from the upper-left corner of the Canvas, click Duotone from the Edit image pane at the center, if need be, click See all, choose your preferred duotone effect to apply on the image, choose your preferred highlight and shadow colors from the box that appears next, and click Back from the top of the pane.
Next, click See all next to the Adjust section from the center pane, and drag the Blur slider to the right to increase the blur effect on the image.
Step 3: Position the Layers
While keeping the duplicate image selected, click the Position button from the upper-right area of the Canvas, and click Background to send the second image behind the first one to get the neon border effect for the photo.
Part 3: How to Outline a Person in a YouTube Thumbnail with Photoshop
Because YouTube thumbnails are nothing but static images, creating YouTube thumbnail border with Adobe Photoshop is comparatively easier. The process of doing this is given below:
Step 1: Define Document Preferences and Import an Image
Launch Adobe Photoshop on your PC, click Create new, and on the New Document customization box, define the width and height values to 1280 and 720 pixels respectively. Select Transparent from the Background Contents menu as well if not already selected. Click Create from the bottom to create a new Photoshop document with the specified document settings. Next, open the folder that contains the source image, drag the photo to Photoshop, and press Enter to place the photo.
Step 2: Remove Background from the Image
Make sure that the image layer is selected in the Layers panel on the right, go to Select from the menu bar at the top, and click Subject. From the bottom of the Layers panel, click the Add a mask icon to get rid of the background, leaving only the human on the Canvas.
Step 3: Add a Custom Background and an Outline Around the Subject
Use the method explained earlier to import a background image of your choice to Photoshop. Drag the background image layer to the bottom in the Layers panel. Double-click the masked layer, click to select Stroke from the left pane of the Layer Style box, and use the options available on the right to manage the size, color, position, etc. of the stroke that has been added around the human subject. Click OK when done, and then export the image normally to use it as a YouTube thumbnail border.
Summary
It is important to know that the default resolution of a YouTube thumbnail is 1280 x 720 pixels that is usually written and referred to as 720p. While adding a YouTube thumbnail border, it is also imperative to have a good sense of color combination and fonts. Furthermore, a decent tool like Wondershare Filmora X must be used to add an appealing neon border around the main subject in the thumbnail image easily and quickly.
Cut the Cord with YouTube-MP3 Conversion Tools
Best Free YouTube to MP3 Converters You Should Know [Online/Win/Mac]

Benjamin Arango
Mar 27, 2024• Proven solutions
Hey, when you find a wonderful or dramatic song or music in a YouTube video, what would you like to do? For me, I want to download it and listen to it when I’m offline. How about you? Instead of tapping the frequently used links on the YouTube platform, you can convert YouTube to mp3 by using a YouTube to mp3 converter. Then you can always listen to music or audio whenever you want. Therefore, this article will show 10 best free YouTube to mp3 converters for you to convert a YouTube video to mp3, on both Windows and Mac. You will learn:
- Part 1: Best Free Online YouTube to MP3 Converters
- Part 2: YouTube to MP3 Converters for Windows and Mac [Free Download]
- Part 3: Bonus Tip—Edit and Cut MP3 with Wondershare Filmora
Warning and Notice: It is illegal when you misuse the content uploaded by other users on YouTube. If it is your content, then go ahead to download the YouTube video and convert it to mp3. You should follow the terms and conditions displayed on the YouTube website.
Part 1: 5 Free Online YouTube to MP3 Converters for Windows and Mac
Whether you’re using a Windows or a Mac computer, you can find a YouTube to MP3 converter that fits your need perfectly from the below list. In the following part, I will share with you some incredible online YouTube videos to MP3 converters. Enlighten and sharpen your skills on video conversion by exploring the discussed steps below:
- **1. YtMp3 Video Converter
- **2. Flvto Converter Tool
- **3. y2mate YouTube to MP3 Converter
- **4. YOUTUBETOMP3 Online
- **5. youtubetomp3music.com
1. YtMp3 Video Converter
This is a free online YouTube to MP3/MP4 converting tool. It will assist you to accomplish reliable YouTube video conversions at free of cost. There is no need to fill in any details for registration to make use of this online service. This platform offers you an immediate solution to convert YouTube to mp3.
- Visit https://ytmp3.cc/youtube-to-mp3/ to open the YtMp3 converter tool with your browser
- Copy your favorite video’s URL from YouTube
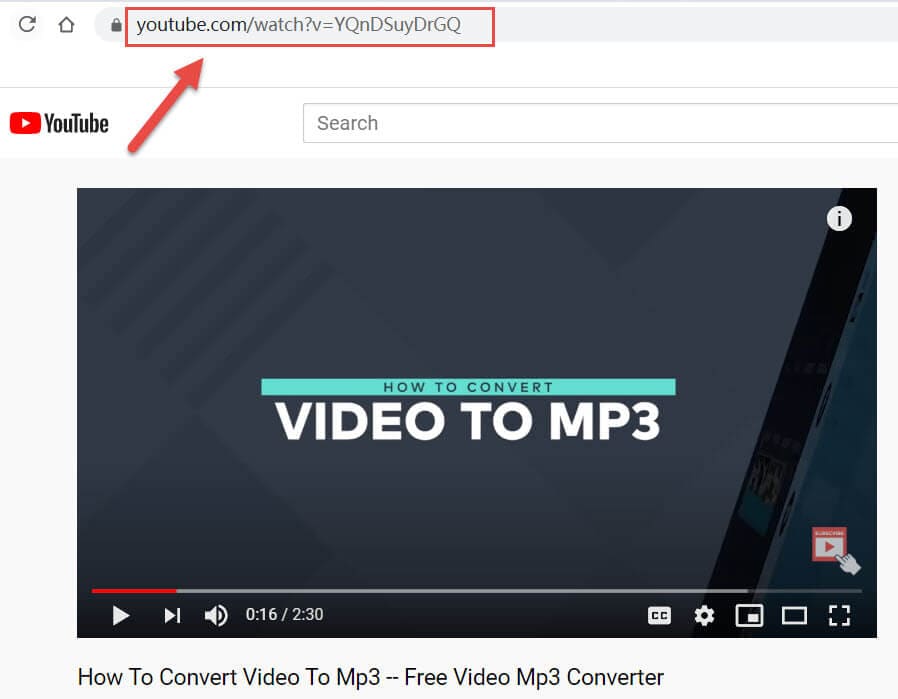
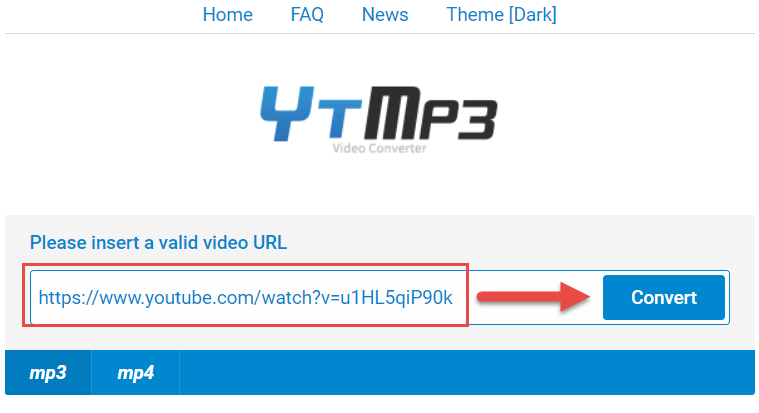
- Paste the URL on the text field. Then, choose MP3 below the text box and finally hit the Convert button to start the conversion
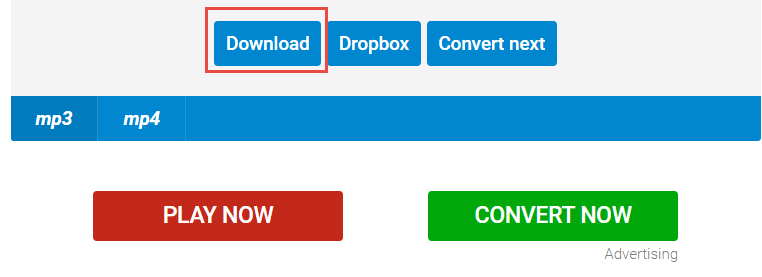
- Once the conversion finishes, click Download to save the mp4 file at your desired location in your device.
2. Flvto Converter Tool
If you are looking for a reliable online platform to convert YouTube to MP3, MP4, or AVI**,** this online tool is also the right choice. The steps are quite simple and you can perform the conversion process anytime without any issues. Save the converted file in your desired location and access it whenever you need it. Ease the YouTube conversion process using this online software by following the below instructions:
- Visit https://www.flvto.biz/en91/ to open Flvto converter tool online with your browser
- Copy your favorite video’s URL from YouTube, as mentioned before
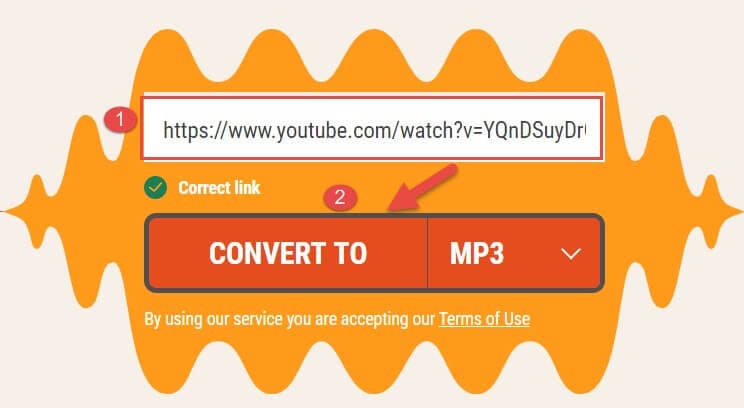
- Enter the link to the box, then select the file format as mp3, then click CONVERT TO button to trigger the conversion process
- Once finished, press the Download icon to download and save a converted mp3 file to your computer or local device. You can also send the mp3 to an email or upload it to dropbox directly.
3. y2mate YouTube to MP3 Converter
Y2mate is an online YouTube video downloader and converter. This online tool is compatible with all kinds of browsers optimally. You can use this program to convert YouTube to MP3 on both Windows and Mac. This platform allows you to make unlimited file conversions without spending even a penny from your pocket. You can avail for this service anytime and anywhere without any interruptions.
- Visit https://www.y2mate.com/en68 to open y2mate YouTube to MP3 Converter with your browser
- Go to YouTube and copy your desired URL link into the clipboard
- Copy and paste the YouTube URL to the box, and click Start
- Just a second, the YouTube video will be converted successfully. Please select the format as MP3 and then hit Download to save it at your favorite storage place in your device for easy retrieval when required.
4. YOUTUBETOMP3 Online
This extraordinary online platform wins your expectations by offering you with free service without any registration. There is no need to download any software to convert YouTube to mp3 instead of stepping into this online platform and carry on with unlimited quality conversion without any issues. Follow the below guidelines for the successful file conversion process:
- Visit https://youtubetomp3.sc/ to open this YOUTUBETOMP3 Online tool with your browser
- Take a quick copy of your favorite YouTube link
- Still paste the URL and select MP3 as the desired format in the list. Next press the Convert button.
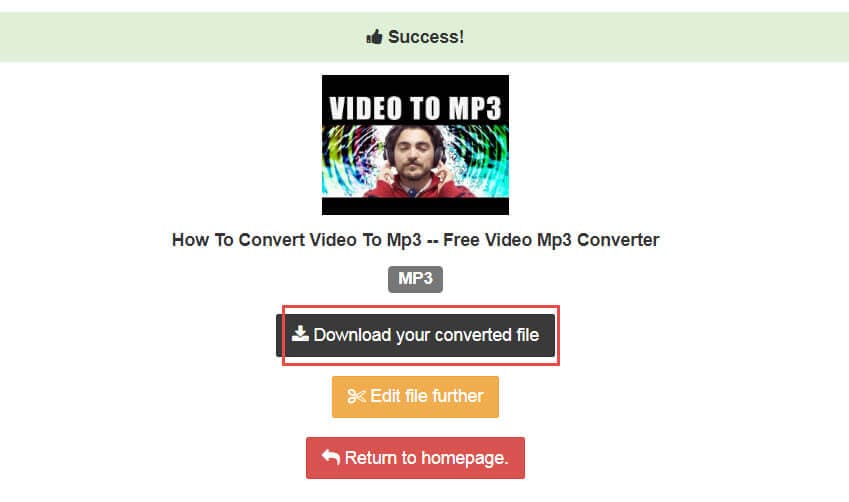
- Then it will show Success, which means the YouTube video has been converted successfully. Then you can click Download your converted file to save the mp3 as you need.
5. youtubetomp3music.com
This online YouTube to MP3 converter allows you to convert YouTube video to MP3 with high quality.
It supports both desktop and mobile devices, so you can use it on Windows, Mac, iPhone, or Android. Besides YouTube, it also supports Facebook, Vimeo and Dailymotion, which is great. Below are the brief steps of converting YouTube to MP3.
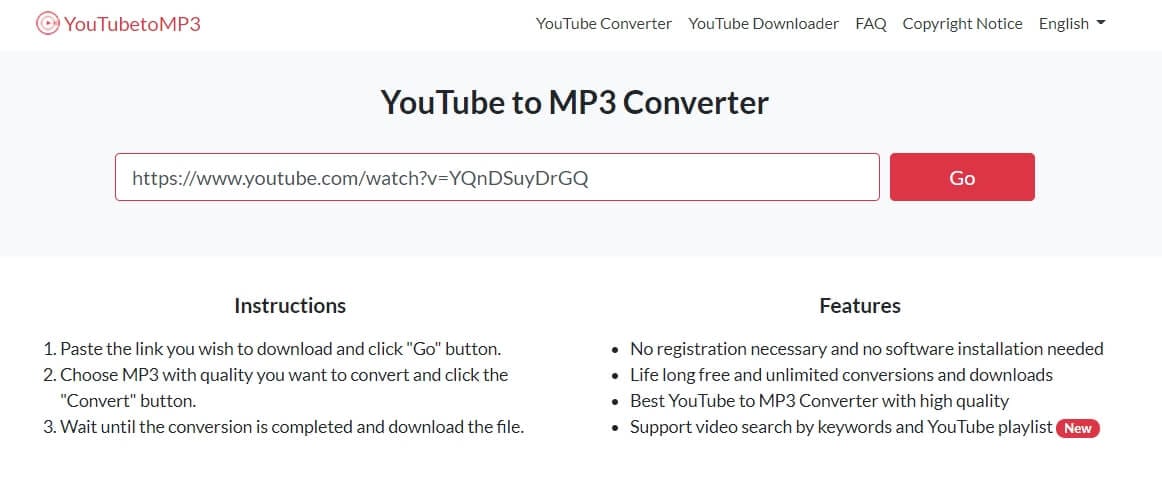
- Visit https://youtubetomp3music.com/en16/ , paste the YouTube video link, and click the Go button.
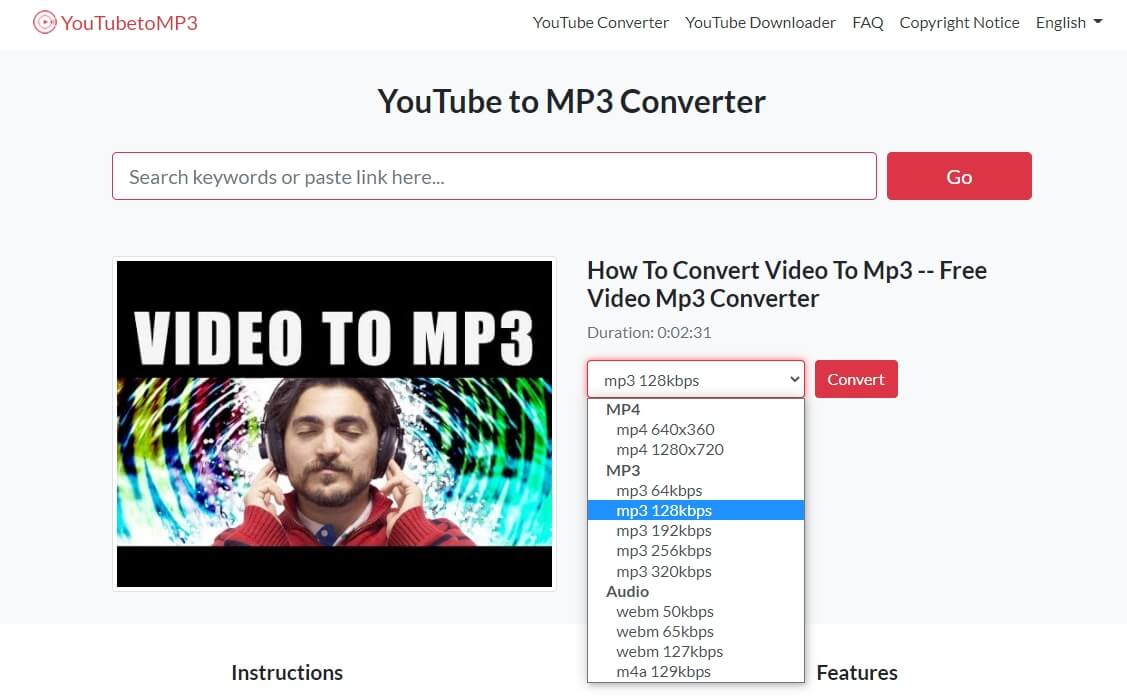
- Now, you can choose the MP3 quality from 64kbps to 320kbps, the higher the kbps, the clear the audio.
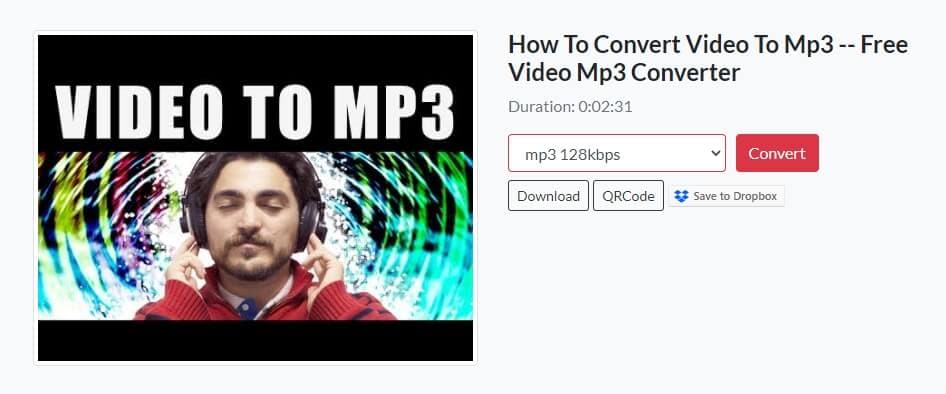
- Click Convert to start the conversion, and then you can choose Download to save the converted YouTube video to local, or choose to Save to Dropbox.
Part 2: YouTube to MP3 Converters for Windows and Mac [Free Download]
For people who will convert YouTube to MP3 audio files often, I recommend you to try the offline YouTube to MP3 downloader. If you have tried the converters above, you may find that some of them are filled with ads. Here are some YouTube to MP3 converters for Windows and Mac that you can download for free.
- **1. Wondershare UniConverter
- **2. 4K Video Downloader
- **3. DVDVideoSoft YouTube to MP3 Converter
- **4. Mediahuman’s YouTube to MP3 Converter
- **5. Clipgrab
1. Wondershare UniConverter
UniCovnerter is the professional desktop video converter application from Wondershare. This one-stop video converter provides high-quality video and audio conversion, which is compatible with both Windows and Mac OS. Converting YouTube video to MP3 audio is easy with UniConverter, check the steps below:
- Download and install UniConverter on your computer (Windows 7 64-bit or later & macOS 10.10 or later). Launch it and then go to the Downloader menu and then click the Plus File icon.
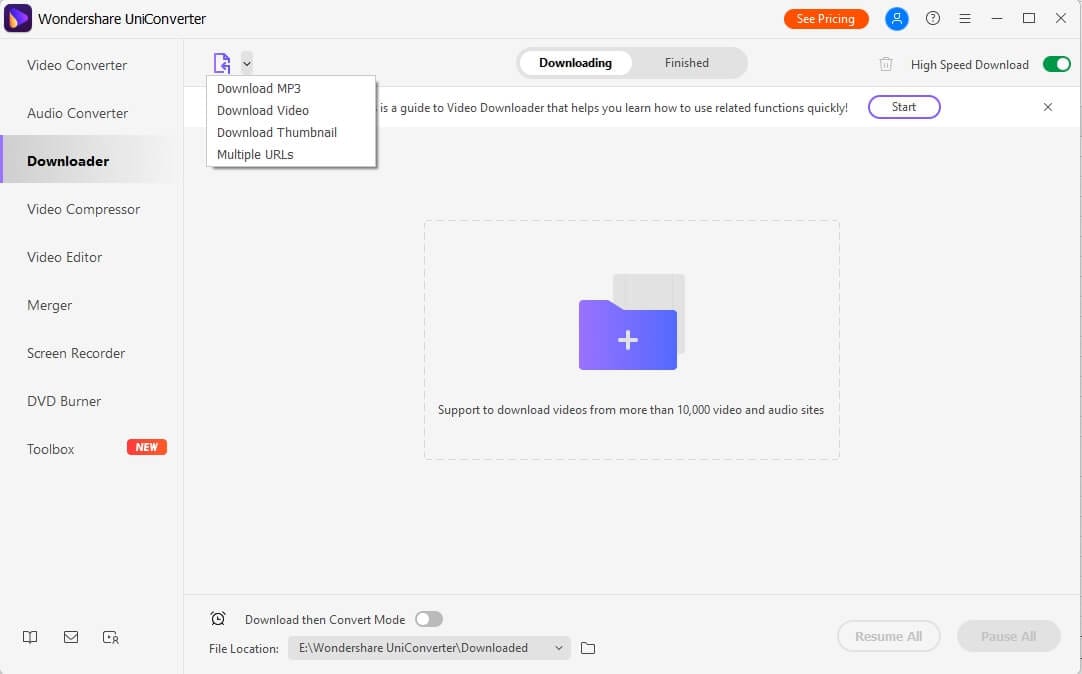
- In the pop-up window, paste the YouTube video link. If you want to download multiple MP3 files, you can paste one URL per line to continue, and then click the Download button.
- In the Download Audio tab, you can choose the downloaded audio quality. In UniConverter, you can download MP3 in 128Kbps, 256Kbps, or 320Kbps high quality. Click Download to start downloading.
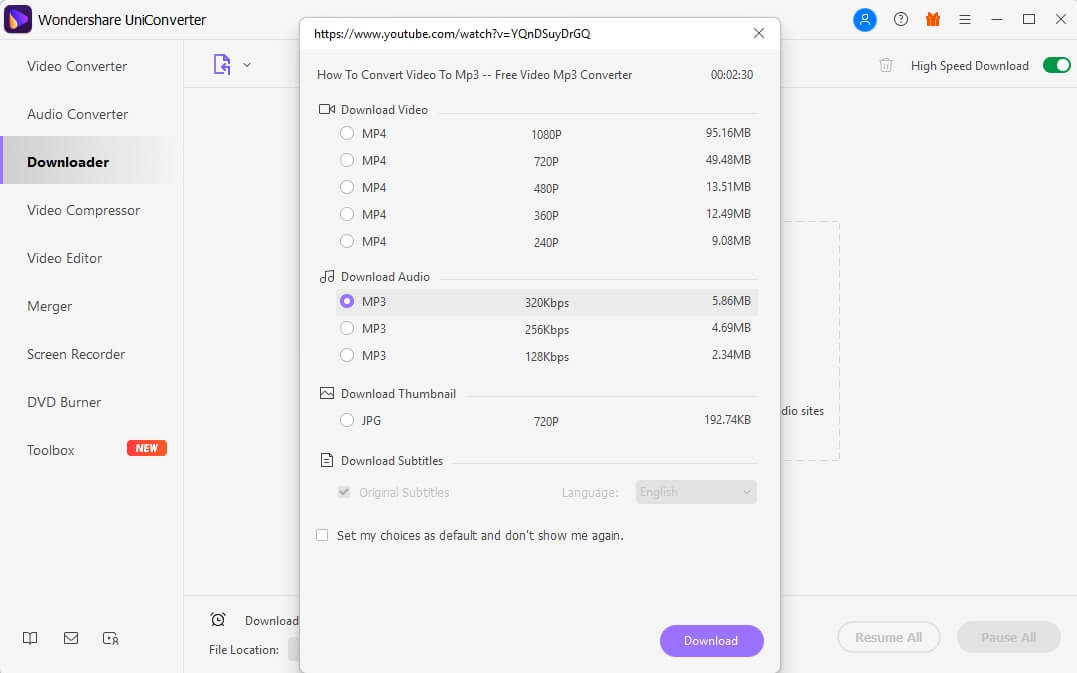
Besides MP3 audio file, you can also download the YouTube video in mp4 format, or download the thumbnail, or the subtitles if needed with UniConverter.
2. 4K Video Downloader
This tool is an offline converter where you have to download the app from its official website to discover it’s built-in features. It is a quality converter, which allows you to download full playlist and channels in your local drive for future reference. This program is compatible with all platforms like Mac, Windows, and Linux, etc. It supports more than 50 languages and it is trusted by million of users across boundaries.
Note
This 4K Video Downloader application enables you to download and convert up to 24 YouTube videos to mp3 files. You need to purchase a license for it if you want to convert more YouTube videos to mp3.
- Download the 4K Video Downloader application to your computer. It is compatible with both Windows and Mac OS
- After installation, please open this application on your computer, and copy the video URL from YouTube to your clipboard
- Tap the Paste Link option, and then this application will detect the URL automatically. You will see it’s parsing the video
- Once done, drop down the list and select Extract Audio and MP3 as the format. You can hit Choose to change the output directory on your computer to save the converted mp3 file. Finally, press Extract to start the conversion
- After conversion, you can go to the output directory you set and find the converted mp3.

3. DVDVideoSoft YouTube to MP3 Converter
It is an excellent YouTube to MP3 converter available for free download. This application has ample features like lossless conversion, retains the quality during the conversion process, and lastly it is safe and secure to carry on with the conversion procedure. Apart from the MP3 format, you can also choose other file types like M4A, WAV, FLAC and OGG.
- Download and install this app to your PC as per the OS type
- Open this mp3 converter after installation. Copy the URL from YouTube and paste in the blank field by pressing the Paste button.
- Choose MP3 original quality from the drop-down list
- Finally hit the Download button. You can now save the file at any location of your choice without issues.
4. Mediahuman’s YouTube to MP3 Converter
This application can work on both Windows and Mac. It also supports downloading playlists and channels from YouTube. The download tracks can be merged with the iTunes platform easily. You can make a copy of HD tracks of YouTube videos at your local disk and listen to it whenever you feel like. This tool saves a lot of time and the required process completes in a few minutes. Let’s see how you can convert YouTube to mp3 using this application:
- Download this video converter tool and install it to your computer
- Launch this application. Then go to YouTube and copy the video URL to the clipboard
- Click Paste link option(you should copy the YouTube URL first, otherwise this option will gray out), and it will load the YouTube video
- Then hit the download icon to trigger the conversion process
- Once done, you can click the Search icon to locate the converted mp3 file on your computer.
5. Clipgrab
This open-source video converter assists you to convert YouTube to mp3 optimally. It is enough if you tap the download link from its official website without any fee. This free software updates with the latest controls now and then to serve their customers efficiently. Take a glance at the steps regarding the conversion procedure
- Download and install this free application to your computer
- Open this application after installation, and go to the Downloads tab at the top
- Copy and paste and your favorite YouTube video link to the box, and choose MP3 format followed by adjusting HD quality. At last, press Grab this clip! button to trigger the conversion
- Once finished, you can click Open the target folder of the selected download to find the converted mp3 file.
Part3: Bonus Tip—Edit &Cut MP3 with Wondershare Filmora
In case if you want to edit and customize the downloaded MP3 file from YouTube, what can you do? Get started with Wondershare Filmora! It is a prestigious product from Wondershare to carry out the editing process after you convert YouTube to mp3 from your favorite tracks.
Excited to explore dazzling features then scroll down:
- Flexible audio control to do more audio adjustment
- Cut and trim your desired tracks in audio and video files
- Get rid of noise and unwanted background disturbances in the audio files
- This tool guarantees crisp and quality video and audio files
Just surf through the below guidelines to cut or edit your mp3 file:
- Download and install the program below. Then open Filmora on your computer
 Download Mac Version ](https://tools.techidaily.com/wondershare/filmora/download/ )
- Hit the File-Import Media option to load the converted mp3 file to the Media Library
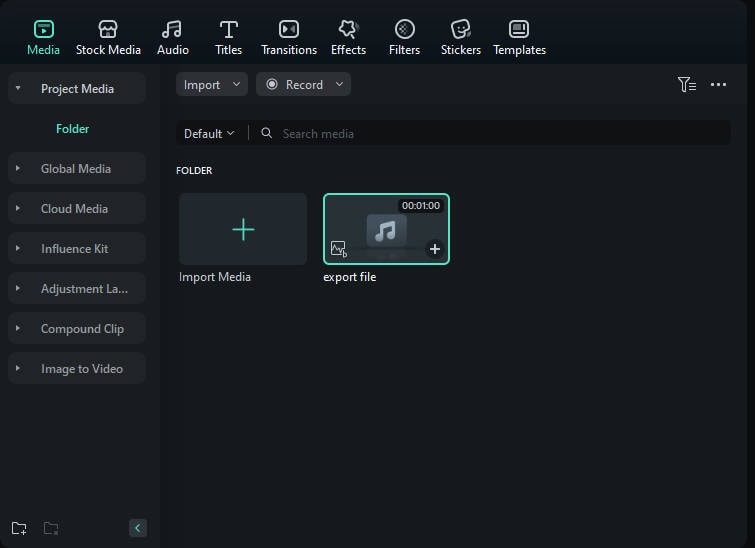
- Add the mp3 to the timeline, move the indicator to the place you want to cut, then click the red scissor icon to cut the mp3.

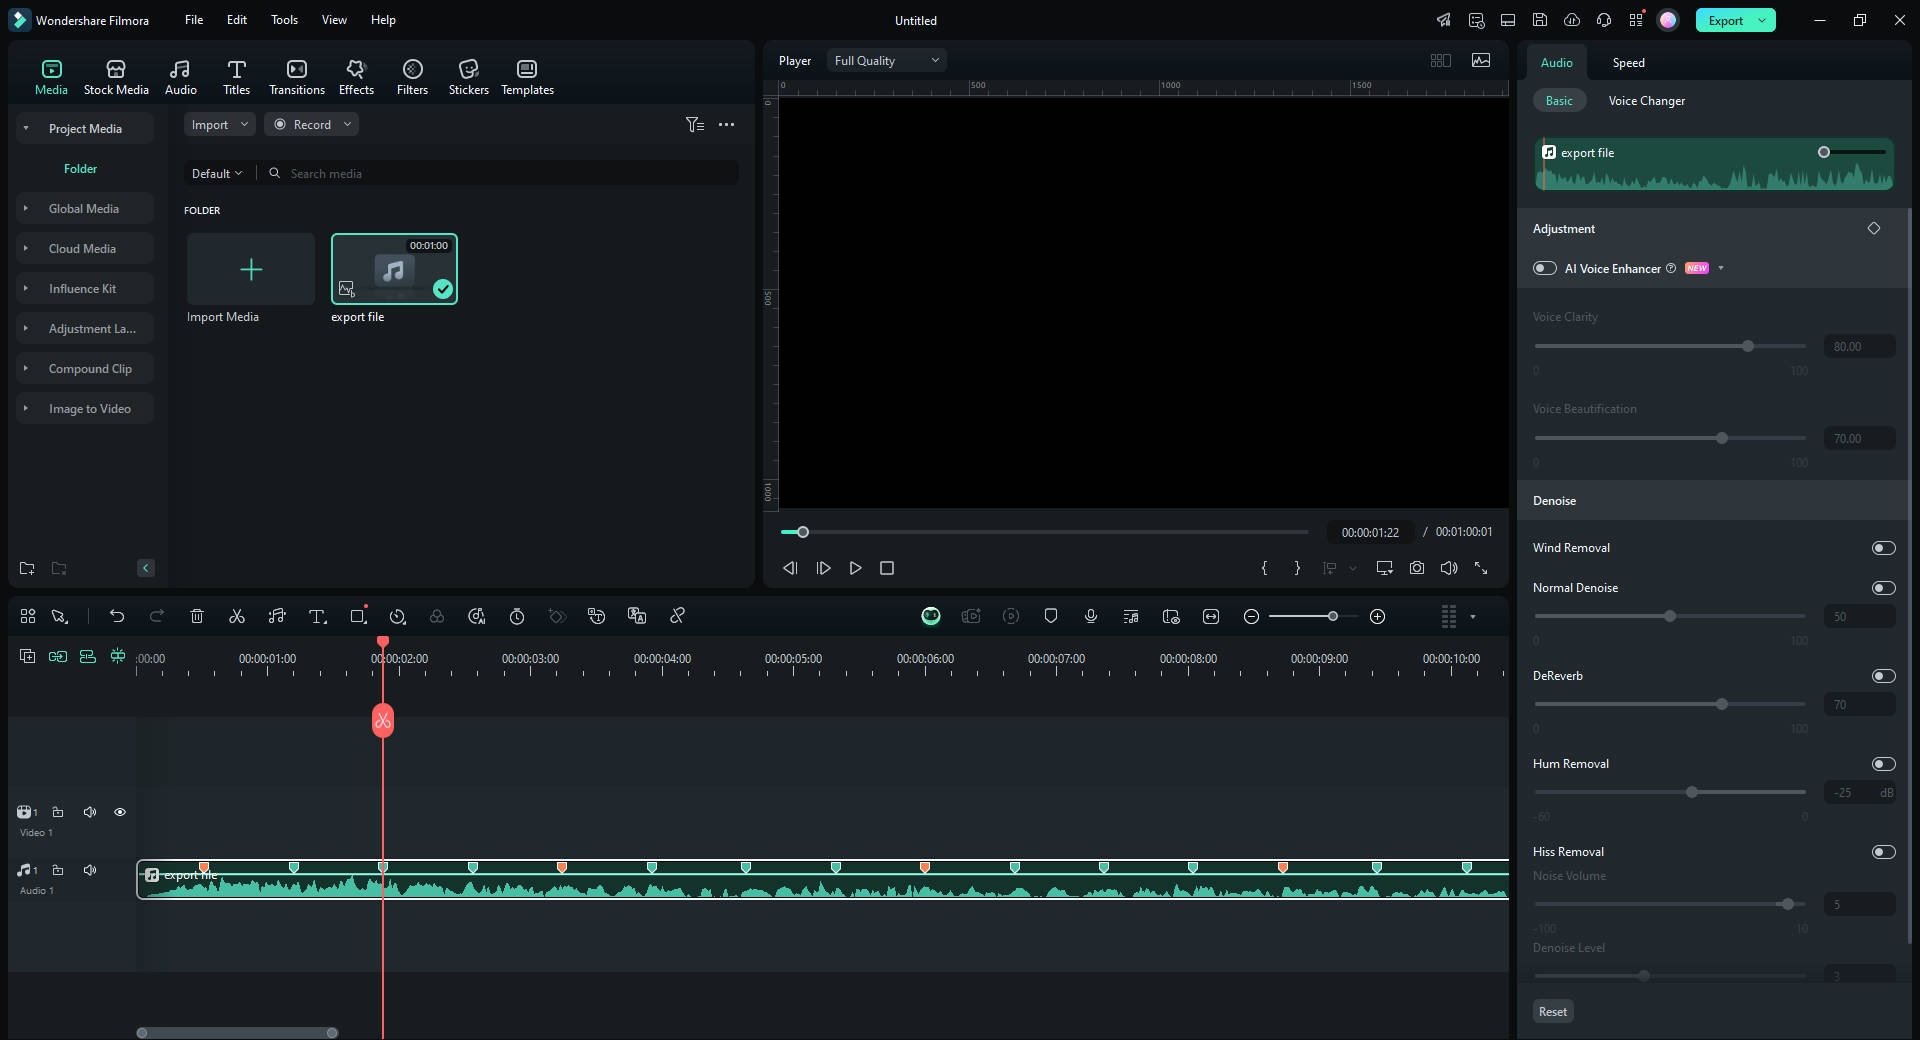
- And you can right-click the mp3 on the timeline, select Adjust Audio to get more audio control. The users can fade in/out the audio, adjust the volume/pitch, remove background noise, etc.
To sum up
Finally, it is time to conclude the discussion on a wide range of free YouTube to mp3 converters. You had a better idea of different video converters both on the online and offline platforms. Choose Filmora to obtain better quality edited audio and video tracks. You can now convert, edit, and store it at your desired location of video and audio files effortlessly. You can give your comments and write down your suggestions regarding this article. Get connected with us to explore and discover more facts on video editors and converters.
Benjamin Arango
Benjamin Arango is a writer and a lover of all things video.
Follow @Benjamin Arango
Benjamin Arango
Mar 27, 2024• Proven solutions
Hey, when you find a wonderful or dramatic song or music in a YouTube video, what would you like to do? For me, I want to download it and listen to it when I’m offline. How about you? Instead of tapping the frequently used links on the YouTube platform, you can convert YouTube to mp3 by using a YouTube to mp3 converter. Then you can always listen to music or audio whenever you want. Therefore, this article will show 10 best free YouTube to mp3 converters for you to convert a YouTube video to mp3, on both Windows and Mac. You will learn:
- Part 1: Best Free Online YouTube to MP3 Converters
- Part 2: YouTube to MP3 Converters for Windows and Mac [Free Download]
- Part 3: Bonus Tip—Edit and Cut MP3 with Wondershare Filmora
Warning and Notice: It is illegal when you misuse the content uploaded by other users on YouTube. If it is your content, then go ahead to download the YouTube video and convert it to mp3. You should follow the terms and conditions displayed on the YouTube website.
Part 1: 5 Free Online YouTube to MP3 Converters for Windows and Mac
Whether you’re using a Windows or a Mac computer, you can find a YouTube to MP3 converter that fits your need perfectly from the below list. In the following part, I will share with you some incredible online YouTube videos to MP3 converters. Enlighten and sharpen your skills on video conversion by exploring the discussed steps below:
- **1. YtMp3 Video Converter
- **2. Flvto Converter Tool
- **3. y2mate YouTube to MP3 Converter
- **4. YOUTUBETOMP3 Online
- **5. youtubetomp3music.com
1. YtMp3 Video Converter
This is a free online YouTube to MP3/MP4 converting tool. It will assist you to accomplish reliable YouTube video conversions at free of cost. There is no need to fill in any details for registration to make use of this online service. This platform offers you an immediate solution to convert YouTube to mp3.
- Visit https://ytmp3.cc/youtube-to-mp3/ to open the YtMp3 converter tool with your browser
- Copy your favorite video’s URL from YouTube
- Paste the URL on the text field. Then, choose MP3 below the text box and finally hit the Convert button to start the conversion
- Once the conversion finishes, click Download to save the mp4 file at your desired location in your device.
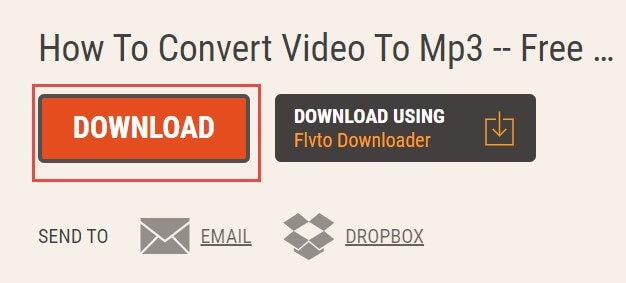
2. Flvto Converter Tool
If you are looking for a reliable online platform to convert YouTube to MP3, MP4, or AVI**,** this online tool is also the right choice. The steps are quite simple and you can perform the conversion process anytime without any issues. Save the converted file in your desired location and access it whenever you need it. Ease the YouTube conversion process using this online software by following the below instructions:
- Visit https://www.flvto.biz/en91/ to open Flvto converter tool online with your browser
- Copy your favorite video’s URL from YouTube, as mentioned before
- Enter the link to the box, then select the file format as mp3, then click CONVERT TO button to trigger the conversion process
- Once finished, press the Download icon to download and save a converted mp3 file to your computer or local device. You can also send the mp3 to an email or upload it to dropbox directly.
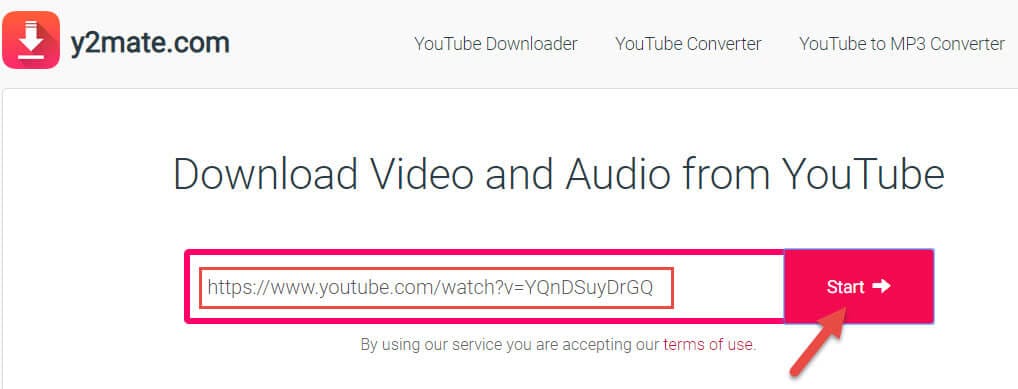
3. y2mate YouTube to MP3 Converter
Y2mate is an online YouTube video downloader and converter. This online tool is compatible with all kinds of browsers optimally. You can use this program to convert YouTube to MP3 on both Windows and Mac. This platform allows you to make unlimited file conversions without spending even a penny from your pocket. You can avail for this service anytime and anywhere without any interruptions.
- Visit https://www.y2mate.com/en68 to open y2mate YouTube to MP3 Converter with your browser
- Go to YouTube and copy your desired URL link into the clipboard
- Copy and paste the YouTube URL to the box, and click Start
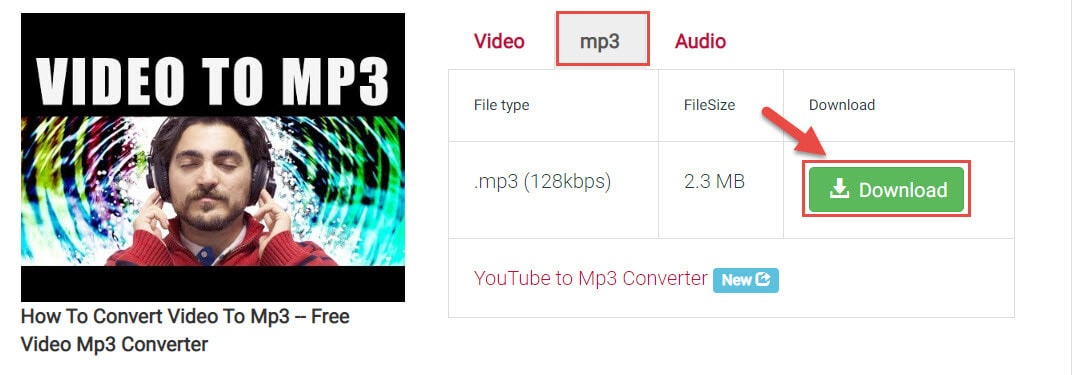
- Just a second, the YouTube video will be converted successfully. Please select the format as MP3 and then hit Download to save it at your favorite storage place in your device for easy retrieval when required.
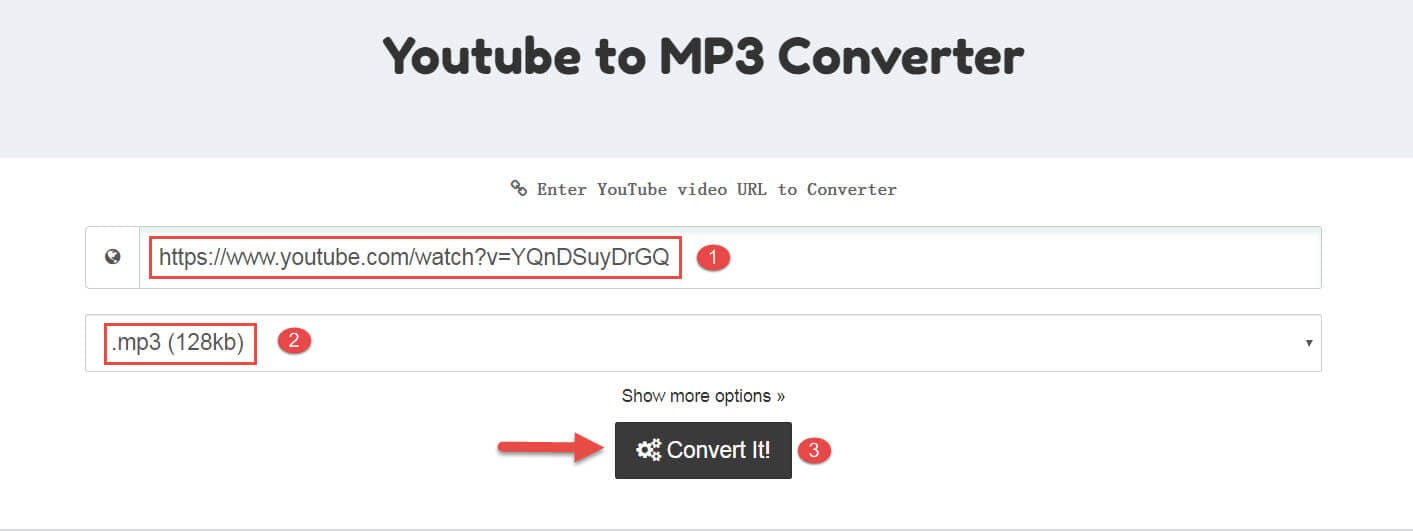
4. YOUTUBETOMP3 Online
This extraordinary online platform wins your expectations by offering you with free service without any registration. There is no need to download any software to convert YouTube to mp3 instead of stepping into this online platform and carry on with unlimited quality conversion without any issues. Follow the below guidelines for the successful file conversion process:
- Visit https://youtubetomp3.sc/ to open this YOUTUBETOMP3 Online tool with your browser
- Take a quick copy of your favorite YouTube link
- Still paste the URL and select MP3 as the desired format in the list. Next press the Convert button.
- Then it will show Success, which means the YouTube video has been converted successfully. Then you can click Download your converted file to save the mp3 as you need.
5. youtubetomp3music.com
This online YouTube to MP3 converter allows you to convert YouTube video to MP3 with high quality.
It supports both desktop and mobile devices, so you can use it on Windows, Mac, iPhone, or Android. Besides YouTube, it also supports Facebook, Vimeo and Dailymotion, which is great. Below are the brief steps of converting YouTube to MP3.
- Visit https://youtubetomp3music.com/en16/ , paste the YouTube video link, and click the Go button.
- Now, you can choose the MP3 quality from 64kbps to 320kbps, the higher the kbps, the clear the audio.
- Click Convert to start the conversion, and then you can choose Download to save the converted YouTube video to local, or choose to Save to Dropbox.
Part 2: YouTube to MP3 Converters for Windows and Mac [Free Download]
For people who will convert YouTube to MP3 audio files often, I recommend you to try the offline YouTube to MP3 downloader. If you have tried the converters above, you may find that some of them are filled with ads. Here are some YouTube to MP3 converters for Windows and Mac that you can download for free.
- **1. Wondershare UniConverter
- **2. 4K Video Downloader
- **3. DVDVideoSoft YouTube to MP3 Converter
- **4. Mediahuman’s YouTube to MP3 Converter
- **5. Clipgrab
1. Wondershare UniConverter
UniCovnerter is the professional desktop video converter application from Wondershare. This one-stop video converter provides high-quality video and audio conversion, which is compatible with both Windows and Mac OS. Converting YouTube video to MP3 audio is easy with UniConverter, check the steps below:
- Download and install UniConverter on your computer (Windows 7 64-bit or later & macOS 10.10 or later). Launch it and then go to the Downloader menu and then click the Plus File icon.
- In the pop-up window, paste the YouTube video link. If you want to download multiple MP3 files, you can paste one URL per line to continue, and then click the Download button.
- In the Download Audio tab, you can choose the downloaded audio quality. In UniConverter, you can download MP3 in 128Kbps, 256Kbps, or 320Kbps high quality. Click Download to start downloading.
Besides MP3 audio file, you can also download the YouTube video in mp4 format, or download the thumbnail, or the subtitles if needed with UniConverter.
2. 4K Video Downloader
This tool is an offline converter where you have to download the app from its official website to discover it’s built-in features. It is a quality converter, which allows you to download full playlist and channels in your local drive for future reference. This program is compatible with all platforms like Mac, Windows, and Linux, etc. It supports more than 50 languages and it is trusted by million of users across boundaries.
Note
This 4K Video Downloader application enables you to download and convert up to 24 YouTube videos to mp3 files. You need to purchase a license for it if you want to convert more YouTube videos to mp3.
- Download the 4K Video Downloader application to your computer. It is compatible with both Windows and Mac OS
- After installation, please open this application on your computer, and copy the video URL from YouTube to your clipboard
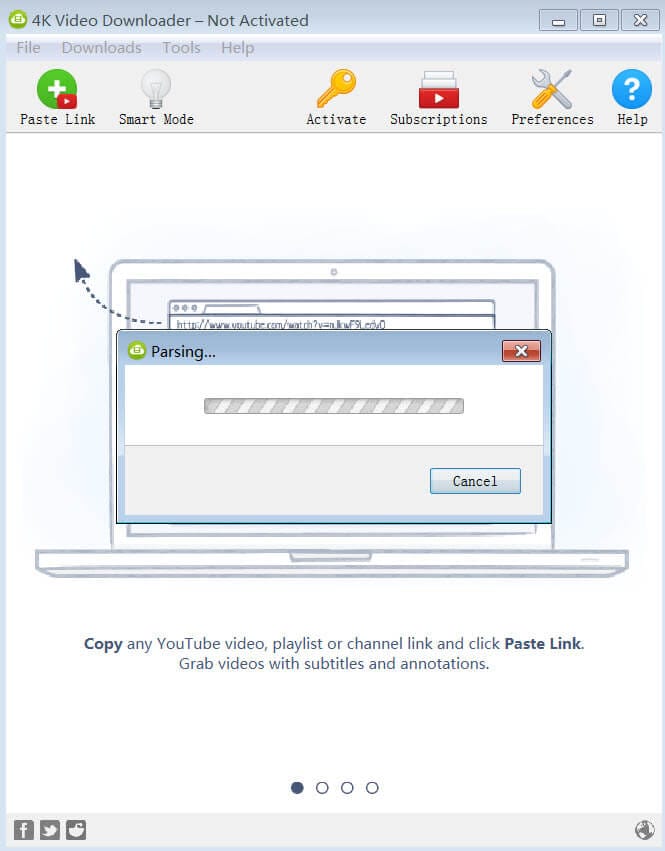
- Tap the Paste Link option, and then this application will detect the URL automatically. You will see it’s parsing the video
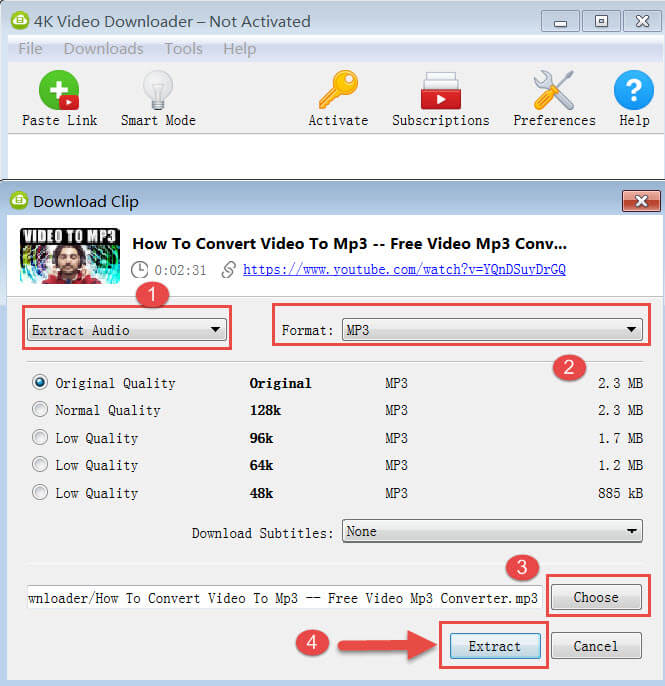
- Once done, drop down the list and select Extract Audio and MP3 as the format. You can hit Choose to change the output directory on your computer to save the converted mp3 file. Finally, press Extract to start the conversion
- After conversion, you can go to the output directory you set and find the converted mp3.
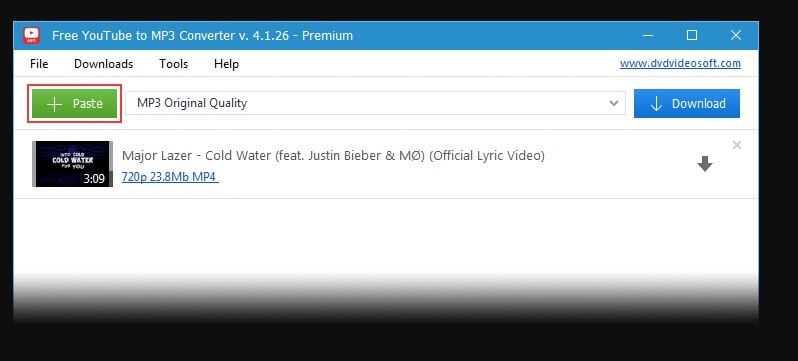
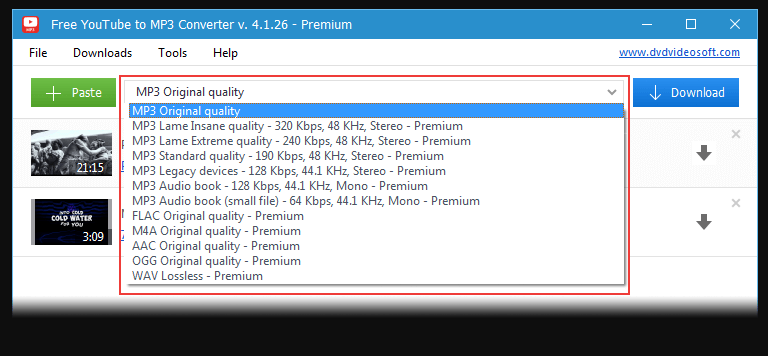
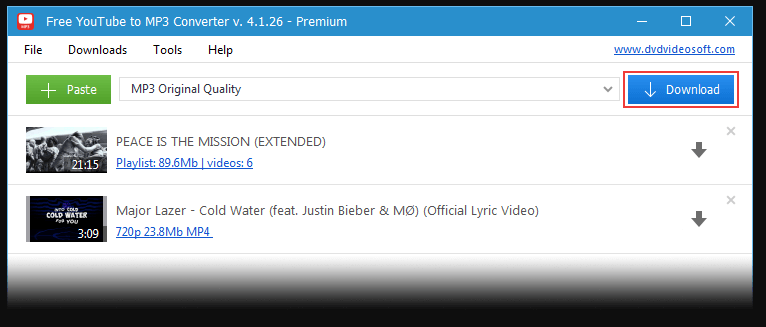
3. DVDVideoSoft YouTube to MP3 Converter
It is an excellent YouTube to MP3 converter available for free download. This application has ample features like lossless conversion, retains the quality during the conversion process, and lastly it is safe and secure to carry on with the conversion procedure. Apart from the MP3 format, you can also choose other file types like M4A, WAV, FLAC and OGG.
- Download and install this app to your PC as per the OS type
- Open this mp3 converter after installation. Copy the URL from YouTube and paste in the blank field by pressing the Paste button.
- Choose MP3 original quality from the drop-down list
- Finally hit the Download button. You can now save the file at any location of your choice without issues.
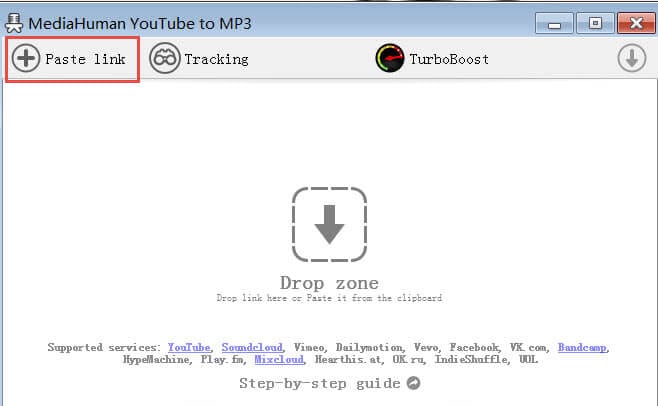
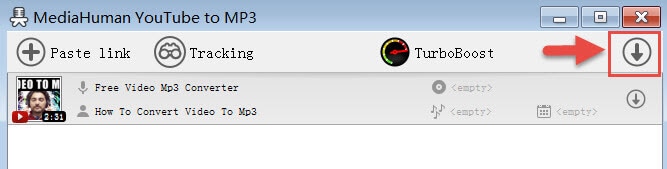
4. Mediahuman’s YouTube to MP3 Converter
This application can work on both Windows and Mac. It also supports downloading playlists and channels from YouTube. The download tracks can be merged with the iTunes platform easily. You can make a copy of HD tracks of YouTube videos at your local disk and listen to it whenever you feel like. This tool saves a lot of time and the required process completes in a few minutes. Let’s see how you can convert YouTube to mp3 using this application:
- Download this video converter tool and install it to your computer
- Launch this application. Then go to YouTube and copy the video URL to the clipboard
- Click Paste link option(you should copy the YouTube URL first, otherwise this option will gray out), and it will load the YouTube video
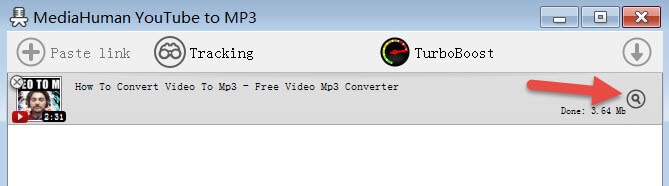
- Then hit the download icon to trigger the conversion process
- Once done, you can click the Search icon to locate the converted mp3 file on your computer.
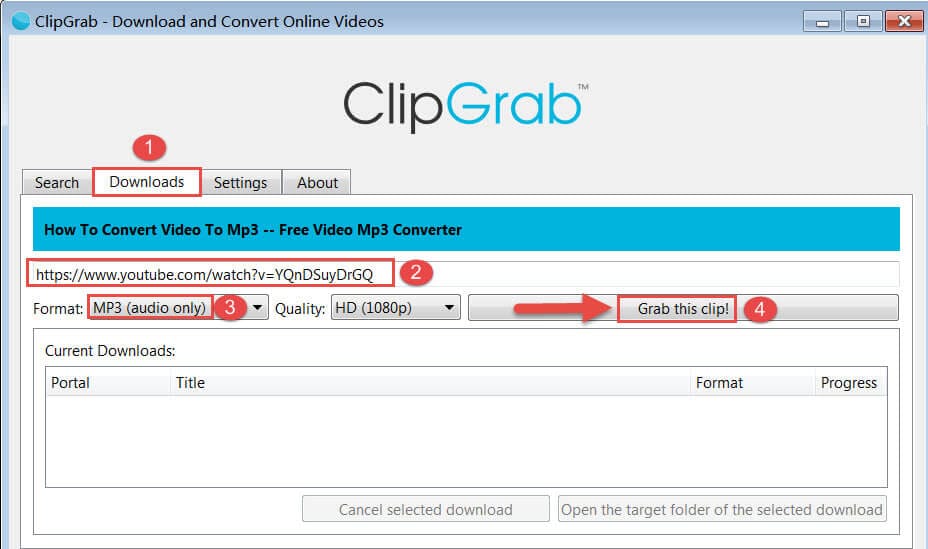
5. Clipgrab
This open-source video converter assists you to convert YouTube to mp3 optimally. It is enough if you tap the download link from its official website without any fee. This free software updates with the latest controls now and then to serve their customers efficiently. Take a glance at the steps regarding the conversion procedure
- Download and install this free application to your computer
- Open this application after installation, and go to the Downloads tab at the top
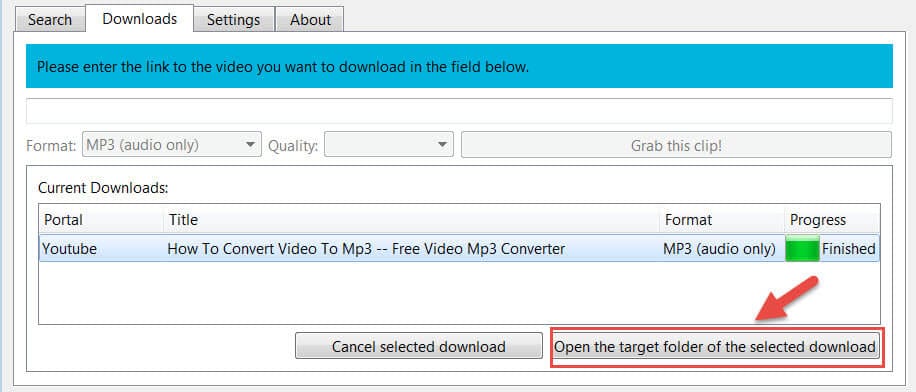
- Copy and paste and your favorite YouTube video link to the box, and choose MP3 format followed by adjusting HD quality. At last, press Grab this clip! button to trigger the conversion
- Once finished, you can click Open the target folder of the selected download to find the converted mp3 file.
Part3: Bonus Tip—Edit &Cut MP3 with Wondershare Filmora
In case if you want to edit and customize the downloaded MP3 file from YouTube, what can you do? Get started with Wondershare Filmora! It is a prestigious product from Wondershare to carry out the editing process after you convert YouTube to mp3 from your favorite tracks.
Excited to explore dazzling features then scroll down:
- Flexible audio control to do more audio adjustment
- Cut and trim your desired tracks in audio and video files
- Get rid of noise and unwanted background disturbances in the audio files
- This tool guarantees crisp and quality video and audio files
Just surf through the below guidelines to cut or edit your mp3 file:
- Download and install the program below. Then open Filmora on your computer
Download Mac Version ](https://tools.techidaily.com/wondershare/filmora/download/ )
- Hit the File-Import Media option to load the converted mp3 file to the Media Library
- Add the mp3 to the timeline, move the indicator to the place you want to cut, then click the red scissor icon to cut the mp3.
- And you can right-click the mp3 on the timeline, select Adjust Audio to get more audio control. The users can fade in/out the audio, adjust the volume/pitch, remove background noise, etc.
To sum up
Finally, it is time to conclude the discussion on a wide range of free YouTube to mp3 converters. You had a better idea of different video converters both on the online and offline platforms. Choose Filmora to obtain better quality edited audio and video tracks. You can now convert, edit, and store it at your desired location of video and audio files effortlessly. You can give your comments and write down your suggestions regarding this article. Get connected with us to explore and discover more facts on video editors and converters.
Benjamin Arango
Benjamin Arango is a writer and a lover of all things video.
Follow @Benjamin Arango
Benjamin Arango
Mar 27, 2024• Proven solutions
Hey, when you find a wonderful or dramatic song or music in a YouTube video, what would you like to do? For me, I want to download it and listen to it when I’m offline. How about you? Instead of tapping the frequently used links on the YouTube platform, you can convert YouTube to mp3 by using a YouTube to mp3 converter. Then you can always listen to music or audio whenever you want. Therefore, this article will show 10 best free YouTube to mp3 converters for you to convert a YouTube video to mp3, on both Windows and Mac. You will learn:
- Part 1: Best Free Online YouTube to MP3 Converters
- Part 2: YouTube to MP3 Converters for Windows and Mac [Free Download]
- Part 3: Bonus Tip—Edit and Cut MP3 with Wondershare Filmora
Warning and Notice: It is illegal when you misuse the content uploaded by other users on YouTube. If it is your content, then go ahead to download the YouTube video and convert it to mp3. You should follow the terms and conditions displayed on the YouTube website.
Part 1: 5 Free Online YouTube to MP3 Converters for Windows and Mac
Whether you’re using a Windows or a Mac computer, you can find a YouTube to MP3 converter that fits your need perfectly from the below list. In the following part, I will share with you some incredible online YouTube videos to MP3 converters. Enlighten and sharpen your skills on video conversion by exploring the discussed steps below:
- **1. YtMp3 Video Converter
- **2. Flvto Converter Tool
- **3. y2mate YouTube to MP3 Converter
- **4. YOUTUBETOMP3 Online
- **5. youtubetomp3music.com
1. YtMp3 Video Converter
This is a free online YouTube to MP3/MP4 converting tool. It will assist you to accomplish reliable YouTube video conversions at free of cost. There is no need to fill in any details for registration to make use of this online service. This platform offers you an immediate solution to convert YouTube to mp3.
- Visit https://ytmp3.cc/youtube-to-mp3/ to open the YtMp3 converter tool with your browser
- Copy your favorite video’s URL from YouTube
- Paste the URL on the text field. Then, choose MP3 below the text box and finally hit the Convert button to start the conversion
- Once the conversion finishes, click Download to save the mp4 file at your desired location in your device.
2. Flvto Converter Tool
If you are looking for a reliable online platform to convert YouTube to MP3, MP4, or AVI**,** this online tool is also the right choice. The steps are quite simple and you can perform the conversion process anytime without any issues. Save the converted file in your desired location and access it whenever you need it. Ease the YouTube conversion process using this online software by following the below instructions:
- Visit https://www.flvto.biz/en91/ to open Flvto converter tool online with your browser
- Copy your favorite video’s URL from YouTube, as mentioned before
- Enter the link to the box, then select the file format as mp3, then click CONVERT TO button to trigger the conversion process
- Once finished, press the Download icon to download and save a converted mp3 file to your computer or local device. You can also send the mp3 to an email or upload it to dropbox directly.
3. y2mate YouTube to MP3 Converter
Y2mate is an online YouTube video downloader and converter. This online tool is compatible with all kinds of browsers optimally. You can use this program to convert YouTube to MP3 on both Windows and Mac. This platform allows you to make unlimited file conversions without spending even a penny from your pocket. You can avail for this service anytime and anywhere without any interruptions.
- Visit https://www.y2mate.com/en68 to open y2mate YouTube to MP3 Converter with your browser
- Go to YouTube and copy your desired URL link into the clipboard
- Copy and paste the YouTube URL to the box, and click Start
- Just a second, the YouTube video will be converted successfully. Please select the format as MP3 and then hit Download to save it at your favorite storage place in your device for easy retrieval when required.
4. YOUTUBETOMP3 Online
This extraordinary online platform wins your expectations by offering you with free service without any registration. There is no need to download any software to convert YouTube to mp3 instead of stepping into this online platform and carry on with unlimited quality conversion without any issues. Follow the below guidelines for the successful file conversion process:
- Visit https://youtubetomp3.sc/ to open this YOUTUBETOMP3 Online tool with your browser
- Take a quick copy of your favorite YouTube link
- Still paste the URL and select MP3 as the desired format in the list. Next press the Convert button.
- Then it will show Success, which means the YouTube video has been converted successfully. Then you can click Download your converted file to save the mp3 as you need.
5. youtubetomp3music.com
This online YouTube to MP3 converter allows you to convert YouTube video to MP3 with high quality.
It supports both desktop and mobile devices, so you can use it on Windows, Mac, iPhone, or Android. Besides YouTube, it also supports Facebook, Vimeo and Dailymotion, which is great. Below are the brief steps of converting YouTube to MP3.
- Visit https://youtubetomp3music.com/en16/ , paste the YouTube video link, and click the Go button.
- Now, you can choose the MP3 quality from 64kbps to 320kbps, the higher the kbps, the clear the audio.
- Click Convert to start the conversion, and then you can choose Download to save the converted YouTube video to local, or choose to Save to Dropbox.
Part 2: YouTube to MP3 Converters for Windows and Mac [Free Download]
For people who will convert YouTube to MP3 audio files often, I recommend you to try the offline YouTube to MP3 downloader. If you have tried the converters above, you may find that some of them are filled with ads. Here are some YouTube to MP3 converters for Windows and Mac that you can download for free.
- **1. Wondershare UniConverter
- **2. 4K Video Downloader
- **3. DVDVideoSoft YouTube to MP3 Converter
- **4. Mediahuman’s YouTube to MP3 Converter
- **5. Clipgrab
1. Wondershare UniConverter
UniCovnerter is the professional desktop video converter application from Wondershare. This one-stop video converter provides high-quality video and audio conversion, which is compatible with both Windows and Mac OS. Converting YouTube video to MP3 audio is easy with UniConverter, check the steps below:
- Download and install UniConverter on your computer (Windows 7 64-bit or later & macOS 10.10 or later). Launch it and then go to the Downloader menu and then click the Plus File icon.
- In the pop-up window, paste the YouTube video link. If you want to download multiple MP3 files, you can paste one URL per line to continue, and then click the Download button.
- In the Download Audio tab, you can choose the downloaded audio quality. In UniConverter, you can download MP3 in 128Kbps, 256Kbps, or 320Kbps high quality. Click Download to start downloading.
Besides MP3 audio file, you can also download the YouTube video in mp4 format, or download the thumbnail, or the subtitles if needed with UniConverter.
2. 4K Video Downloader
This tool is an offline converter where you have to download the app from its official website to discover it’s built-in features. It is a quality converter, which allows you to download full playlist and channels in your local drive for future reference. This program is compatible with all platforms like Mac, Windows, and Linux, etc. It supports more than 50 languages and it is trusted by million of users across boundaries.
Note
This 4K Video Downloader application enables you to download and convert up to 24 YouTube videos to mp3 files. You need to purchase a license for it if you want to convert more YouTube videos to mp3.
- Download the 4K Video Downloader application to your computer. It is compatible with both Windows and Mac OS
- After installation, please open this application on your computer, and copy the video URL from YouTube to your clipboard
- Tap the Paste Link option, and then this application will detect the URL automatically. You will see it’s parsing the video
- Once done, drop down the list and select Extract Audio and MP3 as the format. You can hit Choose to change the output directory on your computer to save the converted mp3 file. Finally, press Extract to start the conversion
- After conversion, you can go to the output directory you set and find the converted mp3.
3. DVDVideoSoft YouTube to MP3 Converter
It is an excellent YouTube to MP3 converter available for free download. This application has ample features like lossless conversion, retains the quality during the conversion process, and lastly it is safe and secure to carry on with the conversion procedure. Apart from the MP3 format, you can also choose other file types like M4A, WAV, FLAC and OGG.
- Download and install this app to your PC as per the OS type
- Open this mp3 converter after installation. Copy the URL from YouTube and paste in the blank field by pressing the Paste button.
- Choose MP3 original quality from the drop-down list
- Finally hit the Download button. You can now save the file at any location of your choice without issues.
4. Mediahuman’s YouTube to MP3 Converter
This application can work on both Windows and Mac. It also supports downloading playlists and channels from YouTube. The download tracks can be merged with the iTunes platform easily. You can make a copy of HD tracks of YouTube videos at your local disk and listen to it whenever you feel like. This tool saves a lot of time and the required process completes in a few minutes. Let’s see how you can convert YouTube to mp3 using this application:
- Download this video converter tool and install it to your computer
- Launch this application. Then go to YouTube and copy the video URL to the clipboard
- Click Paste link option(you should copy the YouTube URL first, otherwise this option will gray out), and it will load the YouTube video
- Then hit the download icon to trigger the conversion process
- Once done, you can click the Search icon to locate the converted mp3 file on your computer.
5. Clipgrab
This open-source video converter assists you to convert YouTube to mp3 optimally. It is enough if you tap the download link from its official website without any fee. This free software updates with the latest controls now and then to serve their customers efficiently. Take a glance at the steps regarding the conversion procedure
- Download and install this free application to your computer
- Open this application after installation, and go to the Downloads tab at the top
- Copy and paste and your favorite YouTube video link to the box, and choose MP3 format followed by adjusting HD quality. At last, press Grab this clip! button to trigger the conversion
- Once finished, you can click Open the target folder of the selected download to find the converted mp3 file.
Part3: Bonus Tip—Edit &Cut MP3 with Wondershare Filmora
In case if you want to edit and customize the downloaded MP3 file from YouTube, what can you do? Get started with Wondershare Filmora! It is a prestigious product from Wondershare to carry out the editing process after you convert YouTube to mp3 from your favorite tracks.
Excited to explore dazzling features then scroll down:
- Flexible audio control to do more audio adjustment
- Cut and trim your desired tracks in audio and video files
- Get rid of noise and unwanted background disturbances in the audio files
- This tool guarantees crisp and quality video and audio files
Just surf through the below guidelines to cut or edit your mp3 file:
- Download and install the program below. Then open Filmora on your computer
Download Mac Version ](https://tools.techidaily.com/wondershare/filmora/download/ )
- Hit the File-Import Media option to load the converted mp3 file to the Media Library
- Add the mp3 to the timeline, move the indicator to the place you want to cut, then click the red scissor icon to cut the mp3.
- And you can right-click the mp3 on the timeline, select Adjust Audio to get more audio control. The users can fade in/out the audio, adjust the volume/pitch, remove background noise, etc.
To sum up
Finally, it is time to conclude the discussion on a wide range of free YouTube to mp3 converters. You had a better idea of different video converters both on the online and offline platforms. Choose Filmora to obtain better quality edited audio and video tracks. You can now convert, edit, and store it at your desired location of video and audio files effortlessly. You can give your comments and write down your suggestions regarding this article. Get connected with us to explore and discover more facts on video editors and converters.
Benjamin Arango
Benjamin Arango is a writer and a lover of all things video.
Follow @Benjamin Arango
Also read:
- Fostering Connection Through Respectful Engagement for 2024
- In 2024, Tasty Tales Ideal Naming for Culinary Broadcasts
- In 2024, Ideal Video Maker Apps for Novice iPhone and Android Users
- In 2024, Make a Memorable Mark with Your Own Thumbnails
- Invaluable List of Costless Photographic and Moving Images for 2024
- In 2024, Master Your Online Presence The Ultimate Guide to Effective FreeFire Tags
- In 2024, Keep Watching YouTube in the Background with Ease
- Ideal Winter Settings for Warmer YT Videos for 2024
- In 2024, Techniques in Motivating Viewers with Lifestyle Vlogs
- [New] 2024 Approved Quick-Convert Facebook Videos to MP4, Opting for HD Variants
- New Reaction Video Maker Top Picks for iPhone and Android for 2024
- 2024 Approved Transform Your Podcast with These Google Upload Insights
- Updated In 2024, Tips for GIF to Animated PNG You Should Know
- 2024 Approved Pixelated Punchlines Design with Kapwing
- Unlock Mastery The Beginner's Guide to Editing Excellence for 2024
- In 2024, How To Remove iCloud On Apple iPhone 6 Smoothly
- [Updated] The Ultimate Compilation of Phone Apps Altering Sound
- Best Snapchat Filters and Lenses That You Want to Try
- Does Airplane Mode Turn off GPS Location On Honor X7b? | Dr.fone
- Title: "In 2024, Revamping YouTube Images Adding Electric Neon Frames"
- Author: Thomas
- Created at : 2024-06-11 01:31:06
- Updated at : 2024-06-12 01:31:06
- Link: https://youtube-help.techidaily.com/in-2024-revamping-youtube-images-adding-electric-neon-frames/
- License: This work is licensed under CC BY-NC-SA 4.0.
