
"In 2024, Sound Sanitization Cleaning Up Your Online Footage"
Sound Sanitization: Cleaning Up Your Online Footage
How To Remove Background Noise from Your Youtube Video

Richard Bennett
Mar 27, 2024• Proven solutions
There are few things more annoying to viewers on YouTube than background noise. It is distracting and makes it difficult to engage with the content of a video. If there is noticeable background noise in a video, even a small noise like the faint hum of a computer fan, then it will increase the chances of viewers clicking away. The good news is that these kinds of noises are fairly easy to get rid of.
In order to remove background noise from your video clip, you will first need to create an MP3 of your audio. Then you will be able to take out the unwanted noise in a free program called Audacity and reintroduce your corrected audio into your Filmora project. This article will walk you through the audio editing process.

How To Remove Background Noise from Your Youtube Video
Background Noise Removal


Open up Filmora, import your clip, and drag it into the timeline. Then, play your clip and listen for background noise. If you hear a noise that you wish to remove move on to the first step of background noise removal .
1. Creating An MP3
If you do not already have it you will need to download VLC Media Player from videoLAN.org. VLC is a completely free media player that can play almost any type of file, is great for converting files, and can even be used as a screen recorder. If you consume a lot of media online then chances are you already have VLC. You could also use is Free Video to MP3 Converter by DVDVideoSoft.
If you choose to use VLC, open it up and select Convert/Save under Media. Select your video in the Open Media window that pops up. After you click Convert/Save you will be able to choose your format, in this case, MP3, under Save as type.
2. Removing Background Noise in Audacity
You can download Audacity for free at Audacityteam.org.
Once you have Audacity use it to open your MP3. Then, find a section of your audio that is silent aside from your background noise and highlight it by clicking and dragging. The idea is to point out to the program exactly what sound is a problem for you so it knows what to remove. If you have trouble finding a significant stretch of background noise that does not also include dialogue remember to record a pause before or after the content of your video next time you film.
With your section of background noise highlighted, go to Effect and then Noise Reduction. Then, click on Get Noise Profile. After that, you will select your entire audio timeline before going back to Noise Reduction under Effect. This time click on OK (the default settings are the best in most situations so you do not need to worry about changing them).
Audacity will remove everything that sounds like the sound profile, eliminating your background noise. Sometimes this method will also dull your dialogue, which can be fixed by selecting your entire track and then going to Effect and Amplify. Increasing amplification will fix any muffling of your audio.
3. Syncing in Filmora
Export your corrected MP3 from Audacity and import it into Filmora. Then, drag it into your music track. Syncing your audio should not be difficult, but you can always use your original audio to help you line it up properly if you need to. Just look for a significant spike in your audio waves in both your MP3 and the original audio and make sure they are right on top of each other.
Then, since you no longer need your original audio, you can delete it. Right-click on your clip and select Audio Detach. Once your audio is on its own track just select it and click delete.
Covering Background Noise
Sometimes background noise is so minor that you do not want to bother going through the process of removing it. In these situations, it may be easier to cover up your background noise than to remove it. This is as simple as dragging a song into the music track of your timeline and adjusting its volume so it is not loud enough to draw attention away from your dialogue. Chances are you want to add background music anyways and this is not even an extra step.
Richard Bennett
Richard Bennett is a writer and a lover of all things video.
Follow @Richard Bennett
Richard Bennett
Mar 27, 2024• Proven solutions
There are few things more annoying to viewers on YouTube than background noise. It is distracting and makes it difficult to engage with the content of a video. If there is noticeable background noise in a video, even a small noise like the faint hum of a computer fan, then it will increase the chances of viewers clicking away. The good news is that these kinds of noises are fairly easy to get rid of.
In order to remove background noise from your video clip, you will first need to create an MP3 of your audio. Then you will be able to take out the unwanted noise in a free program called Audacity and reintroduce your corrected audio into your Filmora project. This article will walk you through the audio editing process.
How To Remove Background Noise from Your Youtube Video
Background Noise Removal
Open up Filmora, import your clip, and drag it into the timeline. Then, play your clip and listen for background noise. If you hear a noise that you wish to remove move on to the first step of background noise removal .
1. Creating An MP3
If you do not already have it you will need to download VLC Media Player from videoLAN.org. VLC is a completely free media player that can play almost any type of file, is great for converting files, and can even be used as a screen recorder. If you consume a lot of media online then chances are you already have VLC. You could also use is Free Video to MP3 Converter by DVDVideoSoft.
If you choose to use VLC, open it up and select Convert/Save under Media. Select your video in the Open Media window that pops up. After you click Convert/Save you will be able to choose your format, in this case, MP3, under Save as type.
2. Removing Background Noise in Audacity
You can download Audacity for free at Audacityteam.org.
Once you have Audacity use it to open your MP3. Then, find a section of your audio that is silent aside from your background noise and highlight it by clicking and dragging. The idea is to point out to the program exactly what sound is a problem for you so it knows what to remove. If you have trouble finding a significant stretch of background noise that does not also include dialogue remember to record a pause before or after the content of your video next time you film.
With your section of background noise highlighted, go to Effect and then Noise Reduction. Then, click on Get Noise Profile. After that, you will select your entire audio timeline before going back to Noise Reduction under Effect. This time click on OK (the default settings are the best in most situations so you do not need to worry about changing them).
Audacity will remove everything that sounds like the sound profile, eliminating your background noise. Sometimes this method will also dull your dialogue, which can be fixed by selecting your entire track and then going to Effect and Amplify. Increasing amplification will fix any muffling of your audio.
3. Syncing in Filmora
Export your corrected MP3 from Audacity and import it into Filmora. Then, drag it into your music track. Syncing your audio should not be difficult, but you can always use your original audio to help you line it up properly if you need to. Just look for a significant spike in your audio waves in both your MP3 and the original audio and make sure they are right on top of each other.
Then, since you no longer need your original audio, you can delete it. Right-click on your clip and select Audio Detach. Once your audio is on its own track just select it and click delete.
Covering Background Noise
Sometimes background noise is so minor that you do not want to bother going through the process of removing it. In these situations, it may be easier to cover up your background noise than to remove it. This is as simple as dragging a song into the music track of your timeline and adjusting its volume so it is not loud enough to draw attention away from your dialogue. Chances are you want to add background music anyways and this is not even an extra step.
Richard Bennett
Richard Bennett is a writer and a lover of all things video.
Follow @Richard Bennett
Direct Transfer Path: YouTube Content to Dailymotion Hub
How to Transfer Video From YouTube to Dailymotion?

Ollie Mattison
Mar 27, 2024• Proven solutions
It is significant for a business to stay connected to its customers and videos are a wonderful medium to build that connect! Dailymotion gives you a golden opportunity and platform to share your videos on websites other than YouTube. This means that you can transfer your videos from YouTube to dailymotion in few minutes and increase the audience. There is no direct transfer feature in YouTube and hence this post will help in guiding how can you transfer the video content from YouTube to Dailymotion!
- Method 1: Download YouTube video and upload to Dailymotion
- Method 2: Sync YouTube videos to Dailymotion
Note: We resolutely oppose all forms of copyright-infringing downloads. This tutorial is only for downloading YouTube videos/audio materials from your own channel.
Method 1: Download YouTube video and upload to Dailymotion
This one is little longer but many people vote for it as a safer one! All you have to do is to login to your YouTube official account and download all the videos that you have uploaded in MP4 format by clicking on Edit option appearing at right of the video.
Ready to learn How to Download YouTube Videos . It’s easy, fun and a great way to share your movies with the world.
Save it to the desired folder on your PC and navigate to the Dailymotion account page. Sign in with your credentials and click on upload video. Browse the video from the location where you saved, give it a title and description.
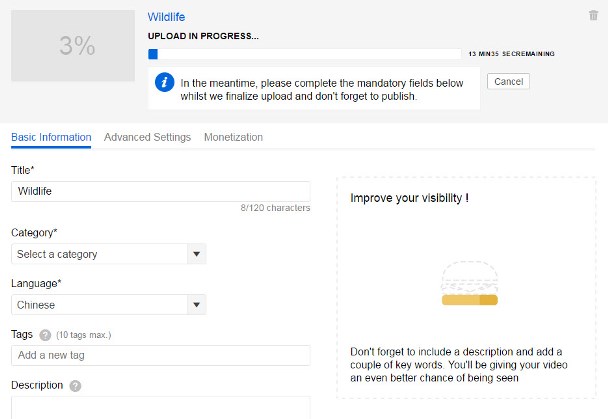
Next, click on channel drop-down menu and choose a category which best describes your video. Besides this, you would see a ‘Tags’ text box. You can add one or more tags (maximum 10) and select the privacy options as per your requirement. Tags act as a criterion for SEO optimization and help people in finding your video. Finally, just click on save to upload the video on dailymotion.
Method 2: Sync YouTube videos to Dailymotion
You can do this by liaising with Freedom MCN Network as it allows you to grow faster on Dailymotion. All you have to do is to search for ‘dashboard.tm’ on Google and sign in using you email and password. It will direct you to Dailymotion page; you can also opt to sign in with your Facebook credentials. When you will press enter and login, the first screen only will show the prompt if you want to synch YouTube and Dailymotion channels? Since, our answer is yes, the screen will ask you to login into your YouTube account and the screen will navigate you to the login into Google account linked to your YouTube account. Just like in all apps, you have to allow Freedom to access the data from your YouTube account. The next screen will list down number of videos that have been uploaded to your YouTube Account and the ones which are already synched with Dailymotion will have a check against their name. The ones which are not synched will have a box; you can simply check it and click on ‘Synch videos’ at the top right corner.
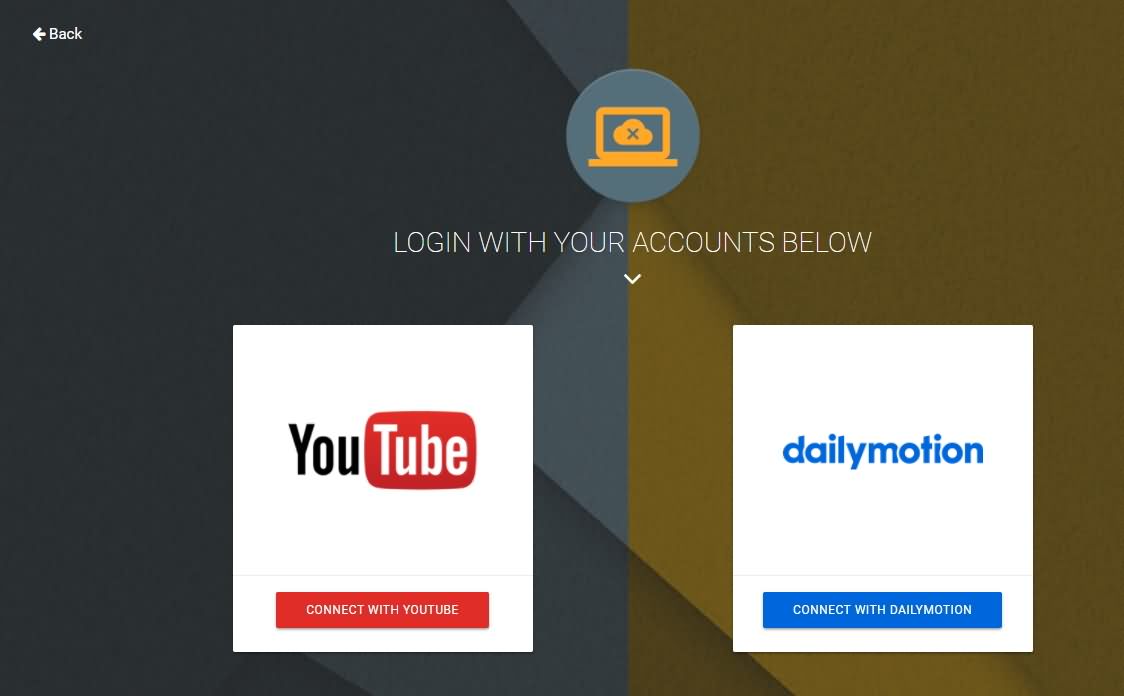
It will ask for your email address to get notifications, put in your email ID and click on Sync. Once they are active and synched you will receive a notification on your email with a subject ‘Done reuploading’ followed by the tile of the video. This simply means that you need not upload any video separately on dailymotion, you can simply synch it with YouTube and put in your efforts of uploading only once!
Ollie Mattison
Ollie Mattison is a writer and a lover of all things video.
Follow @Ollie Mattison
Ollie Mattison
Mar 27, 2024• Proven solutions
It is significant for a business to stay connected to its customers and videos are a wonderful medium to build that connect! Dailymotion gives you a golden opportunity and platform to share your videos on websites other than YouTube. This means that you can transfer your videos from YouTube to dailymotion in few minutes and increase the audience. There is no direct transfer feature in YouTube and hence this post will help in guiding how can you transfer the video content from YouTube to Dailymotion!
- Method 1: Download YouTube video and upload to Dailymotion
- Method 2: Sync YouTube videos to Dailymotion
Note: We resolutely oppose all forms of copyright-infringing downloads. This tutorial is only for downloading YouTube videos/audio materials from your own channel.
Method 1: Download YouTube video and upload to Dailymotion
This one is little longer but many people vote for it as a safer one! All you have to do is to login to your YouTube official account and download all the videos that you have uploaded in MP4 format by clicking on Edit option appearing at right of the video.
Ready to learn How to Download YouTube Videos . It’s easy, fun and a great way to share your movies with the world.
Save it to the desired folder on your PC and navigate to the Dailymotion account page. Sign in with your credentials and click on upload video. Browse the video from the location where you saved, give it a title and description.
Next, click on channel drop-down menu and choose a category which best describes your video. Besides this, you would see a ‘Tags’ text box. You can add one or more tags (maximum 10) and select the privacy options as per your requirement. Tags act as a criterion for SEO optimization and help people in finding your video. Finally, just click on save to upload the video on dailymotion.
Method 2: Sync YouTube videos to Dailymotion
You can do this by liaising with Freedom MCN Network as it allows you to grow faster on Dailymotion. All you have to do is to search for ‘dashboard.tm’ on Google and sign in using you email and password. It will direct you to Dailymotion page; you can also opt to sign in with your Facebook credentials. When you will press enter and login, the first screen only will show the prompt if you want to synch YouTube and Dailymotion channels? Since, our answer is yes, the screen will ask you to login into your YouTube account and the screen will navigate you to the login into Google account linked to your YouTube account. Just like in all apps, you have to allow Freedom to access the data from your YouTube account. The next screen will list down number of videos that have been uploaded to your YouTube Account and the ones which are already synched with Dailymotion will have a check against their name. The ones which are not synched will have a box; you can simply check it and click on ‘Synch videos’ at the top right corner.
It will ask for your email address to get notifications, put in your email ID and click on Sync. Once they are active and synched you will receive a notification on your email with a subject ‘Done reuploading’ followed by the tile of the video. This simply means that you need not upload any video separately on dailymotion, you can simply synch it with YouTube and put in your efforts of uploading only once!
Ollie Mattison
Ollie Mattison is a writer and a lover of all things video.
Follow @Ollie Mattison
Also read:
- [New] Find Your Next Favorite Free Video Player in Our Top 12 Picks (PC/Mobile)
- [New] In 2024, Boosting Collaboration Essential Zoom Video Alterations
- [New] In 2024, Cloud Storage Pricing Comparison and Best Price Recommendations
- [New] Pranks & Puns Playbook 7 Clever Gags for Video Virtuosos
- [New] Unveiling Clarity Overcoming GoPro Haze Challenges
- [Updated] Decoding Instagram's Max Video Length Policy
- 2024 Approved How to Captivate and Expand Your Online Following with Viral YouTube Shorts
- 2024 Approved PhotoMixer Pro Compiling Media on macOS
- 2024 Approved Top Directors Weaving Visual, Auditory Tapestries
- 2024 Approved Tutorial on YouTube Thumbnail Extraction for All OS Enthusiasts
- Best 7 Multimedia Cameras For Quality Live Streams & Video Blogs
- From Idea to Execution A Comprehensive YouTube Video Guide for 2024
- How Can We Unlock Our Motorola Moto G 5G (2023) Phone Screen?
- In 2024, Connectivity at Its Peak USB-C & the HP Envy 27 Monitor
- In 2024, Mastering the Art of Caption Placement in Multimedia Projects for YouTube
- Title: In 2024, Sound Sanitization Cleaning Up Your Online Footage
- Author: Thomas
- Created at : 2024-12-07 22:17:00
- Updated at : 2024-12-10 00:44:15
- Link: https://youtube-help.techidaily.com/in-2024-sound-sanitization-cleaning-up-your-online-footage/
- License: This work is licensed under CC BY-NC-SA 4.0.