
:max_bytes(150000):strip_icc()/QueenEliminator-28047f0d10d94fe5941ae9f388d9c025.png)
"In 2024, Step Into Song Savvy YouTube Playlist Excellence"
Step Into Song Savvy: YouTube Playlist Excellence
How to Create a Playlist on YouTube

Richard Bennett
Mar 27, 2024• Proven solutions
Want to watch the missed-out episodes of your favorite serial? As well know it irritates to find out every single episode on order? But why to worry when YouTube has a separate playlist on your famous tv-series. Want to watch new trending music of 2020? YouTube has a playlist for it. Missing comedy videos from the favorite show on TV? YouTube has a playlist on it. Need to know different ideas about marketing on improving your brand? Yes, you got my point. There is a playlist on YouTube for that as well.

Although it isn’t the latest one on the Internet, it is still the unbeatable application that brings everything in a single screen from trending tunes, entertaining videos, industry backgrounds, and the latest news to your notice that happens every second. Especially if you are an individual with a marketing background or a brand developer, YouTube playlists can do a lot from its side? Need to know what are its benefits and how to create a playlist on YouTube? You are in the right spot.
- Part 1: What is a YouTube Playlist?
- Part 2: YouTube Channel vs. YouTube Playlist
- Part 3: Benefits of Creating a playlist on YouTube
- Part 4: How to Make a YouTube Playlist?
- Part 5: Tips to Improve Your Video SEO
What is a YouTube Playlist?
Irritated from surfing over the Internet for videos related to your concept or topic you are searching for? Else are you a party-hard person who needs continuously playing of fantastic music to keeping the fun going? YouTube playlists are the better option: a collection of videos that keep playing in order, sequentially, and play one after another automatically unless you change it manually.
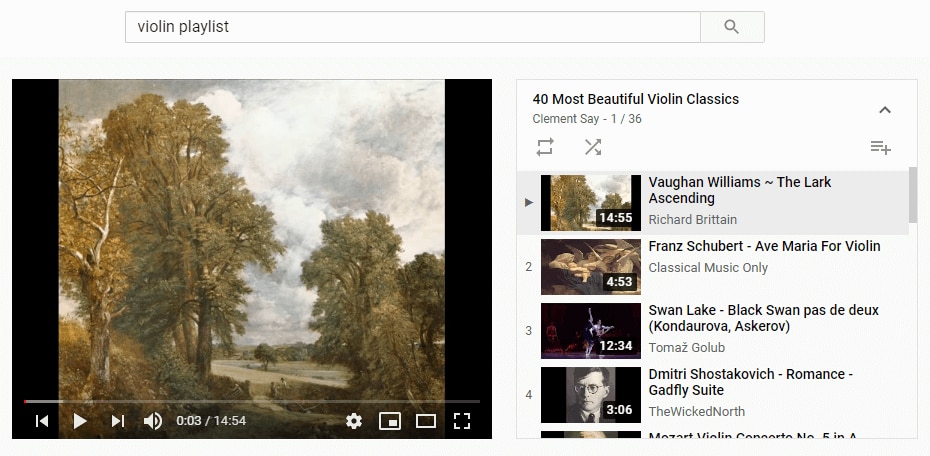
It is closely related to the music playlists like the ones we find in Spotify and Apple music. Different playlists on YouTube are available in all genres, like entertainment, fun, relaxation, thrilling, and educational niches. Do you have a monotonous routine at the office? Let’s play something crazy and fun-filled like the comedy series or bloopers? Need some workout ideas? Check out the compilation of different custom fitness workouts as a playlist on YouTube. Whatever you want, you can find everything in YouTube playlists.
It is a fantastic app that can do wonders that one could think. Besides being used for the fun-filled purposes, they are content curation tools that can be used by marketers as a platform to attract customers and engage with them with various product videos under a single roof called playlists.
If you are a tricky person who has a changing mindset and different mood-offs, you can create your playlists that combine all your favorite videos from varied niches.
Difference between a Channel and a Playlist on YouTube
There are times where one gets confused with the YouTube channels and playlists. While some say they are similar, the fact is both are different. A person with a specific name creates a channel, and it is the place where the person posts all the videos or uploads them for his/her subscribers to get likes and more audience.
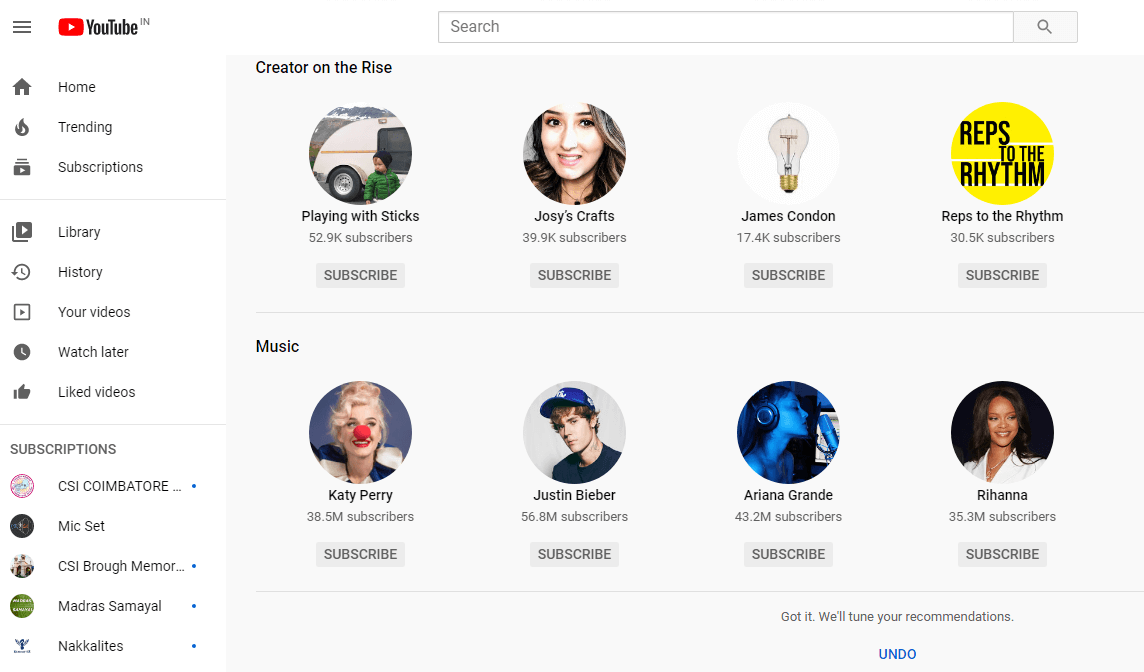
But YouTube playlists are auto-generated contents that consist of videos from different channels but with the same content concept. For example, a PewDiePie channel will have his uploaded videos. Still, PewDiePie playlists will have all his videos and the ones similar to his stream but off the channel. Likewise, self-created playlists will have videos that you have saved to see them later or often.
What are the benefits of a playlist on YouTube?
There are various YouTube and video creators who have undervalued playlists’ importance, and hence the hidden benefits are often off-screen. So, we have listed the top 5 reasons why YouTube playlists are essential and how a YouTuber can benefit from playlists.
1. YouTube playlists help you organize videos in order
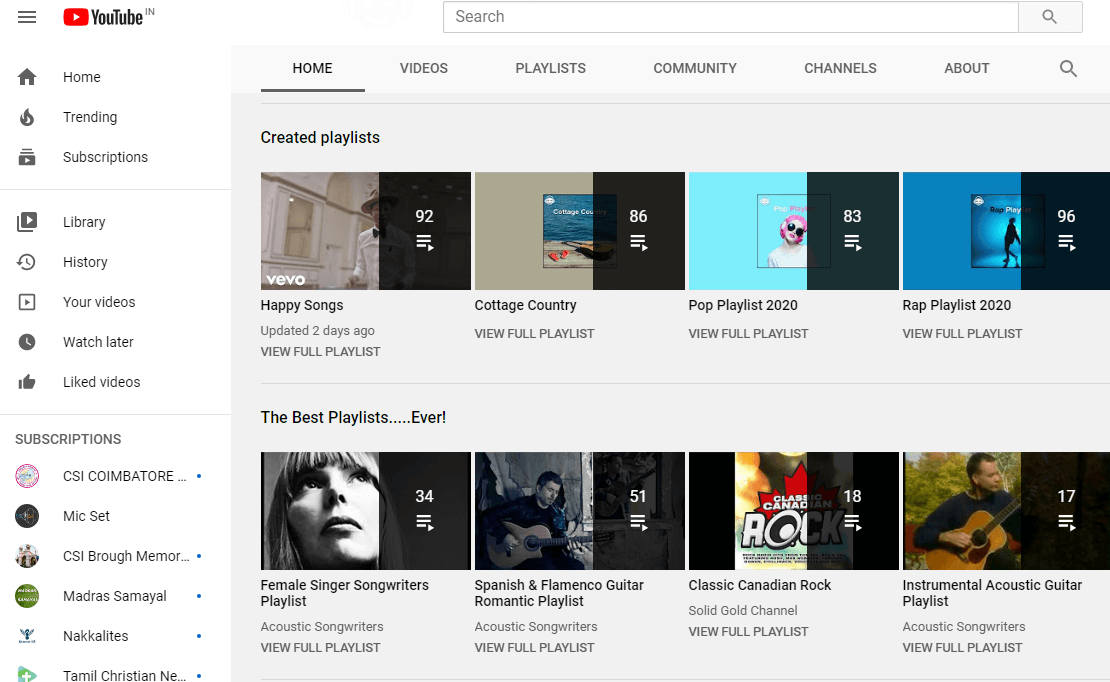
YouTube these days appears scattered with numerous information where some are important at the critical instances of time. You also have some playlists that are the effective ones grouped based on a common theme. Suppose your company focuses on selling musical equipment. In that case, you can make separate playlists for a guitar or pianos so that viewers can come across different equipment styles, available variants allowing them to navigate through various parts in your channel. Alongside this, you can tell your viewers what the YouTube channel or the organization is all about at first glance as the first impression is the best expression!
2. Increase the rank of your video
If your video gets added to a playlist, there are high chances for it to be in the YouTube watchlist even it is less popular but related to the ones that the audience prefers. In turn, this act raises your video’s rank as the “total watch time” is a vital factor that drives your video to the highly ranked video list.
3. Playlists account to discoverability and improve visibility on search engines
Apart from being enlisted as single videos, individual videos indexed in playlists get opportunities to appear on the search engines based on the keywords. Playlists are bread slices packed with jam as keywords providing likelihood to emerge on multiple times. But to catch the gain of this method, one has to enrich the video with an outstanding keyword, titles, or description and optimize the video with remarkable SEO techniques.
4. Get more views
When your video comes under a theme and is categorized, the YouTube algorithm places it over with the other related to each other. The next time, your video will appear on the right sidebar below the “related videos.” As the video plays automatically, one after the other, the number of views increases. “Amazing playlists can make viewers watch it longer!”
5. Playlists are best for video SEO
Such playlists can boost and help one to reach your YouTube channel. Especially when it comes to educators or artists, they provide value and save time. Playlists get ranked for keywords that help your audience in reaching you on YouTube.
How to Make a YouTube Playlist?
Surprised to know that a simple playlist has handy benefits that you weren’t aware of still now? Are you excited and eager to create your playlists on YouTube? Here is a step-by-step guide that will guide you on how to make a playlist on YouTube.
1. Open your channel page on YouTube
To start with, open your YouTube channel page and tap the “Customize Channel” button.
2. Create your YouTube playlist
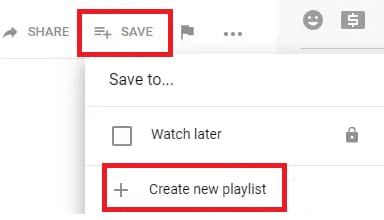
Now, find or select the video you wish to add to the playlist. To save it, click on the “Plus” icon. You can click on “Watch later” that will add the video to your already created playlist from the drop-down.
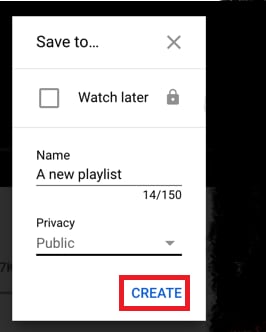
3. Give the playlist a name
Name your new YouTube playlist and make sure it fulfills the criteria of a maximum of 150 characters. Specify the privacy level and make it to the public so that anyone can view it. Once satisfied, tap the “Create” option.
4. Your YouTube playlist is now live
You have successfully made the playlist and added the video to find by clicking on the “Library” option.
Tips to Improve Your Video SEO
As said before, to improve your video playlist and bring it to rank, optimizing your playlists with SEO is mandatory.
1. Make use of appealing titles and depiction
While many viewers don’t prefer reading through the entire description, the title and the Metadata are the major factors that attract viewers at first glance. Hence, pay attention and spend time to build and craft an appealing title. Give importance to the thumbnail image and ensure that it is engaging.
2. Concentrate on keywords
Surf through the various playlists and find keywords used in popular videos related to your niche. Remember, keywords can be included in your titles and increase the chances of increasing the ranking of the video.
3. Prefer the optimal video hosting platform
Set a goal and choose a wise video hosting platform to gain traffic and generate new leads. Before deciding with the right one, consider making trails or find a review from the Internet.
Conclusion
So, now you know every nook and corner on the answers to how to make YouTube playlists and create them through a simple guide yourself. Besides using it for product marketing or brand deliverance, you can use it to make your YouTube channel a popular one. Yes, do you have a collection of videos to showcase the world? Upload them on YouTube as a playlist and optimize it with SEO tips discussed today. Maybe it is an ASMR video or a vlogging one. It can help in reaching your YouTube target audience for sure!
Richard Bennett
Richard Bennett is a writer and a lover of all things video.
Follow @Richard Bennett
Richard Bennett
Mar 27, 2024• Proven solutions
Want to watch the missed-out episodes of your favorite serial? As well know it irritates to find out every single episode on order? But why to worry when YouTube has a separate playlist on your famous tv-series. Want to watch new trending music of 2020? YouTube has a playlist for it. Missing comedy videos from the favorite show on TV? YouTube has a playlist on it. Need to know different ideas about marketing on improving your brand? Yes, you got my point. There is a playlist on YouTube for that as well.
Although it isn’t the latest one on the Internet, it is still the unbeatable application that brings everything in a single screen from trending tunes, entertaining videos, industry backgrounds, and the latest news to your notice that happens every second. Especially if you are an individual with a marketing background or a brand developer, YouTube playlists can do a lot from its side? Need to know what are its benefits and how to create a playlist on YouTube? You are in the right spot.
- Part 1: What is a YouTube Playlist?
- Part 2: YouTube Channel vs. YouTube Playlist
- Part 3: Benefits of Creating a playlist on YouTube
- Part 4: How to Make a YouTube Playlist?
- Part 5: Tips to Improve Your Video SEO
What is a YouTube Playlist?
Irritated from surfing over the Internet for videos related to your concept or topic you are searching for? Else are you a party-hard person who needs continuously playing of fantastic music to keeping the fun going? YouTube playlists are the better option: a collection of videos that keep playing in order, sequentially, and play one after another automatically unless you change it manually.
It is closely related to the music playlists like the ones we find in Spotify and Apple music. Different playlists on YouTube are available in all genres, like entertainment, fun, relaxation, thrilling, and educational niches. Do you have a monotonous routine at the office? Let’s play something crazy and fun-filled like the comedy series or bloopers? Need some workout ideas? Check out the compilation of different custom fitness workouts as a playlist on YouTube. Whatever you want, you can find everything in YouTube playlists.
It is a fantastic app that can do wonders that one could think. Besides being used for the fun-filled purposes, they are content curation tools that can be used by marketers as a platform to attract customers and engage with them with various product videos under a single roof called playlists.
If you are a tricky person who has a changing mindset and different mood-offs, you can create your playlists that combine all your favorite videos from varied niches.
Difference between a Channel and a Playlist on YouTube
There are times where one gets confused with the YouTube channels and playlists. While some say they are similar, the fact is both are different. A person with a specific name creates a channel, and it is the place where the person posts all the videos or uploads them for his/her subscribers to get likes and more audience.
But YouTube playlists are auto-generated contents that consist of videos from different channels but with the same content concept. For example, a PewDiePie channel will have his uploaded videos. Still, PewDiePie playlists will have all his videos and the ones similar to his stream but off the channel. Likewise, self-created playlists will have videos that you have saved to see them later or often.
What are the benefits of a playlist on YouTube?
There are various YouTube and video creators who have undervalued playlists’ importance, and hence the hidden benefits are often off-screen. So, we have listed the top 5 reasons why YouTube playlists are essential and how a YouTuber can benefit from playlists.
1. YouTube playlists help you organize videos in order
YouTube these days appears scattered with numerous information where some are important at the critical instances of time. You also have some playlists that are the effective ones grouped based on a common theme. Suppose your company focuses on selling musical equipment. In that case, you can make separate playlists for a guitar or pianos so that viewers can come across different equipment styles, available variants allowing them to navigate through various parts in your channel. Alongside this, you can tell your viewers what the YouTube channel or the organization is all about at first glance as the first impression is the best expression!
2. Increase the rank of your video
If your video gets added to a playlist, there are high chances for it to be in the YouTube watchlist even it is less popular but related to the ones that the audience prefers. In turn, this act raises your video’s rank as the “total watch time” is a vital factor that drives your video to the highly ranked video list.
3. Playlists account to discoverability and improve visibility on search engines
Apart from being enlisted as single videos, individual videos indexed in playlists get opportunities to appear on the search engines based on the keywords. Playlists are bread slices packed with jam as keywords providing likelihood to emerge on multiple times. But to catch the gain of this method, one has to enrich the video with an outstanding keyword, titles, or description and optimize the video with remarkable SEO techniques.
4. Get more views
When your video comes under a theme and is categorized, the YouTube algorithm places it over with the other related to each other. The next time, your video will appear on the right sidebar below the “related videos.” As the video plays automatically, one after the other, the number of views increases. “Amazing playlists can make viewers watch it longer!”
5. Playlists are best for video SEO
Such playlists can boost and help one to reach your YouTube channel. Especially when it comes to educators or artists, they provide value and save time. Playlists get ranked for keywords that help your audience in reaching you on YouTube.
How to Make a YouTube Playlist?
Surprised to know that a simple playlist has handy benefits that you weren’t aware of still now? Are you excited and eager to create your playlists on YouTube? Here is a step-by-step guide that will guide you on how to make a playlist on YouTube.
1. Open your channel page on YouTube
To start with, open your YouTube channel page and tap the “Customize Channel” button.
2. Create your YouTube playlist
Now, find or select the video you wish to add to the playlist. To save it, click on the “Plus” icon. You can click on “Watch later” that will add the video to your already created playlist from the drop-down.
3. Give the playlist a name
Name your new YouTube playlist and make sure it fulfills the criteria of a maximum of 150 characters. Specify the privacy level and make it to the public so that anyone can view it. Once satisfied, tap the “Create” option.
4. Your YouTube playlist is now live
You have successfully made the playlist and added the video to find by clicking on the “Library” option.
Tips to Improve Your Video SEO
As said before, to improve your video playlist and bring it to rank, optimizing your playlists with SEO is mandatory.
1. Make use of appealing titles and depiction
While many viewers don’t prefer reading through the entire description, the title and the Metadata are the major factors that attract viewers at first glance. Hence, pay attention and spend time to build and craft an appealing title. Give importance to the thumbnail image and ensure that it is engaging.
2. Concentrate on keywords
Surf through the various playlists and find keywords used in popular videos related to your niche. Remember, keywords can be included in your titles and increase the chances of increasing the ranking of the video.
3. Prefer the optimal video hosting platform
Set a goal and choose a wise video hosting platform to gain traffic and generate new leads. Before deciding with the right one, consider making trails or find a review from the Internet.
Conclusion
So, now you know every nook and corner on the answers to how to make YouTube playlists and create them through a simple guide yourself. Besides using it for product marketing or brand deliverance, you can use it to make your YouTube channel a popular one. Yes, do you have a collection of videos to showcase the world? Upload them on YouTube as a playlist and optimize it with SEO tips discussed today. Maybe it is an ASMR video or a vlogging one. It can help in reaching your YouTube target audience for sure!
Richard Bennett
Richard Bennett is a writer and a lover of all things video.
Follow @Richard Bennett
Professional Recordings at Home: 10 Key Strategies for Excellence
10 Recording Tips for Recording Audio with High Quality
Richard Bennett
Oct 26, 2023• Proven solutions
Getting the best sound for your recording is not as simplistic as buying an expensive microphone. There are many different things you can do to record your audio more clearly. Here are 10 recording tips to record high-quality audio.
1. Silence everything you don’t want your microphone to record
2. Put your mobile phone in airplane mode
3. Minimize echo
4. Block wind from reaching your microphone
5. Upgrade your microphone
6. Adjust your levels
7. Start with a sound cue if you’re planning to do some syncing in post
8. Get close to the sound
9. ADR
10. Record Ambient Sound
Bonus Tip-Record Your Audio with Wondershare Filmora
Wondershare Filmora has great recording features that enable you to record screen , voiceover, and webcam. Just connect the recording device to your computer, and start the recording in Wondershare Filmora and you will get high-quality audio. And you can also easily pick a song from the royalty-free music library on Wondershare Filmora. These audio features on Filmora are rare and very simple to use, you only need to click a few times and your video will have a new sound and background song.


1. Silence everything you don’t want your microphone to record
When you’re recording audio, you have to be more aware of the subtle sounds that drone on in your background. These sounds may include humming from machines with fans, buzzing from lights, and jingling from your pet’s collar. Observe your recording space and find ways to silence everything that you don’t want in your audio recording.
2. Put your mobile phone in airplane mode
Although it may be quite obvious to turn your phone’s ring tone off when you’re recording, it may not be as obvious to put your phone in airplane mode. When phones receive calls or perform searches as part of their background processes, they emit signals that can get picked up by your recording system. Avoid ruining good takes with unwanted sounds of phone signals by putting your phones in airplane mode.
3. Minimize echo
If you are recording yourself talk or sing, make sure to set up your recording space in a way where the sound projected from your voice bounces minimally off the walls and back to your microphone. Bare walls and hardwood floors will cause a lot of bouncing. Make use of materials that will absorb your sound rather than bounce it, like a thick rug or a comforter. If you want your voice to echo, that’s something you should do in post-production.
4. Block wind from reaching your microphone
Although it might not sound so loud and distracting to the naked ear, wind sounds terribly loud through a microphone recording and can cause your audio to clip (distortion of waveform due to output of sound exceeding maximum capacity or 0 dB point). This includes the “wind” that comes out of your mouth when you pronounce words starting with the letter “p.” Use pop filters, windscreens, and deadcats to block wind from reaching your microphone.
5. Upgrade your microphone
As much as you try to control all the noise in your surroundings, your greatest recording limitation will come from the hardware that you use. Improve your recordings by plugging in an external microphone into your camera’s microphone jack or record audio completely separately with a professional microphone.
Need help with deciding on a microphone to buy? Check out our recommended list of microphones.
6. Adjust your levels
Before pressing the record button, see how loudly your microphone picks up the sound you wish to record. Adjust your levels (sensitivity of your microphone) until the sound sits in between -6 dBs and -12dBs. This range gives the source of your sound some room to get louder without the recorded audio getting clipped. When you first listen to audio recorded within this range, it may sound very quiet. No need to worry though because you can increase the volume later in editing.
7. Start with a sound cue if you’re planning to do some syncing in post
If you’re recording separate audio that you plan to sync to your video later in editing, start your recording with a short and loud sound cue like a clap or a high pitched “beep” tone. Later, when you’re editing, it’ll be much easier for you to find the section where your video and additional audio match.
8. Get close to the sound
Unless you’re aiming to record ambient sound, bring your microphone close to the source of sound you are wanting to record. The closer your microphone is to the source of sound, the lower your sensitivity setting can be on your microphone. As a result of lowering your levels, sounds you are not meaning to record will also sound fainter.
9. ADR
When you need to record a scene in a loud setting where you have very little control over the noise, record additional vocals later and replace the original vocals through a process called automated dialogue replacement.
10. Record Ambient Sound
Remember to record ambient sound or “room tone.” You can use these recordings to fill in the blanks if you run out of audio and also smooth out parts of your audio where you hear pops, clicks, and other unwanted noise.
Richard Bennett
Richard Bennett is a writer and a lover of all things video.
Follow @Richard Bennett
Richard Bennett
Oct 26, 2023• Proven solutions
Getting the best sound for your recording is not as simplistic as buying an expensive microphone. There are many different things you can do to record your audio more clearly. Here are 10 recording tips to record high-quality audio.
1. Silence everything you don’t want your microphone to record
2. Put your mobile phone in airplane mode
3. Minimize echo
4. Block wind from reaching your microphone
5. Upgrade your microphone
6. Adjust your levels
7. Start with a sound cue if you’re planning to do some syncing in post
8. Get close to the sound
9. ADR
10. Record Ambient Sound
Bonus Tip-Record Your Audio with Wondershare Filmora
Wondershare Filmora has great recording features that enable you to record screen , voiceover, and webcam. Just connect the recording device to your computer, and start the recording in Wondershare Filmora and you will get high-quality audio. And you can also easily pick a song from the royalty-free music library on Wondershare Filmora. These audio features on Filmora are rare and very simple to use, you only need to click a few times and your video will have a new sound and background song.
1. Silence everything you don’t want your microphone to record
When you’re recording audio, you have to be more aware of the subtle sounds that drone on in your background. These sounds may include humming from machines with fans, buzzing from lights, and jingling from your pet’s collar. Observe your recording space and find ways to silence everything that you don’t want in your audio recording.
2. Put your mobile phone in airplane mode
Although it may be quite obvious to turn your phone’s ring tone off when you’re recording, it may not be as obvious to put your phone in airplane mode. When phones receive calls or perform searches as part of their background processes, they emit signals that can get picked up by your recording system. Avoid ruining good takes with unwanted sounds of phone signals by putting your phones in airplane mode.
3. Minimize echo
If you are recording yourself talk or sing, make sure to set up your recording space in a way where the sound projected from your voice bounces minimally off the walls and back to your microphone. Bare walls and hardwood floors will cause a lot of bouncing. Make use of materials that will absorb your sound rather than bounce it, like a thick rug or a comforter. If you want your voice to echo, that’s something you should do in post-production.
4. Block wind from reaching your microphone
Although it might not sound so loud and distracting to the naked ear, wind sounds terribly loud through a microphone recording and can cause your audio to clip (distortion of waveform due to output of sound exceeding maximum capacity or 0 dB point). This includes the “wind” that comes out of your mouth when you pronounce words starting with the letter “p.” Use pop filters, windscreens, and deadcats to block wind from reaching your microphone.
5. Upgrade your microphone
As much as you try to control all the noise in your surroundings, your greatest recording limitation will come from the hardware that you use. Improve your recordings by plugging in an external microphone into your camera’s microphone jack or record audio completely separately with a professional microphone.
Need help with deciding on a microphone to buy? Check out our recommended list of microphones.
6. Adjust your levels
Before pressing the record button, see how loudly your microphone picks up the sound you wish to record. Adjust your levels (sensitivity of your microphone) until the sound sits in between -6 dBs and -12dBs. This range gives the source of your sound some room to get louder without the recorded audio getting clipped. When you first listen to audio recorded within this range, it may sound very quiet. No need to worry though because you can increase the volume later in editing.
7. Start with a sound cue if you’re planning to do some syncing in post
If you’re recording separate audio that you plan to sync to your video later in editing, start your recording with a short and loud sound cue like a clap or a high pitched “beep” tone. Later, when you’re editing, it’ll be much easier for you to find the section where your video and additional audio match.
8. Get close to the sound
Unless you’re aiming to record ambient sound, bring your microphone close to the source of sound you are wanting to record. The closer your microphone is to the source of sound, the lower your sensitivity setting can be on your microphone. As a result of lowering your levels, sounds you are not meaning to record will also sound fainter.
9. ADR
When you need to record a scene in a loud setting where you have very little control over the noise, record additional vocals later and replace the original vocals through a process called automated dialogue replacement.
10. Record Ambient Sound
Remember to record ambient sound or “room tone.” You can use these recordings to fill in the blanks if you run out of audio and also smooth out parts of your audio where you hear pops, clicks, and other unwanted noise.
Richard Bennett
Richard Bennett is a writer and a lover of all things video.
Follow @Richard Bennett
- Title: "In 2024, Step Into Song Savvy YouTube Playlist Excellence"
- Author: Thomas
- Created at : 2024-05-31 12:43:40
- Updated at : 2024-06-01 12:43:40
- Link: https://youtube-help.techidaily.com/in-2024-step-into-song-savvy-youtube-playlist-excellence/
- License: This work is licensed under CC BY-NC-SA 4.0.
