
:max_bytes(150000):strip_icc()/55a66c62-7dd6-4b7c-b176-5942ad8b77a1-9693aedc51a242109ed21be18d9c340c.jpeg)
"In 2024, The Pinnacle Selector Your Personal Video Vault"
The Pinnacle Selector: Your Personal Video Vault
Top 12 Video Grabber Online to Download Any Video You Like

Liza Brown
Mar 27, 2024• Proven solutions
Watching videos online can cause interruptions and can take a lot of time loading after every few minutes. The best way to avoid all these problems from occurring while you are watching your favorite video or movie is to download them to your device for a smooth and interruption-free experience. There are multiple platforms and websites available on the internet that promise you high-quality downloaded videos. But only a few of them provide the original video quality. It is difficult to find a perfect Video Grabber that can help you download videos from your preferred website because most video grabbers have access to limited websites. That’s why it is important to have a video grabber platform that can help you in downloading all kinds of videos, from all websites and in all formats. In this article, we will list down the 12 best video grabbers that you can use to download your favorite videos for a smooth and spectacular experience.
You might be interested in:
| Program | Operating System | Price | Feature |
|---|---|---|---|
| iTube Go | Windows, macOS, Android | $29.95 | Store a full playlist of videos |
| 4K video Downloader | Windows, macOS | Free - $45 | Download Video in 4K Quality |
| By Click Downloader | Windows | Free - $4.99 | Supports a wide range of websites |
| Snap Downloader | Windows, macOS | Free – $54.99 | Supports up to 900 websites |
| ClipGrab | Windows | Free | Wide range of downloading options |
| aTube Catcher | Windows | Free | An easy to use & user friendly Interface |
| JDownloader | Windows, macOS, Linux | Free | Free and Open source Video Grabber |
| Clip Converter | Website | Free | Convert & Download video in any format |
| VideoProc | Window, macOS | Free - $37.95 | Search matched subtitles for shows |
| Video Grabber | Website, Windows | Free | All in one: Convert, download edit & record Videos |
| Aiseesoft Video Converter Ultimate | Windows, macOS | Free | Supports a wide range of formats |
| SaveFrom | Website | Free | Simple & easy to use online video grabber |
Note: We resolutely oppose all forms of copyright-infringing downloads. This tutorial is only for downloading YouTube videos/audio materials from your own channel.
1. iTube Go
Platform: Windows, macOS, Android
Price: $29.9

iTube Go is a fabulous Video Grabber available for Windows, macOS, and Android devices that will help you download videos from more than 1000 websites in several different formats. iTube Go supports all the famous videos sharing platforms such as Facebook, Instagram, Youtube, and more. This platform allows its users to convert the videos in formats like MP4, MP3, and other widely used formats. It also finds and downloads the matched subtitles of videos that you download.
Features
- Finds the most suitable subtitles of videos your download
- Wide range of video quality options to choose from
- Download videos in Bulk
- Convert videos into audio
- Cut Youtube videos
2. 4K video Downloader
Price: Free - $45

4K video downloader is an ideal video grabber to download high-quality videos from Youtube. It allows you to choose from different video qualities according to your requirement. You can also download the entire playlist of Youtube with a single click. It also allows you to convert the videos into an audio format such as MP3, OGG, and M4A. Apart from simple videos, if you want to download 3D or 360 videos, a 4K video downloader can help you achieve that goal.
Features
- Fast video converting and downloading speed
- One-click video downloading feature
- Supports 360 videos
- Download the entire playlist in one click
3. By Click Downloader
Platform: Windows
Price: Free - $4.99

By Click Downloader is a video grabber platform that allows you to download videos from more than 40 websites. It supports all the famous video-sharing platforms such as Youtube, Facebook, Instagram, Vimeo, Dailymotion, and more. While downloading a video from any website, you can choose the preferred video quality you want. It also allows you to download multiple videos at the same time, including playlists, channels, or any other videos of your choice. There is no limit on the number of downloads, which means you can download as many videos as you want.
Features
- Track your downloaded videos
- Download videos in 8K, 4K, and other qualities
- Convert videos into MP3, 3GP, MP4, and more formats
- Download Youtube and Facebook private videos
4. Snap Downloader
Price: Free – $54.99

Snap Downloader is a platform that supports more than 900 websites and downloads videos from them in different qualities and formats. It helps you download videos from all your favorite websites such as Youtube, Facebook, Vimeo, Dailymotion, Twitter, and more. It allows you to download videos of high quality such as 8K and 4K. Snap Downloader also helps you in downloading 360 videos in their original form.
Features
- High-speed video downloading
- Supports proxy
- Convert videos in your desired formats
- Download multiple videos in one click
5. ClipGrab
Platform: Windows
Price: Free
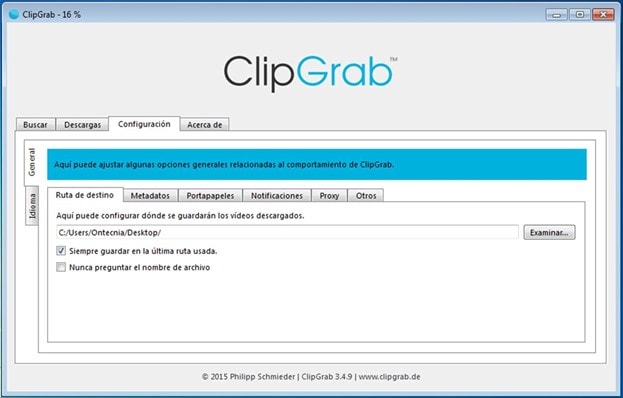
ClipGrab is a free video grabber tool that enables you to download videos from a wide range of websites. All the videos can be converted into your required format using ClipGrab. ClipGrab supports all kinds of video qualities and it can set according to your requirements while downloading the videos. With all these features, it also has a user-friendly and easy-to-use interface, which makes it an ideal video grabber for all your needs.
Features
- Search videos directly in ClipGrab
- User-Friendly Interface
- Download videos in multiple resolutions
- Support a wide range of formats
- Download multiple videos at one time
6. aTube Catcher
Platform: Windows
Price: Free

aTubeCatcher is an amazing video grabber tool that comes with several other amazing functions. It allows its users to download videos by pasting the link of those videos into it. It allows you to download videos in a wide range of formats and resolutions. Apart from downloading videos, it allows you to record the screen of your PC. The best thing about this platform is it is totally free. You don’t have to spend anything to access all these features.
Features
- User-friendly Interface
- Convert videos into multiple formats
- Supports all kinds of video formats
- Download videos from several websites
- Burn your DVD, and VCD
- Download streaming videos
7. JDownloader
Platform: Windows, macOS, _L_inux
Price: Free

JDownloader is a free and open-source video grabber which is being upgraded regularly with the help of a huge developers community. It is one of the fast and smooth video grabbers that you can find on the internet that can help you download videos from all sorts of websites such as video-sharing platforms or social media websites. It allows you to pause and resume the download whenever you want. If you have a huge video you can easily download it in parts.
Features
- Open-source platform
- 24 hours customer support
- Support several languages
- Choose from different themes
- Fast and smooth video downloading
8. Clip Converter
Platform: Website
Price: Free

Clip Converter is a web-based video grabber that allows its users to download videos from a wide range of websites and convert them into their required format and resolution. With Clip Converter, there is no need to download any software to grab videos. You have to copy the URL of the video and paste it into Clip Converter and download your video in your required format.
Features
- Download and convert videos
- Support a wide variety of websites
- Helps in screen recording
- Easy to use and astounding user interface
9. VideoProc
Price: Free - $37.95

VideoProc is one of the best video grabber tools that help you download videos and audio from multiple websites including Youtube, Dailymotion, and Vimeo. It also lets your download streaming videos. This platform is limited to downloading the videos and allows you to convert them into your required format before downloading them into your PC. If you use subtitles in all your videos, this platform can help you save your time by finding the most suitable and matching subtitles for all your downloaded videos or movies.
Features
- Download videos in their highest quality
- Change the resolution of the videos according to your needs
- Fast downloading and converting speed
- Supports multiple video formats
10. Video Grabber
Price: Free

Video Grabber is the most powerful video downloading platform that can be used from any device by simply visiting the web page. It is also available in software for Windows users. It comes with a wide variety of features and options apart from its primary and main option of video downloading. Video Grabber allows you to download videos from all kinds of websites, convert them into your required format and choose your desired video quality. Just paste the URL of your video into this platform to enjoy your videos in high quality and have a smooth experience.
Features
- Simple and user-friendly interface
- Supports several different video and audio formats
- Convert videos into any format
- No need to download
- Supports Video Editing
11. Aiseesoft Video Converter Ultimate
Price: Free

Aiseesoft is a unique video converting platform that allows you to convert and download video from any website ranging from simple to 3D videos. You can convert the video of Youtube and other video-sharing platforms into any of the video or audio formats that you want. It a very simple and fast video grabber available on the internet. Apart from converting and downloading videos from a different website, this platform also lets you edit your videos. It allows you to add watermarks and special effects to your videos. You can also use this platform to trim and crop your videos.
Features
- Supports a wide variety of formats
- Fast and secure downloading
- Supports video editing
- Change video quality
- Rip DVDs
12. SaveFrom
Platform: Website
Price: Free

SaveFrom is a web-based video grabber that helps you to download the video directly from a different website without downloading and installing any software into your PC. It is one of the easiest ways to download videos from different websites. Just paste the URL of your video into SaveFrom and let it download it for you. It is also available in the form of a chrome extension to make this process easy and more convenient. It only provides you videos in original formats and resolutions. It doesn’t allow you to change the format of videos.
Features
- Easy to use interface
- Simple and fast downloading
- Available as a chrome extension
- Download video from multiple different websites
Conclusion
Streaming videos over the internet can make your experience worse if you are not having a stable internet connection. All the above video grabbers will help you have a smooth and inconvenient experience of watching your favorite movies or other videos by downloading them from websites to your device into your preferred format. Check all of the above video grabbers and select one that best suits your requirements and needs and watch your videos without any interruption or loading.


Liza Brown
Liza Brown is a writer and a lover of all things video.
Follow @Liza Brown
Liza Brown
Mar 27, 2024• Proven solutions
Watching videos online can cause interruptions and can take a lot of time loading after every few minutes. The best way to avoid all these problems from occurring while you are watching your favorite video or movie is to download them to your device for a smooth and interruption-free experience. There are multiple platforms and websites available on the internet that promise you high-quality downloaded videos. But only a few of them provide the original video quality. It is difficult to find a perfect Video Grabber that can help you download videos from your preferred website because most video grabbers have access to limited websites. That’s why it is important to have a video grabber platform that can help you in downloading all kinds of videos, from all websites and in all formats. In this article, we will list down the 12 best video grabbers that you can use to download your favorite videos for a smooth and spectacular experience.
You might be interested in:
| Program | Operating System | Price | Feature |
|---|---|---|---|
| iTube Go | Windows, macOS, Android | $29.95 | Store a full playlist of videos |
| 4K video Downloader | Windows, macOS | Free - $45 | Download Video in 4K Quality |
| By Click Downloader | Windows | Free - $4.99 | Supports a wide range of websites |
| Snap Downloader | Windows, macOS | Free – $54.99 | Supports up to 900 websites |
| ClipGrab | Windows | Free | Wide range of downloading options |
| aTube Catcher | Windows | Free | An easy to use & user friendly Interface |
| JDownloader | Windows, macOS, Linux | Free | Free and Open source Video Grabber |
| Clip Converter | Website | Free | Convert & Download video in any format |
| VideoProc | Window, macOS | Free - $37.95 | Search matched subtitles for shows |
| Video Grabber | Website, Windows | Free | All in one: Convert, download edit & record Videos |
| Aiseesoft Video Converter Ultimate | Windows, macOS | Free | Supports a wide range of formats |
| SaveFrom | Website | Free | Simple & easy to use online video grabber |
Note: We resolutely oppose all forms of copyright-infringing downloads. This tutorial is only for downloading YouTube videos/audio materials from your own channel.
1. iTube Go
Platform: Windows, macOS, Android
Price: $29.9
iTube Go is a fabulous Video Grabber available for Windows, macOS, and Android devices that will help you download videos from more than 1000 websites in several different formats. iTube Go supports all the famous videos sharing platforms such as Facebook, Instagram, Youtube, and more. This platform allows its users to convert the videos in formats like MP4, MP3, and other widely used formats. It also finds and downloads the matched subtitles of videos that you download.
Features
- Finds the most suitable subtitles of videos your download
- Wide range of video quality options to choose from
- Download videos in Bulk
- Convert videos into audio
- Cut Youtube videos
2. 4K video Downloader
Price: Free - $45
4K video downloader is an ideal video grabber to download high-quality videos from Youtube. It allows you to choose from different video qualities according to your requirement. You can also download the entire playlist of Youtube with a single click. It also allows you to convert the videos into an audio format such as MP3, OGG, and M4A. Apart from simple videos, if you want to download 3D or 360 videos, a 4K video downloader can help you achieve that goal.
Features
- Fast video converting and downloading speed
- One-click video downloading feature
- Supports 360 videos
- Download the entire playlist in one click
3. By Click Downloader
Platform: Windows
Price: Free - $4.99
By Click Downloader is a video grabber platform that allows you to download videos from more than 40 websites. It supports all the famous video-sharing platforms such as Youtube, Facebook, Instagram, Vimeo, Dailymotion, and more. While downloading a video from any website, you can choose the preferred video quality you want. It also allows you to download multiple videos at the same time, including playlists, channels, or any other videos of your choice. There is no limit on the number of downloads, which means you can download as many videos as you want.
Features
- Track your downloaded videos
- Download videos in 8K, 4K, and other qualities
- Convert videos into MP3, 3GP, MP4, and more formats
- Download Youtube and Facebook private videos
4. Snap Downloader
Price: Free – $54.99
Snap Downloader is a platform that supports more than 900 websites and downloads videos from them in different qualities and formats. It helps you download videos from all your favorite websites such as Youtube, Facebook, Vimeo, Dailymotion, Twitter, and more. It allows you to download videos of high quality such as 8K and 4K. Snap Downloader also helps you in downloading 360 videos in their original form.
Features
- High-speed video downloading
- Supports proxy
- Convert videos in your desired formats
- Download multiple videos in one click
5. ClipGrab
Platform: Windows
Price: Free
ClipGrab is a free video grabber tool that enables you to download videos from a wide range of websites. All the videos can be converted into your required format using ClipGrab. ClipGrab supports all kinds of video qualities and it can set according to your requirements while downloading the videos. With all these features, it also has a user-friendly and easy-to-use interface, which makes it an ideal video grabber for all your needs.
Features
- Search videos directly in ClipGrab
- User-Friendly Interface
- Download videos in multiple resolutions
- Support a wide range of formats
- Download multiple videos at one time
6. aTube Catcher
Platform: Windows
Price: Free
aTubeCatcher is an amazing video grabber tool that comes with several other amazing functions. It allows its users to download videos by pasting the link of those videos into it. It allows you to download videos in a wide range of formats and resolutions. Apart from downloading videos, it allows you to record the screen of your PC. The best thing about this platform is it is totally free. You don’t have to spend anything to access all these features.
Features
- User-friendly Interface
- Convert videos into multiple formats
- Supports all kinds of video formats
- Download videos from several websites
- Burn your DVD, and VCD
- Download streaming videos
7. JDownloader
Platform: Windows, macOS, _L_inux
Price: Free
JDownloader is a free and open-source video grabber which is being upgraded regularly with the help of a huge developers community. It is one of the fast and smooth video grabbers that you can find on the internet that can help you download videos from all sorts of websites such as video-sharing platforms or social media websites. It allows you to pause and resume the download whenever you want. If you have a huge video you can easily download it in parts.
Features
- Open-source platform
- 24 hours customer support
- Support several languages
- Choose from different themes
- Fast and smooth video downloading
8. Clip Converter
Platform: Website
Price: Free
Clip Converter is a web-based video grabber that allows its users to download videos from a wide range of websites and convert them into their required format and resolution. With Clip Converter, there is no need to download any software to grab videos. You have to copy the URL of the video and paste it into Clip Converter and download your video in your required format.
Features
- Download and convert videos
- Support a wide variety of websites
- Helps in screen recording
- Easy to use and astounding user interface
9. VideoProc
Price: Free - $37.95
VideoProc is one of the best video grabber tools that help you download videos and audio from multiple websites including Youtube, Dailymotion, and Vimeo. It also lets your download streaming videos. This platform is limited to downloading the videos and allows you to convert them into your required format before downloading them into your PC. If you use subtitles in all your videos, this platform can help you save your time by finding the most suitable and matching subtitles for all your downloaded videos or movies.
Features
- Download videos in their highest quality
- Change the resolution of the videos according to your needs
- Fast downloading and converting speed
- Supports multiple video formats
10. Video Grabber
Price: Free
Video Grabber is the most powerful video downloading platform that can be used from any device by simply visiting the web page. It is also available in software for Windows users. It comes with a wide variety of features and options apart from its primary and main option of video downloading. Video Grabber allows you to download videos from all kinds of websites, convert them into your required format and choose your desired video quality. Just paste the URL of your video into this platform to enjoy your videos in high quality and have a smooth experience.
Features
- Simple and user-friendly interface
- Supports several different video and audio formats
- Convert videos into any format
- No need to download
- Supports Video Editing
11. Aiseesoft Video Converter Ultimate
Price: Free
Aiseesoft is a unique video converting platform that allows you to convert and download video from any website ranging from simple to 3D videos. You can convert the video of Youtube and other video-sharing platforms into any of the video or audio formats that you want. It a very simple and fast video grabber available on the internet. Apart from converting and downloading videos from a different website, this platform also lets you edit your videos. It allows you to add watermarks and special effects to your videos. You can also use this platform to trim and crop your videos.
Features
- Supports a wide variety of formats
- Fast and secure downloading
- Supports video editing
- Change video quality
- Rip DVDs
12. SaveFrom
Platform: Website
Price: Free
SaveFrom is a web-based video grabber that helps you to download the video directly from a different website without downloading and installing any software into your PC. It is one of the easiest ways to download videos from different websites. Just paste the URL of your video into SaveFrom and let it download it for you. It is also available in the form of a chrome extension to make this process easy and more convenient. It only provides you videos in original formats and resolutions. It doesn’t allow you to change the format of videos.
Features
- Easy to use interface
- Simple and fast downloading
- Available as a chrome extension
- Download video from multiple different websites
Conclusion
Streaming videos over the internet can make your experience worse if you are not having a stable internet connection. All the above video grabbers will help you have a smooth and inconvenient experience of watching your favorite movies or other videos by downloading them from websites to your device into your preferred format. Check all of the above video grabbers and select one that best suits your requirements and needs and watch your videos without any interruption or loading.
Liza Brown
Liza Brown is a writer and a lover of all things video.
Follow @Liza Brown
From Editing Desk to YouTube: Post-Production Processes
How to Upload a Video from iMovie to YouTube?
Liza Brown
Aug 18, 2022• Proven solutions
“Is iMovie good for YouTube?”
The iMovie is not only good for YouTube but various other social media platforms. The thing is, you have to compromise with the quality offered by Apple’s video editor iMovie. Well, iMovie is perfect for getting started for beginners. But, the professionals and ones who want a bit high features than basic ones should look elsewhere. Thus, we always recommend alternatives to a particular software for our audience. In this article, there is a mention of Wondershare Filmora to overcome the drawbacks of iMovie.
Without further ado, let’s begin with how to upload a video from iMovie to YouTube. We want to lead with the best iMovie export settings, specific troubleshooting issues, and our alternative intro section to overcome iMovie’s limitations.
Part 1: How to Upload a Video from iMovie to YouTube?
iMovie is ideal for making YouTube videos if you are too basic and are not looking for advanced features. Remember that professionalism pays in these platforms and helps you stand better among others. If you’re still interested in making introductory videos, here is a step-by-step guide on uploading a video to YouTube from iMovie on Mac first and leading with iPhone.
Step-by-Step Tutorial on how to upload a video from iMovie to YouTube on Mac
Step 1: Create a Project
On the first step, go to iMovie on Mac and click the Create New tab below.
Step 2: Import Media
Click the Import Media button and browse the files on your computer, as shown below.
Step 3: Edit Clips
It’s time to edit video footage. Drag your video to the timeline, as shown below.
Then, you can trim and drag the edges of video clips to allow editing.
Step 4: Add Titles
You can add titles by clicking the Title tab and further drag the Title’s template into the timeline.
Step 5: Export the Video
Click the Export button as follows after editing is over.
Select YouTube to upload your video over the platform directly.
Step 6: Save
After selecting the desired platform, click the Next tab to proceed with saving the file.
At last, save your video as shown below.
Step-by-Step Tutorial on how to upload iMovie to YouTube from iPhone
Step 1: Share the iMovie Project
Go to iMovie on your iPhone. Open the iMovie project on your iPhone and tap the Share button to select YouTube. Enter the information of Title, Description, Size, Tags, Privacy, and Location (optional).
Step 2: Upload iMovie Files
For ease of use, you can upload saved videos in Photo Library on your iPhone. Then, you can upload iMovie videos via the YouTube iOS app. Sign In to YouTube and click the Camera icon at the top of the Home page. Select your iPhone Photo Library file and set the video Title, Description, Size, Tags, and Privacy. Then, hit the Upload button to confirm.
Part 2: The Best iMovie Export Settings for YouTube Videos
As we all know that iMovie consists of a bit long procedure to export projects. Here are some tips on the best iMovie export settings to avoid an unnecessary headache.
- Set small resolution: Small resolution plays a more significant role, especially while uploading. Thus, you can set the smallest resolution in the Email tab of the Export button.
2. Change Export settings in the File tab: There is a File tab under the Export button. Click it and find various settings that you need to change to get the best export settings for YouTube 2021. Make the Title of the video as small as possible. Set the resolution at 1080P than 4K.
However, it isn’t going to upgrade the resolution if your video is already in the 1080P definition. Now, the last setting that will crazily offer you the best quality and lots of space-saving. You have to select Best (ProRes) in quality settings for this purpose. These settings also take less time to upload to YouTube.
3. Compress is not for speed: Various options you see in the Compresstab are not for speed. They are for how you save the video on a desktop. Thus, always choose the Better Quality tab than Faster.
- Do not export directly to YouTube: iMovie is pretty basic and doesn’t offer great settings to upload your video instantly. You may have to make changes to the uploaded video even if you do this as per our step-by-step guide mentioned above.
Part 3: How to fix the “Failed to Upload to YouTube” Error on iMovie?
The “iMovie to YouTube failed” problem occurs when you directly upload a YouTube video from iMovie. The issue will result if you upload from any third-party uploader. That is why the direct upload doesn’t work, especially in iMovie. You can opt to share your video to the desktop first and then drag it to upload to the YouTube platform.
Part 4: Upload Videos to YouTube with the Best Alternative to iMovie - Wondershare Filmora
“What can I use instead of iMovie to overcome its limitations?”
When you see that iMovie is not uploading to YouTube or iMovie upload to YouTube got stuck, go for a better alternative. In this section, we’d like to recommend Wondershare Filmora that offers the best export settings compared to iMovie. It is the go-to solution if you can’t upload video from iMovie to YouTube directly. Filmora further provides intuitive editing tools that professionally make your YouTube video projects.
Export Key Aspects of Wondershare Filmora in comparison to iMovie:
- It offers a long list of export resolutions to choose from.
- You get separate video and audio settings such as Encoder, Channel, Frame Rate, Bit Rate, Resolution, etc.
- It is further compatible with export to various devices including the iPhone, Samsung, iPod, Apple TV, iPad, Google Pixel, PSP, Smart TV, etc.
Step-by-Step Guide on how to upload a video from iMovie to YouTube via Wondershare Filmora
Step 1: Click the Export button and select resolution
After your project in Wondershare Filmora is over, click the Export tab and select video resolution from the Local tab, as shown below.
It has a list of formats. You can also edit the Name and saving location here.
Step 2: Select Quality
Select the Settings button and choose from three quality levels of Best, Better, and Good. You can also adjust video and audio parameters, including the Encoder, Frame Rate, Resolution, Bit Rate, etc.
Step 3: Select platform
Select the YouTube tab, Sign In to your YouTube account, and hit the Export button after modifying the Title and Quality if needed. Also, make sure to check the Enable GPU accelerated video encoding tab.
Select Wondershare Filmora as the ultimate solution even if iMovie upload to YouTube not showing up.
Conclusion
Hopefully, we’ve informed you of the relevant facts on how to upload a video from iMovie to YouTube. We have also examined the number of troubleshooting issues involved in the iMovie video editor. Well, you will get to face similar kinds of export difficulties in the iMovie editor. Also, the entire procedure to end the exporting task is a bit long in iMovie compared to any other video editing software. Thus, it’s crucial to check out what other alternatives the technological world has today. We can’t state to you a better beginner-friendly yet advanced editing option than Wondershare Filmora that rightly outtakes the iMovie video editor in all aspects.
Liza Brown
Liza Brown is a writer and a lover of all things video.
Follow @Liza Brown
Liza Brown
Aug 18, 2022• Proven solutions
“Is iMovie good for YouTube?”
The iMovie is not only good for YouTube but various other social media platforms. The thing is, you have to compromise with the quality offered by Apple’s video editor iMovie. Well, iMovie is perfect for getting started for beginners. But, the professionals and ones who want a bit high features than basic ones should look elsewhere. Thus, we always recommend alternatives to a particular software for our audience. In this article, there is a mention of Wondershare Filmora to overcome the drawbacks of iMovie.
Without further ado, let’s begin with how to upload a video from iMovie to YouTube. We want to lead with the best iMovie export settings, specific troubleshooting issues, and our alternative intro section to overcome iMovie’s limitations.
Part 1: How to Upload a Video from iMovie to YouTube?
iMovie is ideal for making YouTube videos if you are too basic and are not looking for advanced features. Remember that professionalism pays in these platforms and helps you stand better among others. If you’re still interested in making introductory videos, here is a step-by-step guide on uploading a video to YouTube from iMovie on Mac first and leading with iPhone.
Step-by-Step Tutorial on how to upload a video from iMovie to YouTube on Mac
Step 1: Create a Project
On the first step, go to iMovie on Mac and click the Create New tab below.
Step 2: Import Media
Click the Import Media button and browse the files on your computer, as shown below.
Step 3: Edit Clips
It’s time to edit video footage. Drag your video to the timeline, as shown below.
Then, you can trim and drag the edges of video clips to allow editing.
Step 4: Add Titles
You can add titles by clicking the Title tab and further drag the Title’s template into the timeline.
Step 5: Export the Video
Click the Export button as follows after editing is over.
Select YouTube to upload your video over the platform directly.
Step 6: Save
After selecting the desired platform, click the Next tab to proceed with saving the file.
At last, save your video as shown below.
Step-by-Step Tutorial on how to upload iMovie to YouTube from iPhone
Step 1: Share the iMovie Project
Go to iMovie on your iPhone. Open the iMovie project on your iPhone and tap the Share button to select YouTube. Enter the information of Title, Description, Size, Tags, Privacy, and Location (optional).
Step 2: Upload iMovie Files
For ease of use, you can upload saved videos in Photo Library on your iPhone. Then, you can upload iMovie videos via the YouTube iOS app. Sign In to YouTube and click the Camera icon at the top of the Home page. Select your iPhone Photo Library file and set the video Title, Description, Size, Tags, and Privacy. Then, hit the Upload button to confirm.
Part 2: The Best iMovie Export Settings for YouTube Videos
As we all know that iMovie consists of a bit long procedure to export projects. Here are some tips on the best iMovie export settings to avoid an unnecessary headache.
- Set small resolution: Small resolution plays a more significant role, especially while uploading. Thus, you can set the smallest resolution in the Email tab of the Export button.
2. Change Export settings in the File tab: There is a File tab under the Export button. Click it and find various settings that you need to change to get the best export settings for YouTube 2021. Make the Title of the video as small as possible. Set the resolution at 1080P than 4K.
However, it isn’t going to upgrade the resolution if your video is already in the 1080P definition. Now, the last setting that will crazily offer you the best quality and lots of space-saving. You have to select Best (ProRes) in quality settings for this purpose. These settings also take less time to upload to YouTube.
3. Compress is not for speed: Various options you see in the Compresstab are not for speed. They are for how you save the video on a desktop. Thus, always choose the Better Quality tab than Faster.
- Do not export directly to YouTube: iMovie is pretty basic and doesn’t offer great settings to upload your video instantly. You may have to make changes to the uploaded video even if you do this as per our step-by-step guide mentioned above.
Part 3: How to fix the “Failed to Upload to YouTube” Error on iMovie?
The “iMovie to YouTube failed” problem occurs when you directly upload a YouTube video from iMovie. The issue will result if you upload from any third-party uploader. That is why the direct upload doesn’t work, especially in iMovie. You can opt to share your video to the desktop first and then drag it to upload to the YouTube platform.
Part 4: Upload Videos to YouTube with the Best Alternative to iMovie - Wondershare Filmora
“What can I use instead of iMovie to overcome its limitations?”
When you see that iMovie is not uploading to YouTube or iMovie upload to YouTube got stuck, go for a better alternative. In this section, we’d like to recommend Wondershare Filmora that offers the best export settings compared to iMovie. It is the go-to solution if you can’t upload video from iMovie to YouTube directly. Filmora further provides intuitive editing tools that professionally make your YouTube video projects.
Export Key Aspects of Wondershare Filmora in comparison to iMovie:
- It offers a long list of export resolutions to choose from.
- You get separate video and audio settings such as Encoder, Channel, Frame Rate, Bit Rate, Resolution, etc.
- It is further compatible with export to various devices including the iPhone, Samsung, iPod, Apple TV, iPad, Google Pixel, PSP, Smart TV, etc.
Step-by-Step Guide on how to upload a video from iMovie to YouTube via Wondershare Filmora
Step 1: Click the Export button and select resolution
After your project in Wondershare Filmora is over, click the Export tab and select video resolution from the Local tab, as shown below.
It has a list of formats. You can also edit the Name and saving location here.
Step 2: Select Quality
Select the Settings button and choose from three quality levels of Best, Better, and Good. You can also adjust video and audio parameters, including the Encoder, Frame Rate, Resolution, Bit Rate, etc.
Step 3: Select platform
Select the YouTube tab, Sign In to your YouTube account, and hit the Export button after modifying the Title and Quality if needed. Also, make sure to check the Enable GPU accelerated video encoding tab.
Select Wondershare Filmora as the ultimate solution even if iMovie upload to YouTube not showing up.
Conclusion
Hopefully, we’ve informed you of the relevant facts on how to upload a video from iMovie to YouTube. We have also examined the number of troubleshooting issues involved in the iMovie video editor. Well, you will get to face similar kinds of export difficulties in the iMovie editor. Also, the entire procedure to end the exporting task is a bit long in iMovie compared to any other video editing software. Thus, it’s crucial to check out what other alternatives the technological world has today. We can’t state to you a better beginner-friendly yet advanced editing option than Wondershare Filmora that rightly outtakes the iMovie video editor in all aspects.
Liza Brown
Liza Brown is a writer and a lover of all things video.
Follow @Liza Brown
- Title: "In 2024, The Pinnacle Selector Your Personal Video Vault"
- Author: Thomas
- Created at : 2024-05-31 12:46:33
- Updated at : 2024-06-01 12:46:33
- Link: https://youtube-help.techidaily.com/in-2024-the-pinnacle-selector-your-personal-video-vault/
- License: This work is licensed under CC BY-NC-SA 4.0.
