
:max_bytes(150000):strip_icc()/how-to-use-the-fortnite-split-screen-e1bea3d8dee841af841e417a2778bbfc.jpg)
In 2024, Transform Videos with These Premium, Free Sound Options
Transform Videos with These Premium, Free Sound Options
7 Places to Find Royalty Free Sound Effects for YouTube Videos

Richard Bennett
Mar 27, 2024• Proven solutions
Sound effects can add a lot of excitement to your videos. Sometimes they are even used for comedic effect. For example, you might use a fake slap sound in a slapstick comedy sketch. Other times sound effects can be more subtle. You might want to add city noises to the background of your video to help set your scene, or a droning sound to build suspense. A lot of the most popular free sound effects are related to the genres of science fiction or action.
- Part 1: Three Types of Sound Effects
- Part 2: Royalty-Free Sound Effects for Your YouTube Videos
- Part 3: Free Sound Effects and Music in Filmora
Part 1: Three Types of Sound Effects
1. Without License
When you want to download sound effects for YouTube, the licensed ones cannot be used, but there are a few that do not hold a license and can be easily downloaded from the website. The quality might be poor to some extent, but you may use the sound effects without a license in any product or video.
2. Creative Commons License
The sound effects under the CC license need to be checked for their type. There are some vlog sound effects that can be used for personal projects free but not for commercial ones. There are a few sound effects that might just require attribution or credit to the creator and cannot be modified in any way.
3. Royalty-free license
You may download sound effects for YouTube by purchasing the licensed sound effects that a professional offers. When you purchase it, you will get high-quality sound, and you may use it on one or more projects, irrespective of personal or commercial types.
Where can you get free sound effects and edit audios at the same time? Just try Filmora for free!


Part 2: Royalty-Free Sound Effects for Your YouTube Videos
This article will introduce you to the six best sites to find royalty-free sound effects and explain their terms of use.
1.YouTube Audio Library – Free!
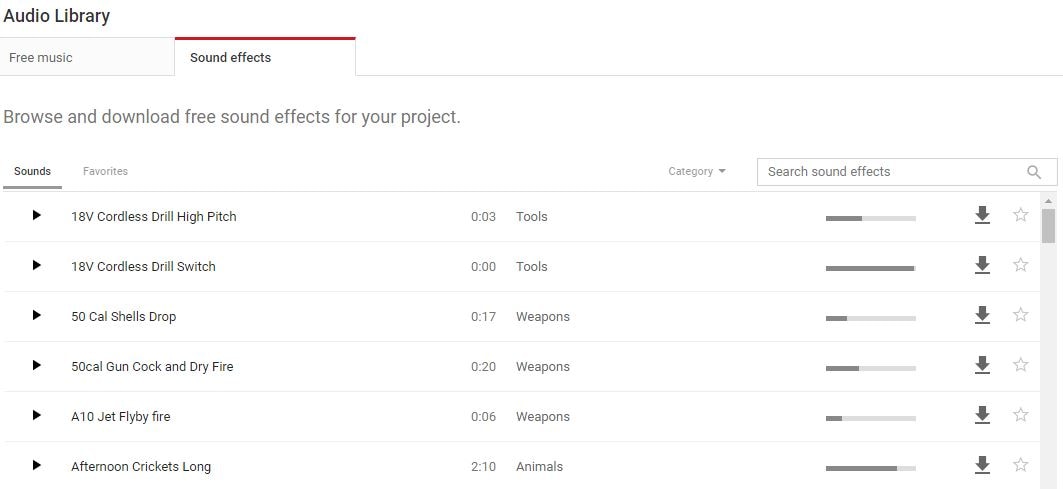
Besides royalty-free music, the YouTube Audio Library also has sound effects that you can download for free. The sound effects in YouTube’s library are organized into categories. You can select a category, i.e ‘sci-fi’, from the drop-down menu next to the search bar and browse through just the types of sounds you are interested in. You can also favorite sounds you like so you can find them again easily.
The sound effects you download from YouTube’s library can be used as many times as you like and in as many different projects. Monetizing your videos will not impact your ability to use these sound effects either. Some other sources of sound effects have different rules about monetizing or using sound effects in multiple projects.
2.Freesound – Free!
![]()
Freesound.org is a huge database of royalty-free sound effects and other audio files. All downloads are free, but there are conditions for using some of the sounds on Freesound. There are three different Creative Commons licenses uses on Freesound and which one applies to the sound effect you want depends on the user who posted it.
The three licenses used on Freesound are Zero, Attribution, and Attribution-Noncommercial.
Zero (cc0): you can do anything you want with these sound effects except claim that you created them. You can make money off of them and you do not have to credit the original creator.
Attribution (by): you should credit the creator of the sound. Usually, this means adding a ‘Sound effect by Username on Freesound’ line in the description of your video. So long as you credit the artists you can do anything with these sounds, even monetize the videos you use them in.
Attribution-Noncommercial (by –nc): you must credit the creators of these sound effects and you cannot make money off of them. This means that you cannot monetize a video in which you used these sound effects.
Freesound is a social site where you can talk to the creators of the sounds you want to download. If you are planning to monetize a video that uses an Attribution-Noncommercial sound effect you can always ask the artist for permission.
I’ve also found a YouTube video that explains the Creative Commons in detail. You can watch it below.
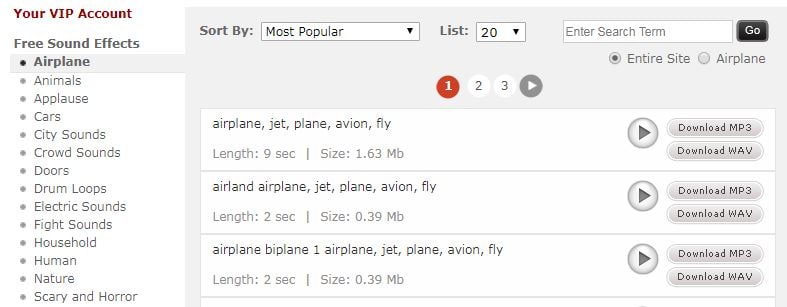
3.AudioJungle - $1 and Up
AudioJungle.net has a wide selection of royalty-free sound effects available for prices as low as $1. Sound effects costing more than $10 tend to either be longer or include whole sets of sounds. You can filter the sounds on AudioJungle by category, tags, and price while you browse.
There are two different licenses you can purchase on AudioJungle, SFX Single Use, and SFX Multi-Use. The prices displayed are all for the Single Use license. The Multi-Use license costs more.
The main difference between the two licenses on AudioJungle is how many projects you can use your sound effect in. If you purchase a sound under a Single-Use license you can only use it in one project. You can use it as many times as you want within that project, and you can even make money off of that project, but you cannot use it again in a second project unless you repurchase it. While it is more expensive, the Multi-Use license gives you unlimited use of your download.
If you decide to use sound effects from any of these sites then please make sure to read their more detailed legal information.
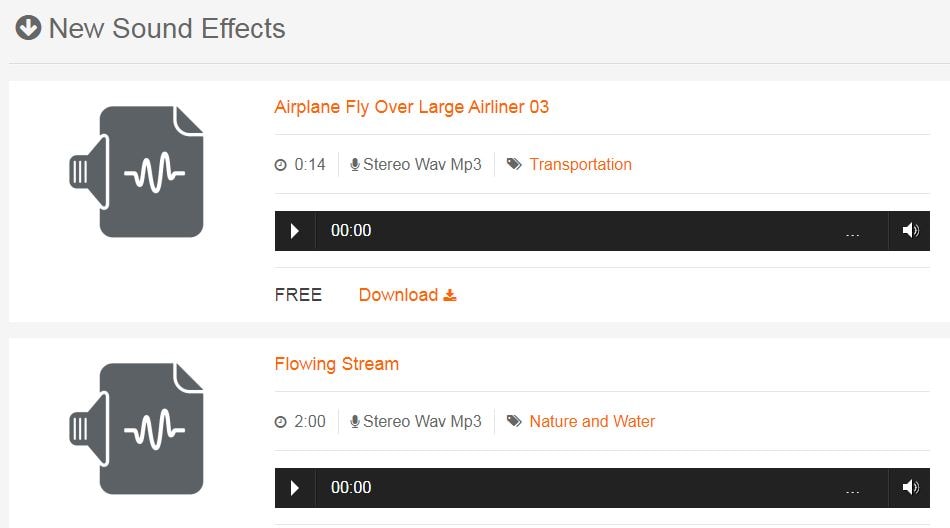
4.Free Sound Effects
The Free Sound Effects lets you access free as well as licensed sound effects. If you want to download sound effects for YouTube videos, the legally licensed soundtracks with high-quality effects can be selected from the Pro Sound Effects sections. These are royalty-free sound effects.
It requires a one-time fee and you get access to use the sound effects as many times you want for your projects. But, if you are not really serious and just creating videos out of fun, you may also try the free sound effects like animals, applause, cars, etc. to ensure good vlog sound effects that can give life to your vlog.
5.Soundsnap

Whether you wish to spice up your games videos or make the notification alerts hilarious, the Soundsnap app lets you download some of the most amazing sound effects. It is the best platform to search and also share the free vlog sound effects or loops legally. Soundsnap offers original sound effects created by the users and not the edited or mixed sounds that you find in usual commercial libraries. It features above 200,000 loops and sound effects created by expert and knowledgeable music producers and sound engineers.
6.PacDV Free Sound Effects
Now, you may create vlog sound effects from this royalty-free library of sounds produced by film students, multimedia developers, sound designers, music producers, etc. On the PacDV Free Sound Effects site, you can find free sound clips that have been used in a number of films, television programs, and videos.
You may definitely enjoy downloading sound effects for YouTube from this site completely free but cannot sell it or re-license it to anyone for your benefit. It must be used by you for your video only. The sound clips must not be put on site for download or link to other sound files.
Part 3: Get Free Sound Effects for YouTube Video in Filmora
If you’re using the Filmora video editor to produce YouTube videos, then you have a free sound effect library already. You can find them in the Audio library (shown below).

There are currently 25 different sound effects available, varying from animal, machine, people, sci-fi, and ambiance. After adding the sound effect to the timeline, you can change the speed to make the sound sounds fun.
Richard Bennett
Richard Bennett is a writer and a lover of all things video.
Follow @Richard Bennett
Richard Bennett
Mar 27, 2024• Proven solutions
Sound effects can add a lot of excitement to your videos. Sometimes they are even used for comedic effect. For example, you might use a fake slap sound in a slapstick comedy sketch. Other times sound effects can be more subtle. You might want to add city noises to the background of your video to help set your scene, or a droning sound to build suspense. A lot of the most popular free sound effects are related to the genres of science fiction or action.
- Part 1: Three Types of Sound Effects
- Part 2: Royalty-Free Sound Effects for Your YouTube Videos
- Part 3: Free Sound Effects and Music in Filmora
Part 1: Three Types of Sound Effects
1. Without License
When you want to download sound effects for YouTube, the licensed ones cannot be used, but there are a few that do not hold a license and can be easily downloaded from the website. The quality might be poor to some extent, but you may use the sound effects without a license in any product or video.
2. Creative Commons License
The sound effects under the CC license need to be checked for their type. There are some vlog sound effects that can be used for personal projects free but not for commercial ones. There are a few sound effects that might just require attribution or credit to the creator and cannot be modified in any way.
3. Royalty-free license
You may download sound effects for YouTube by purchasing the licensed sound effects that a professional offers. When you purchase it, you will get high-quality sound, and you may use it on one or more projects, irrespective of personal or commercial types.
Where can you get free sound effects and edit audios at the same time? Just try Filmora for free!
Part 2: Royalty-Free Sound Effects for Your YouTube Videos
This article will introduce you to the six best sites to find royalty-free sound effects and explain their terms of use.
1.YouTube Audio Library – Free!
Besides royalty-free music, the YouTube Audio Library also has sound effects that you can download for free. The sound effects in YouTube’s library are organized into categories. You can select a category, i.e ‘sci-fi’, from the drop-down menu next to the search bar and browse through just the types of sounds you are interested in. You can also favorite sounds you like so you can find them again easily.
The sound effects you download from YouTube’s library can be used as many times as you like and in as many different projects. Monetizing your videos will not impact your ability to use these sound effects either. Some other sources of sound effects have different rules about monetizing or using sound effects in multiple projects.
2.Freesound – Free!
![]()
Freesound.org is a huge database of royalty-free sound effects and other audio files. All downloads are free, but there are conditions for using some of the sounds on Freesound. There are three different Creative Commons licenses uses on Freesound and which one applies to the sound effect you want depends on the user who posted it.
The three licenses used on Freesound are Zero, Attribution, and Attribution-Noncommercial.
Zero (cc0): you can do anything you want with these sound effects except claim that you created them. You can make money off of them and you do not have to credit the original creator.
Attribution (by): you should credit the creator of the sound. Usually, this means adding a ‘Sound effect by Username on Freesound’ line in the description of your video. So long as you credit the artists you can do anything with these sounds, even monetize the videos you use them in.
Attribution-Noncommercial (by –nc): you must credit the creators of these sound effects and you cannot make money off of them. This means that you cannot monetize a video in which you used these sound effects.
Freesound is a social site where you can talk to the creators of the sounds you want to download. If you are planning to monetize a video that uses an Attribution-Noncommercial sound effect you can always ask the artist for permission.
I’ve also found a YouTube video that explains the Creative Commons in detail. You can watch it below.
3.AudioJungle - $1 and Up
AudioJungle.net has a wide selection of royalty-free sound effects available for prices as low as $1. Sound effects costing more than $10 tend to either be longer or include whole sets of sounds. You can filter the sounds on AudioJungle by category, tags, and price while you browse.
There are two different licenses you can purchase on AudioJungle, SFX Single Use, and SFX Multi-Use. The prices displayed are all for the Single Use license. The Multi-Use license costs more.
The main difference between the two licenses on AudioJungle is how many projects you can use your sound effect in. If you purchase a sound under a Single-Use license you can only use it in one project. You can use it as many times as you want within that project, and you can even make money off of that project, but you cannot use it again in a second project unless you repurchase it. While it is more expensive, the Multi-Use license gives you unlimited use of your download.
If you decide to use sound effects from any of these sites then please make sure to read their more detailed legal information.
4.Free Sound Effects
The Free Sound Effects lets you access free as well as licensed sound effects. If you want to download sound effects for YouTube videos, the legally licensed soundtracks with high-quality effects can be selected from the Pro Sound Effects sections. These are royalty-free sound effects.
It requires a one-time fee and you get access to use the sound effects as many times you want for your projects. But, if you are not really serious and just creating videos out of fun, you may also try the free sound effects like animals, applause, cars, etc. to ensure good vlog sound effects that can give life to your vlog.
5.Soundsnap
Whether you wish to spice up your games videos or make the notification alerts hilarious, the Soundsnap app lets you download some of the most amazing sound effects. It is the best platform to search and also share the free vlog sound effects or loops legally. Soundsnap offers original sound effects created by the users and not the edited or mixed sounds that you find in usual commercial libraries. It features above 200,000 loops and sound effects created by expert and knowledgeable music producers and sound engineers.
6.PacDV Free Sound Effects
Now, you may create vlog sound effects from this royalty-free library of sounds produced by film students, multimedia developers, sound designers, music producers, etc. On the PacDV Free Sound Effects site, you can find free sound clips that have been used in a number of films, television programs, and videos.
You may definitely enjoy downloading sound effects for YouTube from this site completely free but cannot sell it or re-license it to anyone for your benefit. It must be used by you for your video only. The sound clips must not be put on site for download or link to other sound files.
Part 3: Get Free Sound Effects for YouTube Video in Filmora
If you’re using the Filmora video editor to produce YouTube videos, then you have a free sound effect library already. You can find them in the Audio library (shown below).
There are currently 25 different sound effects available, varying from animal, machine, people, sci-fi, and ambiance. After adding the sound effect to the timeline, you can change the speed to make the sound sounds fun.
Richard Bennett
Richard Bennett is a writer and a lover of all things video.
Follow @Richard Bennett
Live Stream Success: OBS Steps to Shine on Youtube
Live stream to youtube with OBS step by step guide for beginners
Richard Bennett
Mar 27, 2024• Proven solutions
- Part1. Stream Now set up
- Part2. Set up Your Live Streaming Encoder
- Part3. Youtube Events set up
- Part4. Video tutorial
1. Stream Now set up
Follow these steps to live stream your impressive videos to YouTube using Stream Now tool:
Step 1: First of all you need to login with your account and then move to Creator Studio option directly.

Step 2: Choose the Video Manager option from top most toolbar.

Step 3: From the drop down menu, simply select Live Streaming option to begin with.

Step 4: Now hot the steam now option on your screen.

Step 5: Change or Upload your thumbnail as per need.

Step 6: It is time to provide an eye catching title to your video, add description and finally choose category from the drop down menu.

Step 7: While using stream option, never forget to click on ‘make archive unlisted when complete’ option so that you can save as well as watch your content on YouTube at later stage.

Step 8: You can monetize your ads as per need.

Step 9: It also provides options to add cards.

Step 10: Now move to encoder setup and then simply copy and paste these details to your streaming software.

Step 11: Now you can set your live chat option as per your requirement.

Step 12: The analysis window will help you to know about how many viewers are connected to your video as well as the message updates will be reflected.

Step 13: Stream health can be monitored directly.

Step 14: One can also use the social media button for live shares.

2.Set up Your Live Streaming Encoder
As soon as you have completed the above set up then next task is to adjust settings of your streaming encoder. It is possible to make easy selection out of wide range of live streaming encoders. The details below are provided with reference to OBS too that is open source type free to access software.
Step 1: First of all you need to visit official website of OBS and get your software tool installed on your system.
Step 2: Now launch OBS on your device and directly go to settings option.

Step 3: It is time to copy the stream key from YouTube and then paste it directly in the specified field of OBS.

Step 4: Users can now add their sources and scenes.

Step 5: Once all these settings are done then you can simply hit the option for start streaming and it will bring your content to YouTube directly.

3. Youtube Events set up
Live stream is little different from Stream Now platform as it allows users to schedule the streams as well as a connectivity to Google Hangouts is provided. These easy to follow steps will assist you to handle all settings for your events using Live Stream tool:
Step 1: Simply click on the schedule event option on screen.

Step 2: It is much easier to make settings for basic information as well as audience type. Make some desired changes to SNS platform. If you select the Quick type then it will directly select your webcam and you need not to make additional complicated settings whereas the custom type option provides easy set up options with OBS.

Step 3: The advance settings option works same as that of stream now features and users can adjust most of these settings as per their streaming needs.

Step 4: Users can turn monetization On or Off as per their preferences.

Step 5: As soon as you finish all above settings then simply click on the create event option.

Step 6: One more window will appear on your screen and here you can make adjustment for preferred bit rate. Also put your dedicated stream key with encoder.

Step 7: When all above steps are completed then you need to hit the option for save changes so that your tool can act accordingly.

Step 8: Now click on events and here you will be able to find your event. Move to live control room if you want to access complete details about this event and you can easily delete it.

Step 9: Users can set privacy terms or simple delete the event that is currently in action.

Video tutorial
Richard Bennett
Richard Bennett is a writer and a lover of all things video.
Follow @Richard Bennett
Richard Bennett
Mar 27, 2024• Proven solutions
- Part1. Stream Now set up
- Part2. Set up Your Live Streaming Encoder
- Part3. Youtube Events set up
- Part4. Video tutorial
1. Stream Now set up
Follow these steps to live stream your impressive videos to YouTube using Stream Now tool:
Step 1: First of all you need to login with your account and then move to Creator Studio option directly.
Step 2: Choose the Video Manager option from top most toolbar.
Step 3: From the drop down menu, simply select Live Streaming option to begin with.
Step 4: Now hot the steam now option on your screen.
Step 5: Change or Upload your thumbnail as per need.
Step 6: It is time to provide an eye catching title to your video, add description and finally choose category from the drop down menu.
Step 7: While using stream option, never forget to click on ‘make archive unlisted when complete’ option so that you can save as well as watch your content on YouTube at later stage.
Step 8: You can monetize your ads as per need.
Step 9: It also provides options to add cards.
Step 10: Now move to encoder setup and then simply copy and paste these details to your streaming software.
Step 11: Now you can set your live chat option as per your requirement.
Step 12: The analysis window will help you to know about how many viewers are connected to your video as well as the message updates will be reflected.
Step 13: Stream health can be monitored directly.
Step 14: One can also use the social media button for live shares.
2.Set up Your Live Streaming Encoder
As soon as you have completed the above set up then next task is to adjust settings of your streaming encoder. It is possible to make easy selection out of wide range of live streaming encoders. The details below are provided with reference to OBS too that is open source type free to access software.
Step 1: First of all you need to visit official website of OBS and get your software tool installed on your system.
Step 2: Now launch OBS on your device and directly go to settings option.
Step 3: It is time to copy the stream key from YouTube and then paste it directly in the specified field of OBS.
Step 4: Users can now add their sources and scenes.
Step 5: Once all these settings are done then you can simply hit the option for start streaming and it will bring your content to YouTube directly.
3. Youtube Events set up
Live stream is little different from Stream Now platform as it allows users to schedule the streams as well as a connectivity to Google Hangouts is provided. These easy to follow steps will assist you to handle all settings for your events using Live Stream tool:
Step 1: Simply click on the schedule event option on screen.
Step 2: It is much easier to make settings for basic information as well as audience type. Make some desired changes to SNS platform. If you select the Quick type then it will directly select your webcam and you need not to make additional complicated settings whereas the custom type option provides easy set up options with OBS.
Step 3: The advance settings option works same as that of stream now features and users can adjust most of these settings as per their streaming needs.
Step 4: Users can turn monetization On or Off as per their preferences.
Step 5: As soon as you finish all above settings then simply click on the create event option.
Step 6: One more window will appear on your screen and here you can make adjustment for preferred bit rate. Also put your dedicated stream key with encoder.
Step 7: When all above steps are completed then you need to hit the option for save changes so that your tool can act accordingly.
Step 8: Now click on events and here you will be able to find your event. Move to live control room if you want to access complete details about this event and you can easily delete it.
Step 9: Users can set privacy terms or simple delete the event that is currently in action.
Video tutorial
Richard Bennett
Richard Bennett is a writer and a lover of all things video.
Follow @Richard Bennett
- Title: In 2024, Transform Videos with These Premium, Free Sound Options
- Author: Thomas
- Created at : 2024-05-31 12:44:28
- Updated at : 2024-06-01 12:44:28
- Link: https://youtube-help.techidaily.com/in-2024-transform-videos-with-these-premium-free-sound-options/
- License: This work is licensed under CC BY-NC-SA 4.0.
