
Integrating YouTube Into IGTV's Repertoire (3 Ways) for 2024
Integrating YouTube Into IGTV’s Repertoire (3 Ways)
How to Convert YouTube to IGTV Videos? [3 Ways]

Shanoon Cox
Mar 27, 2024• Proven solutions
Publishing video content on social media platforms like Instagram or IGTV can help influencers and brands reach new customers. The only trouble is that both Instagram and IGTV have very precise video upload requirements, so each video you want to share on your IGTV channel must be saved in MP4 file format and in a 9:16 aspect ratio.
YouTube videos, on the other hand, are mostly horizontally oriented. If you attempt to upload a YouTube video to IGTV and wondering how to achieve it, just keep reading. Because in this article, we are going to show you how you can convert a horizontal YouTube video into IGTV vertical one in 3 different ways.
- Part 1: Re-post YouTube Video to IGTV with Filmora
- Part 2: Use YouTube to IGTV Online Converter
- Part 3: Convert YouTube Video to IGTV with FXP
Part 1: Convert YouTube Videos to IGTV Vertical Videos with Filmora


If you don’t already have the original file of the video you’d like to upload to your IGTV channel, you can download a video from YouTube , but keep in mind that you can’t use any content without permission from its owner.
Once you have the file, you can create a new project in Filmora and then after the project loads you should click on the File menu and select the Project Settings option. Pick one of the 9:16 video resolution options provided by the editor and click OK to confirm the changes.

Click on the Import button to add a YouTube video to your project and then place it on the timeline. Your video will be displayed in the Preview Panel, and you’ll be able to see that the video is positioned at the center of the panel and that its top and bottom are black.
Go to the Effects tab and click on the Background Blur submenu if you want to blur the empty areas of the frame. Add the Basic Blur effect to the timeline and drag one of its sides to position it over the entire video.

In case you are working with a video that already has a 16:9 aspect ratio, you can create a project that has the same aspect ratio, and then just use the Rotate slider in the Transform menu, to change turn a landscape video into a portrait video. The scaling tool is helpful to enlarge the frames in a vertical aspect ratio.

Filmora lets you create vertical videos in just a few quick steps, which makes it a perfect choice for influencers and marketers who want to share video content on YouTube and IGTV.
Latest News: In Filmora V10.5 and later versions, there is a new feature called Auto-Reframe. This feature allows users to convert one video for different social media platforms based on the aspect ratio changing, and its features of detecting the moving object. Click the Analyze button, and Filmora will convert this 16:9 YouTube video to vertical 9:16 IGTV video automatically. And I can adjust frames to follow Yasmine’s movement to fine-tune the result.

You can watch the video below to find out more information about the Auto-Reframe tool.
Part 2: Use Kapwing to Convert YouTube to IGTV Online
YouTubers who already have lots of videos on their channel can use online video editing platforms, like Kapwing to edit the content they want to post on IGTV. This online video editor offers a number of video editing tools that let you polish your videos before posting them on social media.
Click on the Resize tool and simply copy and paste the URL of a YouTube into the appropriate bar and the platform will automatically import a video and display it on the screen once the content is finally fetched.

Pick the Story (Snap/Insta) or IGTV 9:16 option and then proceed to choose the background color for your IGTV video, increase or decrease the zoom level or change the position of the video. Click on the Create button when ready and wait for Kapwing to process your video. All videos you create with the free version of this online video editor are going to be watermarked and you have to pay a six-dollar fee for each watermark-free video you edit with Kapwing or you can opt for a $20 monthly subscription fee that enables you to export an unlimited amount of videos without watermarks each month.

A growing number of IGTV users choose to rotate their videos, instead of resizing them, so if you already have a YouTube video with a 16:9 aspect ratio you can just rotate it and get a video with a 9:16 aspect ratio. Click on the Rotate option and then rotate it 90 degrees clockwise or counterclockwise and click on the Create button. If you opt for this method of creating a vertical video for IGTV, your video will remain the same size, but the viewers will have to hold their phones horizontally in order to view it properly.
You may also like: How to Convert MKV to MP4 without Losing Quality [Free Converters Provided] >>
Part 3: Changing the Aspect Ratio of a YouTube Video with Final Cut Pro
Editing videos with professional video editing software products like Final Cut Pro or Premiere Pro requires a certain amount of skill. There is more than just one way to change the aspect ratio of a video in Final Cut Pro, but probably the best one is to set the project resolution to 2160X3840 or any other lower resolution that matches the 9:16 aspect ratio. During the video editing process, you will have to resize all of the footage you want to include in the final version of the video. Planning your shots and composing them differently than you would compose horizontally oriented shots can potentially save you a little time on resizing and repositioning the video clips you’re working with.
If you’ve already exported a video and uploaded it to your YouTube channel, you can open that video in Final Cut Pro and just rotate it using the Transform tools. However, the viewers will have to hold their phones in a horizontal position while watching the video if you choose this method of creating a 9:16 aspect ratio in Final Cut Pro.
Conclusion
Posting YouTube videos on your IGTV channel is still a somewhat complicated process because you can’t share posts directly from one platform to the other. Moreover, you can’t upload videos that last more than ten minutes to IGTV, unless you have a verified account. Even so, the IGTV platform can help you extend the reach of your videos and increase the revenue you’re generating from the content you’re sharing on social media. Do you know another way of changing a YouTube video’s aspect ratio before re-posting it on IGTV? Leave a comment and let us know.
You may also like: YouTube to WAV File: 4 Best Free Convert Solutions >>
Shanoon Cox
Shanoon Cox is a writer and a lover of all things video.
Follow @Shanoon Cox
Shanoon Cox
Mar 27, 2024• Proven solutions
Publishing video content on social media platforms like Instagram or IGTV can help influencers and brands reach new customers. The only trouble is that both Instagram and IGTV have very precise video upload requirements, so each video you want to share on your IGTV channel must be saved in MP4 file format and in a 9:16 aspect ratio.
YouTube videos, on the other hand, are mostly horizontally oriented. If you attempt to upload a YouTube video to IGTV and wondering how to achieve it, just keep reading. Because in this article, we are going to show you how you can convert a horizontal YouTube video into IGTV vertical one in 3 different ways.
- Part 1: Re-post YouTube Video to IGTV with Filmora
- Part 2: Use YouTube to IGTV Online Converter
- Part 3: Convert YouTube Video to IGTV with FXP
Part 1: Convert YouTube Videos to IGTV Vertical Videos with Filmora
If you don’t already have the original file of the video you’d like to upload to your IGTV channel, you can download a video from YouTube , but keep in mind that you can’t use any content without permission from its owner.
Once you have the file, you can create a new project in Filmora and then after the project loads you should click on the File menu and select the Project Settings option. Pick one of the 9:16 video resolution options provided by the editor and click OK to confirm the changes.
Click on the Import button to add a YouTube video to your project and then place it on the timeline. Your video will be displayed in the Preview Panel, and you’ll be able to see that the video is positioned at the center of the panel and that its top and bottom are black.
Go to the Effects tab and click on the Background Blur submenu if you want to blur the empty areas of the frame. Add the Basic Blur effect to the timeline and drag one of its sides to position it over the entire video.
In case you are working with a video that already has a 16:9 aspect ratio, you can create a project that has the same aspect ratio, and then just use the Rotate slider in the Transform menu, to change turn a landscape video into a portrait video. The scaling tool is helpful to enlarge the frames in a vertical aspect ratio.
Filmora lets you create vertical videos in just a few quick steps, which makes it a perfect choice for influencers and marketers who want to share video content on YouTube and IGTV.
Latest News: In Filmora V10.5 and later versions, there is a new feature called Auto-Reframe. This feature allows users to convert one video for different social media platforms based on the aspect ratio changing, and its features of detecting the moving object. Click the Analyze button, and Filmora will convert this 16:9 YouTube video to vertical 9:16 IGTV video automatically. And I can adjust frames to follow Yasmine’s movement to fine-tune the result.
You can watch the video below to find out more information about the Auto-Reframe tool.
Part 2: Use Kapwing to Convert YouTube to IGTV Online
YouTubers who already have lots of videos on their channel can use online video editing platforms, like Kapwing to edit the content they want to post on IGTV. This online video editor offers a number of video editing tools that let you polish your videos before posting them on social media.
Click on the Resize tool and simply copy and paste the URL of a YouTube into the appropriate bar and the platform will automatically import a video and display it on the screen once the content is finally fetched.
Pick the Story (Snap/Insta) or IGTV 9:16 option and then proceed to choose the background color for your IGTV video, increase or decrease the zoom level or change the position of the video. Click on the Create button when ready and wait for Kapwing to process your video. All videos you create with the free version of this online video editor are going to be watermarked and you have to pay a six-dollar fee for each watermark-free video you edit with Kapwing or you can opt for a $20 monthly subscription fee that enables you to export an unlimited amount of videos without watermarks each month.
A growing number of IGTV users choose to rotate their videos, instead of resizing them, so if you already have a YouTube video with a 16:9 aspect ratio you can just rotate it and get a video with a 9:16 aspect ratio. Click on the Rotate option and then rotate it 90 degrees clockwise or counterclockwise and click on the Create button. If you opt for this method of creating a vertical video for IGTV, your video will remain the same size, but the viewers will have to hold their phones horizontally in order to view it properly.
You may also like: How to Convert MKV to MP4 without Losing Quality [Free Converters Provided] >>
Part 3: Changing the Aspect Ratio of a YouTube Video with Final Cut Pro
Editing videos with professional video editing software products like Final Cut Pro or Premiere Pro requires a certain amount of skill. There is more than just one way to change the aspect ratio of a video in Final Cut Pro, but probably the best one is to set the project resolution to 2160X3840 or any other lower resolution that matches the 9:16 aspect ratio. During the video editing process, you will have to resize all of the footage you want to include in the final version of the video. Planning your shots and composing them differently than you would compose horizontally oriented shots can potentially save you a little time on resizing and repositioning the video clips you’re working with.
If you’ve already exported a video and uploaded it to your YouTube channel, you can open that video in Final Cut Pro and just rotate it using the Transform tools. However, the viewers will have to hold their phones in a horizontal position while watching the video if you choose this method of creating a 9:16 aspect ratio in Final Cut Pro.
Conclusion
Posting YouTube videos on your IGTV channel is still a somewhat complicated process because you can’t share posts directly from one platform to the other. Moreover, you can’t upload videos that last more than ten minutes to IGTV, unless you have a verified account. Even so, the IGTV platform can help you extend the reach of your videos and increase the revenue you’re generating from the content you’re sharing on social media. Do you know another way of changing a YouTube video’s aspect ratio before re-posting it on IGTV? Leave a comment and let us know.
You may also like: YouTube to WAV File: 4 Best Free Convert Solutions >>
Shanoon Cox
Shanoon Cox is a writer and a lover of all things video.
Follow @Shanoon Cox
Why AV1 Matters: Enabling It for YouTube Videos
Do you notice that many YouTube videos have been streamed in AV1? YouTube AV1 just happened suddenly a few years ago. This article will inform you about all the things you want to know about AV1 Youtube settings. I will let you know the tutorial to turn in AV1 settings on YouTube and the reason why should choose AV1 along with the others, and some more things about AV1.
Part 1: How to turn on AV1 settings on YouTube?
Do you wonder how to turn on AV1 settings on YouTube? For your information, AV1 is a video codec that is developed by a consortium of companies. It offers you advanced compression, enabling you to do smoother HD streaming and data savings for the video. Google also has already implemented AV1 use on YouTube. To turn on AV1 settings on YouTube, here are the steps:
Step1Go to playback and performance
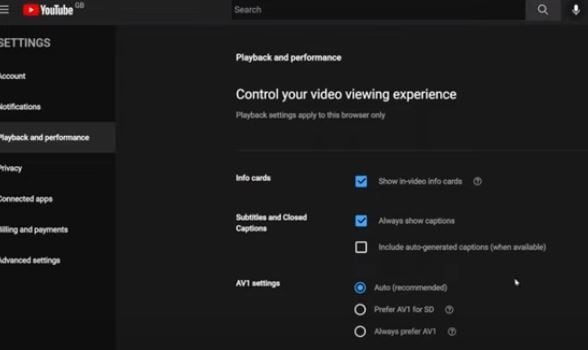
- To turn on the AV1 settings, go to your YouTube account, after that click “Playback and Performance”.
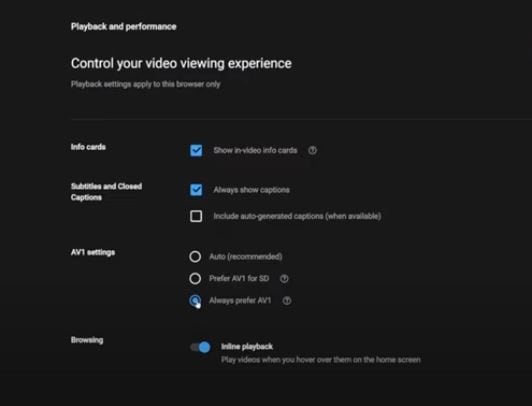
- In the AV1 settings. Besides “Auto (Recommended)”, there are other two options, which are “Prefer AV1 for SD” and also “Always prefer SD”.
- “Always Prefer AV1” uses the codec whenever it is available for a video while “Prefer AV1 for SD” limits it to SD videos. There are two options to avoid low-performance devices when AV1 videos are played on YouTube. You can select “Always Prefer AV1” to see if your device performance is good enough when you play videos on YouTube that support AV1.
Step2Test if the AV1 settings are already enabled in your video
You may ask how to confirm your YouTube videos are playing with AV1 Codec. Well, you can search playlist on YouTube with the keywords “4K, 5K, and 8K videos with the new AV1 Codec “. You can test it by playing one of the videos. You have to right-click on the media player and then select “Stats for nerd”. If it shows the av01 codec there, then the AV1 settings are enabled already.
Part 2: Why choose AV1 over VP9 and other formats?
Now, do you need a reason why you should choose AV1 compared to VP9 and the others? As you know, there is also another video codec like VP9. There are also the others such as VVC, and many more. So what is the superiority of AV1 over the others? I will let you know why you should choose AV1 in this part.
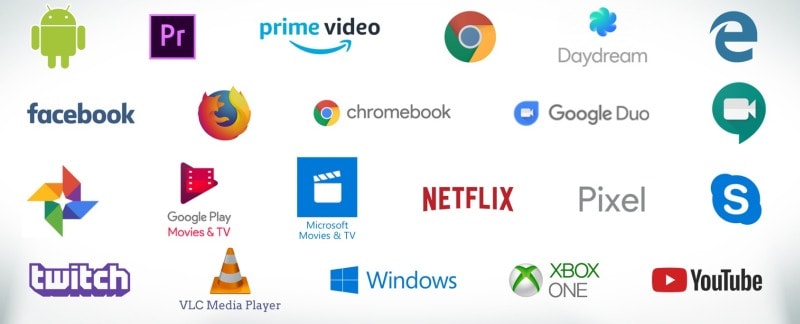
The main thing is, as mentioned before, AV1 is developed by a consortium of companies founded in 2015. It is supported by The Alliance for Open Media (AOMedia) such as Amazon, Facebook, Google, Microsoft, and Netflix, and also by web browser developers and semiconductor firms. Aomedia made it clear the algorithm is free-to-use. It means that there are no greedy negotiators that will be dependent on the developers.
Also, these days, with a format that provides a much smaller workload for internet providers. Their today focus is, that AV1 can reach the quality but can get the job done with 20% more efficiency. Then, with AV1 encoding, a “standard” 4K movie will be much more accessible than it is now. These are some more reasons why you should choose AV1.
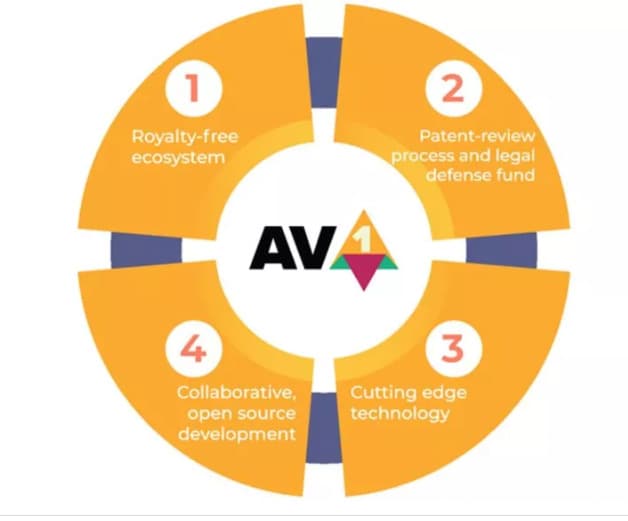
1. Royalty-free
As mentioned before, AV1 is royalty-free. AV1 is such a next-generation of royalty video codec. It means that it is not just free to use, but also free of charge, obligations, or even liability. It is an open and royalty-free video codec that the video platform will not charge to pay royalties to the Moving Picture Experts Group (MPEG), the developer of video codecs.
When it comes to the group that will ask for the royalty, MPEG is not the only one. There are also other patent groups and companies that can ask for it. Aomedia integrated Google, Mozilla, and Cisco, while they were busy creating their new video codec. However, the three companies joined together to create one codec to beat them all.
2. Better performance
It is said that the AV1 codec is 30% more efficient. According to the tests conducted by Moscow State University, AV1 can outperform AV1 by about 28% in the efficiency of encoding and decoding. As per the performance graph from the Graphics & Media Lab Video Group, MSU below, AV1 can offer the exactly same quality as X264 at 55% of the average bitrate.
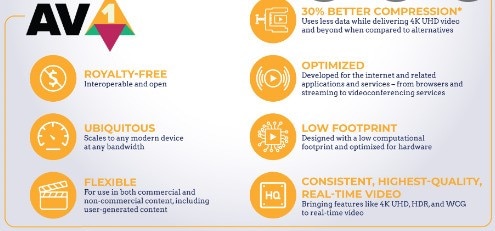
AV1 is designed so exclusively to function better than all the other codecs in the market. It is an open-sourced codec with simple patent licensing, and the integration manages to save, as mentioned, up to 30% of the bandwidth for the exactly same image quality. In other words, with AV1, distributors can send streams much faster and cheaper and we can enjoy higher definitions in the same bandwidth.
3. AV2 to come in the future
AV1 is undoubtedly superior if we compare it to other available video codecs and the exploration of the codec technology AV2 has already begun. This is such an early performance evaluation. There is some interesting part of the exploration development of AV2, such as multiple line selection for Intra prediction can make you select not just neighboring row/column for directional prediction. The same tool also exists in VVC.
There are also three essential improvements, which are simplifying the existing feature (also complete removal) and picking the tool used by VVC/H.266 (It is lack originality but so much work on it) and improvement periodically improvement of an existing tool, it is too few and also not original. We haven’t known yet when AV2 will be done completely though, maybe there still be some more essential improvements.
Part 3: What’s the best video editor for YouTubers with AV1 format?
When we talk about YouTube, it feels incomplete if we don’t talk about the video editor. So, what is the best video editing software for YouTubers with AV1 format? Yes, it is Filmora . It is such a great video editing software that allows you to import and edit many video file formats. Filmora also allows users to export AV1 MP4 format video and then can directly upload it to YouTube.

Filmora gives some ways to export your videos. Here are the five ways. You can also customize the export settings then you can save them to reuse the same settings next time. The first is you can export your project file and video to the local computer. It supports export as MP4, AVI, WMV, AV1, MOV, GoPro Cineform, F4V, MKV, TS, and 3GP.
After that, you can export your video to any device you want, such as iPhone, iPad, Apple TV, Apple TV 4K, iPod, Samsung Galaxy, Smart Phone, Android Generic, Google Pixel, Xbox One, PlayStation 4, PSP, and Smart TV. Then you can upload it to YouTube, Filmora provides you to export your video to Youtube directly. All you need to do is logging your Youtube account and export.
Free Download For Win 7 or later(64-bit)
Free Download For macOS 10.14 or later
Part 4: FAQ: Does YouTube use AV1 or VP9?
For today, YouTube encodes all the videos with the VP9 codec, but for some reason displays for low view count videos. AV1 usage also had been pushed to very low view counts. When it comes to cost or quality tradeoffs, AV1 took about 18 times longer to encode than x264.
Also read:
- [New] 2024 Approved Step Up Your Game Mastering the Art of Capturing Playthroughs
- [New] Harness 10 Tools to Grab YouTube Images Online
- [New] In-Depth Video Metrics at Your Fingertips Social Blade for YouTube
- 「MP3プレイヤーで音楽を再生するたびに解決法」
- 2024 Approved A Compreenas Guide for Efficient PIP Integration in Edge Browser
- 2024 Approved Quick Tips to Create Dynamic GIFs Using YouTube Media
- 2024 Approved SMB Video Marketing Success Factors
- At the Forefront Haptic-Enhanced Headgear for 2024
- In 2024, Crafting Professional Images Using Photoshop's Powerful LUTs
- In 2024, Mimicking Masterpieces Crafting Successful Parodies
- In 2024, Optimizing YouTube Content With Social Blade - A Stats Journey
- In 2024, The Blueprint of Tomorrow Eco-Friendly Urban Strategies
- In 2024, The Ultimate Networking Haven Beyond VidCon
- Master the Art of Budget-Friendly YouTubes Intros and Ends for 2024
- Nebula Accounting Data Salvation
- New Discover the Best Top 10 Public Domain Image Libraries
- Step-by-Step Guide to Enable a Locked Apple Mobile Phone/Tablet
- Step-by-Step Instructions to Concoct an Awkward Potion in Minecraft Universe
- Visual Tapestry Maker Premium Photo Edition for 2024
- Title: Integrating YouTube Into IGTV's Repertoire (3 Ways) for 2024
- Author: Thomas
- Created at : 2025-01-08 16:31:49
- Updated at : 2025-01-10 16:09:37
- Link: https://youtube-help.techidaily.com/integrating-youtube-into-igtvs-repertoire-3-ways-for-2024/
- License: This work is licensed under CC BY-NC-SA 4.0.