Making Money with Media Mastery of Merchandise Musings for 2024
Making Money with Media Mastery of Merchandise Musings
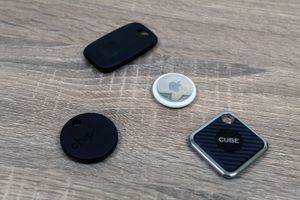
How to Get Paid to Review Products on YouTube

Richard Bennett
Oct 26, 2023• Proven solutions
You can get paid to review products on YouTube, and that’s just one of the benefits. Here are a few more:
- You get to help your viewers by providing them with both factual information, and the opinion of someone they trust (you!).
- Your reviews can help people save money! By watching your videos, viewers will be able to make informed buying decisions.
- Your reviews can help YOU save money! Once you build up a following of loyal subscribers, brands will start sending you free products to review.
How to Make Money on YouTube Doing Product Reviews
First, you need to find a product that you want to review. The product should be related to a topic you know a lot about. This will make your review more credible. It is easier to grow your channel if you focus on a niche (i.e. camera equipment or makeup) you are particularly knowledgeable about.
Part 1: Get Paid by Reviewing Product with Affiliate Links
One of the main ways you can make money doing reviews is through affiliate links. When you join the affiliate program of an online store they will allow you to create special links, called affiliate links, to products listed there. You post these affiliate links in the descriptions of your video reviews and, if viewers choose to click on those links and buy the products, you will earn a sales commission. Here are some stores with great affiliate programs:
1. JVZoo
You can find high end products for about $5 to $10. Budgeting will be important if you plan on purchasing products to review instead of only reviewing products you already own (you should try to review items you already have as much as possible).
2. Click Bank
You can find a wide range of interesting products here, and you can earn as much as 75% on sales commissions if you provide your viewers with an affiliate link.
3. Warrior Plus
This is a highly renowned affiliate program. It very similar to JVZoo.
4. Amazon
It doesn’t get any better than Amazon. You can find just about anything.
Part 2: Getting Products for Free
Once you’ve built up authority as a reviewer, brands will start giving you free stuff to review. Until then, you can buy the products yourself or review products which you already own. It will be a lot cheaper to review things you already have, or which you were already planning to buy, than to buy products for the purpose of reviewing them. Your reviews will also be more detailed and useful when they are on products you are especially familiar with.
Once you start building a following, brands will come to you and it will be your choice whether you want to review the things they send you. Until then, try to promote/review products you already have opinions on.
Part 3: Filming the Video
Be completely honest. People are going to know when you are trying to sell something. Fake reviewers are all over the place, and they are easily spotted.
That does not mean you shouldn’t make money through affiliate links, or accept free products to review. So long as you are honest in your opinions, and open with your viewers about any relationships you have with brands, you are not ‘selling out’.
Bottom Line
It takes time to earn any money reviewing products on YouTube. However, once you are an established authority in your niche, brands might start coming to you on their own.
If you were going to be paid to review products on YouTube, what kinds of products would they be? And if you want to make the reviewing video better, you should use a video editing software like Filmora .


Richard Bennett
Richard Bennett is a writer and a lover of all things video.
Follow @Richard Bennett
Richard Bennett
Oct 26, 2023• Proven solutions
You can get paid to review products on YouTube, and that’s just one of the benefits. Here are a few more:
- You get to help your viewers by providing them with both factual information, and the opinion of someone they trust (you!).
- Your reviews can help people save money! By watching your videos, viewers will be able to make informed buying decisions.
- Your reviews can help YOU save money! Once you build up a following of loyal subscribers, brands will start sending you free products to review.
How to Make Money on YouTube Doing Product Reviews
First, you need to find a product that you want to review. The product should be related to a topic you know a lot about. This will make your review more credible. It is easier to grow your channel if you focus on a niche (i.e. camera equipment or makeup) you are particularly knowledgeable about.
Part 1: Get Paid by Reviewing Product with Affiliate Links
One of the main ways you can make money doing reviews is through affiliate links. When you join the affiliate program of an online store they will allow you to create special links, called affiliate links, to products listed there. You post these affiliate links in the descriptions of your video reviews and, if viewers choose to click on those links and buy the products, you will earn a sales commission. Here are some stores with great affiliate programs:
1. JVZoo
You can find high end products for about $5 to $10. Budgeting will be important if you plan on purchasing products to review instead of only reviewing products you already own (you should try to review items you already have as much as possible).
2. Click Bank
You can find a wide range of interesting products here, and you can earn as much as 75% on sales commissions if you provide your viewers with an affiliate link.
3. Warrior Plus
This is a highly renowned affiliate program. It very similar to JVZoo.
4. Amazon
It doesn’t get any better than Amazon. You can find just about anything.
Part 2: Getting Products for Free
Once you’ve built up authority as a reviewer, brands will start giving you free stuff to review. Until then, you can buy the products yourself or review products which you already own. It will be a lot cheaper to review things you already have, or which you were already planning to buy, than to buy products for the purpose of reviewing them. Your reviews will also be more detailed and useful when they are on products you are especially familiar with.
Once you start building a following, brands will come to you and it will be your choice whether you want to review the things they send you. Until then, try to promote/review products you already have opinions on.
Part 3: Filming the Video
Be completely honest. People are going to know when you are trying to sell something. Fake reviewers are all over the place, and they are easily spotted.
That does not mean you shouldn’t make money through affiliate links, or accept free products to review. So long as you are honest in your opinions, and open with your viewers about any relationships you have with brands, you are not ‘selling out’.
Bottom Line
It takes time to earn any money reviewing products on YouTube. However, once you are an established authority in your niche, brands might start coming to you on their own.
If you were going to be paid to review products on YouTube, what kinds of products would they be? And if you want to make the reviewing video better, you should use a video editing software like Filmora .
Richard Bennett
Richard Bennett is a writer and a lover of all things video.
Follow @Richard Bennett
Achieve Sharpness: Camera Tips Without a Tripod
DIY Tripods| How to Stabilize Your Camera without Buying a Tripod
Richard Bennett
Oct 26, 2023• Proven solutions
When you’re trying to grow a channel on YouTube it can feel like equipment is a barrier, but it shouldn’t be. If you can’t afford a high-end tripod, for example, there are loads of ways to get by without one.
DIY Your Video with Wondershare Filmora
Wondershare Filmora has the best video stabilization tool is your videos have a bad frame or were recorded in dim lights. If a video is shot in bad weather or unfriendly situation where you don’t have all the equipment required for a quality recording, Wondershare Filmora can help you in the background to edit your videos like a pro. And it has all the relevant tools like effects, transitions, background removal, overlays, and background music that could turn your normal video to a professional one.
Here are 3 of our favorite DIY tripods.
DIY smartphone tripod using binder clips or hair clips
You’re a solo operation and your best camera is on your phone. That’s pretty common.
If you have a DSLR then you can set it down on any stable surface while filming yourself, but your phone can’t stand up by itself. It needs something or someone to hold it. Do you just accept that and shoot everything as a selfie?
No. No, you don’t, because there are common household items that can help you out of this problem. For this DIY tripod, you need either 2 binder clips or 2 ‘claw clips’ (also called ‘hair jaws’).
Hold your phone in landscape mode (horizontally, so it’s long rather than tall) and attach clips to the bottom corners. If you are worried about scratching your screen, fold up some paper to place between your clip and your phone.
Here it is with binder clips:

And here it is with hair clips:

Now you can set your smartphone upon any stable surface, like a table or a stack of books.
Here are some more cool ideas!
DIY adjustable tripod using books and a towel
You’ve probably heard a million times that you can stabilize your camera by sitting it down on any stable surface – on your desk, on a stack of books, up in a tree, etc. This is very true!
But if you can use any stable surface, why do people buy tripods?
Because it isn’t convenient to rearrange your furniture whenever you want to make a video, and also because tripods are adjustable. You can change their height, you can use them to pan or tilt, and it’s pretty easy to move them a bit forwards or backward while you’re setting up your shot.
To get similar functions from the ‘any stable surface’ solution you can use a table, a stack of books, and a towel.
- Set up the area where you’re going to sit while you’re filming on one end of the table.
- Put the towel down over the approximate spot you want your camera to be.
- Stack your books on top of the towel.
- Put your camera on top of the books.
Now if your camera isn’t up high enough, or is too high, you can adjust it just by adding or taking away books. If you want to move it closer or farther away from you, just pull the towel forwards or backward.
DIY gripping ‘Gorillapod’ using wire and tape
Gorillapod’s are cool because you can use them like normal tripods, carry them around like selfie sticks, or attach them to things like fences and posts. Here’s how you can make something similar using wire, electrical tape or duct tape, and a 1/4 bolt.
Your wire should be fairly stiff and you’ll need three pieces the same length, which should be at least 10 inches. Old clothes hangers work well. This needs to be something strong enough to support the weight of your camera, but soft enough that it’s not impossible for you to bend.

All of your supplies plus the finished product.
Readying your legs
Step 1: Bend 2 inches at one end of each wire into a ‘U’ shape. You will probably need pliers for this.
Step 2: Pick up one of your pieces of wire and wrap one end with electrical tape. Go around 5-10 times (to prevent it from coming undone at the end) and then, without cutting your tape, start moving up and wrapping the rest of your wire. Stop before your ‘U’ section.
Repeat this with the other two wires.
Attaching your legs
Step 1: Place the ‘U’ section of a leg against your bolt. The bolt’s threading should be pointing away from the leg. Now, use your tape to attach them. Wind it around 2 or 3 times, then repeat the process with both of the other legs individually.
Step 2: After all the legs are attached, wrap some more tape around all 3 as tightly as you can.
Your camera will mount onto the bolt! You’ll be able to use this as a normal table-top tripod or use the flexible legs to grab onto different things like a Gorillapod. Read more at Instructables.
Note: make sure the bolt is a fit for your camera before you get too far into this process.
Richard Bennett
Richard Bennett is a writer and a lover of all things video.
Follow @Richard Bennett
Richard Bennett
Oct 26, 2023• Proven solutions
When you’re trying to grow a channel on YouTube it can feel like equipment is a barrier, but it shouldn’t be. If you can’t afford a high-end tripod, for example, there are loads of ways to get by without one.
DIY Your Video with Wondershare Filmora
Wondershare Filmora has the best video stabilization tool is your videos have a bad frame or were recorded in dim lights. If a video is shot in bad weather or unfriendly situation where you don’t have all the equipment required for a quality recording, Wondershare Filmora can help you in the background to edit your videos like a pro. And it has all the relevant tools like effects, transitions, background removal, overlays, and background music that could turn your normal video to a professional one.
Here are 3 of our favorite DIY tripods.
DIY smartphone tripod using binder clips or hair clips
You’re a solo operation and your best camera is on your phone. That’s pretty common.
If you have a DSLR then you can set it down on any stable surface while filming yourself, but your phone can’t stand up by itself. It needs something or someone to hold it. Do you just accept that and shoot everything as a selfie?
No. No, you don’t, because there are common household items that can help you out of this problem. For this DIY tripod, you need either 2 binder clips or 2 ‘claw clips’ (also called ‘hair jaws’).
Hold your phone in landscape mode (horizontally, so it’s long rather than tall) and attach clips to the bottom corners. If you are worried about scratching your screen, fold up some paper to place between your clip and your phone.
Here it is with binder clips:
And here it is with hair clips:
Now you can set your smartphone upon any stable surface, like a table or a stack of books.
Here are some more cool ideas!
DIY adjustable tripod using books and a towel
You’ve probably heard a million times that you can stabilize your camera by sitting it down on any stable surface – on your desk, on a stack of books, up in a tree, etc. This is very true!
But if you can use any stable surface, why do people buy tripods?
Because it isn’t convenient to rearrange your furniture whenever you want to make a video, and also because tripods are adjustable. You can change their height, you can use them to pan or tilt, and it’s pretty easy to move them a bit forwards or backward while you’re setting up your shot.
To get similar functions from the ‘any stable surface’ solution you can use a table, a stack of books, and a towel.
- Set up the area where you’re going to sit while you’re filming on one end of the table.
- Put the towel down over the approximate spot you want your camera to be.
- Stack your books on top of the towel.
- Put your camera on top of the books.
Now if your camera isn’t up high enough, or is too high, you can adjust it just by adding or taking away books. If you want to move it closer or farther away from you, just pull the towel forwards or backward.
DIY gripping ‘Gorillapod’ using wire and tape
Gorillapod’s are cool because you can use them like normal tripods, carry them around like selfie sticks, or attach them to things like fences and posts. Here’s how you can make something similar using wire, electrical tape or duct tape, and a 1/4 bolt.
Your wire should be fairly stiff and you’ll need three pieces the same length, which should be at least 10 inches. Old clothes hangers work well. This needs to be something strong enough to support the weight of your camera, but soft enough that it’s not impossible for you to bend.
All of your supplies plus the finished product.
Readying your legs
Step 1: Bend 2 inches at one end of each wire into a ‘U’ shape. You will probably need pliers for this.
Step 2: Pick up one of your pieces of wire and wrap one end with electrical tape. Go around 5-10 times (to prevent it from coming undone at the end) and then, without cutting your tape, start moving up and wrapping the rest of your wire. Stop before your ‘U’ section.
Repeat this with the other two wires.
Attaching your legs
Step 1: Place the ‘U’ section of a leg against your bolt. The bolt’s threading should be pointing away from the leg. Now, use your tape to attach them. Wind it around 2 or 3 times, then repeat the process with both of the other legs individually.
Step 2: After all the legs are attached, wrap some more tape around all 3 as tightly as you can.
Your camera will mount onto the bolt! You’ll be able to use this as a normal table-top tripod or use the flexible legs to grab onto different things like a Gorillapod. Read more at Instructables.
Note: make sure the bolt is a fit for your camera before you get too far into this process.
Richard Bennett
Richard Bennett is a writer and a lover of all things video.
Follow @Richard Bennett
Also read:
- [New] 2024 Approved The Beat of Branding Mixing Music Into Your InstaReel
- [New] How to Use Premiere Audio Transition
- [New] Seamless Transitions for YouTube Videos in Adobe Premiere
- [Updated] In 2024, Dizzy with Design Mastering Upside Down Imagery
- [Updated] In 2024, Methods for Smooth Volume Diminishment in Lumafusion
- [Updated] Larger Print Formats, Same Sharpness Levels
- 2024 Approved Gateways to Google's Advertising on YouTube Platforms
- 2024 Approved Mastering YouTube Live Thumbnails Essentials
- 2024 Approved Ultimate Guide to Find Youtube Templates Vids
- CCleaner Security Concerns: Identifying Potential Risks & Ensuring Online Safety
- Exploring the Features and Speed of TP-Link Archer C80 - The Best Budget-Friendly Router Reviewed
- In 2024, Expert Tips for Post-Upload Video Improvement
- In 2024, How to Change Spotify Location After Moving to Another Country On Infinix Smart 8 Pro | Dr.fone
- Innovative & Inexpensive The Best Free YouTube Name Generators for 2024
- Mastering Technology with Expert Advice From Tom's Hardware Team
- Title: Making Money with Media Mastery of Merchandise Musings for 2024
- Author: Thomas
- Created at : 2025-01-28 19:00:45
- Updated at : 2025-01-29 20:21:56
- Link: https://youtube-help.techidaily.com/making-money-with-media-mastery-of-merchandise-musings-for-2024/
- License: This work is licensed under CC BY-NC-SA 4.0.