![[New] Expert Insights on Incorporating Hashtags for Game Streams](https://thmb.techidaily.com/84d0bc5cbf75aff634c938ea8def6c75418d8f0746613af42a2c779a9073e228.jpg)
[New] Expert Insights on Incorporating Hashtags for Game Streams
Expert Insights on Incorporating Hashtags for Game Streams
Hashtags are a great way to reach new viewers and subscribers interested in your content. But with so many hashtags out there, finding which ones are perfect for your YouTube gaming channel can be challenging.
That’s why we’ve extensively researched you and compiled a list of the 30 best tags/hashtags for YouTube gaming videos. We’ve also included tools to help you generate or plan your hashtags effectively to grow your channel and boost your subscription.
So, if you want to take your YouTube gaming channel to the next level, read on!
30 Best YouTube Gaming Hashtags
In recent years, YouTube has become the most popular platform for gamers worldwide. However, with millions of users uploading new videos daily, making your content stand out from the rest can take time and effort.
One way to alleviate the reach of your YouTube gaming videos is to use popular hashtags that can help you for many purposes like:
- Driving traffic toward your videos
- Increasing your brand awareness
- Expanding the search visibility of your content
You can also increase your video’s organic volume by using appropriate hashtags.
Here is the list of the 30 most popular hashtags with high search volume for YouTube gaming:
- #gamer
- #nintendo
- #games
- #livestream
- #videogames
- #gaming
- #youtubegamer
- #fortnite
- #PleaseForgiveMe
- #pcgaming
- #playfortnite
- #xbox
- #gamingcommunity
- #gamerguy
- #gamergirl
- #gamereview
- #livegaming
- #play
- #winning
- #videogameaddict
- #twitchstreamer
- #youtubegaming
- #reddead
- #playinggames
- #diablo
- #callofduty
- #xboxone
- #retrogaming
- #smallyoutuberarmy
- #nintendoswitch
Useful Tools For YouTube Gaming Hashtags
Well goes an old saying: “Better to teach someone to fish than to give him a fish.”
As a vlogger, you should use hashtags every time you upload a video to help your video spread and guide viewers to find more of your content. But it would help if you can ensure these hashtags are natural and relevant.
Hence, apart from providing the list of popular gaming hashtags, we have created this list of YouTube hashtag tools to help you generate such tags.
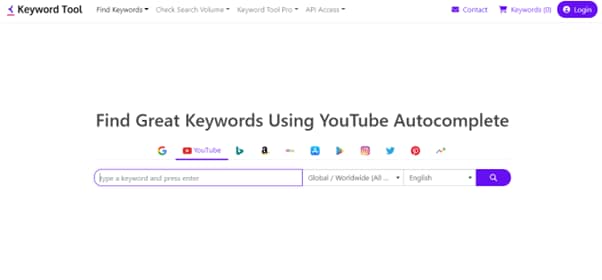
Keyword Tool
The Keyword Tool is a popular YouTube hashtags generator that can help you find popular gaming hashtags to use on YouTube. You can understand what keywords your audience is searching for with this tool.
New and popular YouTube gaming hashtags are just one click away with Keyword Tool. This tool makes developing variations, ideas, and other stuff relatively easy. It’s the best tool on the market now and gets updated regularly to provide the most relevant result each time.
The Keyword tool offers categories for each social platform and search engine where you can find the most popular tag for your videos. Hence, you can create more relevant content and reach more people on YouTube, Twitch streams, and Instagram posts. Moreover, it provides suggestions for combinations of titles. For example, it produces the fastest results and uses tolls to add the names of the games, providing you with more personalized results.
To use Keyword Tool, enter a topic into the search bar. You will then see a list of popular gaming hashtags related to your keyword. You can then use them to help promote your videos and get more views.

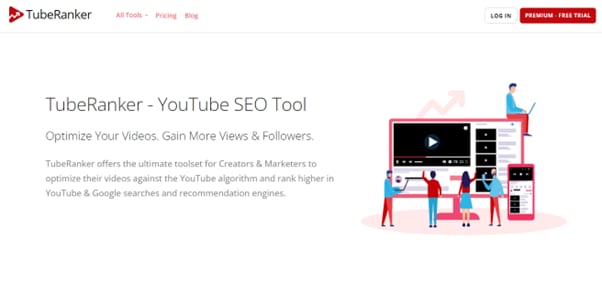
Tube Ranker
Tube Ranker is another excellent tool for ranking your videos on YouTube. This YouTube hashtag generator is fast, easy to use, and effective at getting your videos to the top of search results in no time.
Tube Ranker tool can work as a description generator, a channel auditor, a tags extractor, an SEO rank tracker, a keyword generator, and a title generator.
Therefore, if you want more views and engagement on your YouTube gaming videos, the Tube Ranker should be a must-have tool in your arsenal!
As to the price, TubeBuddy comes with a Pro version for $7.20/month, a Star version for $15.20/month, and a Legend version for $39.20/month in addition to the free version.
SEO Book
SEOBook is an excellent website for learning about search engine optimization (SEO). Aaron Wall, a leading expert on the topic, writes the book. This website covers everything from the basics of SEO to more advanced concepts.
The tool can help you generate relevant hashtags for your YouTube gaming videos and make your content more visible.

![]()
Note: If you want to optimize your YouTube gaming videos’ descriptions, tags and titles, click here to learn how!
Bonus: Using Filmora To Screen Record Or Edit The Gaming Video
Although we have talked about the most popular gaming hashtags and the useful tools for you videos, meanwhile, the quality and the content of the video are worth of high attention.
With the popularity of YouTube Gaming videos, how to record or edit content to make it more engaging and eye-capturing is important.
Therefore, we recommend using Filmora - a user-friendly video editing software for both Mac and Windows. It has all the features you need to edit, screen record, and export the edited videos to YouTube.
https://www.youtube.com/embed/
Free Download For Win 7 or later(64-bit)
Free Download For macOS 10.14 or later
There are many reasons to use Filmora, but here are the most important ones:
- Quick and easy to use, even for novice users
- It helps you screen record the footage of your game and webcam simultaneously while you are playing.
- Offers AI portrait, green screen, mask & blend, New BlueFX, and Boris FX effects
- Excellent and clear UI
- It lets you edit the video and add effects, transitions, and other elements to make it more engaging.
- It includes instant mode, PIP, preset templates for different occasions, WordArt, title editing, and motion tracking features.
- You can export the edited video to YouTube with just a few clicks.
Conclusion
This comprehensive article provides the 30 best tags/hashtags for YouTube gaming to help you improve your content visibility. We’ve also discussed the three most popular YouTube hashtags generator.
Moreover, we’ve recommended using Filmora to quickly screen record or edit your YouTube gaming videos before searching for popular hashtags.
We hope you’ve enjoyed reading this article and can now use the right hashtags for your YouTube gaming content.
Jump Cut Strategies for Compelling Vlogs
How To Use Jump Cuts in Your Vlog

Richard Bennett
Mar 27, 2024• Proven solutions
A common problem for new YouTubers and Vlogers is that they cannot get through a recording without feeling like they have messed up and need to restart. It can be extremely discouraging at first. More experienced vloggers know that mistakes happen and they are no reason to stop recording. Instead of trying to record a perfect clip it is common for vloggers to remove errors from their videos in editing using jump cuts.
How To Use Jump Cuts in Your Vlog
1. What is a Jump Cut?
A jump cut is when you jump from one part of your clip to a later part of that same clip, cutting out the section in-between.
In movies or tv shows jump cuts can be distracting. In vlogs it is the exact opposite; jump cuts are used to remove distractions. It is not strange for a YouTube video to contain a lot of jump cuts. If you go and re-watch a video by your favorite vlogger you will probably notice that every once in a while the vlogger is suddenly sitting differently or that something else has suddenly changed. That is a jump cut, and chances are you did not even think twice about it when you first watched the video.
2. When to use Jump Cuts in your Youtube Video
There are a lot of things you might want to take out of your clips using jump cuts. Here are some examples:
Repetition: You may have had to repeat yourself because you misspoke. Or, you might watch your clip back and realize that two sections you intended – perhaps even scripted – are very similar and you only need one.
Off-Topic Tangents: Once you get comfortable talking to the camera it is easy to find yourself getting off-topic while recording. These tangents might be funny or feel important, but you should still cut them out of your final video. Rather than scrapping them completely, though, consider giving your tangent its very own video. Successful vloggers post new videos frequently, after all.
Silence: Use jump cuts to take out any pauses in your video. Every period of silence is an opportunity for viewers to get distracted and decide to click on something else. Adding music to the background of your video can help with shorter pauses, but cutting out any silence is still a good way to go.
In the video tutorial below, we will share with you some practical and creative jump cuts tips that you can try in video editing. And most of the jump cuts are done with the cutting features in Filmora . You can download the free trial version below by clicking the Free Download button based on your system.
 Download Mac Version ](https://tools.techidaily.com/wondershare/filmora/download/ )
3. How to Make Jump Cuts in Vlog & YouTube Videos
You can make jump cuts in almost every editing program, from free software like Windows Movie Maker to professional programs like Adobe Premiere. Remember no matter which video editing software you are using to edit your videos with jump cut, you need to ensure that the software can scroll through your video clips and audio files frame-by-frame. And some video editors may only allow you to scroll video footage frame by frame. This tutorial is for Filmora Video Editor (Now upgraded to Filmora), but many of the same steps will apply to other software.
Download Mac Version ](https://tools.techidaily.com/wondershare/filmora/download/ )
You may also like: How to trim and cut videos in Windows Movie Maker for Free
Open up Filmora Video Editor and add a clip into the timeline. Watch it through, and then revisit sections where you think you might want to make cuts.
Find a place in your clip that has silence and use the scissors icon to cut your clip into two. Then start playing your clip and pause as soon as you hear sound.
Make sure your clip is selected, and then go back frame by frame until you hear nothing.
Use the scissors icon to make another cut. You will now have three clips; one before the silence, the silent pause, and the section where sound starts again. Delete the quiet middle clip.
4. Keep video shorter for more views
The videos that get the most views on YouTube are an average of three minutes long. People will use the length of a video as a reason not to click on it. Viewers are also more likely to get distracted and stop watching longer videos before they are over. That does not mean you should not take as long as you need to properly explain your ideas, just that you should be careful your video is not longer than it needs to be. It is common for youtubers to use only about a third of the clip they record. The rest is removed using jump cuts.
Filmora video editor will help you to be more creative in video editing and saving your time at the same time. Download and leave a comment below about how do you like it.

Richard Bennett
Richard Bennett is a writer and a lover of all things video.
Follow @Richard Bennett
Richard Bennett
Mar 27, 2024• Proven solutions
A common problem for new YouTubers and Vlogers is that they cannot get through a recording without feeling like they have messed up and need to restart. It can be extremely discouraging at first. More experienced vloggers know that mistakes happen and they are no reason to stop recording. Instead of trying to record a perfect clip it is common for vloggers to remove errors from their videos in editing using jump cuts.
How To Use Jump Cuts in Your Vlog
1. What is a Jump Cut?
A jump cut is when you jump from one part of your clip to a later part of that same clip, cutting out the section in-between.
In movies or tv shows jump cuts can be distracting. In vlogs it is the exact opposite; jump cuts are used to remove distractions. It is not strange for a YouTube video to contain a lot of jump cuts. If you go and re-watch a video by your favorite vlogger you will probably notice that every once in a while the vlogger is suddenly sitting differently or that something else has suddenly changed. That is a jump cut, and chances are you did not even think twice about it when you first watched the video.
2. When to use Jump Cuts in your Youtube Video
There are a lot of things you might want to take out of your clips using jump cuts. Here are some examples:
Repetition: You may have had to repeat yourself because you misspoke. Or, you might watch your clip back and realize that two sections you intended – perhaps even scripted – are very similar and you only need one.
Off-Topic Tangents: Once you get comfortable talking to the camera it is easy to find yourself getting off-topic while recording. These tangents might be funny or feel important, but you should still cut them out of your final video. Rather than scrapping them completely, though, consider giving your tangent its very own video. Successful vloggers post new videos frequently, after all.
Silence: Use jump cuts to take out any pauses in your video. Every period of silence is an opportunity for viewers to get distracted and decide to click on something else. Adding music to the background of your video can help with shorter pauses, but cutting out any silence is still a good way to go.
In the video tutorial below, we will share with you some practical and creative jump cuts tips that you can try in video editing. And most of the jump cuts are done with the cutting features in Filmora . You can download the free trial version below by clicking the Free Download button based on your system.
Download Mac Version ](https://tools.techidaily.com/wondershare/filmora/download/ )
3. How to Make Jump Cuts in Vlog & YouTube Videos
You can make jump cuts in almost every editing program, from free software like Windows Movie Maker to professional programs like Adobe Premiere. Remember no matter which video editing software you are using to edit your videos with jump cut, you need to ensure that the software can scroll through your video clips and audio files frame-by-frame. And some video editors may only allow you to scroll video footage frame by frame. This tutorial is for Filmora Video Editor (Now upgraded to Filmora), but many of the same steps will apply to other software.
Download Mac Version ](https://tools.techidaily.com/wondershare/filmora/download/ )
You may also like: How to trim and cut videos in Windows Movie Maker for Free
Open up Filmora Video Editor and add a clip into the timeline. Watch it through, and then revisit sections where you think you might want to make cuts.
Find a place in your clip that has silence and use the scissors icon to cut your clip into two. Then start playing your clip and pause as soon as you hear sound.
Make sure your clip is selected, and then go back frame by frame until you hear nothing.
Use the scissors icon to make another cut. You will now have three clips; one before the silence, the silent pause, and the section where sound starts again. Delete the quiet middle clip.
4. Keep video shorter for more views
The videos that get the most views on YouTube are an average of three minutes long. People will use the length of a video as a reason not to click on it. Viewers are also more likely to get distracted and stop watching longer videos before they are over. That does not mean you should not take as long as you need to properly explain your ideas, just that you should be careful your video is not longer than it needs to be. It is common for youtubers to use only about a third of the clip they record. The rest is removed using jump cuts.
Filmora video editor will help you to be more creative in video editing and saving your time at the same time. Download and leave a comment below about how do you like it.
Richard Bennett
Richard Bennett is a writer and a lover of all things video.
Follow @Richard Bennett
Also read:
- [New] 2024 Approved Visual Storytelling Crafting Compelling Narratives in YouTube Videos
- [New] From Pure to Perfected Enhancing Photo Dynamics with Illustrator Techniques for 2024
- [New] Securing Your Stake in YouTube's Financial Future
- [New] Streaming Profitably Understanding YouTube Updates
- [Updated] 2024 Approved AI-Powered Frame Refactoring Suite
- [Updated] In 2024, Crafting Virtual Laughter The Metaverse Meme Journey
- 2024 Approved Instant Guide Photos to Powerful YouTube Channel Thumbnails in a Flash
- How to Infinix Note 30 VIP Get Deleted photos Back with Ease and Safety?
- How to Use Video Titles and YouTube Tags, In 2024
- In 2024, Can Life360 Track Or See Text Messages? What Can You Do with Life360 On Apple iPhone 12? | Dr.fone
- In 2024, Mobile YouTube Watching IPhone & Android Edition
- In 2024, Navigating Filmora's FCC Initiative A Guide
- Transformez Vos Fichiers WTV en WMV Gratuitement Sur Internet - Utilisation Simple De Movavi
- Ultimate Guide: Resolving the Windows 7 'Blue Screen' Error
- Ways To Find Unlocking Codes For Lava Yuva 2 Phones
- Title: [New] Expert Insights on Incorporating Hashtags for Game Streams
- Author: Thomas
- Created at : 2024-11-12 02:30:13
- Updated at : 2024-11-14 21:04:29
- Link: https://youtube-help.techidaily.com/new-expert-insights-on-incorporating-hashtags-for-game-streams/
- License: This work is licensed under CC BY-NC-SA 4.0.