
!["[New] Prime Choices The Premier Portable Devices for Editors"](https://www.lifewire.com/thmb/_Ej_X3hPH3B-NysfuGKlyGpeXA4=/400x300/filters:no_upscale():max_bytes(150000):strip_icc()/ScreenShot2022-05-13at12.45.28PM-5adf863e855c43f8805feadfbe1a7672.png)
"[New] Prime Choices The Premier Portable Devices for Editors"
Prime Choices: The Premier Portable Devices for Editors
The Best Laptops for Video Editing

Richard Bennett
Oct 26, 2023• Proven solutions
This article lists the 3 best laptops for video editing in 2018.
Whether you’re an industry professional or an avid YouTuber, you know how important it is to produce quality videos consistently.
The quality of the videos you create will depend on your creativity, the editing software you use, and the hardware that software is installed on. And as you probably know, it can be tough to work fast and get good results when your hardware or laptop isn’t strong enough to power your software properly and allow you to work at the pace you want.
The best laptops for video editing in 2018 have three things in common. First, they have top-of-the-line display technology for color accuracy, color depth, and clarity. Next, they have discrete (dedicated) Graphic Processing Units (GPUs) with accompanying RAM to enable them to handle video processing fast without compromising other system functions. And finally, they have Intel core i7 CPU processors and Solid-State Drives (SSD) for faster overall performance.
THE TOP 3 LAPTOPS FOR EDITING VIDEO IN 2018
The top 3 laptops below are quite impressive. They have the right mix of power and function that video editing requires.
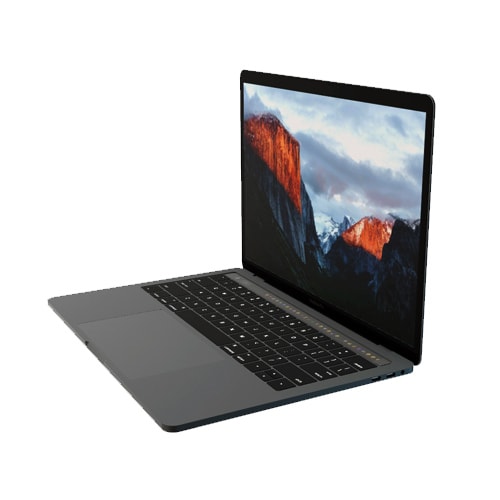
1.MACBOOK PRO WITH TOUCH BAR
PRICE: $1500 - $1800
SYSTEM SPECS:
CPU: Intel Core i7 Processor
GRAPHICS: Radeon Pro 555 with 2GB memory – 560 with 4GB memory
RAM: 16GB
SCREEN: 15.4” Retina Display
RES: 2880 x 1800px
STORAGE: 128 – 256GB SSD
PROS
- OLED Touch Bar
- Thunderbolt 3 ports
- Large Trackpad
CONS:
- No other input ports available besides Thunderbolt 3
- Expensive
The MacBook Pro with Touch Bar is the best video editing laptop produced by Apple. It has a wide 15.4” screen with thin bezels, and its proprietary OLED Touch bar amps up its flexibility and functionality considerably. The Touch Bar is set-up to show different shortcuts for different apps. It works quite well with Photoshop and will show thumbnails, filter options, a color picker, and more while you’re editing videos or stills.
Working with large 4K video files is much easier with the MacBook Pro. It’s fitted with Thunderbolt 3 Ports which have the highest data and video bandwidth available for USB-C connections. With these Thunderbolt ports, you can also use high-speed and high-power peripherals without a hitch. This laptop also has an extra-wide touchpad or Trackpad (as Apple calls it) which expands your physical working surface while also making it easier to do detailed video editing.
Unfortunately, if you need a variety of ports like most videographers, working with the MacBook Pro could be a challenge as it only has Thunderbolt 3 ports. If this is the laptop you prefer, you’ll need to buy additional connection hardware to work with different input devices. And while this laptop impresses in many ways, it’s also quite expensive. There are certainly other laptops on the market which can give you similar performance at a lower cost.
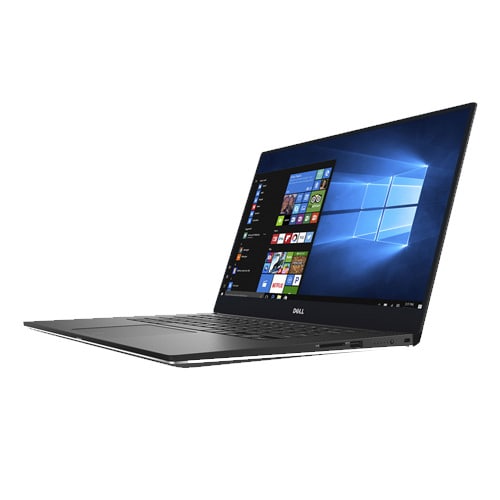
2. DELL XPS 15
PRICE: $999 - $1300
SYSTEM SPECS:
CPU: Intel Core i7 Processor
GRAPHICS: NVIDIA GeForce GTX 1050
RAM: 8 - 16GB
SCREEN: 15.6”
RES: FHD - 4k UHD 3840 x 2160px
STORAGE: 256GB – 1TB SSD
PROS
- 4k InfinityEdge display
- Good battery life
- Has multiple input ports
CONS:
- Webcam is oddly positioned
The Dell XPS 15 is one laptop that hits the sweet spot for many videographers. It’s considered the closest competitor to the MacBook Pro reviewed above. In fact, many would argue that it tops the MacBook Pro when it comes to speed, color accuracy, and color depth. Its 15.6” screen has very thin bezels for minimal distraction and immersive work experience. At 4K resolution and displaying a wide range of the sRGB gamut, video editing with the Dell XPS 15 promises to be both smooth and enjoyable.
The Dell XPS 15 is certainly more affordable, while still delivering excellent graphics performance. It features an Intel i7 processor and the NVIDIA GeForce GTX 1050 graphics processor. This makes it remarkably fast for video editing, as well as energy-efficient. People who work with different input devices will also like that this laptop has legacy adapters (USB, HDMI, ethernet) alongside a USB type C port.
The biggest downside to the Dell XPS 15 laptop is its oddly positioned webcam. It feels awkward and can be an inconvenience to use since you’ll have to adjust your position significantly while making video calls or recording for your YouTube channel.
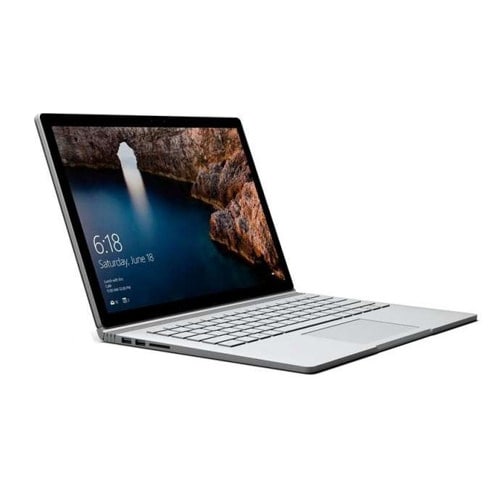
3. MICROSOFT SURFACE BOOK 2
PRICE: $1499 - $2499
SYSTEM SPECS:
CPU: Intel Core i7 Processor
GRAPHICS: Intel HD 620 or Nvidia GTX 1050 / GTX 1060
RAM: 16GB
SCREEN: 15.0”
RES: 3240 x 2160px
STORAGE: 256GB, 512GB – 1TB SSD
PROS
- Detachable screen
- Has multiple input ports (USB Type-A, USB Type-C, SD card reader)
- Works with a Stylus
CONS:
- Expensive
- Fulcrum hinge
The Microsoft Surface Book 2 is a laptop and a tablet thanks to its detachable screen. At a resolution of 3240 x 2160px, its screen is nearly 4k and can handle Full HD and HD footage with ease. Add to this its capacity to show a considerable portion of the sRGB gamut and its easy-to-use stylus and you can see why this 2-in-1 combo from Microsoft is one of the top 3 laptops for video editing in 2018.
Surface Book 2 also has the right combination of power and storage capacity that video editing requires. It boasts a state-of-the-art NVIDIA graphics processor and an Intel i7 processor for a smooth workflow no matter the size or level of detail involved in your video editing project.
On the downside, this laptop is undoubtedly very expensive. Compared to the function and power you can get from the DELL XPS 15, it’s hard to justify paying nearly $2500 for the Surface Book 2. Its detachable screen, supported by a fulcrum hinge, also comes at a price. It makes the laptop a bit bulky at one end when it’s folded. This in turn can make day-to-day handling a bit more tricky than it has to be.
CONCLUSION
If you’re searching for a good laptop to help you improve the quality of your videos in 2018, look no further than these 3. They have all the power, function, and storage capacity you need to handle any project with ease. Just be mindful of your budget and consider which extras are worth the expense. Go for the MacBook Pro with Touch Bar if customizing your workflow is a priority. Opt for the Dell XPS 15 if you want the best combination of display quality and graphics processing. Finally, consider the Surface Book 2 if you need the flexibility of a 2-in-1 device.
What do you think is the best laptop for video editing?
Equip Your Laptop with the Best Video Editing Software


Richard Bennett
Richard Bennett is a writer and a lover of all things video.
Follow @Richard Bennett
Richard Bennett
Oct 26, 2023• Proven solutions
This article lists the 3 best laptops for video editing in 2018.
Whether you’re an industry professional or an avid YouTuber, you know how important it is to produce quality videos consistently.
The quality of the videos you create will depend on your creativity, the editing software you use, and the hardware that software is installed on. And as you probably know, it can be tough to work fast and get good results when your hardware or laptop isn’t strong enough to power your software properly and allow you to work at the pace you want.
The best laptops for video editing in 2018 have three things in common. First, they have top-of-the-line display technology for color accuracy, color depth, and clarity. Next, they have discrete (dedicated) Graphic Processing Units (GPUs) with accompanying RAM to enable them to handle video processing fast without compromising other system functions. And finally, they have Intel core i7 CPU processors and Solid-State Drives (SSD) for faster overall performance.
THE TOP 3 LAPTOPS FOR EDITING VIDEO IN 2018
The top 3 laptops below are quite impressive. They have the right mix of power and function that video editing requires.
1.MACBOOK PRO WITH TOUCH BAR
PRICE: $1500 - $1800
SYSTEM SPECS:
CPU: Intel Core i7 Processor
GRAPHICS: Radeon Pro 555 with 2GB memory – 560 with 4GB memory
RAM: 16GB
SCREEN: 15.4” Retina Display
RES: 2880 x 1800px
STORAGE: 128 – 256GB SSD
PROS
- OLED Touch Bar
- Thunderbolt 3 ports
- Large Trackpad
CONS:
- No other input ports available besides Thunderbolt 3
- Expensive
The MacBook Pro with Touch Bar is the best video editing laptop produced by Apple. It has a wide 15.4” screen with thin bezels, and its proprietary OLED Touch bar amps up its flexibility and functionality considerably. The Touch Bar is set-up to show different shortcuts for different apps. It works quite well with Photoshop and will show thumbnails, filter options, a color picker, and more while you’re editing videos or stills.
Working with large 4K video files is much easier with the MacBook Pro. It’s fitted with Thunderbolt 3 Ports which have the highest data and video bandwidth available for USB-C connections. With these Thunderbolt ports, you can also use high-speed and high-power peripherals without a hitch. This laptop also has an extra-wide touchpad or Trackpad (as Apple calls it) which expands your physical working surface while also making it easier to do detailed video editing.
Unfortunately, if you need a variety of ports like most videographers, working with the MacBook Pro could be a challenge as it only has Thunderbolt 3 ports. If this is the laptop you prefer, you’ll need to buy additional connection hardware to work with different input devices. And while this laptop impresses in many ways, it’s also quite expensive. There are certainly other laptops on the market which can give you similar performance at a lower cost.
2. DELL XPS 15
PRICE: $999 - $1300
SYSTEM SPECS:
CPU: Intel Core i7 Processor
GRAPHICS: NVIDIA GeForce GTX 1050
RAM: 8 - 16GB
SCREEN: 15.6”
RES: FHD - 4k UHD 3840 x 2160px
STORAGE: 256GB – 1TB SSD
PROS
- 4k InfinityEdge display
- Good battery life
- Has multiple input ports
CONS:
- Webcam is oddly positioned
The Dell XPS 15 is one laptop that hits the sweet spot for many videographers. It’s considered the closest competitor to the MacBook Pro reviewed above. In fact, many would argue that it tops the MacBook Pro when it comes to speed, color accuracy, and color depth. Its 15.6” screen has very thin bezels for minimal distraction and immersive work experience. At 4K resolution and displaying a wide range of the sRGB gamut, video editing with the Dell XPS 15 promises to be both smooth and enjoyable.
The Dell XPS 15 is certainly more affordable, while still delivering excellent graphics performance. It features an Intel i7 processor and the NVIDIA GeForce GTX 1050 graphics processor. This makes it remarkably fast for video editing, as well as energy-efficient. People who work with different input devices will also like that this laptop has legacy adapters (USB, HDMI, ethernet) alongside a USB type C port.
The biggest downside to the Dell XPS 15 laptop is its oddly positioned webcam. It feels awkward and can be an inconvenience to use since you’ll have to adjust your position significantly while making video calls or recording for your YouTube channel.
3. MICROSOFT SURFACE BOOK 2
PRICE: $1499 - $2499
SYSTEM SPECS:
CPU: Intel Core i7 Processor
GRAPHICS: Intel HD 620 or Nvidia GTX 1050 / GTX 1060
RAM: 16GB
SCREEN: 15.0”
RES: 3240 x 2160px
STORAGE: 256GB, 512GB – 1TB SSD
PROS
- Detachable screen
- Has multiple input ports (USB Type-A, USB Type-C, SD card reader)
- Works with a Stylus
CONS:
- Expensive
- Fulcrum hinge
The Microsoft Surface Book 2 is a laptop and a tablet thanks to its detachable screen. At a resolution of 3240 x 2160px, its screen is nearly 4k and can handle Full HD and HD footage with ease. Add to this its capacity to show a considerable portion of the sRGB gamut and its easy-to-use stylus and you can see why this 2-in-1 combo from Microsoft is one of the top 3 laptops for video editing in 2018.
Surface Book 2 also has the right combination of power and storage capacity that video editing requires. It boasts a state-of-the-art NVIDIA graphics processor and an Intel i7 processor for a smooth workflow no matter the size or level of detail involved in your video editing project.
On the downside, this laptop is undoubtedly very expensive. Compared to the function and power you can get from the DELL XPS 15, it’s hard to justify paying nearly $2500 for the Surface Book 2. Its detachable screen, supported by a fulcrum hinge, also comes at a price. It makes the laptop a bit bulky at one end when it’s folded. This in turn can make day-to-day handling a bit more tricky than it has to be.
CONCLUSION
If you’re searching for a good laptop to help you improve the quality of your videos in 2018, look no further than these 3. They have all the power, function, and storage capacity you need to handle any project with ease. Just be mindful of your budget and consider which extras are worth the expense. Go for the MacBook Pro with Touch Bar if customizing your workflow is a priority. Opt for the Dell XPS 15 if you want the best combination of display quality and graphics processing. Finally, consider the Surface Book 2 if you need the flexibility of a 2-in-1 device.
What do you think is the best laptop for video editing?
Equip Your Laptop with the Best Video Editing Software
Richard Bennett
Richard Bennett is a writer and a lover of all things video.
Follow @Richard Bennett
Personalized Video Setups: A Beginner’s Guide to Selfies on YouTube
4 Ways To Set Up Your Talking-Head Shots For YouTube
Richard Bennett
Oct 26, 2023• Proven solutions
A big part of being a YouTuber involves talking to the camera. How you set up your talking-head shot depends on many factors, including how much space you have, what kind of look you’re going for, and how many people you want to fit in one frame. Here are four ways to set up your talking-head shots for YouTube.
| Table of Contents 1. Close Quarters Wide-Angle Vlog Set-Up2. Medium Vlog Set-Up3. Two Person Vlog Set-Up4. Long Teleprompter Vlog Set-Up |
|---|
How to Set Up Your Talking Heads Shots for YouTube Video [Infographic]
We’ve summarized the key points about setting up talking head style video shots with the Infographic below. It is welcomed to share on social media.

How to Set Up Your Talking-Head Shots for YouTube [4 Ways]
1. Close Quarters Wide-Angle Vlog Set-Up
Don’t have a lot of space to set up your camera and lighting equipment? No problem! You can be within an arm’s length away from your camera with a close quarters wide-angle vlog set-up.
With this set-up, you’re going to need a camera with a wide-angle lens, a tripod, a camera-mounted shotgun mic for sound, and a ring light for light.
Set your camera on the tripod and mount the shotgun mic directly on the camera shoe (the electronic bracket on the top of the camera). Inside the circular space of your ring light, position your camera right in the middle of it so that you can shoot your video through it without getting any part of the lighting equipment in your shot.
In the video above, Sean Cannell demonstrates this set-up. As you can see from this example, the wide-angle lens is able to squeeze in a lot of what’s in front of the camera into the shot.
Objects and people that just make it into the sides of the frame will appear more stretched out as the wide-angle causes distortion and enhances perspectives.
If you look closely into Sean’s eyes, you can also see a specular highlight in the shape of a circle. Many people like the way eyes look against a ring light.
2. Medium Vlog Set-Up
If you have more space and want to shoot a more professional-looking talking-head shot with more realistic perspectives, a medium vlog set-up may be a better alternative for you.
For this set-up, you’ll be using a slightly longer standard/normal lens (like a 35mm or a 50mm lens) attached to your camera which would be set on a tripod. Since this longer lens will show less of the surrounding areas as it “zooms” closer into whatever is in front, you will need to sit further back, away from your camera.
Now that you’re further away from your camera, a camera-mounted shotgun mic may not be the best mic for you. For better sound recording, you’ll need a shotgun mic fixed on a mic stand that is set up like a boom mic, positioned just outside of your camera frame.
At the 39 second mark of the above video, electronic music producer deadmau5 is positioned right in the center of this particular set-up.
You can see from how even the background and couch looks across the entire camera frame that there is no distortion or enhanced perspective.
It appears that, to the right of deadmau5 (camera left), there is a key light and to his left (camera right) there may be a fill light for additional lighting. Behind the couch, there’s also a background uplight to create depth between the subject and the background. At the 1:30 mark of this trailer video, you can briefly see how the Masterclass camera crew set up their shot.
3. Two Person Vlog Set-Up
If your talking-head shot has got to include two people, you can use a similar set-up as the medium vlog set-up detailed above.
If you look back at the 39-second mark of deadmau5’s Masterclass trailer, you can see that there’s a lot of space to the left and right of deadmau5. Now imagine the same shot but with two people.
With two people, though, you’ll want to set up your mic slightly differently. Rather than using a directional shotgun mic with a narrow area of sensitivity, you’ll want to use a directional mic with a wider area of sensitivity.
4. Long Teleprompter Vlog Set-Up
If you want to read over a script but still make it appear like you’re looking straight into the camera, you’ll need to use a long teleprompter vlog set-up.
For this set-up, you’ll need all the same equipment as the medium vlog set-up, but you’ll additionally need a teleprompter placed in front of your camera equipped with a long telephoto lens.
You will have to sit much further back away from your camera for two main reasons. Firstly, you want to be able to fit yourself in your much more zoomed-in camera frame (effect of the long telephoto lens). Secondly, you want to be far enough that the camera cannot detect your eyes reading from left to right. You’ll want to be around six meters away from a 17” teleprompter monitor or around four meters away from a 10” teleprompter monitor.
In the above video, Jared Polin uses a long teleprompter vlog set-up.
In the video, he says there’s about 8 feet (2.4 meters) between himself and his lens. At the 1:15 mark of his video, Jared demonstrates how this set-up works.
It is difficult to know whether the movement in his eyes is caused by not being far enough from the lens or from his horizontal nystagmus condition in his eyes.
Looking to find the right lights for your video recording set? Check out our Top 17 Video Lighting Equipment For YouTubers .
Tips for Making a Talking Head Video Better
To make a talking-head video more interesting, you can add some background music to the video, apply some interesting texts or elements. Filmora has built-in royalty-free music tracks and sound effects as well as text templates , filters and motivating elements. Download the free trial version below and release your creativity.
Richard Bennett
Richard Bennett is a writer and a lover of all things video.
Follow @Richard Bennett
Richard Bennett
Oct 26, 2023• Proven solutions
A big part of being a YouTuber involves talking to the camera. How you set up your talking-head shot depends on many factors, including how much space you have, what kind of look you’re going for, and how many people you want to fit in one frame. Here are four ways to set up your talking-head shots for YouTube.
| Table of Contents 1. Close Quarters Wide-Angle Vlog Set-Up2. Medium Vlog Set-Up3. Two Person Vlog Set-Up4. Long Teleprompter Vlog Set-Up |
|---|
How to Set Up Your Talking Heads Shots for YouTube Video [Infographic]
We’ve summarized the key points about setting up talking head style video shots with the Infographic below. It is welcomed to share on social media.
How to Set Up Your Talking-Head Shots for YouTube [4 Ways]
1. Close Quarters Wide-Angle Vlog Set-Up
Don’t have a lot of space to set up your camera and lighting equipment? No problem! You can be within an arm’s length away from your camera with a close quarters wide-angle vlog set-up.
With this set-up, you’re going to need a camera with a wide-angle lens, a tripod, a camera-mounted shotgun mic for sound, and a ring light for light.
Set your camera on the tripod and mount the shotgun mic directly on the camera shoe (the electronic bracket on the top of the camera). Inside the circular space of your ring light, position your camera right in the middle of it so that you can shoot your video through it without getting any part of the lighting equipment in your shot.
In the video above, Sean Cannell demonstrates this set-up. As you can see from this example, the wide-angle lens is able to squeeze in a lot of what’s in front of the camera into the shot.
Objects and people that just make it into the sides of the frame will appear more stretched out as the wide-angle causes distortion and enhances perspectives.
If you look closely into Sean’s eyes, you can also see a specular highlight in the shape of a circle. Many people like the way eyes look against a ring light.
2. Medium Vlog Set-Up
If you have more space and want to shoot a more professional-looking talking-head shot with more realistic perspectives, a medium vlog set-up may be a better alternative for you.
For this set-up, you’ll be using a slightly longer standard/normal lens (like a 35mm or a 50mm lens) attached to your camera which would be set on a tripod. Since this longer lens will show less of the surrounding areas as it “zooms” closer into whatever is in front, you will need to sit further back, away from your camera.
Now that you’re further away from your camera, a camera-mounted shotgun mic may not be the best mic for you. For better sound recording, you’ll need a shotgun mic fixed on a mic stand that is set up like a boom mic, positioned just outside of your camera frame.
At the 39 second mark of the above video, electronic music producer deadmau5 is positioned right in the center of this particular set-up.
You can see from how even the background and couch looks across the entire camera frame that there is no distortion or enhanced perspective.
It appears that, to the right of deadmau5 (camera left), there is a key light and to his left (camera right) there may be a fill light for additional lighting. Behind the couch, there’s also a background uplight to create depth between the subject and the background. At the 1:30 mark of this trailer video, you can briefly see how the Masterclass camera crew set up their shot.
3. Two Person Vlog Set-Up
If your talking-head shot has got to include two people, you can use a similar set-up as the medium vlog set-up detailed above.
If you look back at the 39-second mark of deadmau5’s Masterclass trailer, you can see that there’s a lot of space to the left and right of deadmau5. Now imagine the same shot but with two people.
With two people, though, you’ll want to set up your mic slightly differently. Rather than using a directional shotgun mic with a narrow area of sensitivity, you’ll want to use a directional mic with a wider area of sensitivity.
4. Long Teleprompter Vlog Set-Up
If you want to read over a script but still make it appear like you’re looking straight into the camera, you’ll need to use a long teleprompter vlog set-up.
For this set-up, you’ll need all the same equipment as the medium vlog set-up, but you’ll additionally need a teleprompter placed in front of your camera equipped with a long telephoto lens.
You will have to sit much further back away from your camera for two main reasons. Firstly, you want to be able to fit yourself in your much more zoomed-in camera frame (effect of the long telephoto lens). Secondly, you want to be far enough that the camera cannot detect your eyes reading from left to right. You’ll want to be around six meters away from a 17” teleprompter monitor or around four meters away from a 10” teleprompter monitor.
In the above video, Jared Polin uses a long teleprompter vlog set-up.
In the video, he says there’s about 8 feet (2.4 meters) between himself and his lens. At the 1:15 mark of his video, Jared demonstrates how this set-up works.
It is difficult to know whether the movement in his eyes is caused by not being far enough from the lens or from his horizontal nystagmus condition in his eyes.
Looking to find the right lights for your video recording set? Check out our Top 17 Video Lighting Equipment For YouTubers .
Tips for Making a Talking Head Video Better
To make a talking-head video more interesting, you can add some background music to the video, apply some interesting texts or elements. Filmora has built-in royalty-free music tracks and sound effects as well as text templates , filters and motivating elements. Download the free trial version below and release your creativity.
Richard Bennett
Richard Bennett is a writer and a lover of all things video.
Follow @Richard Bennett
- Title: "[New] Prime Choices The Premier Portable Devices for Editors"
- Author: Thomas
- Created at : 2024-05-31 12:45:56
- Updated at : 2024-06-01 12:45:56
- Link: https://youtube-help.techidaily.com/new-prime-choices-the-premier-portable-devices-for-editors/
- License: This work is licensed under CC BY-NC-SA 4.0.
